How to implement Java code in the background of RedHat (LinuxONE)
Introduction
If it is a process like uploading a large number of images, it will take hours to execute the code, and it may interfere with other work. This time, I will describe how to implement Java code in the background of Red Hat and do other work locally while executing Java code, so please refer to it.
Server construction
For server construction and server login, please go to the following URL. This time, build a RedHat server with LinuxONE and log in to RedHat with TeraTerm. http://qiita.com/takana-at/items/e51a2e5fa858fbdee19f
Allow local files to be moved on the server
Since WinSCP is used to move the local file on the RedHat server and to move the file on the server locally, build the WinSCP environment.
Key conversion
- Install PuttyGem. Please refer to the following URL for the registration method. https://webkaru.net/linux/putty-install/
- Create a .ppk file.
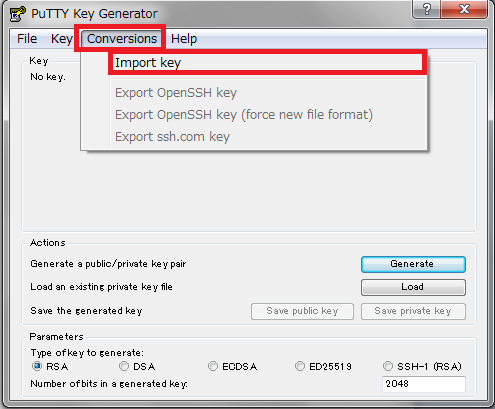
Select Conversions → Import key.
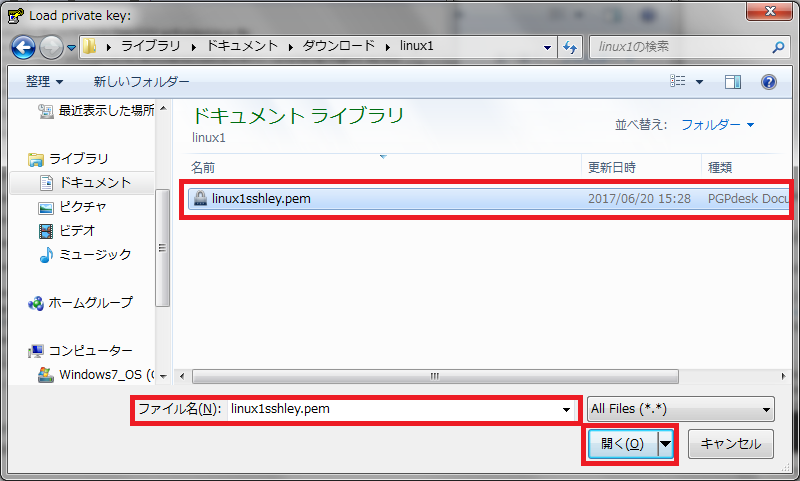
- Specify the .pem file created when building the server.
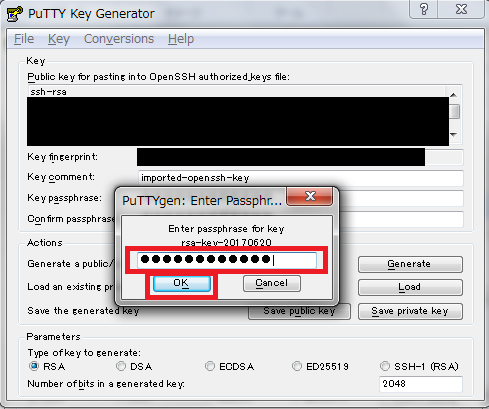
- Enter the password for the .pem file.
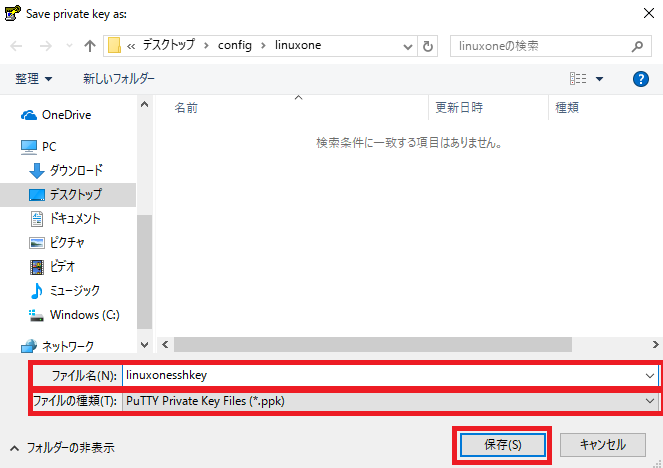
- After importing, enter any "key_passphrase" and "Confirm_passphrase" and click "save private key".
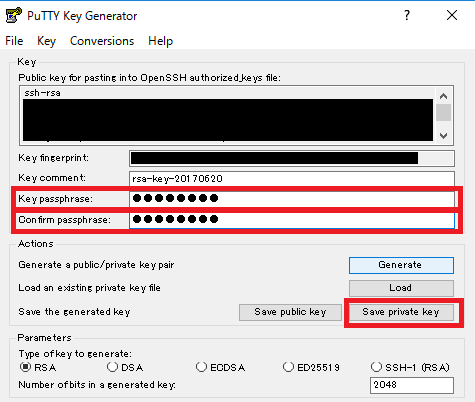
- When the file save screen appears, enter an arbitrary name in "File name", specify the ".ppk" format in "File type", and click the "Save" button.
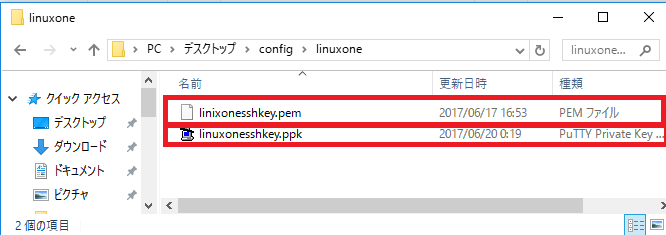
- I was able to create a "ppk" format file from a "pem" format file.
install winSCP
Please refer to the following URL for the registration method. http://www.media.hiroshima-u.ac.jp/services/web/winscp
Log in to the server with winSCP
- Start winSCP.
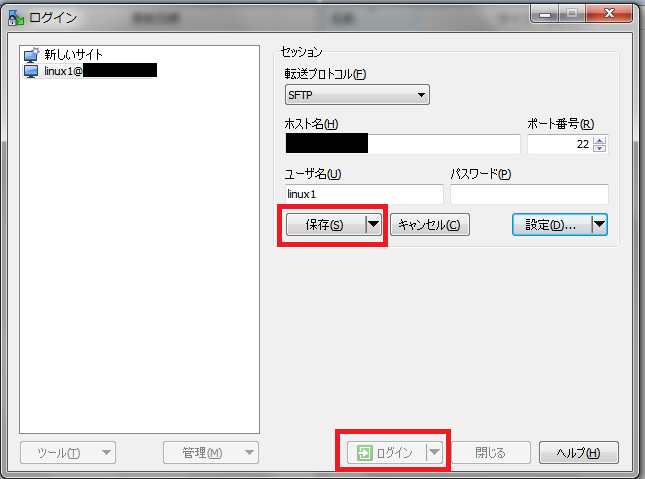
- Specify SFTP in "Transfer Protocol", enter the IP address of the Red Hat server built with LinuxONE in "Host Name", and enter the user name set in Tera Term in "User Name".
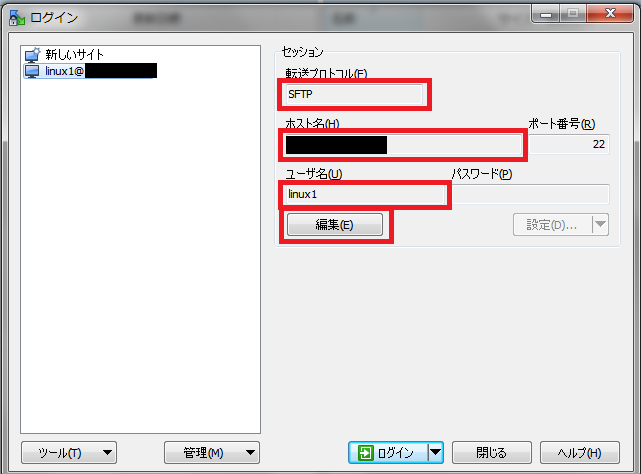
- Click "Edit" and specify the private key. Click "Set".
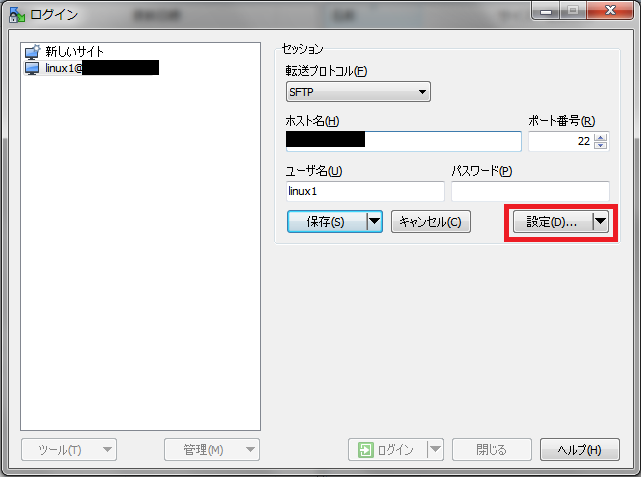
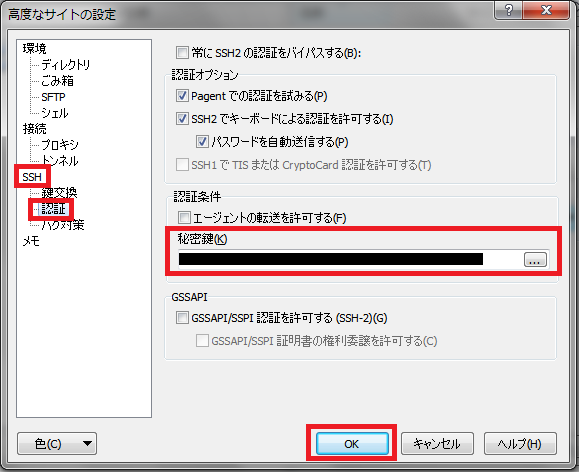
- Click "SSH"-> "Authentication", specify the file converted to ppk format by puttyGen in "Private Key", and click "OK".
- Click Save> Login.
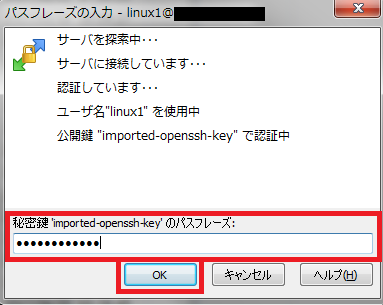
- Enter the password for the private key and click the "OK" button.
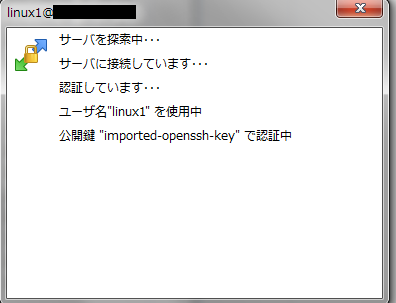
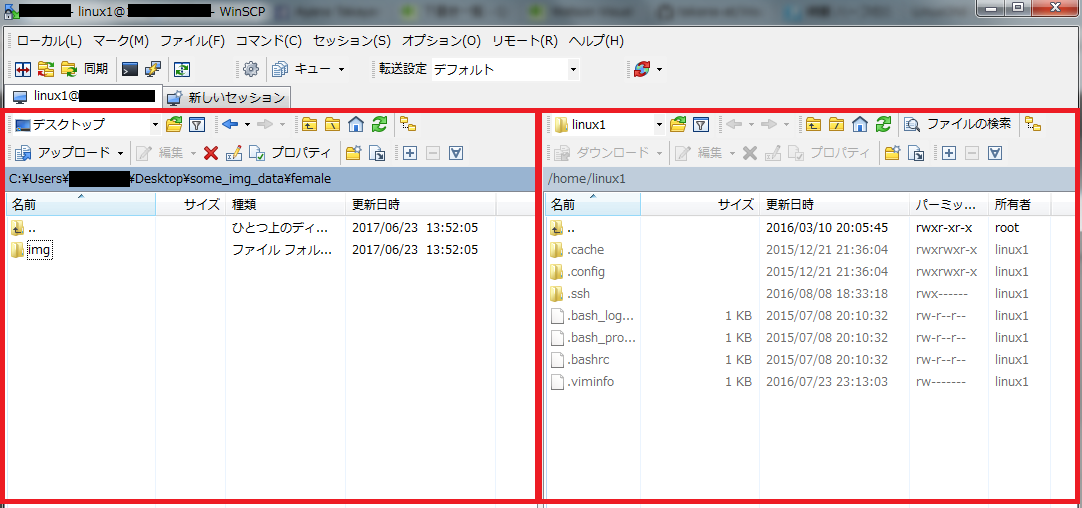
- This is the screen when accessing the RedHat server with winSCP.
- When you can access the server, the following screen will be displayed.
The left side is the local directory and the right side is the directory on the server.
Preparing the code to execute
Compress the execution project
- Open eclipse.
- Select File → Export.
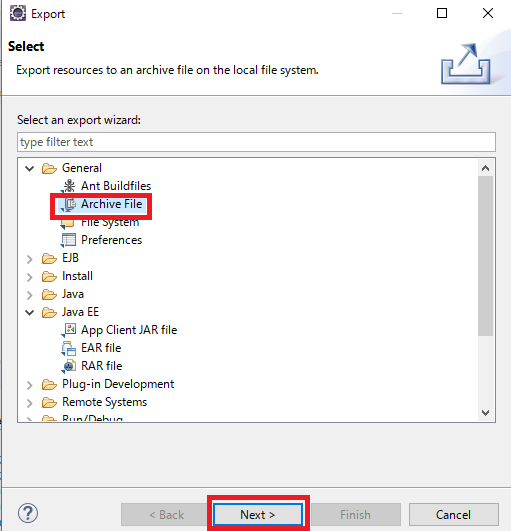
Select General → Archive File and click Next.
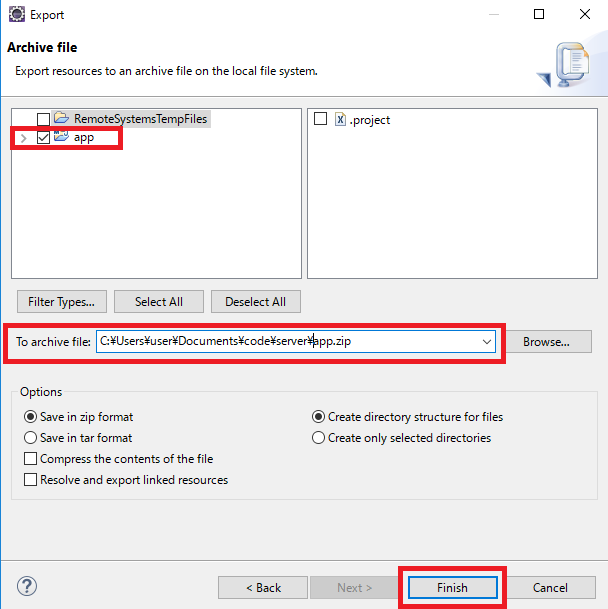
- Select the project to be compressed, specify the directory to create the file and the zip file name in "To archive file", and click "Finish".
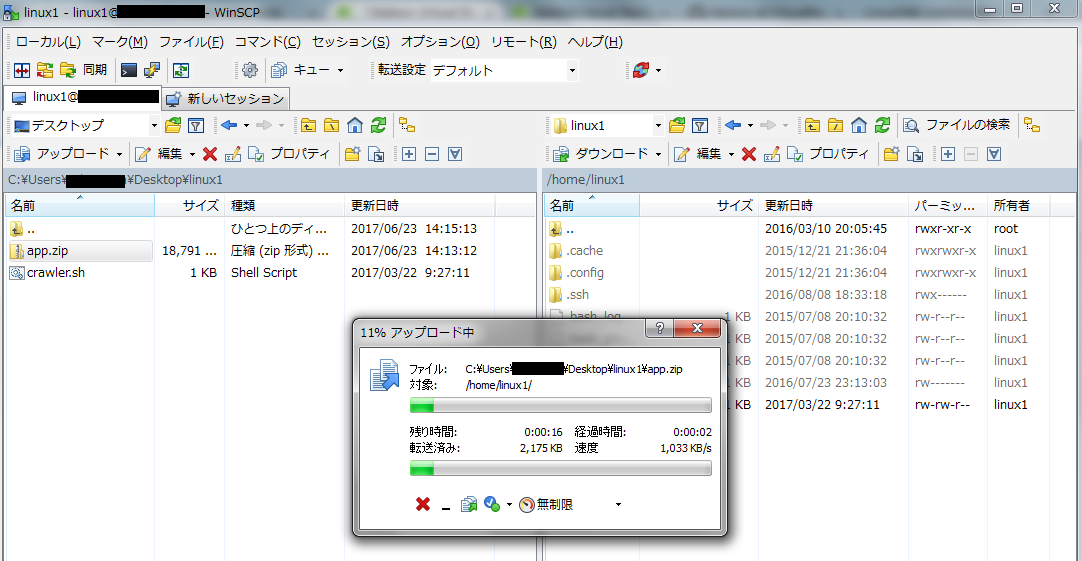
- Copy the zip file to your server.
You can copy the zip file to be executed by drop and drag.
Prepare crawler.sh
- Create a crawler.sh file. Create a "crawler.sh" file, specifying which code in the project you want to run. The code below is an example of how to fill in the crawler.sh file, where "FILENAME" shows which file to execute, and "\ $ 1 \ $ 2 \ $ 3" shows the arguments.
crawler.sh entry example
#!/bin/sh

cd demoApp/target/classes

java -classpath .:../../lib/commons-codec-1.4.jar:../../lib/commons-httpclient-3.1.jar:../../lib/commons-logging-1.1.1.jar:../../lib/mysql-connector-java-5.1.21-bin.jar:../../lib/httpclient-4.5.1.jar:../../lib/httpclient-cache-4.5.1.jar:../../lib/javase-3.3.0.jar:../../lib/httpcore-4.4.3.jar:../../lib/httpmime-4.5.1.jar:../../lib/json-simple-1.1.1.jar FILENAME $1 $2 $3

cd ../../..
2. After saving, copy the crawler.sh file onto the server.
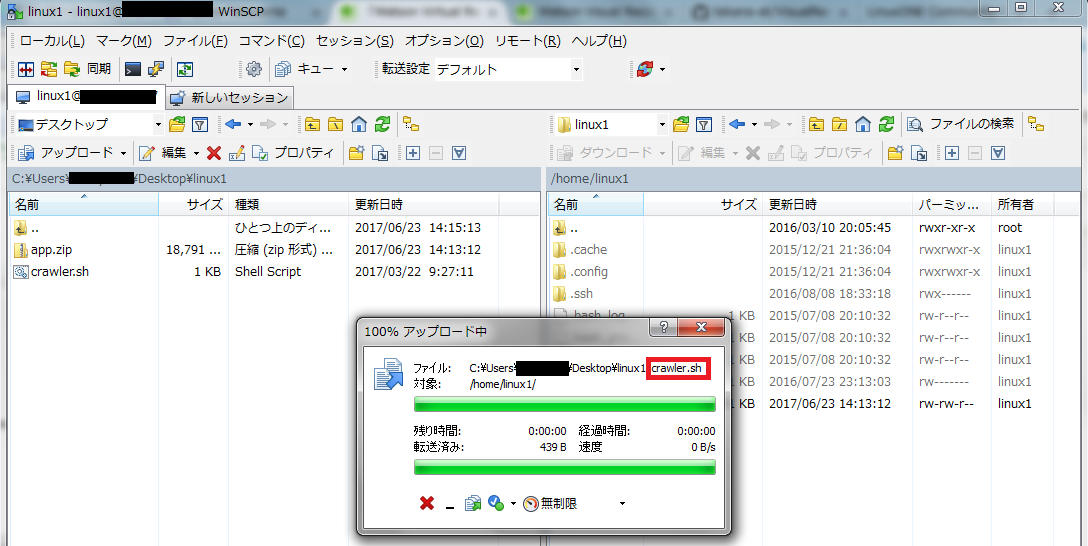
Now you are ready to run the code on the server.
Execution environment construction
Install Java on RedHat
- While logged in to RedHat with TeraTerm, install the same version as the Java version of the compressed code. Please note that if the Java version is different, "java.lang.UnsupportedClassVersionError" will occur.
$sudo yum install java-1.8.0-ibm-devel

2. Click y when prompted to confirm the installation.
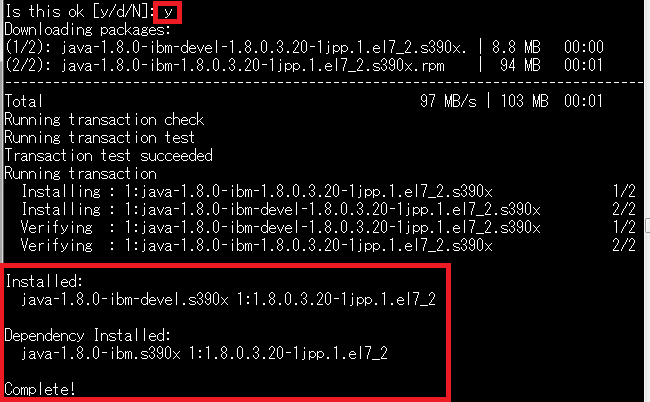
If the installed Java version and the characters "Completed!" Are displayed, the Java installation is complete.
Install screen on RedHat
Install screen while logged in to RedHat with TeraTerm.
$sudo yum install screen

Run Java code in the background of RedHat
Run screen
If you execute the command as it is in RedHat, it cannot be in the state of being executed in the background, so execute the command in the screen.
- Since screen will be executed, execute the following with the command.
$screen
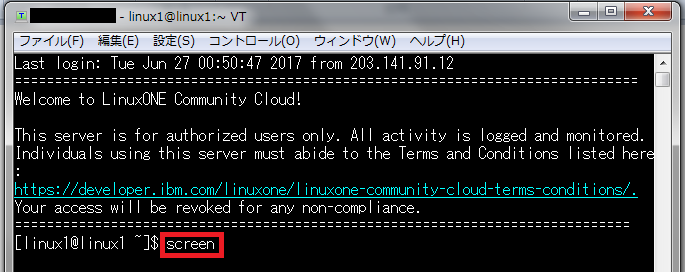
2. When you run screnn, "screen 0" is displayed at the top.
 The screen is now running.
Decompress the compressed file
- After running screen, check the current directory with "ls".
At this time, if the zip file copied to the server does not exist earlier, move to the directory one level above the zip file copied to the server.

- Extract the zip file, so execute the following code. Change FILENAME to your own zip file name.
$unzip FILENAME

Run the crawler.sh file
- Execute the following code to add permission to execute the crawler.sh file.
$chmod +x crawler.sh
2. Run the crawler.sh file. By executing crawler.sh, you can execute the file specified in the crawler.sh file on RedHat.
$./crawler.sh
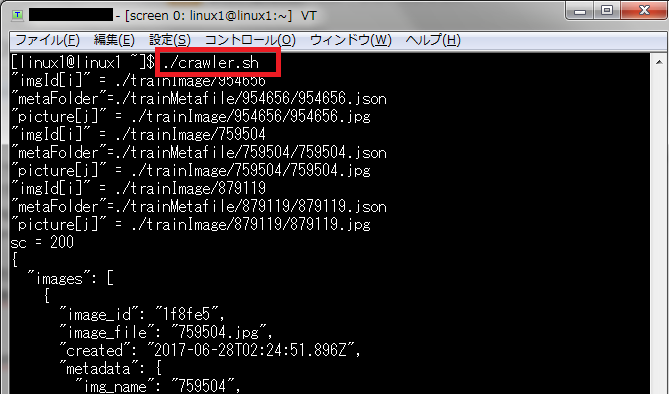
3. Please refer to the following URL for detaching and attaching.
3-1. Detaching method
http://qiita.com/takana-at/items/77120a75e155e180a5d4#%E3%83%87%E3%82%BF%E3%83%83%E3%83%81
3-2. How to attach
http://qiita.com/takana-at/items/77120a75e155e180a5d4#%E3%82%A2%E3%82%BF%E3%83%83%E3%83%81
[link-detach]:http://qiita.com/takana-at/items/77120a75e155e180a5d4#%E3%83%87%E3%82%BF%E3%83%83%E3%83%81
[link-attach]:http://qiita.com/takana-at/items/77120a75e155e180a5d4#%E3%82%A2%E3%82%BF%E3%83%83%E3%83%81
Recommended Posts