[Practice] Make a Watson app with Python! # 1 [Language discrimination]
One of the courses in developer Works, [Create Python apps] with IBM Watson and IBM Bluemix](https://developer.ibm.com/courses/all/create-python-apps-ibm-watson-ibm-bluemix/).
Developer Works is recorded when you log in and complete the text, so it's a good idea to have an account. (Badges accumulate)
I did it in a Mac environment. To be honest, I think it's a little difficult to understand because I will describe what I did in almost all letters, so it may be better to refer to this as a supplement while watching the video linked above. The material talks about both the django version of the app and the flask version, but I'll just trace the django version. I think.

Let's go!
Explore the development Environment
Building a virtual environment
Open a terminal.
If Python is not on your PC, install Python.
Check the python version.
$ which python3
After confirming, create a virtual environment "d-env". The "3.6" part will be replaced with each version confirmed in which python3.
$ virtualenv d-env -p /Library/Frameworks/Python.framework/Versions/3.6/bin/python3
Enter d-env.
```$source d-env/bin/activate```
## Download teaching materials
Download watson-developer-cloud [python-primer-companion-code](https://github.com/watson-developer-cloud/python-primer-companion-code) on github.
If you create two virtual environments for django and flask as shown in the video, it might be easier to create a parent folder that puts them together.
After unzipping the file, it is better to rename it to a short name that is easy to use later, so rename the downloaded folder to "src" according to the guide.
## Text installation
Open a terminal.
Install src / episode-1 / django / src / requirements.txt
Go to the directory where requirements.txt is and
#### **`$pip install -r requirements.txt (installation)`**
```txt (installation)
## Create a new project in a new directory
Then go to src / episode1 / django / src.
```mkdir tmp```Create a directory called tmp with.
```django-admin startproject projwatson```You can create projwatson under the directory with.
Go to projwatson and
#### **`python manage.The app will be launched on the local server with py run server.`**
```The app will be launched on the local server with py run server.
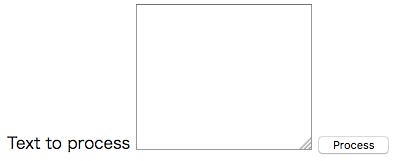
However, the screen below appears and does not start up properly.

If you add / wl / lang / to the end of the URL, a screen like that will appear.

However, it doesn't work even if I input it yet.
What's wrong with not having a clean start as in the text?
https: // localhost: 8000 / admin is the Administration page.
Let's also create an Administration privileged user to enter there.
Get out of run mode with Control + C.
SQLite3 is used by default in django, but we will create migration SQL from here.
#### **`python manage.py makemigrations`**
```py makemigrations
(If nothing is done, the message “No changes detected,” will be displayed.)
#### **`python manage.py migrate`**
```py migrate
Create an administrator user.
#### **`python manage.py createsuperuser`**
```py createsuperuser
#### **`python manage.py shell`**
```py shell
## Edit yml file
Open the folder for this project that you first downloaded in a text editor. I use [Atom](https://atom.io/).
Rewrite manifest.yml in src / episode1 / django / src / projwatson. Rewrite the domain to mybluemix.net and the name and host to the app name and its host name that you gave when you launched the python service from the catalog with bluemix.
Similarly, rewrite domain, name and host in manifest.yml in src / episode1 / flask / src.
## Preparing to use Watson Service
Go back to the terminal and install Requests.
```pip install requests```
Install the Watson Developer Cloud SDK.
```pip install --upgrade watson-developer-cloud```
```pip freeze```
#### **`pip freeze > requirements.txt`**
```txt
Open runtime.txt in Atom and rewrite it to the version of python you are using.
Do the same for f-env (environment for flask).
Deploy to Bluemix
## Log in to bluemix
* Perform the following work in the directory containing the manifest.yml file.
The rest of the work is based on the assumption that the app has been deployed in the southern United States.
Set endpoints in the Bluemix US internal region
#### **`cf api https://api.ng.bluemix.net`**
Log in to Bluemix.
cf login -u (bluemix account id)
After this, you will be asked for the password, so enter it. At this time, the password will not be displayed on the screen, so enter it carefully.
Now you can use `cf push``` to build your app on blumiex according to the contents of manifest.yml. That said, in my case, the version of python was 3.6.0 and it didn't match the version accepted by Python Buildpack when I followed this flow, so [Cloud Foundry Documentation](http://docs. According to cloudfoundry.org/buildpacks/python/), I just pushed with `cf push (app name) -b https://github.com/cloudfoundry/buildpack-python.git``` and it worked.
Add Watson services to your app
Add a project called watsonlanguage.
python manage.py startapp watsonlanguage
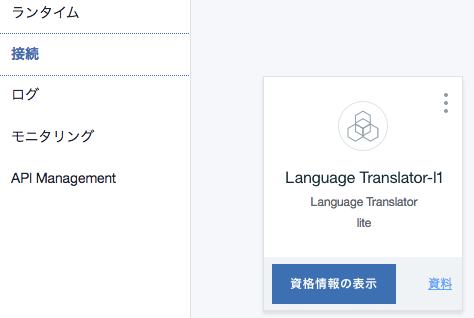
Open the details of the corresponding app in Bluemix (click the name field from the dashboard)
Click "New Connection" in the connection field.
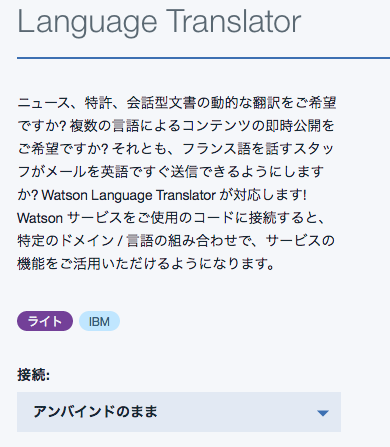
Select "Language Translator" from the catalog and select the binding destination from the connection field here.

It will be available after restage.
Click the connection field of the app you are creating and click "Display Credentials". Since the user ID and password for using the translation function are written, in the wl.py file
try:
language_translation = LanguageTranslation(username='Your watson language translation service username key',
password='sevice password key')
Let's embed it in the part of.

I have to rewrite the contents of some files.
First, rewrite the watson-developer-cloud field in requirements.txt of src / episode1 / django / src / projwatson to 0.26.1 to update it.
Also, the service that was Watson Language Translation when this text was created has been renamed to Watson Language Translator, so it's in the early part of wl.py in src / episode1 / django / src / projwatson / watsonlanguage / views.
```from watson_developer_cloud import languagetranslationv2 as languagetranslation```To```from watson_developer_cloud import languagetranslatorv2 as languagetranslation```Let's rewrite it to.
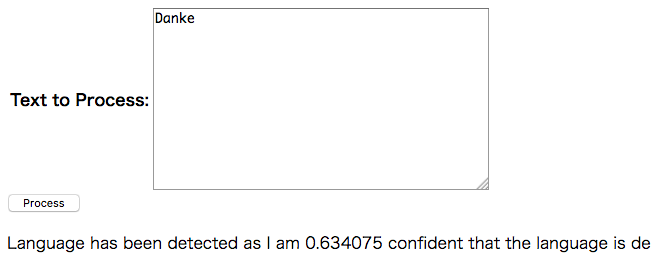
Then, when you access (app name) / wl / lang from your browser, you should see an app that can determine which language the string you typed is in!
(In the example below, it is determined to be German)

Well, this time it's over.
Thank you for your hard work.
Recommended Posts