[JAVA] PlantUML usage memo
Since it will be long, you can draw the diagram only with the class diagram and the sequence diagram.
What is PlantUML
--A type of DSL that allows you to write UML diagrams in text (probably) --The body is written in Java and you can drop a single jar file and run it from the command line - plantuml/plantuml: Generate UML diagram from textual description ――However, when you actually use it, I think that it is often executed by inserting a plug-in such as Visual Studio Code. --License is GPL v3 - plantuml/license.txt at master · plantuml/plantuml
Environment
The OS is Windows 10.
Java
> java --version
openjdk 11.0.6 2020-01-14
OpenJDK Runtime Environment AdoptOpenJDK (build 11.0.6+10)
OpenJDK 64-Bit Server VM AdoptOpenJDK (build 11.0.6+10, mixed mode)
The installation method is omitted.
PlantUML body
https://plantuml.com/ja/download
Drop plantuml.jar from here.
At the time of confirmation, it was plantuml.1.2020.7.jar.
Graphviz http://www.graphviz.org/download/
It looks like the software used to draw the figure. Graphviz - Wikipedia
It is necessary if you want to generate a diagram other than the sequence diagram and activity diagram ** **, so it is practically required.
I dropped 2.38.
Specify the location of dot.exe
When you run PlantUML, you need to specify the location of dot.exe in Graphviz.
The designation method is one of the following (arranged in order of priority to be adopted).
- Specify with the
-graphvizdotoption - Specify in the system property
GRAPHVIZ_DOT - Set the environment variable
GRAPHVIZ_DOT
If the folder where Graphviz is installed is C: \ Graphviz, specify it as follows.
-When specified with the graphvizdot option
> java -jar plantuml.jar -graphvizdot C:\Graphviz\bin\dot.exe ...
When specified in the system properties
> java -DGRAPHVIZ_DOT=C:\Graphviz\bin\dot.exe -jar plantuml.jar ...
When specified by an environment variable
> set GRAPHVIZ_DOT
GRAPHVIZ_DOT=C:\Graphviz\bin\dot.exe
VSCode
If you use the following plugins, set the environment variable GRAPHVIZ_DOT before running VSCode.
PlantUML PlantUML - Visual Studio Marketplace
--Plug-in for writing PlantUML in VSCode
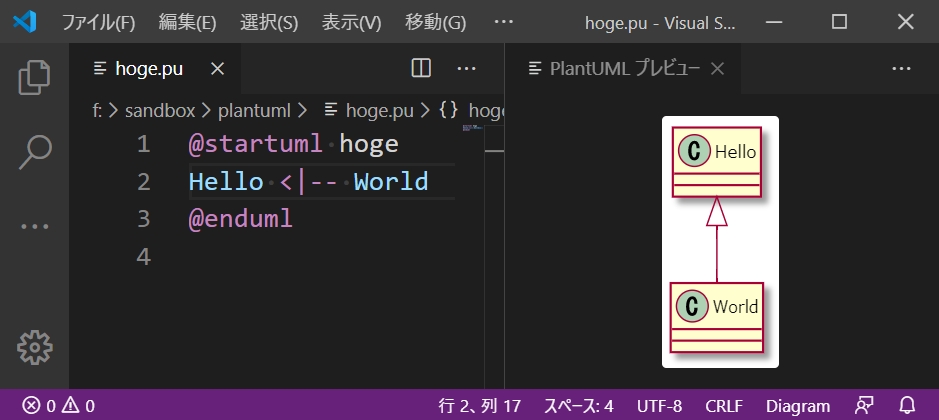
-Preview is displayed with ʻAlt + d --If there are multiple@startuml ... @ enduml`s, the diagram of where the cursor is currently located will be previewed.
Markdown Preview Enhanced Markdown Preview Enhanced - Visual Studio Marketplace
--A plugin that allows you to preview PlantUML in Markdown
--Preview is displayed with Ctrl + k, v

Hello World
hello.pu
@startuml
Hello <|-- World
@enduml
--Create a text file and describe the contents as ↑
--Is it customary for the file extension to be pu?
Run
> java -jar plantuml.jar hello.pu
--Specify the created text file as an argument and execute
--Then, a file called hello.png will be output in the same location as the file specified by the argument.
hello.png

How to execute from the command line
File specification
> dir /b
fuga.pu
hoge.pu
piyo.pu

> java -jar plantuml.jar hoge.pu fuga.pu piyo.pu

> dir /b
fuga.png
fuga.pu
hoge.png
hoge.pu
piyo.png
piyo.pu
--Can be executed by specifying the file path as an argument --Multiple files can be specified --A png file with the same name as the file name will be generated in the same location as the file
Directory specification
Folder structure
`-hoge/
  |-plantuml.pu
  |-markdown.md
  |-JavaSource.java
  `-fuga/
    `-fuga.pu
--Three files are placed directly under the hoge directory.
――The contents of each are as follows
plantuml.pu
@startuml
class PlantUml
@enduml
markdown.md
```
@startuml
class Markdown
@enduml
```
JavaSource.java
/**
 * @startuml
 * class JavaSource {
 *   - String message
 * }
 * @enduml
 */
public class JavaSource {}
--There is a fuga directory under the hoge folder, and the fuga.pu file is located under it.
fuga.pu
@startuml
class Fuga
@enduml
Run
> java -jar plantuml.jar hoge
After execution
`-hoge/
  |-plantuml.pu
  |-plantuml.png
  |-markdown.md
  |-JavaSource.java
  |-JavaSource.png
  `-fuga/
    `-fuga.pu
--plantuml.png and JavaSource.png have been generated
plantuml.png

JavaSource.png

--If you specify a folder and execute it, the files that exist directly under that folder will be automatically read.
--Files with the following extensions are targeted for reading
- .c
- .h
- .cpp
- .txt
- .pu
- .tex
- .html
- .htm
- .java
--If you find a part of these files that starts with @startuml and ends with @enduml, it will generate an image from that part.
Specify with a wildcard
--With the same configuration as ↑, next execute the command as follows
> java -jar plantuml.jar "hoge/**"
--The part where the folder is specified is set to " hoge / ** "
Execution result
`-hoge/
  |-plantuml.pu
  |-plantuml.png
  |-markdown.md
  |-markdown.png
  |-JavaSource.java
  |-JavaSource.png
  `-fuga/
    |-fuga.pu
    `-fuga.png
--markdown.png and fuga.png are also generated
markdown.png

fuga.png

--The following wildcards can be used to specify the target
--* Any character string
--? Any single character
--** Any subdirectory
Specify the exclusion target
> java -jar plantuml -x "**/*.pu" "hoge/**"
Execution result
`-hoge/
  |-plantuml.pu
  |-markdown.md
  |-markdown.png
  |-JavaSource.java
  |-JavaSource.png
  `-fuga/
    `-fuga.pu
--Only files with the extension pu png files have not been generated
--Exclusion target can be specified with -x option
Character code specification
> java -jar plantuml.jar -charset UTF-8 hello.pu
--Character code is specified by -charset option
Read from standard input
> type plantuml | java -jar plantuml.jar -pipe > result.png
--If you specify the -pipe option, it will read from the standard input, so you can pipe.
--The result is written to the standard output, so you can redirect it to an appropriate file.
When there are multiple figure descriptions
hoge.pu
@startuml
class Hoge
@enduml

@startuml
class Fuga
@enduml

@startuml
class Piyo
@enduml
--When there are multiple @startuml ... @ enduml descriptions in one file
Run
> java -jar plantuml.jar hoge.pu
Execution result
> dir /b
hoge.png
hoge.pu
hoge_001.png
hoge_002.png
hoge.png

hoge_001.png

hoge_002.png

--The first figure is generated with filename.png
--The rest of the figures are generated with the serial number of filename_XXX.png
--I haven't tried what happens if there are more than 1000
Specify the file name for each figure
hoge.pu
@startuml hoge
class Hoge
@enduml

@startuml fuga
class Fuga
@enduml

@startuml piyo
class Piyo
@enduml
--The name is written after each @startuml
Run
> java -jar plantuml.jar hoge.pu
Execution result
> dir /b
fuga.png
hoge.png
hoge.pu
piyo.png
hoge.png

fuga.png

pioy.png

--You can specify the file name for each figure by using @startuml name.
View help
> java -jar plantuml.jar -h
--Help can be displayed with -h or -help
Common
comment
@startuml no-scale
'This is a comment
Hello <|-- World
@enduml
--Single quotes (') followed by comments
title
@startuml
title Hello Title
Hello <|-- World
@enduml

--You can set the title of the figure by writing title title.
Multi-line title
@startuml
title
Hello
Title
end title
Hello <|-- World
@enduml

--You can write a multi-line title by enclosing it in title and ʻend title`.
Write in markup language
@startuml
title
* __Hello__
* **World**
end title
Hello <|-- World
@enduml

--You can use the markup language Creole -Click here for an example of Creole description
caption
@startuml
caption Figure 1
Hello <|-- World
@enduml

--You can set the caption of the figure with caption
header footer
@startuml
header Hello
Hello <|-- World
footer World
@enduml

--You can specify the header and footer with header header comment, footer footer comment
--By default, the header is right-justified and the footer is centered.
-Can be described in Creole
Specify the position
@startuml
left header Hello
Hello <|-- World
right footer World
@enduml

--The position can be adjusted by putting left, center, right before header, footer.
Write in multiple lines
@startuml
header
Hello
Header
end header

Hello <|-- World

footer
World
Footer
end footer
@enduml

--By enclosing it in header ... end header, footer ... end footer, it can be described in multiple lines.
Usage Guide
@startuml
legend
Hello World
end legend

Hello <|-- World
class FizzBuzz
@enduml

--You can insert a legend with legend ... end legend
--By default, it is placed at the bottom center
Specify the position
--You can specify the top and bottom positions (top, bottom) and the left and right positions (left, center, right) after the legend.
@startuml right
legend right
Right
end legend

Hello <|-- World
class FizzBuzz
@enduml

--If you specify only the left and right positions, the top and bottom positions will be the default bottom.
@startuml top
legend top
Top
end legend

Hello <|-- World
class FizzBuzz
@enduml

--If you specify only the top and bottom positions, the left and right positions will default to center.
@startuml top-left
legend top left
Top Left
end legend

Hello <|-- World
class FizzBuzz
@enduml

--If both are specified, they will be displayed at the specified position.
--At this time, if you reverse the vertical and horizontal position specifications like legend left top, an error will occur.
--Be sure to specify in the order of top and bottom position → left and right position
Expansion rate
@startuml no-scale
Hello <|-- World
@enduml

@startuml scale-1.5
scale 1.5
Hello <|-- World
@enduml

@startuml scale-0.5
scale 0.5
Hello <|-- World
@enduml

--You can specify the enlargement ratio of the figure by writing scale enlargement ratio.
Creole --One of the wiki description languages --You can use this notation in titles and notes
@startuml
note left
  --Heading--
  =Heading 1
  ==Heading 2
  ===Heading 3

  --Unnumbered list--
  *Listing 1
  *Listing 2
  **Listing 2-1
  *Listing 3

  --Numbered--
  #Numbered list 1
  #Numbered list 2
  ##Numbered list 2-1
  #Numbered list 3

  --Decoration--
  * **Bold**
  * //italic//
  * ""Monospaced font(monospace)""
  * --Strikethrough--
  * __Underline__

  --table--
  |= |= Column1 |= Column2 |
  |1 |Value1-1  |Value1-2  |
  |2 |Value2-1  |Value2-2  |

  --HTML--
  * <color:red>Color name specification</color>
  * <color:#00FF00>Color code specification</color>
  * <back:skyblue>Background color</back>
  * <size:18>font size</size>
  * <b>Bold</b>

  --Tree structure--
  |_build.gradle
  |_src
    |_main
      |_java
        |_**bold**
        |_--strike--
        |_//itaric//
        |___underline__
        |_""monospace""
    |_test

  --Unicode--
  * <U+20BB7>

  --Escape--
  * **This will be bold**
  * ~**This doesn't get bold**

  --Horizon--
  --Insert the title--
  ----
  ==Insert the title==
  ====
  ..Insert the title..
  ....
end note
@enduml

Specify the font
@startuml
skinparam DefaultFontName Meiryo
Good morning<|--world
@enduml

--You can specify the default font by writing skinparam DefaultFontName font name.
--skinparam can specify various skin settings in the formatskinparam <key> <value>
--DefaultFontName is the key to specify the default font
--It is also possible to specify a font for each specific element, such as CaptionFontName or ClassFontName.
--You can check the list of values that can be specified for <key> with the following command.
> java -jar plantuml.jar -language
...
;skinparameter
;536
ActivityBackgroundColor
ActivityBarColor
ActivityBorderColor
ActivityBorderThickness
ActivityDiamondBackgroundColor
ActivityDiamondBorderColor
ActivityDiamondFontColor
...
Class diagram
Declare a class
@startuml
class Hello
class World
@enduml

--You can declare a class by writing class <type name>
Declare the interface
@startuml
interface Hello
interface World
@enduml

--You can declare an interface by writing ʻinterface
Declare an abstract class
@startuml
abstract class Hello
@enduml

--You can declare an abstract class by setting ʻabstract class
Declare an enum
@startuml
enum HelloWorld {
    ONE
    TWO
    THREE
}
@enduml

--You can declare an enum with ʻenum --Continued by writing curly braces{...}` and declaring constants in it
Describe the relationships between types
Related Links)
@startuml
Hello -- World
@enduml

--By writing <type name> <line representing association> <type name>, you can describe the association between types.
---- can only describe simple associations
--Can be used with types not declared with class <type name>
--It is also possible to describe it together with the declaration
Expression of inducibility
@startuml
class One
One --> Two
Three <-- Four
Five <--> Six
Seven x-- Eight
Nine --x Ten
@enduml

--The inducibility can be expressed by <, >, x.
Dependence
@startuml
One ..> Two
Three <.. Four
@enduml

--Dependencies can be expressed with ..> and <..
Generalization
@startuml
One --|> Two
Three <|-- Four
@enduml

<|--,--|>Can express generalization with
Realization
@startuml
One ..|> Two
Three <|.. Four
@enduml

..|>,<|..Can express the realization
Aggregation
@startuml
One --o Two
Three o-- Four
@enduml

--You can express aggregation with --o, ʻo--`
Composition
@startuml
One --* Two
Three *-- Four
@enduml

--Composition can be expressed by -*, *-
Related name
@startuml
One -- Two : Hoge
Three -- Four : Fuga >
Five -- Six : < Piyo
@enduml

--If you put : after the relation, you can write the relation name after it.
--By putting <, > before and after the related name, you can express the direction of the related.
Role name and multiplicity
@startuml
One "Foo" -- Two
Three -- "Bar" Four
Five "1" -- "1..*" Six
Seven "1 Fizz" -- "~* Buzz" Eight
@enduml

--You can describe the role name or multiplicity by writing a string enclosed in double quotation marks (" ) between the type name and the associated line.
--The description is not divided for role name and multiplicity, and it seems that you have to describe both by making good use of this notation.
- multiplicity and role name for both ends of an association - PlantUML Q&A
--In addition, if you start with an asterisk (*) like * Buzz, it will be treated as a list of Creole notation, so you need to escape with~.
Field method definition
@startuml
class Hello {
    one: String
    three(param1: String, param2: int): boolean
    String two
    int four(List<String> param)
}
@enduml

--Fields and methods can be declared inside class <type name> followed by curly braces ({...}).
--Can be written not only in the formal description as UML (field name: type name) but also in Java-like writing (type name field name)
――It seems that you can write anything, but I think it is safe to use the official UML notation.
--Fields and methods are automatically determined and nicely drawn in each part of the class diagram
――It is not necessary to mix them, and it is safer to write them separately.
Visibility
@startuml
class Hello {
    - privateField: int
    # protectedField: int
    ~ packagePrivateField: int
    + publicField: int

    - privateMethod(): void
    # protectedMethod(): void
    ~ packagePrivateMethod(): void
    + publicMethod(): void
}
@enduml

--If visibility is described in UML notation, a dedicated icon will be displayed. --On the contrary, if it is difficult to understand, you can turn off the icon display as follows.
@startuml
skinparam classAttributeIconSize 0
class Hello {
    - privateField: int
    # protectedField: int
    ~ packagePrivateField: int
    + publicField: int

    - privateMethod(): void
    # protectedMethod(): void
    ~ packagePrivateMethod(): void
    + publicMethod(): void
}
@enduml

--When skinparam classAttributeIconSize 0 is set, the visibility icon display disappears.
Abstract member
@startuml
class Hello {
    {abstract} one: int
    {abstract} two(): int
}
@enduml

--You can make it an abstract member by prefixing the member with {abstract}.
Static member
@startuml
class Hello {
    {static} ONE: int
    {static} two(): int
}
@enduml

--You can make it a static member by prepending {static} to the member.
Stereotype
@startuml
class Hello <<Hoge>>
class World <<Fuga>> {
    message: String
}
@enduml

--You can describe the stereotype by writing << stereotype >> after the model name.
template
@startuml
class Hello<H>
class World<W> <<Hoge>>
@enduml

--The template can be expressed by writing <name> immediately after the type name.
--Can be used in combination with stereotypes
Write realizations and generalizations like Java code
@startuml
interface One
interface Two
interface Three extends Two
interface Four
class Five implements One, Three
class Six extends Five implements Four {
    field: String
    method(): void
}
@enduml

--You can write it like Java code by using ʻextends and ʻimplements.
――This progresses
package
@startuml
package one.two {
    class Hello
}

package three.four {
    World -- Hello
}
@enduml

--A package can be expressed by writing package <name> {...}.
--Classes and relationships can be described in curly braces
Pay attention to the order of declaration
When the order of package declaration is reversed
@startuml
package three.four {
    World -- Hello
}

package one.two {
    class Hello
}
@enduml

--The Hello class is supposed to be declared in the ʻone.two package, but it is included in the earlier three.four` package.
――It seems that you have declared it in the package that first appeared by looking at it in order from the top.
Note
@startuml
class Fizz
note left: fizz

class Buzz
note right: buzz

class Foo
note top: foo

class Bar
note bottom: bar
@enduml

-Behind the declaration of class etc.note <top|bottom|left|right>: <comment>By writing, you can write a note for the immediately preceding element.
-Can be described in Creole
Specify the element to add notes
@startuml
Fizz -- Buzz
note left of Fizz: fizz
note right of Buzz: buzz
@enduml

--note <position> of <target>: By writing <comment> , you can add a note to the element specified by<target>.
Make notes on associations
@startuml
Fizz -- Buzz
note on link: fizz-buzz
note left: buzz
@enduml

--You can add a note to the association by writing note on link: <comment> after describing the association between types.
Give your notes a name
@startuml
note "Hello World" as n1
Hello -- n1
World .. n1

note "Fizz Buzz" as n2
@enduml

--You can assign any name to the note by writing note" <comment> "as <name>.
--You can use the assigned name to associate your favorite elements with notes.
-Draw a line in the same way as writing a relationship between types
--With this notation, you can write a single note.
Write multi-line notes
@startuml
class Hello
note left
Hello
World
end note

Fizz -- Buzz
note on link
Fizz
Buzz
end note
note left of Fizz
fizz
buzz
end note

note as n1
Foo
Bar
end note
@enduml

--The notation of each note can be written in multiple lines by ending it with ʻend note`.
Sequence Diagram
Sync message
@startuml
Alice -> Bob: Hi
Bob --> Alice: Hi

Alice -> Bob: Is this a pen?
Bob --> Alice: No! This is an apple!!
@enduml

--The sequence diagram is basically described as <element> <message> <element>: <message name>.
--<message> becomes a synchronous message with ->
---> makes the line dotted and can be used in response messages
Asynchronous message
@startuml
Alice ->> Bob: Hi
Alice ->> Bob: Is this a pen?
Alice ->> Bob: Is this a pen??
Alice ->> Bob: Is this a pen???
Alice ->> Bob: Is this a pen????

Bob -> Alice: This is an apple!!!
@enduml

--Asynchronous messages can be expressed by writing ->>
Specify the order of lifelines
@startuml
participant Alice
participant Bob
participant Carol

Carol -> Bob: Is the tip included?
Bob -> Alice:Will you be able to exceed Teppen someday?
@enduml

--If you do nothing, the lifelines will be arranged from the left in the order they appear from the top.
--If you want to specify the order of lifelines, define a separate order in the form of paritcipant <lifeline name>.
Use icons for lifelines
@startuml
actor Actor
boundary Boundary
control Control
entity Entity
database Database
collections Collections
@enduml

--You can use the icon according to the role by specifying a specific keyword instead of participant.
Message to myself
@startuml
Aclie -> Aclie:Don't run away
Aclie -> Aclie:Don't run away
Aclie -> Aclie:Don't run away
Aclie -> Aclie:Don't run away
Aclie -> Aclie:Don't run away
@enduml

--You can also send a message to yourself
Number messages
@startuml
Alice -> Bob: Hi
autonumber
Bob -> Carol: Hi
Carol -> Dave: Hi
Bob -> Dave: Hi
@enduml

--By writing ʻautonumber` before the message, you can automatically number the subsequent messages.
Specify start number and increment
@startuml
autonumber 3
Alice -> Bob: Hi
Bob -> Carol: Hi
autonumber 2 3
Carol -> Dave: Hi
Bob -> Dave: Hi
@enduml

--You can specify the start number and increment as ʻautonumber
Pause / resume of automatic numbering
@startuml
autonumber
Alice -> Bob: Hi
autonumber stop
Bob -> Carol: Hi
Carol -> Dave: Hi
autonumber resume
Bob -> Dave: Hi
Carol -> Dave: Hi
@enduml

--You can stop automatic numbering with ʻautonumber stop --ʻAutonumber resume allows you to resume automatic numbering from where it left off.
Message grouping
@startuml
Alice -> Bob: Is this a pen?
alt yes
    Alice <-- Bob: Yes! This is a pen!!
else no
    Alice <-- Bob: Noooooooo! This is an apple!!!!!
end
@enduml

--Messages can be grouped by using specific keywords
--The following reserved keywords can be used
- alt/else
- opt
- loop
- par
- break
- critical
--Any character string can be written after the keyword (branch conditions etc. can be written)
――Indentation is not necessary, but I think it is easier to see if you do
--Groups can be nested as follows
When nested
@startuml
Alice -> Bob: Is this a pen?
alt yes
    Alice <-- Bob: Yes! This is a pen!!
else no
    Alice <-- Bob: Noooooooo! This is an apple!!!!!
    loop ∞
        Alice -> Bob: Oh sorry! By the way, is this a pen?
        Alice <-- Bob: Noooooooooooooooooo!!!!
    end
end
@enduml

Create a group with any name
@startuml
group copy
    Alice -> Bob: Is this a pen?
    Alice <-- Bob: No! This is an apple!!
end
@enduml

--You can write a group with any name by setting group <name>
--In this case, it is not possible to describe the conditions that correspond to the conditions applied by ʻalt` etc.
Execution specifications
@startuml
activate Alice
Alice -> Bob

activate Bob
Bob -> Carol

activate Carol
Bob <-- Carol

deactivate Carol
Alice <-- Bob

deactivate Bob
@enduml

--ʻActivate can express the execution specification of the lifeline with the specified name. --must be explicitly deactivated with deactivate
Nest
@startuml
activate Alice
Alice -> Bob

activate Bob
Bob -> Bob
activate Bob
Bob -> Carol

activate Carol
Bob <-- Carol

deactivate Carol
Alice <-- Bob

deactivate Bob
@enduml

--Execution specifications can be nested
Lifeline generation
@startuml
Alice -> Bob
create Carol
Bob -> Carol: new
Bob -> Carol
Bob <-- Carol
Alice <-- Bob
@enduml

--By writing create <name>, you can create a lifeline with the specified name from the middle.
reference
@startuml
Alice -> Bob
ref over Bob, Carol:See over there
Alice <-- Bob
ref over Alice
Over there
reference
end ref
@enduml

--You can describe the reference by writing ref over <object to be enclosed in the reference>: <description>.
-You can specify multiple lifeline names separated by commas for the target enclosed in the reference.
--It is also possible to describe in multiple lines by setting ref over ... end ref
border
@startuml
== Foo ==
Alice -> Bob
Alice <-- Bob

== Bar ==
Bob -> Carol
Bob <-- Carol
@enduml

--You can describe the border by writing == <name> ==
Message from the outside
@startuml
[-> Alice: Hello
Alice ->]: Hello
@enduml

--By using [, ] instead of the lifeline name, you can write a message from the outside (to).
Spacing between messages
@startuml
Alice -> Bob
Alice <-- Bob

Alice -> Bob
Alice <-- Bob
|||
Alice -> Bob
Alice <-- Bob
||80||
Alice -> Bob
Alice <-- Bob
@enduml

-Between messages|||You can leave a little space by sandwiching
||<pixel>||とすれば、間隔の大きさをpixelで指定できる
Note
@startuml
Alice -> Bob
note left: Hello
Alice <-- Bob
note right: World
Alice -> Alice
note left
Hello
World
end note
@enduml

--You can add a note immediately after the message with either note left or note right
--top and bottom cannot be used (if used, they will be interpreted as a class diagram)
--It is possible to write in multiple lines by setting note <left | right> ... end note.
-Can be described in Creole
Use from Java
Graphviz specification
--You must specify the location of Graphviz's dot.exe, just as you would when running it from the command line.
--There are no command line options, so you can set them in system properties or environment variables.
Dependency specification
build.gradle
plugins {
    id "application"
}

sourceCompatibility = 11
targetCompatibility = 11
compileJava.options.encoding = "UTF-8"

mainClassName = "sandbox.plantuml.Main"

repositories {
    mavenCentral()
}

dependencies {
    implementation "net.sourceforge.plantuml:plantuml:8059"
}
-Add net.sourceforge.plantuml: plantuml to the dependency
Read from String source
Main.java
package sandbox.plantuml;

import net.sourceforge.plantuml.SourceStringReader;

import java.io.File;

public class Main {

    public static void main(String[] args) throws Exception {
        String source = "@startuml\n"
                      + "Foo <-- Bar\n"
                      + "@enduml";
        final SourceStringReader reader = new SourceStringReader(source);
        reader.generateImage(new File("result.png "));
    }
}
--You can use SourceStringReader to read the source of String and generate an image.
--You can output the result to the specified file with a method such as generateImage (File).
--If there are multiple @startuml ... @ endumls, only the first image will be generated
Execution result
> gradle run
...

--Note that the environment variable GRAPHVIZ_DOT must be set as it is when running from the command line.
When multiple images are defined
Main.java
package sandbox.plantuml;

import net.sourceforge.plantuml.SourceStringReader;

import java.io.FileOutputStream;
import java.io.OutputStream;

public class Main {

    public static void main(String[] args) throws Exception {
        String source = "@startuml FooBar\n"
                      + "Foo <-- Bar\n"
                      + "@enduml\n"
                      + "\n"
                      + "@startuml FizzBuzz\n"
                      + "Fizz <-- Buzz\n"
                      + "@enduml";
        final SourceStringReader reader = new SourceStringReader(source);
        try (
            OutputStream fooBar = new FileOutputStream("foobar.png ");
            OutputStream fizzBuzz = new FileOutputStream("fizzbuzz.png ");
        ) {
            reader.generateImage(fooBar, 0);
            reader.generateImage(fizzBuzz, 1);
        }
    }
}
--You can use generateImage (OutputStream, int) to generate the image with the specified number.
--Image numbers start with 0 and are in order from the top
Read from source file
Folder structure
|-source.pu
|-build.gradle
`-src/main/java/
  `-sandbox/plantuml/
    `-Main.java
--Add source.pu file
source.pu
@startuml FooBar
Foo <-- Bar
@enduml

@startuml FizzBuzz
Fizz <-- Buzz
@enduml
--Defining two figures
Main.java
package sandbox.plantuml;

import net.sourceforge.plantuml.SourceFileReader;

import java.io.File;

public class Main {

    public static void main(String[] args) throws Exception {
        final SourceFileReader reader = new SourceFileReader(new File("source.pu"));
        reader.getGeneratedImages();
    }
}
--Reading the source file with SourceFileReader
--When you execute getGeneratedImages (), images are generated.
Execution result
> gradle run
...
Folder structure
|-source.pu
|-FooBar.png
|-FizzBuzz.png
|-build.gradle
`-src/main/java/
  `-sandbox/plantuml/
    `-Main.java
FooBar.png

FizzBuzz.png

--The image is output to the folder where the source file exists, just like when executed from the command line.
--getGeneratedImage () returns a List of a File object that represents the generated image file.
reference
- PlantUML - Wikipedia -Open source tool for writing UML in simple text files
- General and common command to handle graphic layout in diagrams.
- Which fonts are available ?
Recommended Posts