[JAVA] CI / CD Spring application with CircleCI (Heroku)
Overview
This is the first post. I would like to CI / CD my Spring application using CircleCI. Use Heroku as the deployment destination.
environment
- Java 11
- Spring Boot 2.2.8
Prerequisites
--You have a GitHub account and can push etc. from the CLI --You have a Heroku account and can create etc. from the CLI
Creating a Spring project
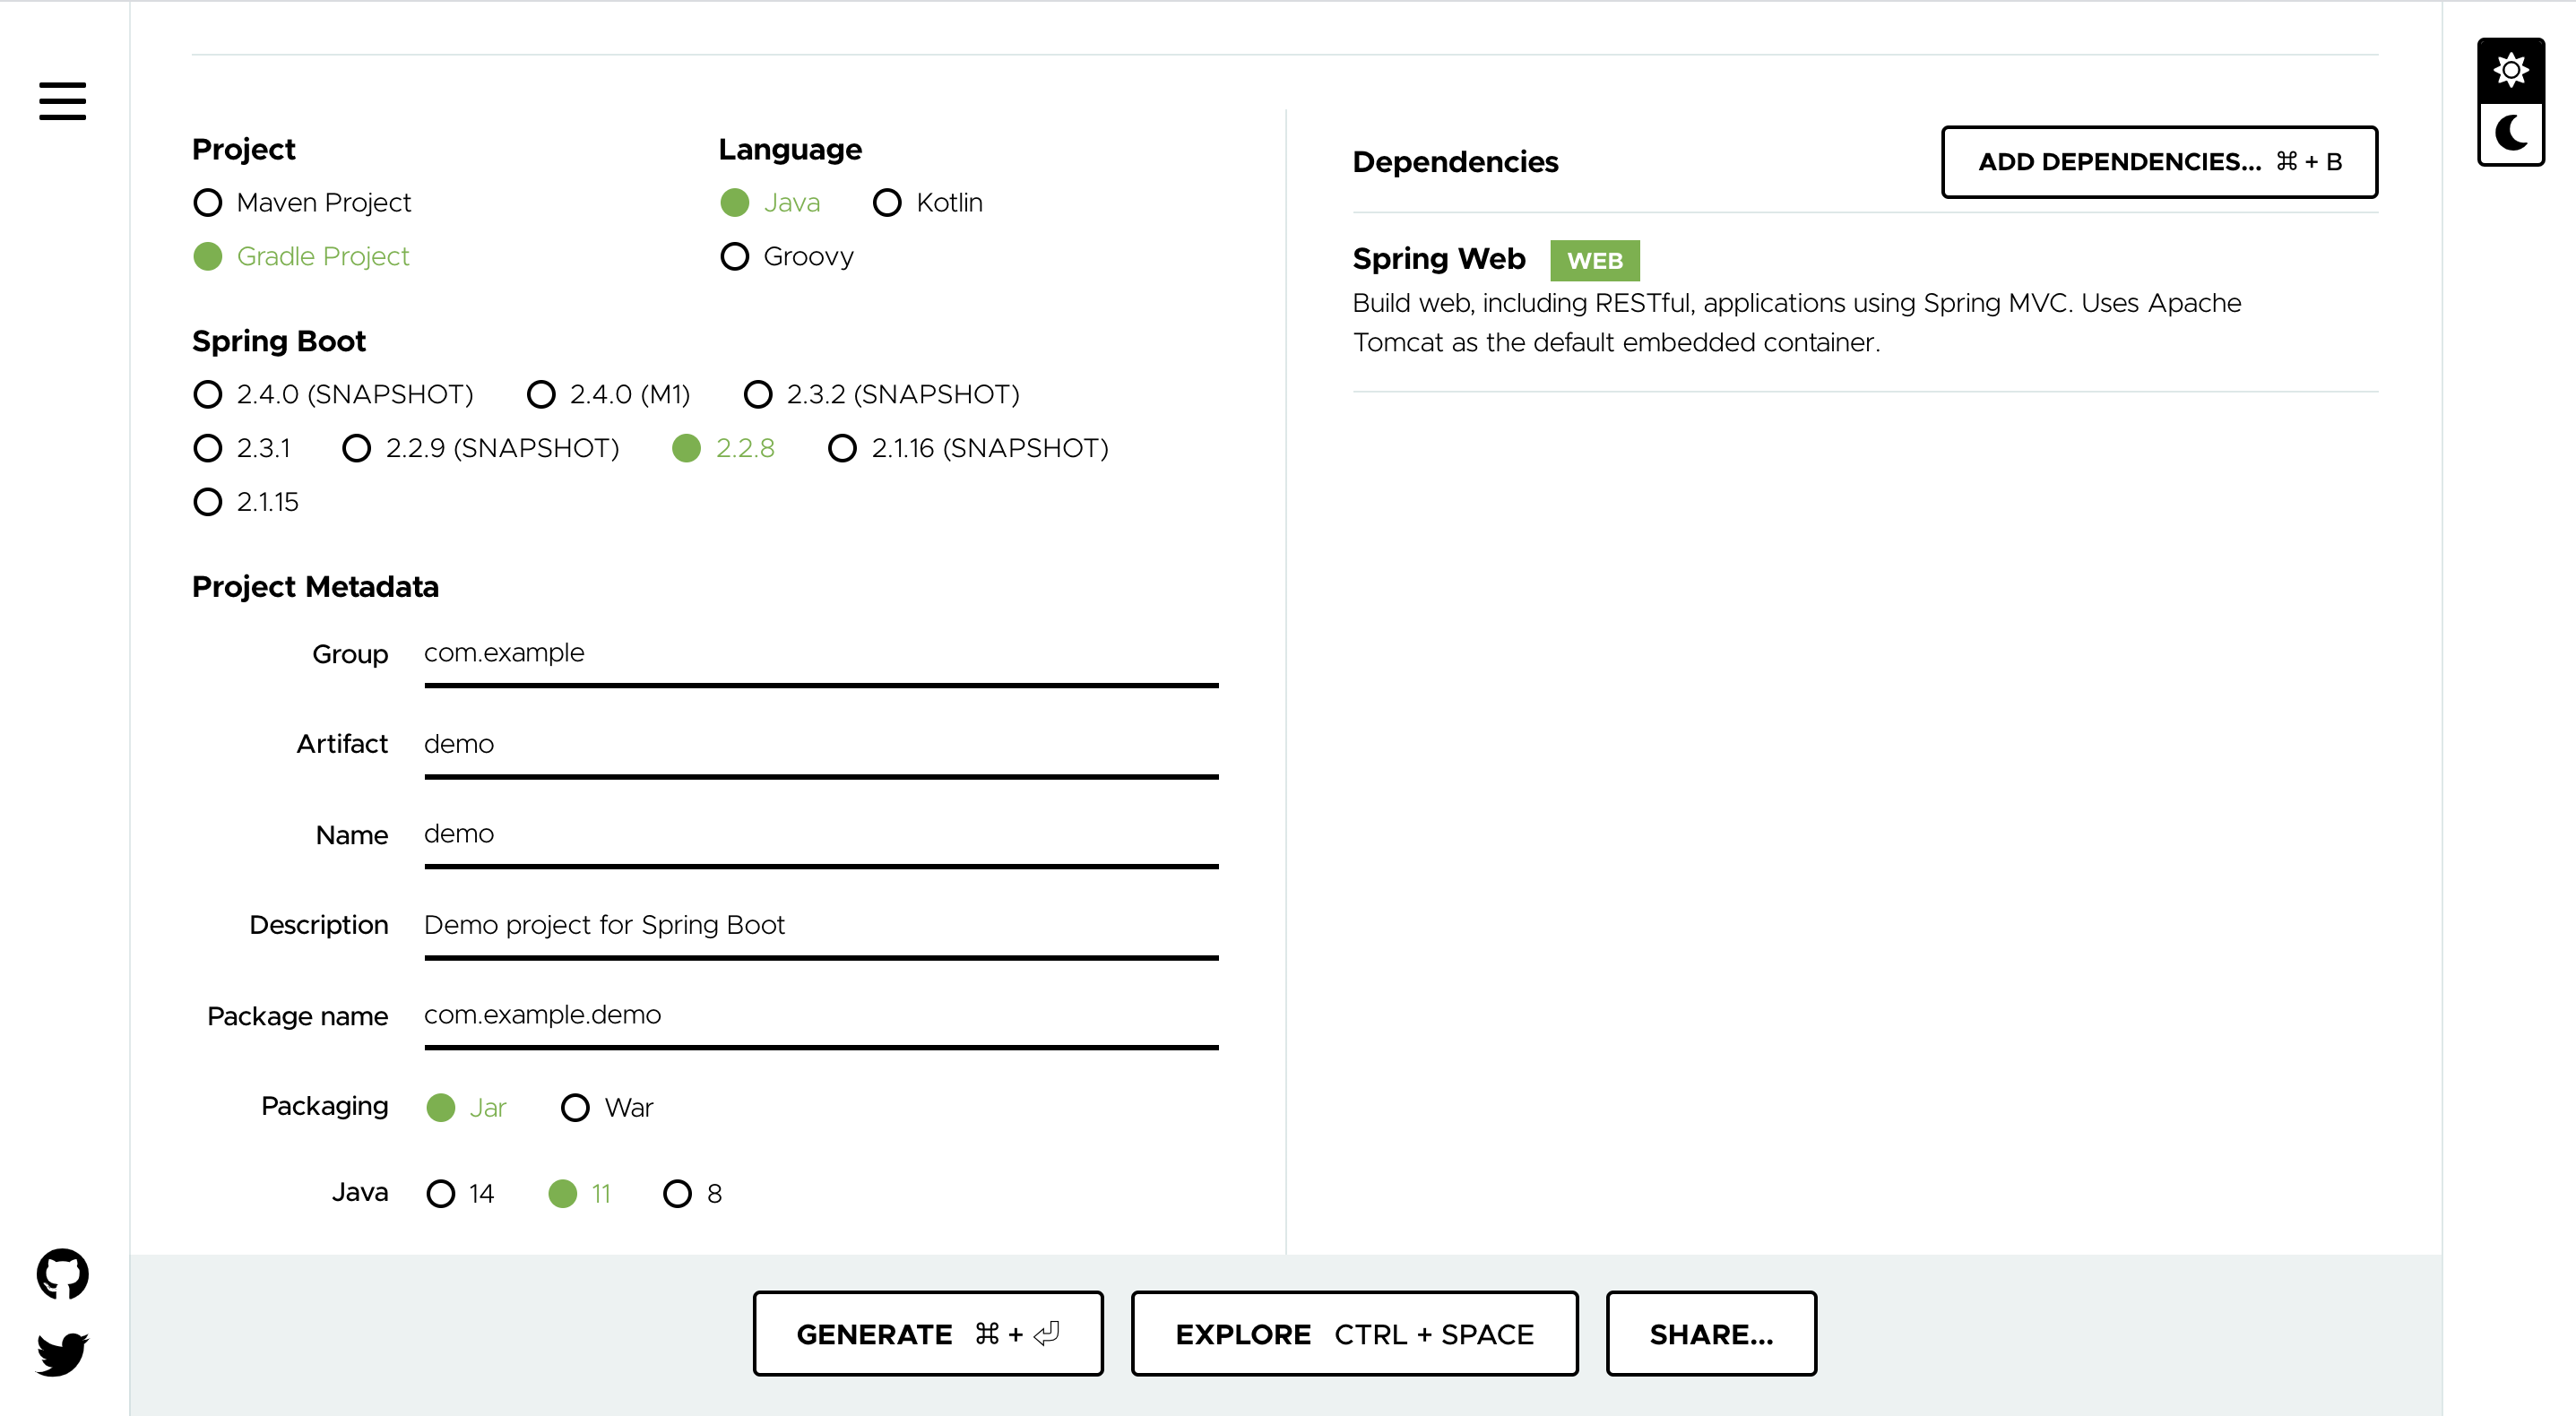
First, create a Spring application using Spring Initializr. This is a convenient site that creates a template for Spring applications.
Make the settings as shown in the image below and click GENERATE. Don't forget to add Spring Web to Dependencies.
A file such as demo.zip will be downloaded, so unzip it to any location you like.
Test creation
Next, create a simple Controller implementation and test.
First, create demo / src / main / java / com / example / demo / controller / HelloController.java.
package com.example.demo.controller;

import org.springframework.web.bind.annotation.GetMapping;
import org.springframework.web.bind.annotation.RestController;

@RestController
public class HelloController {

    @GetMapping(path = "/hello")
    public String hello() {
        return "hello";
    }

}
It's a very simple Controller that just returns " hello " when you access / hello.
Next, create demo / src / test / java / com / example / demo / controller / HelloControllerTest.java.
package com.example.demo.controller;

import org.junit.jupiter.api.BeforeEach;
import org.junit.jupiter.api.Test;
import org.springframework.beans.factory.annotation.Autowired;
import org.springframework.boot.test.autoconfigure.web.servlet.AutoConfigureMockMvc;
import org.springframework.boot.test.context.SpringBootTest;
import org.springframework.test.web.servlet.MockMvc;
import org.springframework.test.web.servlet.setup.MockMvcBuilders;
import org.springframework.web.context.WebApplicationContext;

import static org.junit.jupiter.api.Assertions.assertEquals;
import static org.springframework.test.web.servlet.request.MockMvcRequestBuilders.get;
import static org.springframework.test.web.servlet.result.MockMvcResultHandlers.print;
import static org.springframework.test.web.servlet.result.MockMvcResultMatchers.status;

@SpringBootTest
@AutoConfigureMockMvc
class HelloControllerTest {
    @Autowired
    private MockMvc mockMvc;

    @Autowired
    WebApplicationContext webApplicationContext;

    @BeforeEach
    void setUp() {
        this.mockMvc = MockMvcBuilders.webAppContextSetup(webApplicationContext).build();
    }

    @Test
void hello returns hello when you access the page() throws Exception {
        final var mvcResult = this.mockMvc.perform(get("/hello"))
                .andDo(print()).andExpect(status().isOk()).andReturn();
        String content = mvcResult.getResponse().getContentAsString();
        assertEquals(content, "hello");
    }
}
I'm testing the simple Controller above using a library called MockMvc. If you have a good environment, run the test here and it should be GREEN.
Allow CI
Next, every time I push the test I created earlier to GitHub, I will run it automatically with CircleCI. Create .circleci / config.yml.
version: 2.1

workflows:
  java-ci:
    jobs:
      - test

jobs:
  test:
    docker:
      - image: circleci/openjdk:11-jdk

    working_directory: ~/repo
    environment:
      JVM_OPTS: -Xmx3200m
      TERM: dumb

    steps:
      - checkout
      - restore_cache:
          keys:
            - v1-dependencies-{{ checksum "build.gradle" }}
            - v1-dependencies-
      - run: gradle dependencies
      - save_cache:
          paths:
            - ~/.gradle
          key: v1-dependencies-{{ checksum "build.gradle" }}
      - run: ./gradlew test
I am trying to run ./gradlew test using the image of circleci / openjdk: 11-jdk.
Create a Repository on GitHub and push the changes so far.
Then select Log In With GitHub from the CircleCI Login Page (https://circleci.com/vcs-authorize/) to log in. After entering your GitHub account information, when the Select an organization screen appears, select your GitHub account.
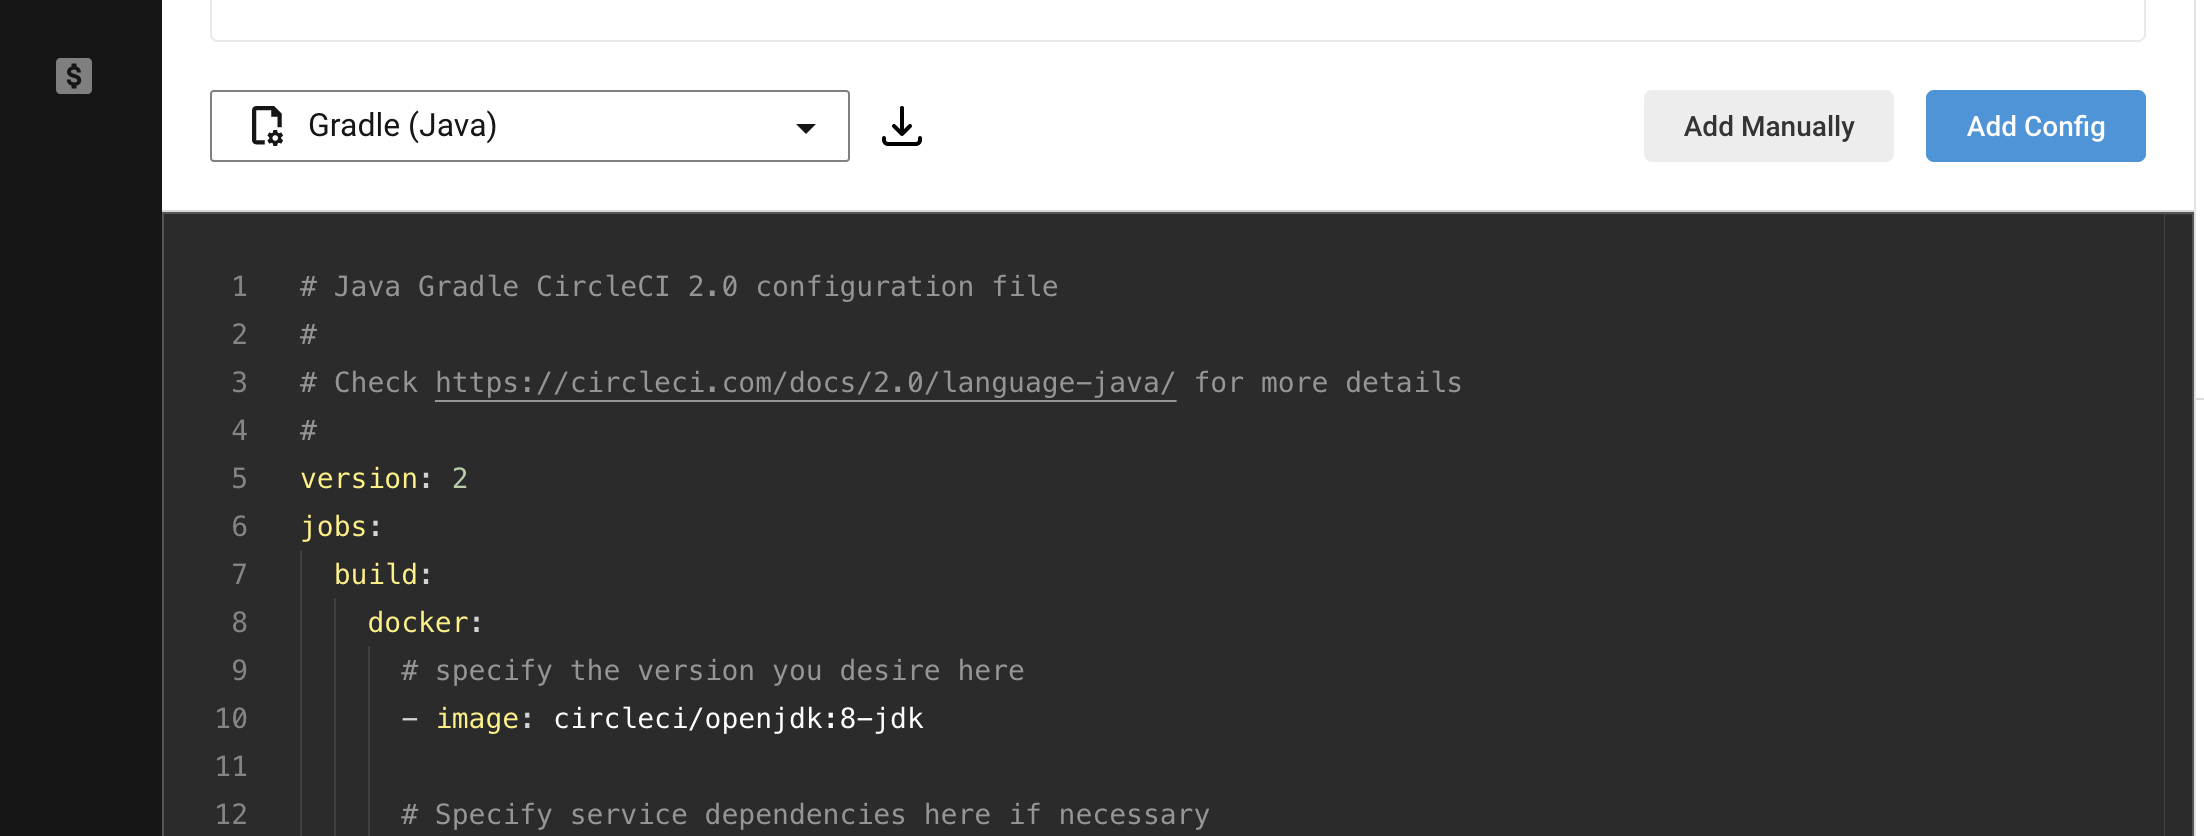
When the Projects page is displayed, select Set Up Project of the Repository created this time. If you see a screen like the one below, this time you have already created .circleci / config.yml, so select ʻAdd Manually`.
This will take you to the Pipelines page, and if the test is run, the CI is complete.
For more information on how to start building CircleCI, please also refer to the Official Page.
Allow CD
Finally, we will continue to deploy the application. Make .circleci / config.yml as follows. Allows you to deploy to Heroku using an Orbs called circleci / heroku.
version: 2.1

orbs:
  heroku: circleci/[email protected]

workflows:
  java-ci-cd:
    jobs:
      - test
      - start_deploy:
          type: approval
          requires:
            - test
      - heroku/deploy-via-git:
          requires:
            - start_deploy

jobs:
  test:
    docker:
      - image: circleci/openjdk:11-jdk

    working_directory: ~/repo
    environment:
      JVM_OPTS: -Xmx3200m
      TERM: dumb

    steps:
      - checkout
      - restore_cache:
          keys:
            - v1-dependencies-{{ checksum "build.gradle" }}
            - v1-dependencies-
      - run: gradle dependencies
      - save_cache:
          paths:
            - ~/.gradle
          key: v1-dependencies-{{ checksum "build.gradle" }}
      - run: ./gradlew test
      -
Next, create on the Heroku side. Create Heroku Apps in the root directory of the Spring application you are creating this time.
$ heroku create
You can pass any string after create to make it your favorite domain.
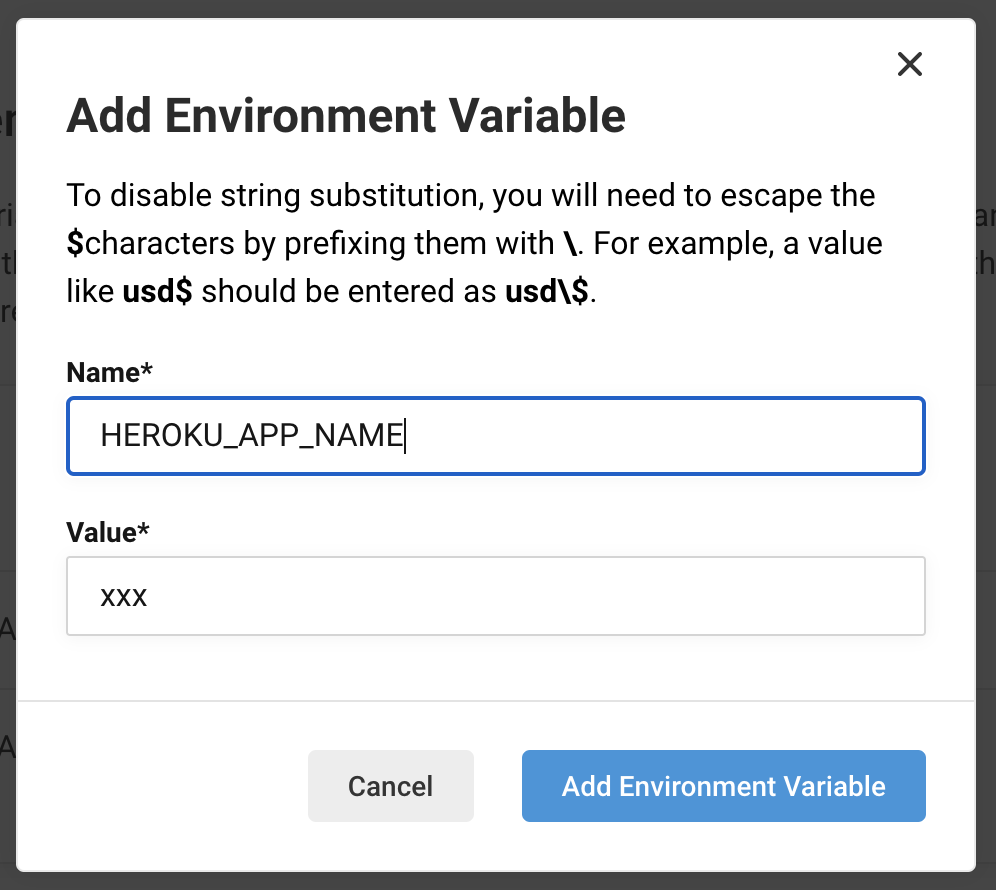
Make a note of the xxx part of the https://xxx.herokuapp.com/ created by this.
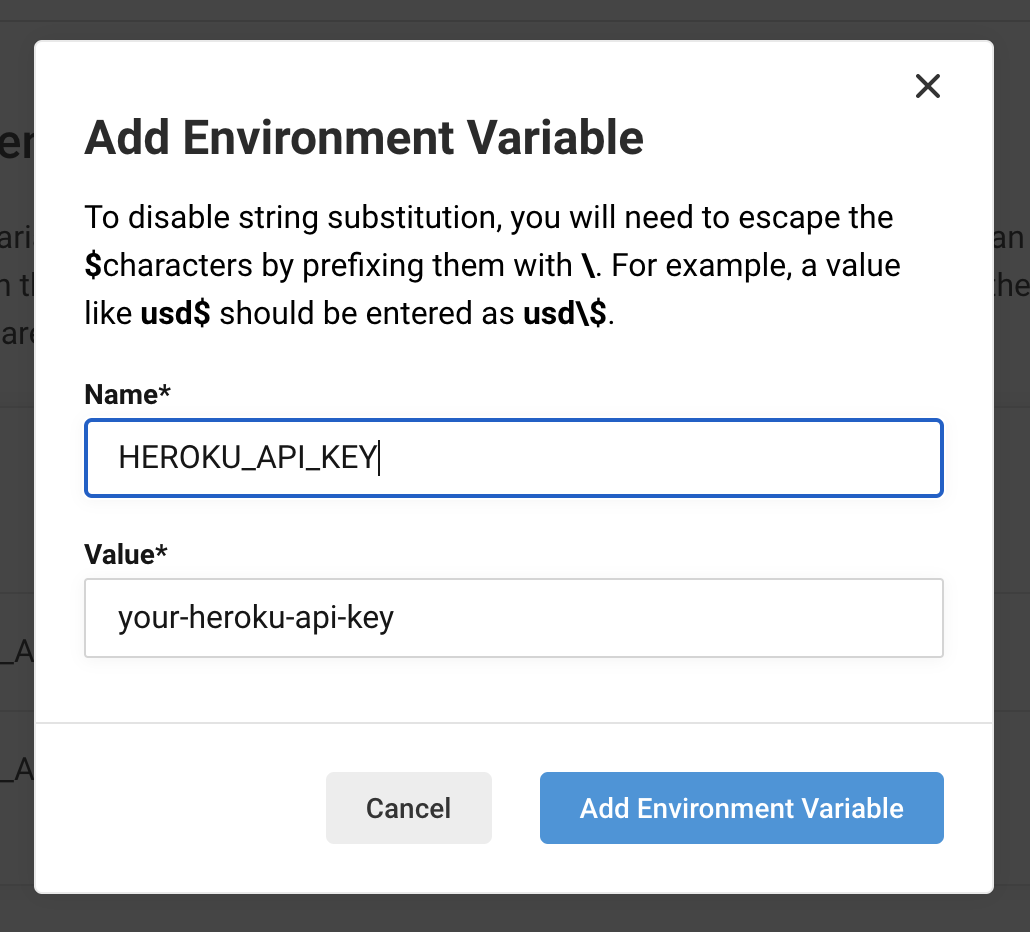
Also, make a note of the value of ʻAPI Key` in the middle of the Heroku Account page (https://dashboard.heroku.com/account).
Set these two values to CircleCI's ʻEnvironment Variables. From the Pipelines page, go to Project Settings → ʻEnvironment Variables. Add one part of the domain as HEROKU_APP_NAME and the API Key value as HEROKU_API_KEY as shown in the image below.
Finally, add a configuration file for Heroku.
Add Procfile to the root directory.
web: java -jar build/libs/demo-0.0.1.jar --server.port=$PORT
In addition, add system.properties to the root directory.
java.runtime.version=11
This will push the differences so far to GitHub.
Then Job will stop after the test is successful on the Pipelines page, so select ʻOn_hold and click ʻApprove Job to run the deployment.
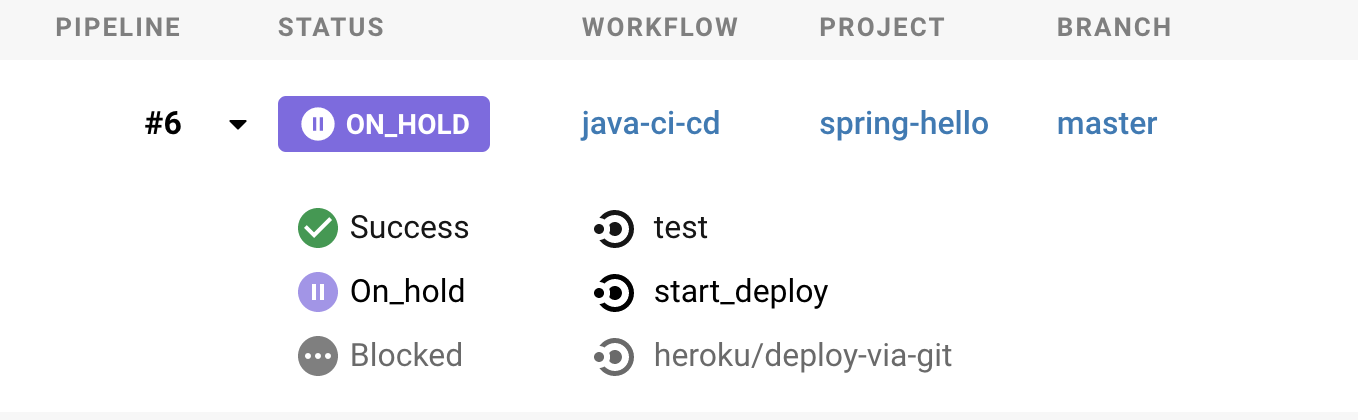
The CD is complete when you finally reach heroku / deploy-via-git.
Here has the code created this time, so please refer to it if you like.
Recommended Posts