[SWIFT] Add Widgets for iOS 14 Applications (Regular Widgets, Configurable Widgets Using Intents)
** This article describes the following: ** **
- Add widgets to existing applications
- ⭐️ Add widgets that allow users to configure content (such as city selection)
You can check the completed source code here.
Adding widgets to existing applications
Creating an application target
Adding widgets to your existing iOS application is easy. Add the target Widget Extension.

Now, make sure you have selected the box labeled ʻInclude Configuration Intent`. That's because you'll need that configuration file for Part 2 of this article.

data structure
You should now see a new folder called WidgetExample-Widget. Click to open the file WidgetExample_Widget.swift, delete the contents of that file, and follow this guide.
You can create a data structure for the data you want to display in the widget. In this example, we will display the cat information!
struct CatEntry: TimelineEntry {
    var date: Date

    var name: String
    var lastFed: Date
    var lastPlayedWith: Date
}
ʻCreate IntentTimelineProvider` structure
The ʻIntentTimelineProviderstructure provides three types of content: 1>placeholderis displayed when the widget is loaded. 2>getSnapshotwill appear in the widget gallery. 3>getTimeline` is used for the actual widget display.
First, create a program structure that checks for type ʻIntentTimelineProvider, and then define the type for ʻEntry.
struct CatProviderStatic: TimelineProvider {
    typealias Entry = CatEntry

    func getSnapshot(in context: Context, completion: @escaping (CatEntry) -> Void) {
        //TODO
    }

    func getTimeline(in context: Context, completion: @escaping (Timeline<CatEntry>) -> Void) {
        //TODO
    }

    func placeholder(in context: Context) -> CatEntry {
        //TODO
    }

}
For the getSnapshot feature, you can provide an example value in the widget view so that the user can understand what information your widget provides:
func getSnapshot(in context: Context, completion: @escaping (CatEntry) -> Void) {
    let entry = CatEntry(date: Date(), name: "Cat name", lastFed: Date(), lastPlayedWith: Date())
    completion(entry)
}
For placeholder views, you can display empty values or example values as follows:
func placeholder(in context: Context) -> CatEntry {
    return CatEntry(date: Date(), name: "Cat name", lastFed: Date(), lastPlayedWith: Date())
}
And for the timeline display, you can provide the actual content to display.
In this example, we just want to display static data values. In your application, Core Data (Click here for an article on how to share that data), or online, from CloudKit, or You can fetch content from ʻUserDefaults`.
func getTimeline(in context: Context, completion: @escaping (Timeline<CatEntry>) -> Void) {
    let entry = CatEntry(date: Date(), name: "Nekonohi", lastFed: Date(), lastPlayedWith: Date())
    let timeline = Timeline(entries: [entry], policy: .atEnd)
    completion(timeline)
}
Widget view design
You can now design a SwiftUI view for your widget.
struct CatWidgetView: View {

    @Environment(\.widgetFamily) var family

    var entry: CatEntry

    var body: some View {

        VStack {

            if family == .systemMedium || family == .systemLarge {
                Image("kitty")
                    .resizable()
                    .frame(width: 50, height: 50)
                    .padding(.vertical, 5)
            }

            Text(entry.name)
                .font(.headline)
                .padding(1)

            Text("Last time played" + entry.lastPlayedWith.getString())
                .font(.caption)
                .padding(.horizontal)

            Text("Last feeding time" + entry.lastFed.getString())
                .font(.caption)
                .padding(.horizontal)

        }

    }

}
You can use the @Environment (\ .widgetFamily) var family variable to see the size of the widget.
This example shows an image of a cat when the widget is large enough to display the image.
if family == .systemMedium || family == .systemLarge {
    Image("kitty")
        .resizable()
        .frame(width: 50, height: 50)
        .padding(.vertical, 5)
}
Coding a widget application
You can now code your widget application.
@main
struct CatWidget: Widget {

    var body: some WidgetConfiguration {
        IntentConfiguration(kind: "CatWidget", intent: ConfigurationIntent.self, provider: CatProvider()) { entry in
            CatWidgetView(entry: entry)
        }.configurationDisplayName("Cat")
        .description("See when you feed and play with your cat.")
    }

}
You can now run the app in the simulator and add the widget you just designed to your screen.

Allows users to configure widgets
If you've used the weather widget, you know that users can select which cities to display by long-pressing and configuring the widget. You can add this functionality using the ʻIntents` framework and Target.
ʻIntents` Add program target

No UI elements are needed at this stage, so you can uncheck the option ʻInclude UI Extension`.

On the created Intents target page, find the section named Supported Intents. Create a new item named ConfigurationIntent. The name is [intent name] Intent. The intent name is displayed in the .intentdefinition file on the left.

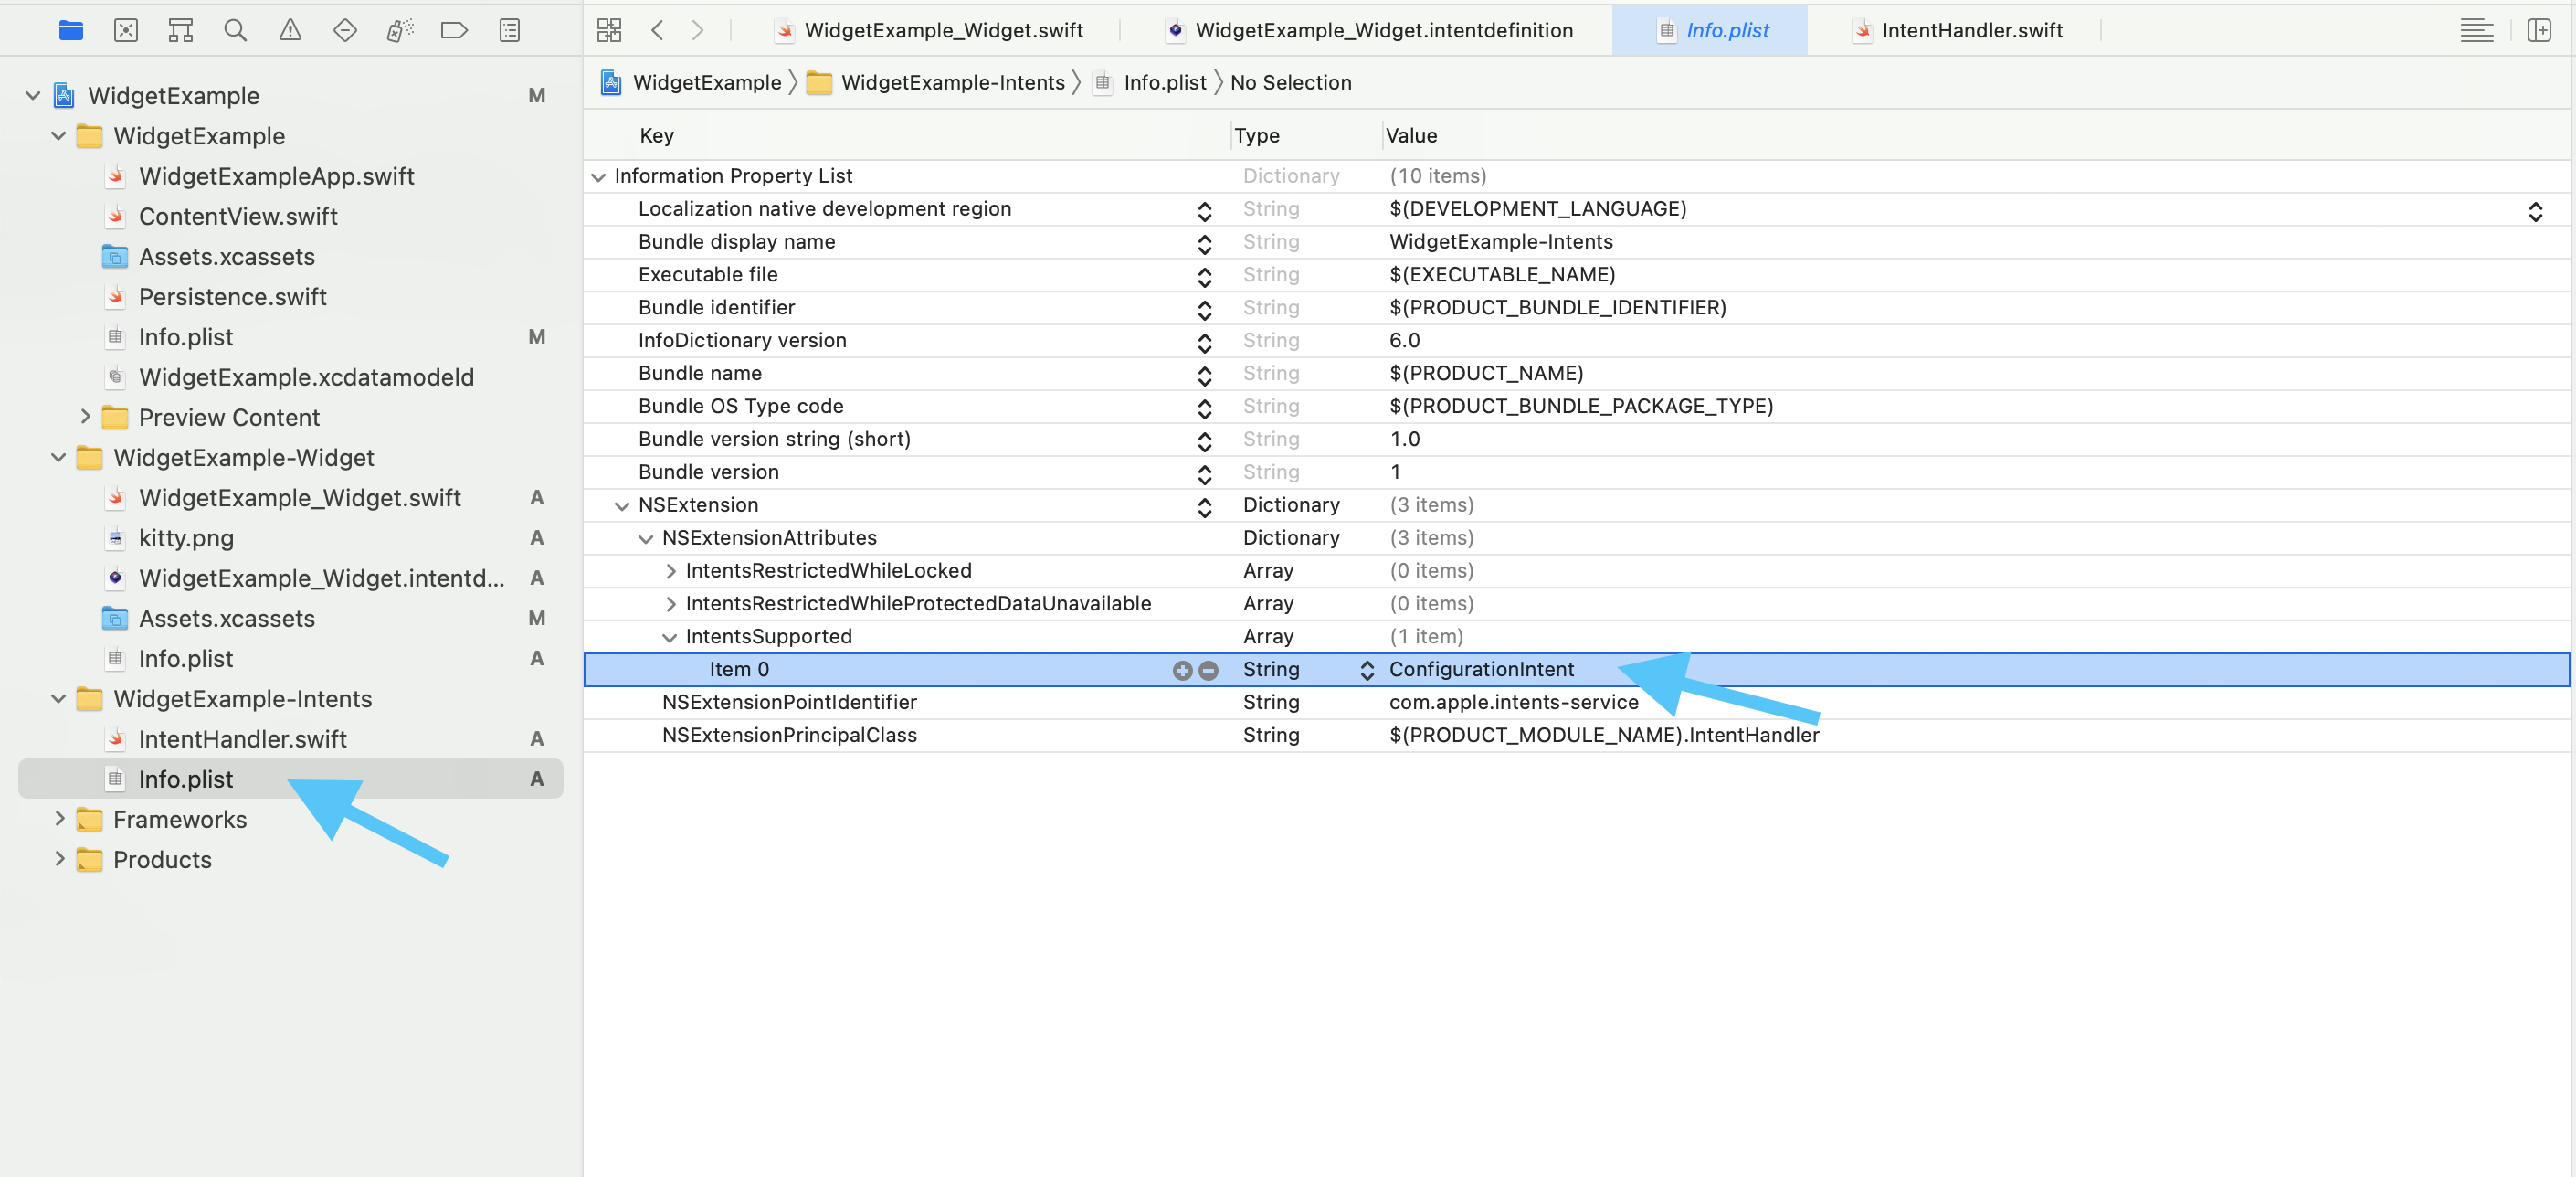
Structure of .intentdefinition
Then, for the WidgetExample_Widget.intentdefinition file in the previously created widget, add the newly created ʻIntents` extension as an intent target.
<img width="300 alt="image" src="https://qiita-image-store.s3.ap-northeast-1.amazonaws.com/0/635330/a9450674-1f3b-9d1d-f8c0-69221b74e7c2.png ">
Click Configuration on the left side of the screen.

On the right side, make sure the composition is the same as the image below.

Then add a new parameter named cat.

On the newly created cat parameter settings screen, select String for the type Type to use the cat identifier as input.

ʻIntentHandler` configuration
Then open the ʻIntentHandler.swift` file. This file gives the user the option to configure the widget. In this example, the option is the cat's identifier.
If you add the ConfigurationIntentHandling keyword next to the class's ʻINExtension` type, the Xcode software will automatically display the name of the next function to add.
class IntentHandler: INExtension, ConfigurationIntentHandling {
    ...
}
In this example, the completed ʻIntentHandler.swift` file looks like this:
class IntentHandler: INExtension, ConfigurationIntentHandling {


    func provideCatOptionsCollection(for intent: ConfigurationIntent, searchTerm: String?, with completion: @escaping (INObjectCollection<NSString>?, Error?) -> Void) {
        let catIdentifiers: [NSString] = [
            "Nekonohi",
            "Wheat",
            "Azuki"
        ]
        let allCatIdentifiers = INObjectCollection(items: catIdentifiers)
        completion(allCatIdentifiers, nil)
    }

    override func handler(for intent: INIntent) -> Any {
        // This is the default implementation.  If you want different objects to handle different intents,
        // you can override this and return the handler you want for that particular intent.

        return self
    }

}
The function provideCatOptionsCollection requires you to enter a list of values. These values can actually be fetched from either ʻUser Defaults, Core Data`, or online. The values are hard-coded in this example.
Use "Core Data" with "App Extensions"
ʻCreate IntentTimelineProvider`
In Part 1 of this article, we used TimelineProvider. This time, we will use ʻIntentTimelineProvider`.
ʻThe data structure between IntentTimelineProvider and TimelineProvideris about the same. The difference is that you need to declare an additionaltypealias`.
typealias Intent = ConfigurationIntent
Another difference is: In each function, we get an additional parameter ConfigurationIntent that represents the selection of intents.
struct CatProvider: IntentTimelineProvider {

    typealias Intent = ConfigurationIntent
    typealias Entry = CatEntry

    func placeholder(in context: Context) -> CatEntry {
        let entry = CatEntry(date: Date(), name: "", lastFed: Date(), lastPlayedWith: Date())
        return entry
    }

    func getSnapshot(for configuration: ConfigurationIntent, in context: Context, completion: @escaping (CatEntry) -> Void) {
        let entry = CatEntry(date: Date(), name: "Cat name", lastFed: Date(), lastPlayedWith: Date())
        completion(entry)
    }

    func getTimeline(for configuration: ConfigurationIntent, in context: Context, completion: @escaping (Timeline<CatEntry>) -> Void) {
        let entry = CatEntry(date: Date(), name: configuration.cat ?? "", lastFed: Date(), lastPlayedWith: Date())
        let timeline = Timeline(entries: [entry], policy: .atEnd)
        completion(timeline)
    }

}
You can use the configuration.cat property to read the value of the option selected by the user.
let entry = CatEntry(date: Date(), name: configuration.cat ?? "", lastFed: Date(), lastPlayedWith: Date())
Update the code for CatWidget.
We used StaticConfiguration in Part 1, but this part uses ʻIntentConfiguration (the name you set in Supported Intents`).
@main
struct CatWidget: Widget {

    var body: some WidgetConfiguration {
        IntentConfiguration(kind: "CatWidget", intent: ConfigurationIntent.self, provider: CatProvider()) { entry in
            CatWidgetView(entry: entry)
        }.configurationDisplayName("Cat")
        .description("See when you feed and play with your cat.")
    }

}
You can now run the program in the simulator. Press and hold the widget to see the option ʻEdge Widget`, where you can rename the cat.
⭐️
Use "Core Data" with "App Extensions"
Visit this web page to see a list of my published Qiita articles by category.