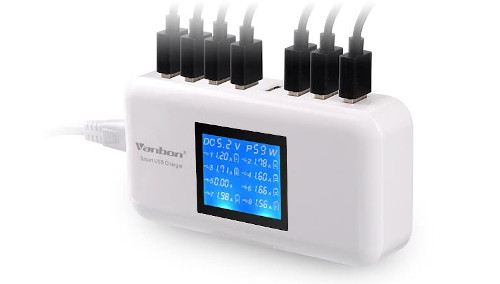
It's impossible to think of one USB-AC adapter for one Raspberry Pi. → There was a good thing

Up to this point, it's a bonus, and the main subject starts here.
Problem # 1: MicroSD media / OS management problem
--The number of damaged microSDs (corpses) will also increase. Completely consumable.
--It is extremely troublesome to manage microSD individually such as free space and OS version.
-** (Returns to me) Isn't it stupid to update the OS one by one? **
Problem? Part 2: Curiosity unique to humans who have multiple cards
You will inadvertently want to make one of the following ...
--Private poor supercomputer in a cluster of HPC (MPI)
--Private poor cloud for PaaS / SaaS with kubernetes etc.
--Distributed compilation environment
** But is it a waste of time to copy many microSDs with the same content? **
How to solve the above problems 1 and 2 in one shot ...
** There is no choice but to make Raspberry Pi a diskless client / network boot **
This article is a summary of diskless client / network boot.
A long way to make Raspberry Pi diskless
Step1: Know the existence of "PiServer"
First of all, I found this article of Nikkei.
You think, "If you install this on a surplus PC or VMWare virtual host, it's a one-shot? Easy win." usually.
Step2: Try PiServer
- 1. Installing
- Ah, the kernel is x86_64, but glibc is 32bit i386 Debian ...
- 2. OS management screen to be distributed to clients
- Registering a distribution other than Raspbian can be a hassle. Apparently you have to create boot.tar.xz and root.tar.xz yourself.
- 3. Setting / updating the OS to be distributed to clients
- Update the OS for clients with qemu-arm-static on PiServer.
Oh, by the way, it's a 32-bit version of glibc, so I can't update the aarch64 version distribution.
- 4. Power on each machine with the microSD actually removed
- That? Can't find any clients other than 3B +? Didn't you throw a DHCP broadcast? (The reason for this phenomenon will be explained later)
At this stage, ** PiServer is shit ** as a whole. I made a tentative decision,
Later, I will analyze the functions of PiServer and think about other ways to implement it.
Step3: Think about what you can do with U-boot installed locally for a moment
There were quite a few articles saying "Put U-boot in the first partition of the local microSD, put it on the tftp server and mount NFS", so I thought about it for a moment and tried it.
Since the SoC is different depending on the model, the number of times U-boot is compiled + image generation increases and it is too troublesome ... Above all, I realized that I was aiming for diskless, so I finally rejected it. If you use U-boot, it's the one you put on the tftp server.
Step4: Know that different models have different ways to enable PXE boot
If you search for "Raspberry PI network boot" on Google, you will find various methods, but ...
In the boot sequence immediately after power-on, when the microSD is not inserted, the final decision result of whether to try PXE boot is completely different depending on the model (release time), and also try PXE boot. I finally realized that the preparation method for changing the behavior is completely different depending on the model.
Step5: Summary of each model and preparation (method as of 2020/06/02)
Raspberry PI 2 Model B (V1.1,V1.2)
- Release date
- The unbranded (V1.1) released on 2015/02 is 32bit arm v7.
- 2016/07 64bit arm v8 after minor change (V1.2)
- Completely diskless is impossible
- Since it was announced at a time when I was not thinking about network boot at all, it does not support complete diskless client conversion.
- How to netboot
- Although it was originally a model that was not supported, the people inside are now working hard to find the bootcode.bin file included in the boot partition of Raspberry PI OS (formerly Raspbian).
It has been improved to the situation where network boot is possible if it exists in the first partition of microSD.
Therefore, it is necessary to insert the microSD that copied bootcode.bin from the Raspbian image and boot it.
[Reference (Qiita)](https://qiita.com/ysugi/items/ee88eed56e0234028228)
Raspberry PI 3 Model B (unmarked)
- Release date
- 2016/03
- Some commands need to be executed only once after purchase.
- The default state does not support network / USB boot, but if you change the cmdline.txt file in the Raspbian boot partition and reboot, the firmware flag will change and diskless boot will occur. It will be possible to respond.
- Actual work
- Please refer to the original tutorial.
[Reference (Original tutorial, English)](https://www.raspberrypi.org/documentation/hardware/raspberrypi/bootmodes/net_tutorial.md)
Raspberry PI 3 Model B+
- Release date
- 2018/03
- Diskless can be done without doing anything
- 2020/06/01 Currently, the model that is the easiest to make into a diskless client. That's why PiServer found it.
Raspberry PI 4
- Release date
- 2019/06
- The command that must be executed only once after purchase is (backtracking)
- The design is completely different from the startup sequence up to 3B system,
A model in which the program corresponding to bootcode.bin, which was required when booting up to 3B series, is now stored in the onboard EEPROM.
Normally, it should be possible to make it diskless without doing anything, but in the initial state, if booting with microSD fails
An unfriendly model that is shipped in a state of giving up everything.
- What to do
- Please refer to the links below as they are well organized.
[Reference (Akii Diary)](https://akkiesoft.hatenablog.jp/entry/20200506/1588750846)
Step6 Check the PXE boot of Raspbian (32bit) again on PiServer
Finally, I was able to perform a PXE boot on all my models.
And to the next stage of how to replace the crappy PiServer
So that's it for this time. Continue to Part 2.