Programmation Ruby avec juste un navigateur: "Blockbreaking" qui crée pas à pas (édition Nyle-canvas)
Aperçu
Cet article est une modification partielle de ce qui a été fait comme matériel pédagogique pour les classes de programmation pour les élèves du premier et du secondaire.
Nous allons créer un jeu "blockbreak" en utilisant Nyle-canvas, qui vous permet de démarrer la programmation de jeux Ruby avec juste un navigateur. Nous allons faire des "sauts de bloc" petit à petit à partir de 0. Même s'il est complété avec Ruby, le "blocage de bloc" peut être effectué en plus de 100 lignes.
Explication technique
Bibliothèque utilisée
--Nyle-toile (style DXRuby)
https://spoolkitamura.github.io/nyle-canvas/
Puisqu'il s'agit d'un environnement de développement intégré qui intègre un éditeur Ruby et un environnement d'exécution qui s'exécute sur un navigateur, il n'est pas nécessaire d'installer Ruby.

Nyle-canvas (style DXRuby)
Dans ce texte, nous utiliserons le "style DXRuby" compatible avec l'API DXRuby parmi les styles de description Nyle-canvas.
Comment utiliser Nyle-canvas
Voir le post ci-dessous.
--Introduction à Nyle-canvas (style DXRuby) --Qiita
https://qiita.com/noanoa07/items/e7ebf97edef4ae9b448a
Environnement d'exploitation requis pour Nyle-canvas
--Browser (Chrome, etc.)
- Connexion Internet --OS qui exécute le navigateur (Windows, macOS, Linux, Android, iPadOS, iOS, etc.)
- PC, tablette (avec clavier externe), smartphone (* Certaines opérations de l'écran tactile sont également prises en charge)
Page d'accueil de Nyle-Canvas
- Page d'accueil de style-canvas
https://spoolkitamura.github.io/nyle-canvas/
- Éditeur de style toile (style DXRuby); écran de l'éditeur pour la programmation réelle
Depuis "Page d'accueil de Nyle-canvas", cliquez sur le lien "DXRuby style".
- Manuel de Nyle-canvas; comment utiliser l'éditeur
https://spoolkitamura.github.io/nyle-canvas/dev2/site/manual_editor.html
Site de référence
Page DXRuby qui est l'original du "style DXRuby";
--Page d'accueil du DXRuby http://dxruby.osdn.jp
--DXRuby 1.4.6 Manuel de référence http://mirichi.github.io/dxruby-doc/index.html
--DXRuby 1.4.1 Manuel de référence http://dxruby.osdn.jp/DXRubyReference/20095313382446.htm
Un article expliquant comment utiliser DXRuby;
- bibliothèque de jeux 2D pour Ruby DXRuby: principes de base de l'utilisation de --Qiita https://qiita.com/noanoa07/items/bced6519d9b53685b651
D'autres bibliothèques compatibles avec l'API DXRuby qui fonctionnent dans le navigateur;
- DXOpal https://yhara.github.io/dxopal/doc/ja/index.html
https://yhara.github.io/dxopal/index.html
- Programmation de jeux commençant par Ruby - Édition DXOpal --Rubyist Magazine n ° 0057 https://magazine.rubyist.net/articles/0057/0057-GameProgramingWithDXOpal.html
L'article sur le "blocage de bloc" réalisé avec DXRuby, qui est à la base de ce texte;
――Pour les débutants en programmation: «Blockbreaking» qui fait étape par étape avec DXRuby ―― Qiita https://qiita.com/noanoa07/items/9ebc059550c620ab223c
Environnement d'exécution de ce texte
--Navigateur; Google Chrome (version 83.0.4103.61, 64 bits, version macOS)
- OS d'exécution; macOS(Catalina 10.15.5)
De plus, nous avons confirmé l'opération sur Safari / macOS et Chrome / Windows10 le cas échéant.
Version correspondante
Nyle-canvas (style DXRuby); dev2 (publié le 30/05/2020)
original
- Modifié de "2014-03-17 J'ai participé à Matsue Ruby Conference 05 - Le journal de la mirichi"
http://d.hatena.ne.jp/mirichi/20140317/p1
Code source de ce texte
https://github.com/noanoa07/nyle-canvas-blocks
Licence de ce texte
Le commentaire, le code source Ruby et les données d'image de ce texte sont tous du domaine public.
(Le code source de Nyle-canvas est sous licence MIT)
Explication du programme
1. Comment utiliser Nyle-canvas (contour)
Voir l'article ci-dessous pour savoir comment utiliser Nyle-canvas.
--Introduction à Nyle-canvas (style DXRuby) --Qiita https://qiita.com/noanoa07/items/e7ebf97edef4ae9b448a
Voici l'explication minimale.
1-1. Ouvrez l'éditeur Nyle-canvas
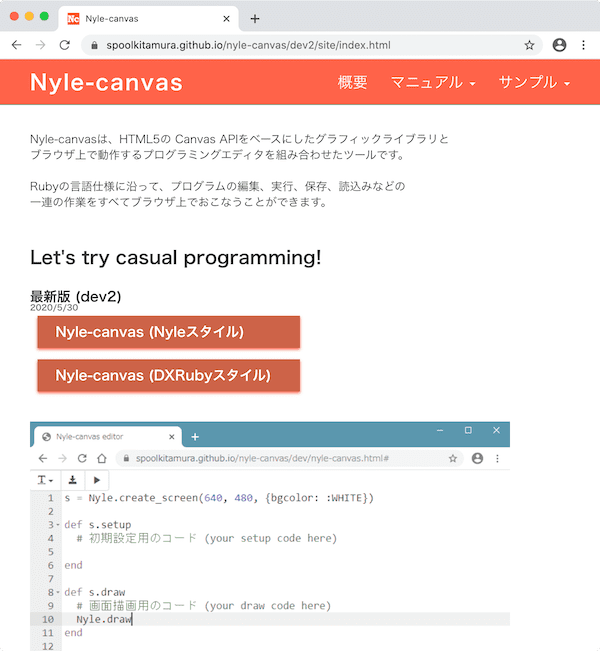
Pour Nyle-canvas, l'écran d'édition du programme (éditeur) s'affiche en accédant au site suivant avec un navigateur.
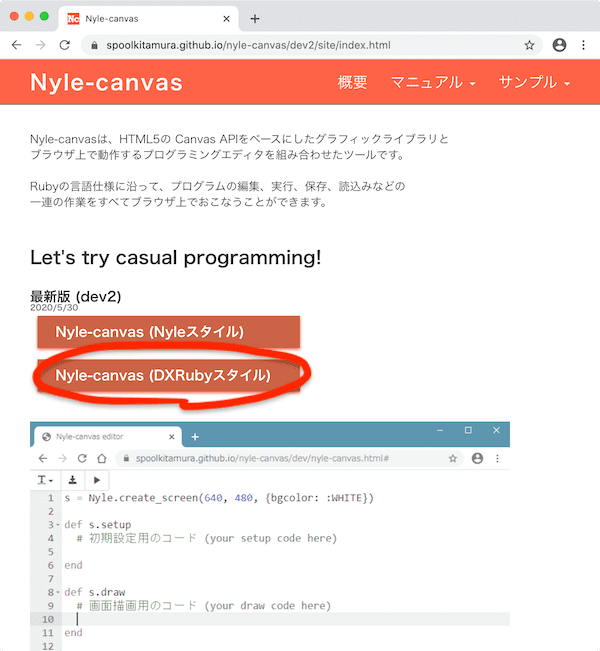 "Page d'accueil de Nyle-canvas"
https://spoolkitamura.github.io/nyle-canvas/
De
Cliquez sur le lien "DX Ruby Style".
"Page d'accueil de Nyle-canvas"
https://spoolkitamura.github.io/nyle-canvas/
De
Cliquez sur le lien "DX Ruby Style".
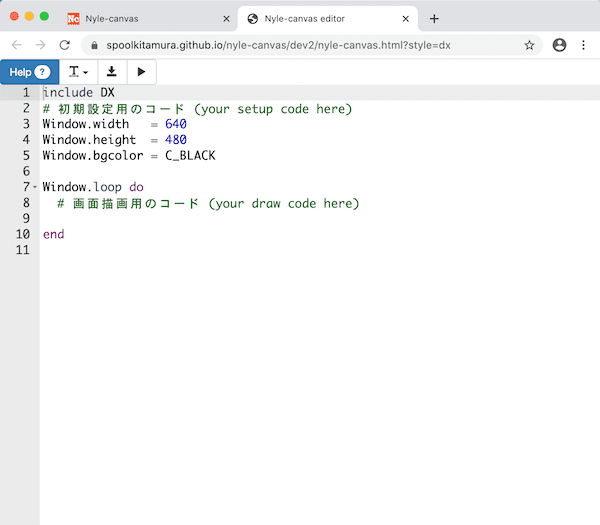
Voici l'écran de l'éditeur Nyle-canvas.
De plus, nous expliquerons ici l'utilisation de Google Chrome comme navigateur. (L'environnement d'exécution est macOS.)
Le programme de base est affiché à l'avance sur l'écran de l'éditeur.
De plus, divers boutons sont alignés dans le coin supérieur gauche de l'écran.
De la droite
-- ▶ ︎ bouton ; Exécution du programme
-- Bouton ↓; Enregistrer le programme (télécharger)
Bouton T; Réglage de la police (taille de la police) --? Bouton; Aller à l'écran d'aide (référence)
・ Création d'un nouveau programme
Nyle-canvas dans votre navigateur ** Sur l'écran de l'éditeur, ** "Recharger" pour revenir à l'état initial.
Comment "recharger":
--Appuyez sur le bouton "" ↻ "en haut du navigateur`
- Sélectionnez
Menu>Fichier>Affichage>Recharger la page--Raccourci; (macOS)Commande+R, (Windows)Ctrl+R
1-2. Exécution / ré-exécution du programme
Le programme est ** aucune opération de sauvegarde ** et sera exécuté ** immédiatement ** en appuyant simplement sur le bouton ▶ ︎.
include DX
#Code pour le réglage initial(your setup code here)
Window.width   = 640
Window.height  = 480
Window.bgcolor = C_BLACK

Window.loop do
  #Code pour le dessin d'écran(your draw code here)

end
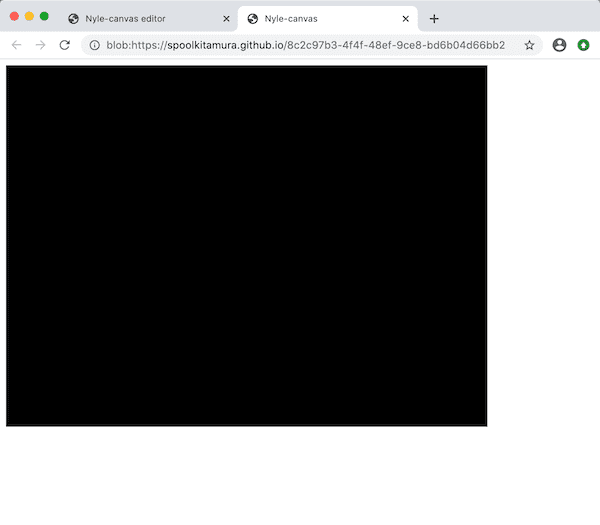
Un nouvel onglet dans votre navigateur s'ouvrira, affichant la fenêtre carrée noire de base.
Le coin supérieur gauche est l'origine (x = 0, y = 0), l'horizontale (x) augmente vers la droite et la verticale (y) augmente vers le bas.
Le code écrit entre «Window.loop do ~ end» est exécuté 60 fois par seconde à plusieurs reprises.
→ Référence DXRuby: Tutoriel 1. Formulaire de base http://mirichi.github.io/dxruby-doc/tutorial/basic.html
・ Ré-exécution
Vous pouvez réexécuter le programme en effectuant ** "Recharger" sur l'écran ** d'exécution.
Comment "recharger":
--Appuyez sur le bouton "" ↻ "en haut du navigateur`
- Sélectionnez
Menu>Fichier>Affichage>Recharger la page--Raccourci; (macOS)Commande+R, (Windows)Ctrl+R
・ Fermez l'écran d'exécution
Fermez l'onglet de l'écran d'exécution. Appuyez sur le bouton «×» en haut de l'écran.
--Raccourci; (macOS) Commande + W, (Windows) Ctrl + W
1-3. Enregistrer (télécharger) le programme
Appuyez sur le bouton ↓ pour télécharger le programme. La destination du téléchargement dépend des paramètres du navigateur, mais il semble que ce soit souvent le dossier «Télécharger».
1-4. Charger le programme
Faites glisser et déposez le fichier programme Nyle-canvas (fichier HTML) sur l'écran de l'éditeur Nyle-canvas de votre navigateur.
1-5. Chargement des fichiers image
Nyle-Canvas enregistre et gère également les fichiers image avec le programme.
Le fichier image que vous souhaitez utiliser peut être copié dans Nyle-canvas par «glisser-déposer» directement sur l'écran de l'éditeur, et sera affiché comme une liste de fichiers image au bas de l'écran de l'éditeur. (* Les majuscules et les minuscules peuvent être inférieures.)

Pour charger et utiliser un fichier image à partir d'un programme, utilisez ʻImage.load (nom du fichier image) `. Il n'y a pas besoin de ** chemin etc. ** pour indiquer l'emplacement avant le «nom du fichier image».
L'image chargée sera dans la ʻImage class`.
1-6. Comment ouvrir la console
Les résultats tels que «messages d'erreur» et «met» au moment de l'exécution sont envoyés à la «console» du navigateur.
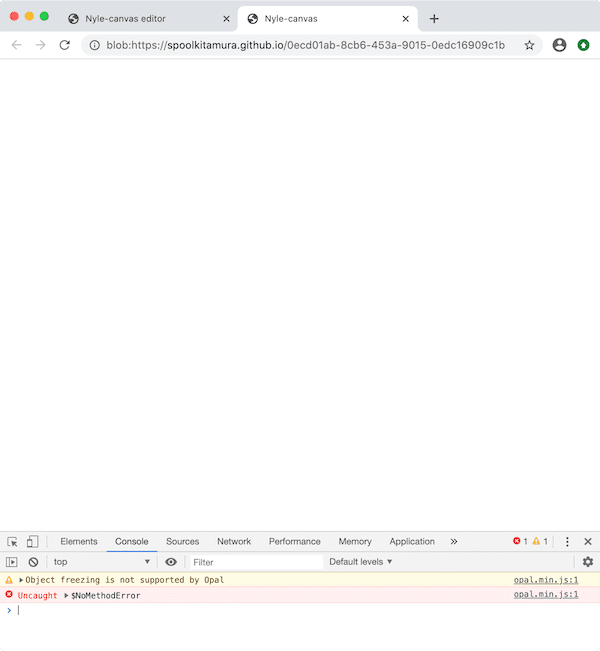
Comment ouvrir dans Chrome; (** sur l'écran d'exécution **)
a) Commun à macOS et Windows
- Appuyez sur la touche
F12(oufn+F12) - (N'importe où sur l'écran);
Clic droit(clic à deux doigts, etc.)>Vérification> Sélectionnez `` Console "` dans les outils de développement ouverts
b) macOS
--Sélectionnez Menu> Affichage> Développement / Gestion> Console Javascript
--Raccourci; Commande + ʻOption + J`
c) Windows
--Menu > ʻAutres outils>Outils de développement > Sélectionnez" Console "dans les outils de développement ouverts --Raccourci;Ctrl + Maj+J`
1-7. Aide (référence)
Appuyez sur le bouton «»? »En haut à gauche de l'écran de l'éditeur Nyle-canvas pour ouvrir l'écran d'aide (référence).
→ \ [Nyle-canvas] API Reference (style DXRuby) https://spoolkitamura.github.io/nyle-canvas/dev2/site/_man_api_dx/index.html
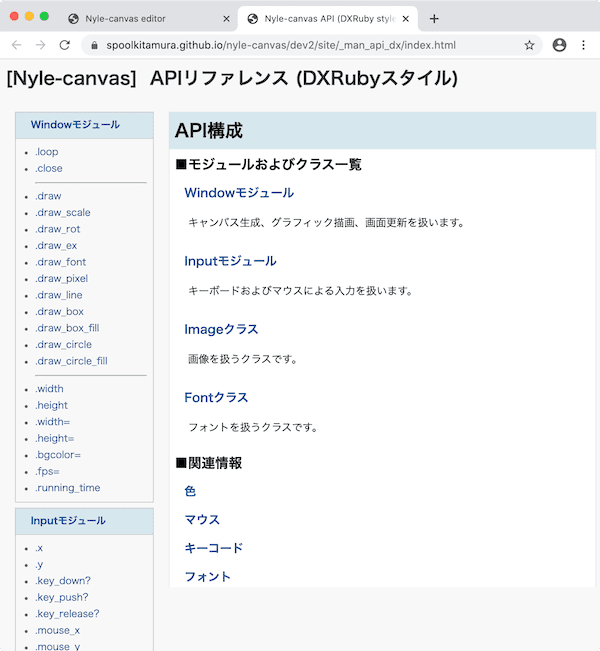
L'API de Nyle-canvas est brièvement résumée, veuillez donc l'utiliser de plus en plus lorsque vous avez des problèmes.
2. Faites une "pause de bloc"
Enfin, nous ferons une "rupture de bloc".
* À propos du fichier .html et du fichier .rb
Le programme qui s'exécute sur Nyle-canvas est le fichier .html. (L'exemple de programme se trouve dans le dossier src / block_html.)
Cependant, dans l'explication suivante, seule la partie programme de Ruby sera répertoriée. (Il y a un fichier .rb avec le même nom dans le dossier src / block_ruby.)
2-1. Éteignez le mur (côté gauche) (rb_block01.html)
Tout d'abord, faites un mur vertical sur le côté gauche (épaisseur 20).
Faites le coin supérieur gauche (0, 0), un rectangle blanc d'une largeur de 20 (épaisseur) et d'une hauteur de 480 (identique à la hauteur de la fenêtre).
Donc, le coin inférieur droit est (20, 480)
Le programme utilise Window.draw_box_fill (supérieur gauche x, supérieur gauche y, inférieur droit x, inférieur droit y, couleur).
Écrivez ceci dans Window.loop do ~ end et laissez-le dessiner à chaque fois.
rb_block01.rb
include DX
#Code pour le réglage initial(your setup code here)
Window.width   = 640
Window.height  = 480
Window.bgcolor = C_BLACK

Window.loop do
  Window.draw_box_fill(0, 0, 20, 480, C_WHITE)    #◆ Ajout
end
2-2. Éteignez le mur (également sur le côté droit) (rb_block02.html)
Ensuite, créez un mur vertical sur le côté droit.
Le "x" dans le coin supérieur gauche est "640 - 20 = 620", qui est la largeur de fenêtre 640 moins l'épaisseur de paroi 20, et le "y" est "0".
Le coin inférieur droit est le même (640, 480) que le coin inférieur droit de la fenêtre.
rb_block02.rb
include DX
#Code pour le réglage initial(your setup code here)
Window.width   = 640
Window.height  = 480
Window.bgcolor = C_BLACK

Window.loop do
  Window.draw_box_fill(  0,   0,  20, 480, C_WHITE)   #◇ Changer (alignement des caractères)
  Window.draw_box_fill(620,   0, 640, 480, C_WHITE)   #◆ Ajout
end
2-3. Éteignez le mur (également sur la face supérieure) (rb_block03.html)
Réaliser la paroi latérale supérieure (épaisseur 20).
Le coin supérieur gauche est "(0, 0)", le coin inférieur droit "x" correspond à la largeur de la fenêtre "640" et "y" correspond à l'épaisseur de la paroi "20".
rb_block03.rb
include DX
#Code pour le réglage initial(your setup code here)
Window.width   = 640
Window.height  = 480
Window.bgcolor = C_BLACK

Window.loop do
  Window.draw_box_fill(  0,   0,  20, 480, C_WHITE)
  Window.draw_box_fill(620,   0, 640, 480, C_WHITE)
  Window.draw_box_fill(  0,   0, 640,  20, C_WHITE)   #◆ Ajout
end

2-4. Sortez une barre (rb_block04.html)
Préparez une image rectangulaire bleu clair (src / image / bar.png) avec une largeur de 100 et une hauteur de 20 comme barre pour frapper la balle en arrière.

Tout d'abord, faites glisser et déposez le fichier bar.png directement sur l'écran de l'éditeur. Cela le copiera dans Nyle-canvas et l'affichera dans la liste des fichiers image en bas de l'écran de l'éditeur.
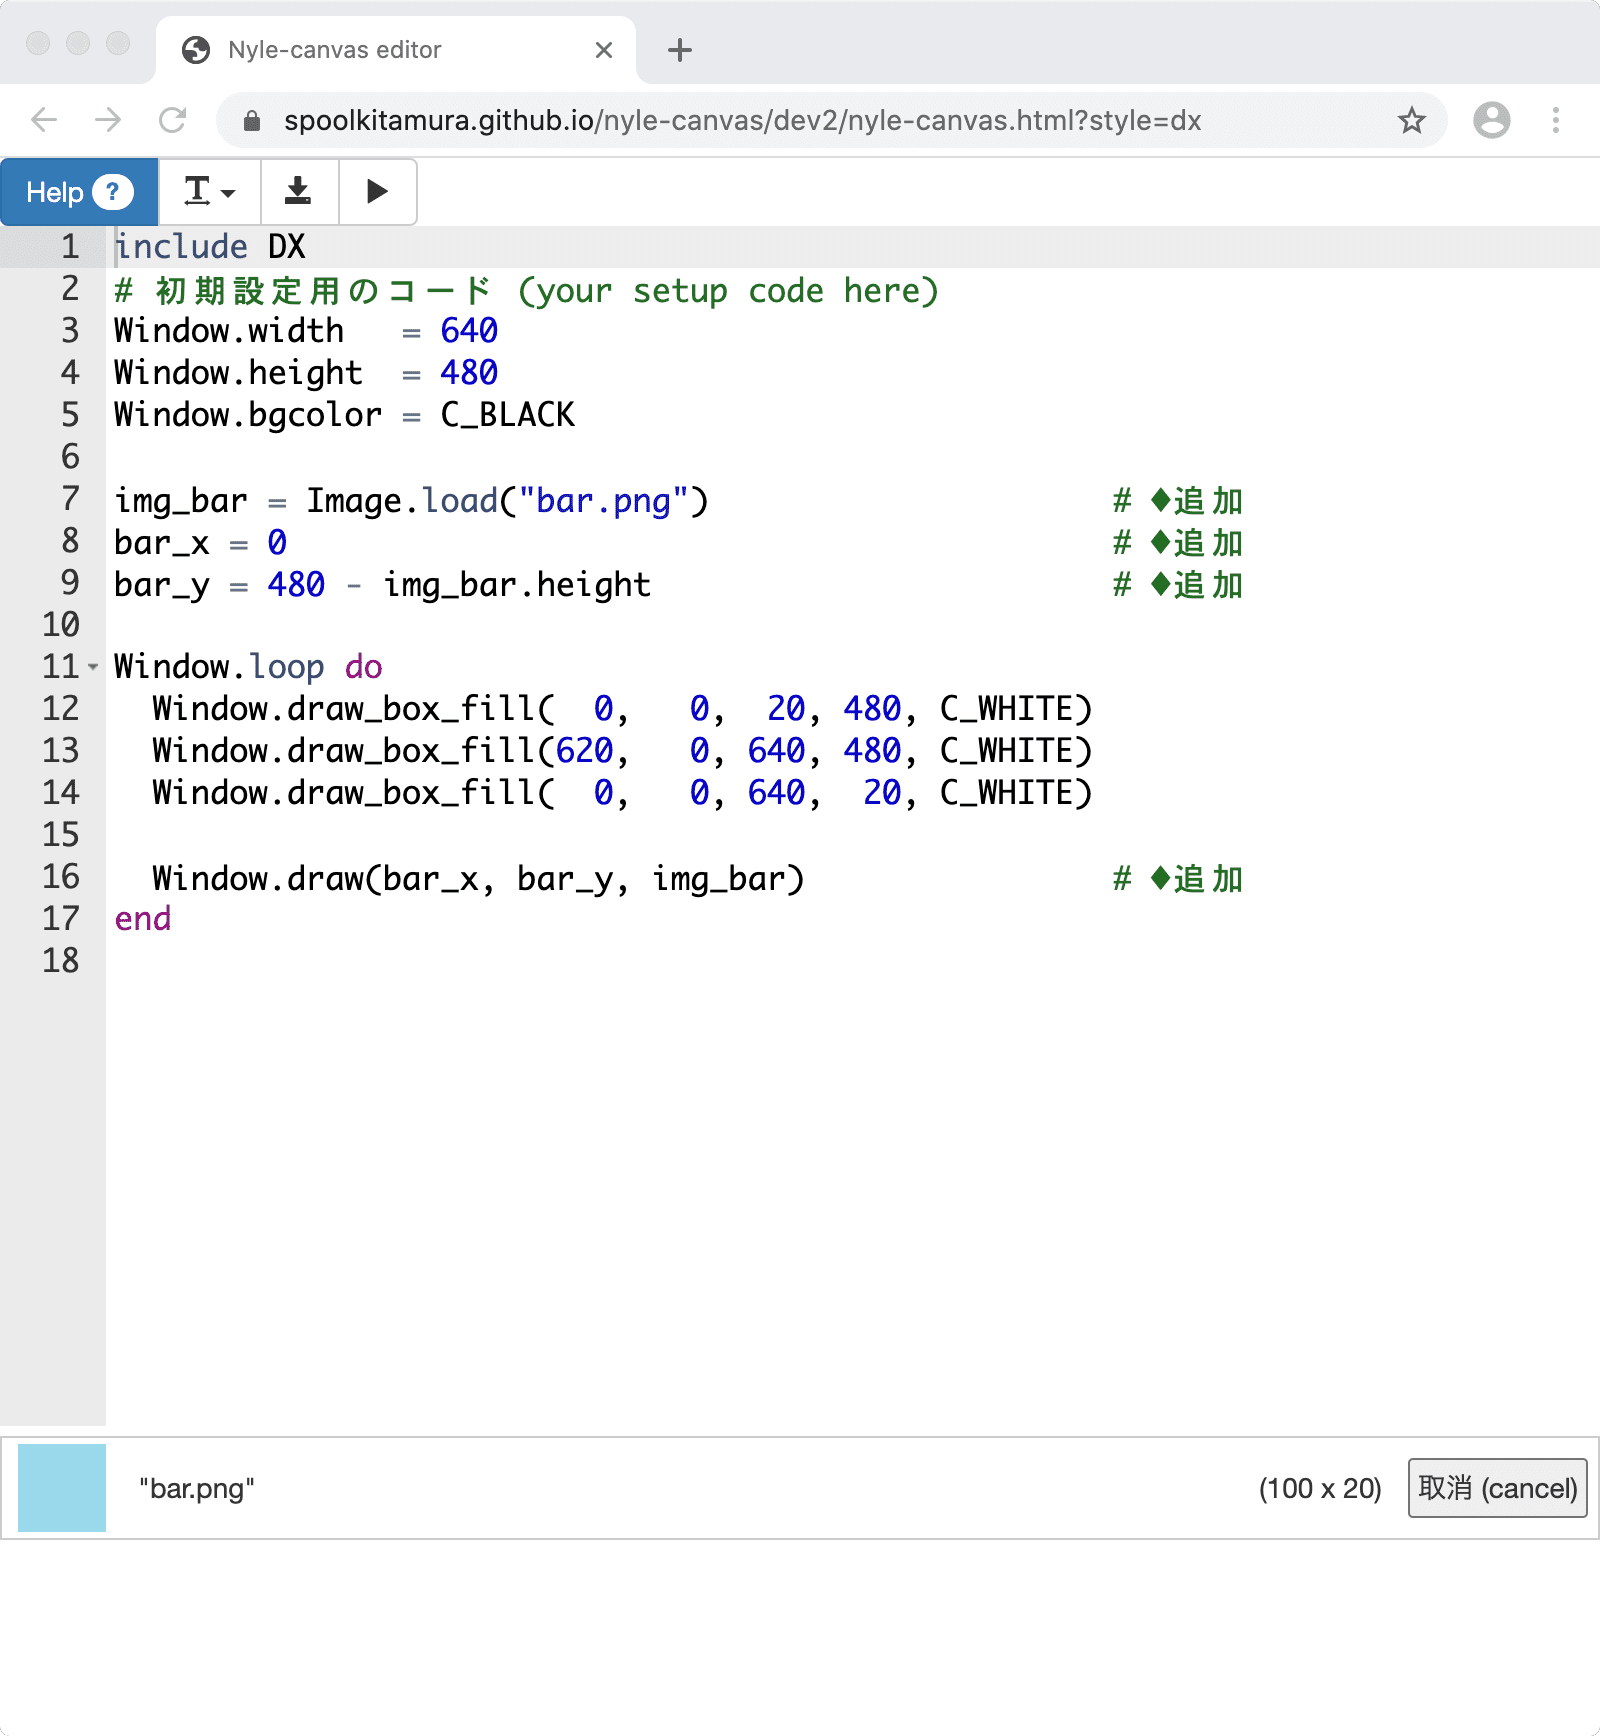
Chargez ensuite le fichier image avec ʻImage.load ("bar.png ") `. (Aucun nom de chemin n'est requis.)
La position verticale de la barre «y» doit être «480 - largeur verticale de la barre» pour correspondre au bas «480» de la fenêtre. La position horizontale «x» de la barre doit être 0.
Pour afficher la barre, utilisez Window.draw (position x, position y, image) dans Window.loop do ~ end.
rb_block04.rb
include DX
#Code pour le réglage initial(your setup code here)
Window.width   = 640
Window.height  = 480
Window.bgcolor = C_BLACK

img_bar = Image.load("bar.png ")                     #◆ Ajout
bar_x = 0                                           #◆ Ajout
bar_y = 480 - img_bar.height                        #◆ Ajout

Window.loop do
  Window.draw_box_fill(  0,   0,  20, 480, C_WHITE)
  Window.draw_box_fill(620,   0, 640, 480, C_WHITE)
  Window.draw_box_fill(  0,   0, 640,  20, C_WHITE)

  Window.draw(bar_x, bar_y, img_bar)                #◆ Ajout
end
2-5. Déplacez la barre avec les touches fléchées (rb_block05.html)
Utilisez les touches fléchées gauche et droite (← →) du clavier pour déplacer la barre vers la gauche et la droite (direction x).
Déplacez la barre en obtenant l'état enfoncé des touches fléchées gauche et droite dans ʻInput.x et en ajoutant les valeurs (-1, 0, 1) à la position x` de la barre. Je vais.
rb_block05.rb
include DX
#Code pour le réglage initial(your setup code here)
Window.width   = 640
Window.height  = 480
Window.bgcolor = C_BLACK

img_bar = Image.load("bar.png ")
bar_x = 0
bar_y = 480 - img_bar.height

Window.loop do
  bar_x = bar_x + Input.x             #◆ Ajout

  Window.draw_box_fill(  0,   0,  20, 480, C_WHITE)
  Window.draw_box_fill(620,   0, 640, 480, C_WHITE)
  Window.draw_box_fill(  0,   0, 640,  20, C_WHITE)

  Window.draw(bar_x, bar_y, img_bar)
end
2-6. Déplacez la barre avec les touches fléchées: une autre façon d'écrire (rb_block06.html)
Une autre façon d'écrire bar_x = bar_x + Input.x,
Réécrivons-le comme bar_x + = Input.x. C'est la même chose, mais si vous vous y habituez, cela peut être plus facile à voir.
rb_block06.rb
include DX
#Code pour le réglage initial(your setup code here)
Window.width   = 640
Window.height  = 480
Window.bgcolor = C_BLACK

img_bar = Image.load("bar.png ")
bar_x = 0
bar_y = 480 - img_bar.height

Window.loop do
  bar_x += Input.x            #◇ Changer (changer le style d'écriture)

  Window.draw_box_fill(  0,   0,  20, 480, C_WHITE)
  Window.draw_box_fill(620,   0, 640, 480, C_WHITE)
  Window.draw_box_fill(  0,   0, 640,  20, C_WHITE)

  Window.draw(bar_x, bar_y, img_bar)
end
2-7. Déplacez rapidement la barre (rb_block07.html)
Déplaçons la barre rapidement.
ʻInput.x renvoie uniquement les valeurs -1, 0, 1, donc je vais le multiplier par 4 pour l'augmenter et l'ajouter à la position x` sur la barre.
rb_block07.rb
include DX
#Code pour le réglage initial(your setup code here)
Window.width   = 640
Window.height  = 480
Window.bgcolor = C_BLACK

img_bar = Image.load("bar.png ")
bar_x = 0
bar_y = 480 - img_bar.height

Window.loop do
  bar_x += Input.x * 4        #◇ Changement (réaction plus rapide)

  Window.draw_box_fill(  0,   0,  20, 480, C_WHITE)
  Window.draw_box_fill(620,   0, 640, 480, C_WHITE)
  Window.draw_box_fill(  0,   0, 640,  20, C_WHITE)

  Window.draw(bar_x, bar_y, img_bar)
end
2-8. Déplacez la barre avec la souris (rb_block08.html)
Fait bouger la barre à gauche et à droite («direction x») suivant le mouvement de la souris.
Déplacez la barre en obtenant la position x de la souris avec ʻInput.mouse_x et en affectant cette valeur à la position x` de la barre.
- La «barre» peut être déplacée avec la «touche gauche / droite» ou avec la «souris», mais à partir de ce point, elle sera affichée en utilisant la «souris».
rb_block08.rb
include DX
#Code pour le réglage initial(your setup code here)
Window.width   = 640
Window.height  = 480
Window.bgcolor = C_BLACK

img_bar = Image.load("bar.png ")
bar_x = 0
bar_y = 480 - img_bar.height

Window.loop do
  #bar_x += Input.x * 4       #Pour les touches gauche et droite#◇ Changer (commenter)
  bar_x = Input.mouse_x       #Pour la souris#◆ Ajout

  Window.draw_box_fill(  0,   0,  20, 480, C_WHITE)
  Window.draw_box_fill(620,   0, 640, 480, C_WHITE)
  Window.draw_box_fill(  0,   0, 640,  20, C_WHITE)

  Window.draw(bar_x, bar_y, img_bar)
end
2-9. Ne laissez pas la barre dépasser (rb_block09.html)
Assurez-vous que la barre ne dépasse pas des murs gauche et droit.
La «position x» de la barre est à l'extrême gauche, la valeur minimale est donc l'épaisseur de paroi «20».
D'autre part, l'extrémité droite est «position x + largeur de la barre img_bar.width», donc la valeur maximale est «largeur de la fenêtre 640 - épaisseur du mur 20 - largeur de la barre img_bar.width».
Écrivez ce qui précède dans ʻif ~ elsif ~ end`.
rb_block09.rb
include DX
#Code pour le réglage initial(your setup code here)
Window.width   = 640
Window.height  = 480
Window.bgcolor = C_BLACK

img_bar = Image.load("bar.png ")
bar_x = 0
bar_y = 480 - img_bar.height

Window.loop do
  #bar_x += Input.x * 4       #Pour les touches gauche et droite
  bar_x = Input.mouse_x       #Pour la souris
  if bar_x < 20                              #◆ Ajout
    bar_x = 20                               #◆ Ajout
  elsif bar_x > 640 - 20 - img_bar.width     #◆ Ajout
    bar_x = 640 - 20 - img_bar.width         #◆ Ajout
  end                                        #◆ Ajout

  Window.draw_box_fill(  0,   0,  20, 480, C_WHITE)
  Window.draw_box_fill(620,   0, 640, 480, C_WHITE)
  Window.draw_box_fill(  0,   0, 640,  20, C_WHITE)

  Window.draw(bar_x, bar_y, img_bar)
end
2-10. Sortez le ballon (rb_block10.html)
Préparez une image (src / image / ball.png) d'un cercle rouge de 20 largeurs et 20 hauteurs comme une boule.

Glissez et déposez le fichier ball.png sur l'écran de l'éditeur, enregistrez-le dans Nyle-canvas, et utilisez ʻImage.load (" ball.png ")` de la même manière que dans "2-4. Sortez la barre". Lis.
Remarque) À propos de la transparence des images
Dans dev2 sorti le 30 mai 2020, la couleur blanche de l'image est automatiquement rendue transparente au moment de ʻImage.load. Par conséquent, l'arrière-plan de ball.png`, qui a une boule rouge dessinée sur un fond blanc, est automatiquement transparent.
Pour le moment, laissez la position x être ball_x = 300 et la position y être ball_y = 400.
Après cela, dessinez avec Window.draw.
rb_block10.rb
include DX
#Code pour le réglage initial(your setup code here)
Window.width   = 640
Window.height  = 480
Window.bgcolor = C_BLACK

img_bar = Image.load("bar.png ")
bar_x = 0
bar_y = 480 - img_bar.height

img_ball = Image.load("ball.png ")  #◆ Ajout
ball_x = 300                       #◆ Ajout
ball_y = 400                       #◆ Ajout

Window.loop do
  #bar_x += Input.x * 4       #Pour les touches gauche et droite
  bar_x = Input.mouse_x       #Pour la souris
  if bar_x < 20
    bar_x = 20
  elsif bar_x > 640 - 20 - img_bar.width
    bar_x = 640 - 20 - img_bar.width
  end

  Window.draw_box_fill(  0,   0,  20, 480, C_WHITE)
  Window.draw_box_fill(620,   0, 640, 480, C_WHITE)
  Window.draw_box_fill(  0,   0, 640,  20, C_WHITE)

  Window.draw(bar_x, bar_y, img_bar)
  Window.draw(ball_x, ball_y, img_ball)       #◆ Ajout
end
2-11. Déplacer la balle (horizontal) (rb_block11.html)
Déplacez la balle latéralement («direction x»). («X» est dans la direction plus à droite)
Avec la vitesse dans la direction x comme «dx», ajoutez «dx» à la position x «ball_x» de la balle à chaque fois qu'elle tourne en boucle (1/60 secondes) («ball_x + = dx»).
rb_block11.rb
include DX
#Code pour le réglage initial(your setup code here)
Window.width   = 640
Window.height  = 480
Window.bgcolor = C_BLACK

img_bar = Image.load("bar.png ")
bar_x = 0
bar_y = 480 - img_bar.height

img_ball = Image.load("ball.png ")
ball_x = 300
ball_y = 400
dx     = 2                    #◆ Ajout


Window.loop do
  #bar_x += Input.x * 4       #Pour les touches gauche et droite
  bar_x = Input.mouse_x       #Pour la souris
  if bar_x < 20
    bar_x = 20
  elsif bar_x > 640 - 20 - img_bar.width
    bar_x = 640 - 20 - img_bar.width
  end

  ball_x += dx                #◆ Ajout

  Window.draw_box_fill(  0,   0,  20, 480, C_WHITE)
  Window.draw_box_fill(620,   0, 640, 480, C_WHITE)
  Window.draw_box_fill(  0,   0, 640,  20, C_WHITE)

  Window.draw(bar_x, bar_y, img_bar)
  Window.draw(ball_x, ball_y, img_ball)
end
2-12. Déplacez la balle (verticalement) (rb_block12.html)
Maintenant, déplacez-le verticalement («direction y»). (Le bas de «y» est dans le sens positif)
Arrêtez de le déplacer horizontalement (commentez avec # ball_x + = dx), réglez la vitesse dans la direction y sur dy, et ajoutez dy chaque fois qu'il tourne en boucle (ball_y + = dy).
rb_block12.rb
include DX
#Code pour le réglage initial(your setup code here)
Window.width   = 640
Window.height  = 480
Window.bgcolor = C_BLACK

img_bar = Image.load("bar.png ")
bar_x = 0
bar_y = 480 - img_bar.height

img_ball = Image.load("ball.png ")
ball_x = 300
ball_y = 400
dx     =   2       #◇ Changer (alignement des caractères)
dy     =  -2       #◆ Ajout


Window.loop do
  #bar_x += Input.x * 4       #Pour les touches gauche et droite
  bar_x = Input.mouse_x       #Pour la souris
  if bar_x < 20
    bar_x = 20
  elsif bar_x > 640 - 20 - img_bar.width
    bar_x = 640 - 20 - img_bar.width
  end

  #ball_x += dx                 #◇ Changer (commenter)
  ball_y += dy                  #◆ Ajout

  Window.draw_box_fill(  0,   0,  20, 480, C_WHITE)
  Window.draw_box_fill(620,   0, 640, 480, C_WHITE)
  Window.draw_box_fill(  0,   0, 640,  20, C_WHITE)

  Window.draw(bar_x, bar_y, img_bar)
  Window.draw(ball_x, ball_y, img_ball)
end

2-13. Déplacez la balle (verticalement et horizontalement) (rb_block13.html)
Si vous recommencez le mouvement dans la direction x (décommenter ball_x + = dx), la balle se déplacera en diagonale.
rb_block13.rb
include DX
#Code pour le réglage initial(your setup code here)
Window.width   = 640
Window.height  = 480
Window.bgcolor = C_BLACK

img_bar = Image.load("bar.png ")
bar_x = 0
bar_y = 480 - img_bar.height

img_ball = Image.load("ball.png ")
ball_x = 300
ball_y = 400
dx     =   2
dy     =  -2


Window.loop do
  #bar_x += Input.x * 4       #Pour les touches gauche et droite
  bar_x = Input.mouse_x       #Pour la souris
  if bar_x < 20
    bar_x = 20
  elsif bar_x > 640 - 20 - img_bar.width
    bar_x = 640 - 20 - img_bar.width
  end

  ball_x += dx                 #◇ Changer (décommenter)
  ball_y += dy

  Window.draw_box_fill(  0,   0,  20, 480, C_WHITE)
  Window.draw_box_fill(620,   0, 640, 480, C_WHITE)
  Window.draw_box_fill(  0,   0, 640,  20, C_WHITE)

  Window.draw(bar_x, bar_y, img_bar)
  Window.draw(ball_x, ball_y, img_ball)
end
2-14. La balle rebondit (horizontalement) (rb_block14.html)
Faire rebondir la balle. Tout d'abord, déplacez-vous uniquement dans le sens horizontal (direction x) (commentez avec # ball_y + = dy).
Il frappe le mur gauche lorsque la «position de la boule x» («boule_x») devient plus petite que l'épaisseur de la paroi gauche de «20».
D'un autre côté, avez-vous heurté le mur droit alors que la largeur de la fenêtre était de 640 - l'épaisseur du mur droit était de 20 = 620`?
Bounce signifie que la vitesse «dx» dans la direction x est dans la direction opposée, vous pouvez donc écrire «dx = -dx».
Écrivez ce qui précède dans «si ~ fin».
rb_block14.rb
include DX
#Code pour le réglage initial(your setup code here)
Window.width   = 640
Window.height  = 480
Window.bgcolor = C_BLACK

img_bar = Image.load("bar.png ")
bar_x = 0
bar_y = 480 - img_bar.height

img_ball = Image.load("ball.png ")
img_ball.set_color_key(C_WHITE)
ball_x = 300
ball_y = 400
dx     =   2
dy     =  -2


Window.loop do
  #bar_x += Input.x * 4       #Pour les touches gauche et droite
  bar_x = Input.mouse_x       #Pour la souris
  if bar_x < 20
    bar_x = 20
  elsif bar_x > 640 - 20 - img_bar.width
    bar_x = 640 - 20 - img_bar.width
  end

  ball_x += dx
  #ball_y += dy                     #◇ Changer (commenter)

  if ball_x < 20 || ball_x > 620    #◆ Ajout
    dx = -dx                        #◆ Ajout
  end                               #◆ Ajout
  include DX
#Code pour le réglage initial(your setup code here)
Window.width   = 640
Window.height  = 480
Window.bgcolor = C_BLACK

img_bar = Image.load("bar.png ")
bar_x = 0
bar_y = 480 - img_bar.height

img_ball = Image.load("ball.png ")
ball_x = 300
ball_y = 400
dx     =   2
dy     =  -2


Window.loop do
  #bar_x += Input.x * 4       #Pour les touches gauche et droite
  bar_x = Input.mouse_x       #Pour la souris
  if bar_x < 20
    bar_x = 20
  elsif bar_x > 640 - 20 - img_bar.width
    bar_x = 640 - 20 - img_bar.width
  end

  ball_x += dx
  #ball_y += dy                     #◇ Changer (commenter)

  if ball_x < 20 || ball_x > 620    #◆ Ajout
    dx = -dx                        #◆ Ajout
  end                               #◆ Ajout

  Window.draw_box_fill(  0,   0,  20, 480, C_WHITE)
  Window.draw_box_fill(620,   0, 640, 480, C_WHITE)
  Window.draw_box_fill(  0,   0, 640,  20, C_WHITE)

  Window.draw(bar_x, bar_y, img_bar)
  Window.draw(ball_x, ball_y, img_ball)
end
 Le côté droit est entré dans le mur.
2-15. La balle rebondit (horizontal): modifié (rb_block15.html)
La boule x position ( ball_x) est l'extrémité gauche de la balle, donc l'extrémité droite est ball_x + ball_width, qui est la somme de la largeur de la balle (ball_width).
«Frapper le mur droit» doit être lorsque cette valeur est supérieure à «largeur de fenêtre 640 - épaisseur de paroi droite 20 = 620».
(ball_x + ball_width) > 620
De plus, afin d'observer lentement l'état de collision, le réglage du nombre de tirages par seconde (valeur initiale: 60) est divisé par deux à 30.
Window.fps = 30
rb_block15.rb
include DX
#Code pour le réglage initial(your setup code here)
Window.width   = 640
Window.height  = 480
Window.bgcolor = C_BLACK

img_bar = Image.load("bar.png ")
bar_x = 0
bar_y = 480 - img_bar.height

img_ball = Image.load("ball.png ")
ball_x = 300
ball_y = 400
dx     =   2
dy     =  -2
ball_width  = img_ball.width              #◆ Ajout

#Définition du nombre de dessins par seconde (valeur initiale: 60)#◆ Ajout
Window.fps = 30                           #◆ Ajout


Window.loop do
  #bar_x += Input.x * 4       #Pour les touches gauche et droite
  bar_x = Input.mouse_x       #Pour la souris
  if bar_x < 20
    bar_x = 20
  elsif bar_x > 640 - 20 - img_bar.width
    bar_x = 640 - 20 - img_bar.width
  end

  ball_x += dx
  #ball_y += dy

  if ball_x < 20 || (ball_x + ball_width) > 620   #◇ Changer
    dx = -dx
  end

  Window.draw_box_fill(  0,   0,  20, 480, C_WHITE)
  Window.draw_box_fill(620,   0, 640, 480, C_WHITE)
  Window.draw_box_fill(  0,   0, 640,  20, C_WHITE)

  Window.draw(bar_x, bar_y, img_bar)
  Window.draw(ball_x, ball_y, img_ball)
end
 Cela a l'air bien, mais quand vous regardez de près, la balle est enfoncée dans le mur pendant un moment (les murs gauche et droit).

2-16. La balle rebondit (horizontal): Fix 2 (rb_block16.html)
Auparavant, si vous frappiez un mur, vous inversiez simplement la x speed ( dx = -dx) de la balle.
Cela va rebondir, mais la position de la balle (ball_x) n'a pas changé, donc la balle reste coincée dans le mur.
Par conséquent, la position de la balle (ball_x) sera également inversée par la quantité de mouvement ( + dx) (ball_x- = dx).
rb_block16.rb
include DX
#Code pour le réglage initial(your setup code here)
Window.width   = 640
Window.height  = 480
Window.bgcolor = C_BLACK

img_bar = Image.load("bar.png ")
bar_x = 0
bar_y = 480 - img_bar.height

img_ball = Image.load("ball.png ")
ball_x = 300
ball_y = 400
dx     =   2
dy     =  -2
ball_width  = img_ball.width

#Définition du nombre de dessins par seconde (valeur initiale: 60)
Window.fps = 30


Window.loop do
  #bar_x += Input.x * 4       #Pour les touches gauche et droite
  bar_x = Input.mouse_x       #Pour la souris
  if bar_x < 20
    bar_x = 20
  elsif bar_x > 640 - 20 - img_bar.width
    bar_x = 640 - 20 - img_bar.width
  end

  ball_x += dx
  #ball_y += dy

  if ball_x < 20 || (ball_x + ball_width) > 620
    ball_x -= dx                                  #◆ Ajout
    dx = -dx
  end

  Window.draw_box_fill(  0,   0,  20, 480, C_WHITE)
  Window.draw_box_fill(620,   0, 640, 480, C_WHITE)
  Window.draw_box_fill(  0,   0, 640,  20, C_WHITE)

  Window.draw(bar_x, bar_y, img_bar)
  Window.draw(ball_x, ball_y, img_ball)
end
 Ça a l'air bien ici.
2-17. La balle rebondit (vertical) (rb_block17.html)
Maintenant, déplacez la balle uniquement verticalement («direction y») pour qu'elle rebondisse sur le mur supérieur.
Il frappe la paroi supérieure lorsque la «position y» («boule_y») de la balle devient plus petite que l'épaisseur «20» de la paroi supérieure.
Le nombre de dessins par seconde est restauré (commenté) et la valeur initiale de la «position x» de la barre est modifiée vers le centre.
rb_block17.rb
include DX
#Code pour le réglage initial(your setup code here)
Window.width   = 640
Window.height  = 480
Window.bgcolor = C_BLACK

img_bar = Image.load("bar.png ")
bar_x = 250                        #◇ Changement (changement numérique)
bar_y = 480 - img_bar.height

img_ball = Image.load("ball.png ")
ball_x = 300
ball_y = 400
dx     =   2
dy     =  -2
ball_width  = img_ball.width
ball_height = img_ball.height       #◆ Ajout

#Définition du nombre de dessins par seconde (valeur initiale: 60)
#Window.fps = 30                    #◇ Changer (commenter)


Window.loop do
  #bar_x += Input.x * 4       #Pour les touches gauche et droite
  bar_x = Input.mouse_x       #Pour la souris
  if bar_x < 20
    bar_x = 20
  elsif bar_x > 640 - 20 - img_bar.width
    bar_x = 640 - 20 - img_bar.width
  end

  #ball_x += dx                     #◇ Changer (commenter)
  ball_y += dy                      #◇ Changer (décommenter)

  if ball_x < 20 || (ball_x + ball_width) > 620
    ball_x -= dx
    dx = -dx
  end

  if ball_y < 20                   #◆ Ajout
    ball_y -= dy                   #◆ Ajout
    dy = -dy                       #◆ Ajout
  end                              #◆ Ajout

  Window.draw_box_fill(  0,   0,  20, 480, C_WHITE)
  Window.draw_box_fill(620,   0, 640, 480, C_WHITE)
  Window.draw_box_fill(  0,   0, 640,  20, C_WHITE)

  Window.draw(bar_x, bar_y, img_bar)
  Window.draw(ball_x, ball_y, img_ball)
end
 Il ne rebondit toujours pas sur la barre.
2-18. La balle rebondit (verticalement et horizontalement) (rb_block18.html)
Déplacez-le verticalement et horizontalement pour le faire rebondir. L'atmosphère de "blockbreak" est un peu ressortie.
rb_block18.rb
include DX
#Code pour le réglage initial(your setup code here)
Window.width   = 640
Window.height  = 480
Window.bgcolor = C_BLACK

img_bar = Image.load("bar.png ")
bar_x = 250
bar_y = 480 - img_bar.height

img_ball = Image.load("ball.png ")
ball_x = 300
ball_y = 400
dx     =   2
dy     =  -2
ball_width  = img_ball.width
ball_height = img_ball.height

#Définition du nombre de dessins par seconde (valeur initiale: 60)
#Window.fps = 30


Window.loop do
  #bar_x += Input.x * 4       #Pour les touches gauche et droite
  bar_x = Input.mouse_x       #Pour la souris
  if bar_x < 20
    bar_x = 20
  elsif bar_x > 640 - 20 - img_bar.width
    bar_x = 640 - 20 - img_bar.width
  end

  ball_x += dx                   #◇ Changer (décommenter)
  ball_y += dy

  if ball_x < 20 || (ball_x + ball_width) > 620
    ball_x -= dx
    dx = -dx
  end

  if ball_y < 20
    ball_y -= dy
    dy = -dy
  end

  Window.draw_box_fill(  0,   0,  20, 480, C_WHITE)
  Window.draw_box_fill(620,   0, 640, 480, C_WHITE)
  Window.draw_box_fill(  0,   0, 640,  20, C_WHITE)

  Window.draw(bar_x, bar_y, img_bar)
  Window.draw(ball_x, ball_y, img_ball)
end
2-19. Balle rebondit (avec barre) (rb_block19.html)
Essayez également de rebondir au bar.
Les conditions lorsque la balle touche la barre sont;
○ coordonnées y
-- Sous la balle> Au-dessus de la barre
(ball_y + ball_height) > (480 - bar_height)
○ «coordonnées x»
--Droite de la balle> A gauche de la barre
(ball_x + ball_width) > bar_x
--Gauche de la balle <À droite de la barre
ball_x < (bar_x + bar_width)
Il est temps de remplir les conditions ci-dessus en même temps (&&).
rb_block19.rb
include DX
#Code pour le réglage initial(your setup code here)
Window.width   = 640
Window.height  = 480
Window.bgcolor = C_BLACK

img_bar = Image.load("bar.png ")
bar_x = 250
bar_y = 480 - img_bar.height
bar_width  = img_bar.width                 #◆ Ajout
bar_height = img_bar.height                #◆ Ajout

img_ball = Image.load("ball.png ")
ball_x = 300
ball_y = 400
dx     =   2
dy     =  -2
ball_width  = img_ball.width
ball_height = img_ball.height

#Définition du nombre de dessins par seconde (valeur initiale: 60)
#Window.fps = 30


Window.loop do
  #bar_x += Input.x * 4       #Pour les touches gauche et droite
  bar_x = Input.mouse_x       #Pour la souris
  if bar_x < 20
    bar_x = 20
  elsif bar_x > 640 - 20 - img_bar.width
    bar_x = 640 - 20 - img_bar.width
  end

  ball_x += dx
  ball_y += dy

  if ball_x < 20 || (ball_x + ball_width) > 620
    ball_x -= dx
    dx = -dx
  end

  if ball_y < 20
    ball_y -= dy
    dy = -dy
  end

  if (ball_y + ball_height) > (480 - bar_height)  &&  #◆ Ajout
     (ball_x + ball_width)  > bar_x               &&  #◆ Ajout
     ball_x                 < (bar_x + bar_width)     #◆ Ajout
                                                      #◆ Ajout
    ball_y -= dy                                      #◆ Ajout
    dy = -dy                                          #◆ Ajout
  end                                                 #◆ Ajout


  Window.draw_box_fill(  0,   0,  20, 480, C_WHITE)
  Window.draw_box_fill(620,   0, 640, 480, C_WHITE)
  Window.draw_box_fill(  0,   0, 640,  20, C_WHITE)

  Window.draw(bar_x, bar_y, img_bar)
  Window.draw(ball_x, ball_y, img_ball)
end
 Cela semble bon, mais le rebond lorsqu'il est frappé par le côté tout en déplaçant la barre est étrange.
2-20. La balle rebondit (avec barre): correction (rb_block20.html)
Une fois que la balle est trop loin dans la barre, elle est toujours à l'intérieur de la barre même après le processus de rebond, donc le «dy» se répète juste plus et moins et vous ne pouvez pas sortir de la barre.
Par conséquent, ajoutez une condition telle que "rebondir uniquement si vous pouvez sortir de la barre lors du" traitement du rebond ".
Dans la direction «y»
ʻUnder the ball<=Sous la barre par la valeur absolue de dy`
(ball_y + ball_height) <= (480 - bar_height + dy.abs)
rb_block20.rb
include DX
#Code pour le réglage initial(your setup code here)
Window.width   = 640
Window.height  = 480
Window.bgcolor = C_BLACK

img_bar = Image.load("bar.png ")
bar_x = 250
bar_y = 480 - img_bar.height
bar_width  = img_bar.width
bar_height = img_bar.height

img_ball = Image.load("ball.png ")
ball_x = 300
ball_y = 400
dx     =   2
dy     =  -2
ball_width  = img_ball.width
ball_height = img_ball.height

#Définition du nombre de dessins par seconde (valeur initiale: 60)
#Window.fps = 30


Window.loop do
  #bar_x += Input.x * 4       #Pour les touches gauche et droite
  bar_x = Input.mouse_x       #Pour la souris
  if bar_x < 20
    bar_x = 20
  elsif bar_x > 640 - 20 - img_bar.width
    bar_x = 640 - 20 - img_bar.width
  end

  ball_x += dx
  ball_y += dy

  if ball_x < 20 || (ball_x + ball_width) > 620
    ball_x -= dx
    dx = -dx
  end

  if ball_y < 20
    ball_y -= dy
    dy = -dy
  end

  if (ball_y + ball_height) >  (480 - bar_height)  &&           #◇ Changer (alignement des caractères)
     (ball_y + ball_height) <= (480 - bar_height + dy.abs)  &&  #◆ Ajout
     (ball_x + ball_width)  >  bar_x               &&           #◇ Changer (alignement des caractères)
     ball_x                 <  (bar_x + bar_width)              #◇ Changer (alignement des caractères)

    ball_y -= dy
    dy = -dy
  end


  Window.draw_box_fill(  0,   0,  20, 480, C_WHITE)
  Window.draw_box_fill(620,   0, 640, 480, C_WHITE)
  Window.draw_box_fill(  0,   0, 640,  20, C_WHITE)

  Window.draw(bar_x, bar_y, img_bar)
  Window.draw(ball_x, ball_y, img_ball)
end
 Cette fois, ça a l'air bien.
2-21. Émettez un bloc (1) (rb_block21.html)
De là, nous ferons des blocs. Premier.
En bloc, préparez une image rectangulaire verte (src / image / block.png) avec une taille de 58 horizontales et 18 verticales.

La largeur est définie sur (largeur de la fenêtre 640 - épaisseur des murs gauche et droit 20 * 2) / 10 = 60, et l'écart entre les voisins est défini sur 58 en prenant 1 chacun à gauche et à droite. ..
Glissez et déposez ce fichier block.png sur l'écran de l'éditeur et enregistrez-le dans Nyle-canvas.
Chargez ensuite le fichier image avec ʻImage.load ("block.png ") `. (Aucun nom de chemin n'est requis.)
Avec le premier bloc comme «block00», la position est de l'intérieur de la paroi supérieure gauche («x = 20», «y = 20») avec un écart de «1» dans les deux directions horizontale et verticale, «block00_x = 21», « Placez-le à block00_y = 21`.
Puis dessinez avec Window.draw (block00_x, block00_y, img_block).
rb_block21.rb
include DX
#Code pour le réglage initial(your setup code here)
Window.width   = 640
Window.height  = 480
Window.bgcolor = C_BLACK

img_bar = Image.load("bar.png ")
bar_x = 250
bar_y = 480 - img_bar.height
bar_width  = img_bar.width
bar_height = img_bar.height

img_ball = Image.load("ball.png ")
ball_x = 300
ball_y = 400
dx     =   2
dy     =  -2
ball_width  = img_ball.width
ball_height = img_ball.height

img_block = Image.load("block.png ")                #◆ Ajout
block_widh = img_block.width                       #◆ Ajout
block_height = img_block.height                    #◆ Ajout

block00_x = 21                                     #◆ Ajout
block00_y = 21                                     #◆ Ajout

#Définition du nombre de dessins par seconde (valeur initiale: 60)
#Window.fps = 30


Window.loop do
  #bar_x += Input.x * 4       #Pour les touches gauche et droite
  bar_x = Input.mouse_x       #Pour la souris
  if bar_x < 20
    bar_x = 20
  elsif bar_x > 640 - 20 - img_bar.width
    bar_x = 640 - 20 - img_bar.width
  end

  ball_x += dx
  ball_y += dy

  if ball_x < 20 || (ball_x + ball_width) > 620
    ball_x -= dx
    dx = -dx
  end

  if ball_y < 20
    ball_y -= dy
    dy = -dy
  end

  if (ball_y + ball_height) >  (480 - bar_height)  &&
     (ball_y + ball_height) <= (480 - bar_height + dy.abs)  &&
     (ball_x + ball_width)  >  bar_x               &&
     ball_x                 <  (bar_x + bar_width)

    ball_y -= dy
    dy = -dy
  end


  Window.draw_box_fill(  0,   0,  20, 480, C_WHITE)
  Window.draw_box_fill(620,   0, 640, 480, C_WHITE)
  Window.draw_box_fill(  0,   0, 640,  20, C_WHITE)

  Window.draw(bar_x, bar_y, img_bar)
  Window.draw(ball_x, ball_y, img_ball)

  Window.draw(block00_x, block00_y, img_block)          #◆ Ajout
end
2-22. Sortez des blocs (2) (rb_block22.html)
Le deuxième bloc (block01) utilise la même image et est décalé vers la droite de largeur de bloc (block_widh) + gap (2).
rb_block22.rb
include DX
#Code pour le réglage initial(your setup code here)
Window.width   = 640
Window.height  = 480
Window.bgcolor = C_BLACK

img_bar = Image.load("bar.png ")
bar_x = 250
bar_y = 480 - img_bar.height
bar_width  = img_bar.width
bar_height = img_bar.height

img_ball = Image.load("ball.png ")
ball_x = 300
ball_y = 400
dx     =   2
dy     =  -2
ball_width  = img_ball.width
ball_height = img_ball.height

img_block = Image.load("block.png ")
block_widh = img_block.width
block_height = img_block.height

block00_x = 21
block00_y = 21

block01_x = 21 + block_widh + 2                    #◆ Ajout
block01_y = 21                                     #◆ Ajout

#Définition du nombre de dessins par seconde (valeur initiale: 60)
#Window.fps = 30


Window.loop do
  #bar_x += Input.x * 4       #Pour les touches gauche et droite
  bar_x = Input.mouse_x       #Pour la souris
  if bar_x < 20
    bar_x = 20
  elsif bar_x > 640 - 20 - img_bar.width
    bar_x = 640 - 20 - img_bar.width
  end

  ball_x += dx
  ball_y += dy

  if ball_x < 20 || (ball_x + ball_width) > 620
    ball_x -= dx
    dx = -dx
  end

  if ball_y < 20
    ball_y -= dy
    dy = -dy
  end

  if (ball_y + ball_height) >  (480 - bar_height)  &&
     (ball_y + ball_height) <= (480 - bar_height + dy.abs)  &&
     (ball_x + ball_width)  >  bar_x               &&
     ball_x                 <  (bar_x + bar_width)

    ball_y -= dy
    dy = -dy
  end


  Window.draw_box_fill(  0,   0,  20, 480, C_WHITE)
  Window.draw_box_fill(620,   0, 640, 480, C_WHITE)
  Window.draw_box_fill(  0,   0, 640,  20, C_WHITE)

  Window.draw(bar_x, bar_y, img_bar)
  Window.draw(ball_x, ball_y, img_ball)

  Window.draw(block00_x, block00_y, img_block)
  Window.draw(block01_x, block01_y, img_block)          #◆ Ajout
end
2-23. Sortez les blocs (3) (rb_block23.html)
Placez également le troisième bloc (block02). La position x est décalée de block_widh + 2 en prévision du bloc et de l'écart.
rb_block23.rb
include DX
#Code pour le réglage initial(your setup code here)
Window.width   = 640
Window.height  = 480
Window.bgcolor = C_BLACK

img_bar = Image.load("bar.png ")
bar_x = 250
bar_y = 480 - img_bar.height
bar_width  = img_bar.width
bar_height = img_bar.height

img_ball = Image.load("ball.png ")
ball_x = 300
ball_y = 400
dx     =   2
dy     =  -2
ball_width  = img_ball.width
ball_height = img_ball.height

img_block = Image.load("block.png ")
block_widh = img_block.width
block_height = img_block.height

block00_x = 21
block00_y = 21

block01_x = 21 + block_widh + 2
block01_y = 21

block02_x = 21 + (block_widh + 2) * 2              #◆ Ajout
block02_y = 21                                     #◆ Ajout

#Définition du nombre de dessins par seconde (valeur initiale: 60)
#Window.fps = 30


Window.loop do
  #bar_x += Input.x * 4       #Pour les touches gauche et droite
  bar_x = Input.mouse_x       #Pour la souris
  if bar_x < 20
    bar_x = 20
  elsif bar_x > 640 - 20 - img_bar.width
    bar_x = 640 - 20 - img_bar.width
  end

  ball_x += dx
  ball_y += dy

  if ball_x < 20 || (ball_x + ball_width) > 620
    ball_x -= dx
    dx = -dx
  end

  if ball_y < 20
    ball_y -= dy
    dy = -dy
  end

  if (ball_y + ball_height) >  (480 - bar_height)  &&
     (ball_y + ball_height) <= (480 - bar_height + dy.abs)  &&
     (ball_x + ball_width)  >  bar_x               &&
     ball_x                 <  (bar_x + bar_width)

    ball_y -= dy
    dy = -dy
  end


  Window.draw_box_fill(  0,   0,  20, 480, C_WHITE)
  Window.draw_box_fill(620,   0, 640, 480, C_WHITE)
  Window.draw_box_fill(  0,   0, 640,  20, C_WHITE)

  Window.draw(bar_x, bar_y, img_bar)
  Window.draw(ball_x, ball_y, img_ball)

  Window.draw(block00_x, block00_y, img_block)
  Window.draw(block01_x, block01_y, img_block)
  Window.draw(block02_x, block02_y, img_block)          #◆ Ajout
end
2-24. Sortez des blocs (10) (rb_block24.html)
Si vous mettez 10 sur le côté, c'est juste la bonne largeur.
rb_block24.rb
include DX
#Code pour le réglage initial(your setup code here)
Window.width   = 640
Window.height  = 480
Window.bgcolor = C_BLACK

img_bar = Image.load("bar.png ")
bar_x = 250
bar_y = 480 - img_bar.height
bar_width  = img_bar.width
bar_height = img_bar.height

img_ball = Image.load("ball.png ")
ball_x = 300
ball_y = 400
dx     =   2
dy     =  -2
ball_width  = img_ball.width
ball_height = img_ball.height

img_block = Image.load("block.png ")
block_widh = img_block.width
block_height = img_block.height

block00_x = 21
block00_y = 21

block01_x = 21 + block_widh + 2
block01_y = 21

block02_x = 21 + (block_widh + 2) * 2
block02_y = 21

block03_x = 21 + (block_widh + 2) * 3              #◆ Ajout
block03_y = 21                                     #◆ Ajout

block04_x = 21 + (block_widh + 2) * 4              #◆ Ajout
block04_y = 21                                     #◆ Ajout

block05_x = 21 + (block_widh + 2) * 5              #◆ Ajout
block05_y = 21                                     #◆ Ajout

block06_x = 21 + (block_widh + 2) * 6              #◆ Ajout
block06_y = 21                                     #◆ Ajout

block07_x = 21 + (block_widh + 2) * 7              #◆ Ajout
block07_y = 21                                     #◆ Ajout

block08_x = 21 + (block_widh + 2) * 8              #◆ Ajout
block08_y = 21                                     #◆ Ajout

block09_x = 21 + (block_widh + 2) * 9              #◆ Ajout
block09_y = 21                                     #◆ Ajout

#Définition du nombre de dessins par seconde (valeur initiale: 60)
#Window.fps = 30


Window.loop do
  #bar_x += Input.x * 4       #Pour les touches gauche et droite
  bar_x = Input.mouse_x       #Pour la souris
  if bar_x < 20
    bar_x = 20
  elsif bar_x > 640 - 20 - img_bar.width
    bar_x = 640 - 20 - img_bar.width
  end

  ball_x += dx
  ball_y += dy

  if ball_x < 20 || (ball_x + ball_width) > 620
    ball_x -= dx
    dx = -dx
  end

  if ball_y < 20
    ball_y -= dy
    dy = -dy
  end

  if (ball_y + ball_height) >  (480 - bar_height)  &&
     (ball_y + ball_height) <= (480 - bar_height + dy.abs)  &&
     (ball_x + ball_width)  >  bar_x               &&
     ball_x                 <  (bar_x + bar_width)

    ball_y -= dy
    dy = -dy
  end


  Window.draw_box_fill(  0,   0,  20, 480, C_WHITE)
  Window.draw_box_fill(620,   0, 640, 480, C_WHITE)
  Window.draw_box_fill(  0,   0, 640,  20, C_WHITE)

  Window.draw(bar_x, bar_y, img_bar)
  Window.draw(ball_x, ball_y, img_ball)

  Window.draw(block00_x, block00_y, img_block)
  Window.draw(block01_x, block01_y, img_block)
  Window.draw(block02_x, block02_y, img_block)
  Window.draw(block03_x, block03_y, img_block)          #◆ Ajout
  Window.draw(block04_x, block04_y, img_block)          #◆ Ajout
  Window.draw(block05_x, block05_y, img_block)          #◆ Ajout
  Window.draw(block06_x, block06_y, img_block)          #◆ Ajout
  Window.draw(block07_x, block07_y, img_block)          #◆ Ajout
  Window.draw(block08_x, block08_y, img_block)          #◆ Ajout
  Window.draw(block09_x, block09_y, img_block)          #◆ Ajout
end
2-25. Créer des blocs ensemble (ʻItem class`) (rb_block25.html)
Le programme de création / dessin de blocs a été répété 10 fois, je vais donc les créer tous en même temps.
Suivez les étapes ci-dessous pour le faire.
1) Créez une classe appelée ʻItem class`
Pour gérer les blocs, il est pratique de pouvoir gérer ensemble les attributs suivants.
--x position --y position --Image --Largeur de l'image --Hauteur de l'image
Sur cette base, nous allons créer une classe appelée ʻItem class`.
class Item
  def initialize(x, y, image)
    @x = x
    @y = y
    @image  = image
    @width  = image.width
    @height = image.height
  end
  attr_accessor :x, :y, :image, :width, :height
end
La ʻItem class` (une instance de) a maintenant une "position x", une "position y", une "image", une "largeur" et une "hauteur".
2) Préparez une image du bloc
img_block = Image.load("block.png ")
3) Créez un bloc avec ʻItem class`
ʻItem.new (position x, position y, img_block) `
4) Préparez le tableau blocs pour créer plusieurs blocs (blocs)
Créez un tableau vide blocks avec blocks = [].
5) Créez les blocs un par un et ajoutez-les au tableau blocks
Utilisez la méthode «<<» d'ajout au tableau pour créer un bloc et répétez l'opération d'ajout au tableau «blocs».
Puisqu'il se répète 10 fois, utilisez «10.times do ~ end» pour augmenter «x» à chaque fois pour créer un bloc avec la position horizontale décalée. («X» devient 0, 1, 2, ..., 9)
10.times do |x|
  blocks << Item.new(21 + (img_block.width + 2) * x, 21, img_block)
6) Résumer le dessin des blocs
Groupe de blocsblocksEst un tableau, alors répétez l'opérationTableau.each do |Tableau要素| 〜 endPeut être utilisé.
blocks.each do |block|
  Window.draw(block.x, block.y, block.image)
end
Avec ce qui précède, le programme est beaucoup plus propre. (Des commentaires ont également été ajoutés.)
rb_block25.rb
include DX
#Code pour le réglage initial(your setup code here)
Window.width   = 640
Window.height  = 480
Window.bgcolor = C_BLACK

#Épaisseur de paroi: gauche, droite, haut; 20#◆ Ajout (commentaire)

#Faire du bloc une classe Item#◆ Ajout (commentaire)
class Item                                        #◆ Ajout
  def initialize(x, y, image)                     #◆ Ajout
    @x = x                                        #◆ Ajout
    @y = y                                        #◆ Ajout
    @image  = image                               #◆ Ajout
    @width  = image.width                         #◆ Ajout
    @height = image.height                        #◆ Ajout
  end                                             #◆ Ajout
  attr_accessor :x, :y, :image, :width, :height   #◆ Ajout
end                                               #◆ Ajout

#Préparation du bar#◆ Ajout (commentaire)
img_bar = Image.load("bar.png ")
bar_x = 250
bar_y = 480 - img_bar.height
bar_width  = img_bar.width
bar_height = img_bar.height

#Préparation du ballon#◆ Ajout (commentaire)
img_ball = Image.load("ball.png ")
ball_x = 300
ball_y = 400
dx     =   2
dy     =  -2
ball_width  = img_ball.width
ball_height = img_ball.height

#Préparation du bloc#◆ Ajout (commentaire)
img_block = Image.load("block.png ")

#Initialisation des blocs#◆ Ajout (commentaire)
blocks = []                                         #◆ Ajout
10.times do |x|                                     #◆ Ajout
  blocks << Item.new(21 + (img_block.width + 2) * x, 21, img_block)   #◆ Ajout
end                                                 #◆ Ajout

#Définition du nombre de dessins par seconde (valeur initiale: 60)
#Window.fps = 30


#Boucle principale#◆ Ajout (commentaire)
Window.loop do
  #Déplacer la barre#◆ Ajout (commentaire)
  #bar_x += Input.x * 4       #Pour les touches gauche et droite
  bar_x = Input.mouse_x       #Pour la souris
  if bar_x < 20
    bar_x = 20
  elsif bar_x > 640 - 20 - img_bar.width
    bar_x = 640 - 20 - img_bar.width
  end

  #Déplacez la balle#◆ Ajout (commentaire)
  ball_x += dx
  ball_y += dy

  #S'il heurte un mur, il rebondit (direction x)#◆ Ajout (commentaire)
  if ball_x < 20 || (ball_x + ball_width) > 620
    ball_x -= dx
    dx = -dx
  end

  #S'il touche le mur, il rebondit(direction y)                       #◆ Ajout (commentaire)
  if ball_y < 20
    ball_y -= dy
    dy = -dy
  end

  #Jugement de collision avec barre#◆ Ajout (commentaire)
  if (ball_y + ball_height) >  (480 - bar_height)  &&
     (ball_y + ball_height) <= (480 - bar_height + dy.abs)  &&
     (ball_x + ball_width)  >  bar_x               &&
     ball_x                 <  (bar_x + bar_width)

    ball_y -= dy
    dy = -dy
  end


  #Dessin d'écran#◆ Ajout (commentaire)
  Window.draw_box_fill(  0,   0,  20, 480, C_WHITE)
  Window.draw_box_fill(620,   0, 640, 480, C_WHITE)
  Window.draw_box_fill(  0,   0, 640,  20, C_WHITE)

  Window.draw(bar_x, bar_y, img_bar)
  Window.draw(ball_x, ball_y, img_ball)

  blocks.each do |block|                             #◆ Ajout
    Window.draw(block.x, block.y, block.image)       #◆ Ajout
  end                                                #◆ Ajout
end
2-26. Mettez un bloc (faites la deuxième étape) (rb_block26.html)
Nous ferons également le deuxième bloc.
Dans la deuxième ligne, augmentez la «position y» de «hauteur de bloc (img_block.height) + écart (2)».
Écrivez en utilisant 10 fois la fin ~ comme dans la première ligne.
rb_block26.rb
include DX
#Code pour le réglage initial(your setup code here)
Window.width   = 640
Window.height  = 480
Window.bgcolor = C_BLACK

#Épaisseur de paroi: gauche, droite, haut; 20

#Faire du bloc une classe Item
class Item
  def initialize(x, y, image)
    @x = x
    @y = y
    @image  = image
    @width  = image.width
    @height = image.height
  end
  attr_accessor :x, :y, :image, :width, :height
end

#Préparation du bar
img_bar = Image.load("bar.png ")
bar_x = 250
bar_y = 480 - img_bar.height
bar_width  = img_bar.width
bar_height = img_bar.height

#Préparation du ballon
img_ball = Image.load("ball.png ")
ball_x = 300
ball_y = 400
dx     =   2
dy     =  -2
ball_width  = img_ball.width
ball_height = img_ball.height

#Préparation du bloc
img_block = Image.load("block.png ")

#Initialisation des blocs
blocks = []
10.times do |x|
  blocks << Item.new(21 + (img_block.width + 2) * x, 21, img_block)
end

10.times do |x|                                     #◆ Ajout
  blocks << Item.new(21 + (img_block.width + 2) * x, 21 + (img_block.height + 2), img_block)   #◆ Ajout
end                                                 #◆ Ajout

#Définition du nombre de dessins par seconde (valeur initiale: 60)
#Window.fps = 30


#Boucle principale
Window.loop do
  #Déplacer la barre
  #bar_x += Input.x * 4       #Pour les touches gauche et droite
  bar_x = Input.mouse_x       #Pour la souris
  if bar_x < 20
    bar_x = 20
  elsif bar_x > 640 - 20 - img_bar.width
    bar_x = 640 - 20 - img_bar.width
  end

  #Déplacez la balle
  ball_x += dx
  ball_y += dy

  #S'il heurte un mur, il rebondit (direction x)
  if ball_x < 20 || (ball_x + ball_width) > 620
    ball_x -= dx
    dx = -dx
  end

  #S'il touche le mur, il rebondit(direction y)
  if ball_y < 20
    ball_y -= dy
    dy = -dy
  end

  #Jugement de collision avec barre
  if (ball_y + ball_height) >  (480 - bar_height)  &&
     (ball_y + ball_height) <= (480 - bar_height + dy.abs)  &&
     (ball_x + ball_width)  >  bar_x               &&
     ball_x                 <  (bar_x + bar_width)

    ball_y -= dy
    dy = -dy
  end


  #Dessin d'écran
  Window.draw_box_fill(  0,   0,  20, 480, C_WHITE)
  Window.draw_box_fill(620,   0, 640, 480, C_WHITE)
  Window.draw_box_fill(  0,   0, 640,  20, C_WHITE)

  Window.draw(bar_x, bar_y, img_bar)
  Window.draw(ball_x, ball_y, img_ball)

  blocks.each do |block|
    Window.draw(block.x, block.y, block.image)
  end
end

2-27. Mettre un bloc (rattraper la 5ème étape) (rb_block27.html)
J'ai rattrapé la 5ème étape.
rb_block27.rb
include DX
#Code pour le réglage initial(your setup code here)
Window.width   = 640
Window.height  = 480
Window.bgcolor = C_BLACK

#Épaisseur de paroi: gauche, droite, haut; 20

#Faire du bloc une classe Item
class Item
  def initialize(x, y, image)
    @x = x
    @y = y
    @image  = image
    @width  = image.width
    @height = image.height
  end
  attr_accessor :x, :y, :image, :width, :height
end

#Préparation du bar
img_bar = Image.load("bar.png ")
bar_x = 250
bar_y = 480 - img_bar.height
bar_width  = img_bar.width
bar_height = img_bar.height

#Préparation du ballon
img_ball = Image.load("ball.png ")
ball_x = 300
ball_y = 400
dx     =   2
dy     =  -2
ball_width  = img_ball.width
ball_height = img_ball.height

#Préparation du bloc
img_block = Image.load("block.png ")

#Initialisation des blocs
blocks = []
10.times do |x|
  blocks << Item.new(21 + (img_block.width + 2) * x, 21, img_block)
end

10.times do |x|
  blocks << Item.new(21 + (img_block.width + 2) * x, 21 + (img_block.height + 2), img_block)
end

10.times do |x|                                     #◆ Ajout
  blocks << Item.new(21 + (img_block.width + 2) * x, 21 + (img_block.height + 2) * 2, img_block)   #◆ Ajout
end                                                 #◆ Ajout

10.times do |x|                                     #◆ Ajout
  blocks << Item.new(21 + (img_block.width + 2) * x, 21 + (img_block.height + 2) * 3, img_block)   #◆ Ajout
end                                                 #◆ Ajout

10.times do |x|                                     #◆ Ajout
  blocks << Item.new(21 + (img_block.width + 2) * x, 21 + (img_block.height + 2) * 4, img_block)   #◆ Ajout
end                                                 #◆ Ajout

#Définition du nombre de dessins par seconde (valeur initiale: 60)
#Window.fps = 30


#Boucle principale
Window.loop do
  #Déplacer la barre
  #bar_x += Input.x * 4       #Pour les touches gauche et droite
  bar_x = Input.mouse_x       #Pour la souris
  if bar_x < 20
    bar_x = 20
  elsif bar_x > 640 - 20 - img_bar.width
    bar_x = 640 - 20 - img_bar.width
  end

  #Déplacez la balle
  ball_x += dx
  ball_y += dy

  #S'il heurte un mur, il rebondit (direction x)
  if ball_x < 20 || (ball_x + ball_width) > 620
    ball_x -= dx
    dx = -dx
  end

  #S'il touche le mur, il rebondit(direction y)
  if ball_y < 20
    ball_y -= dy
    dy = -dy
  end

  #Jugement de collision avec barre
  if (ball_y + ball_height) >  (480 - bar_height)  &&
     (ball_y + ball_height) <= (480 - bar_height + dy.abs)  &&
     (ball_x + ball_width)  >  bar_x               &&
     ball_x                 <  (bar_x + bar_width)

    ball_y -= dy
    dy = -dy
  end


  #Dessin d'écran
  Window.draw_box_fill(  0,   0,  20, 480, C_WHITE)
  Window.draw_box_fill(620,   0, 640, 480, C_WHITE)
  Window.draw_box_fill(  0,   0, 640,  20, C_WHITE)

  Window.draw(bar_x, bar_y, img_bar)
  Window.draw(ball_x, ball_y, img_ball)

  blocks.each do |block|
    Window.draw(block.x, block.y, block.image)
  end
end
2-28. Mettre des blocs (jusqu'à la 5e ligne) (rb_block28.html)
Puisque «10.times do ~ end» est apparu 5 fois, je vais également résumer cela.
Mettez «5.times do ~ end» dans «10.times do ~ end» pour en faire une double forme.
rb_block28.rb
include DX
#Code pour le réglage initial(your setup code here)
Window.width   = 640
Window.height  = 480
Window.bgcolor = C_BLACK

#Épaisseur de paroi: gauche, droite, haut; 20

#Faire du bloc une classe Item
class Item
  def initialize(x, y, image)
    @x = x
    @y = y
    @image  = image
    @width  = image.width
    @height = image.height
  end
  attr_accessor :x, :y, :image, :width, :height
end

#Préparation du bar
img_bar = Image.load("bar.png ")
bar_x = 250
bar_y = 480 - img_bar.height
bar_width  = img_bar.width
bar_height = img_bar.height

#Préparation du ballon
img_ball = Image.load("ball.png ")
ball_x = 300
ball_y = 400
dx     =   2
dy     =  -2
ball_width  = img_ball.width
ball_height = img_ball.height

#Préparation du bloc
img_block = Image.load("block.png ")

#Initialisation des blocs
blocks = []
10.times do |x|
  5.times do |y|                                  #◆ Ajout
    blocks << Item.new(21 + (img_block.width + 2) * x, 21 + (img_block.height + 2) * y, img_block)  #◆ Ajout
  end                                             #◆ Ajout
end

#Définition du nombre de dessins par seconde (valeur initiale: 60)
#Window.fps = 30


#Boucle principale
Window.loop do
  #Déplacer la barre
  #bar_x += Input.x * 4       #Pour les touches gauche et droite
  bar_x = Input.mouse_x       #Pour la souris
  if bar_x < 20
    bar_x = 20
  elsif bar_x > 640 - 20 - img_bar.width
    bar_x = 640 - 20 - img_bar.width
  end

  #Déplacez la balle
  ball_x += dx
  ball_y += dy

  #S'il heurte un mur, il rebondit (direction x)
  if ball_x < 20 || (ball_x + ball_width) > 620
    ball_x -= dx
    dx = -dx
  end

  #S'il touche le mur, il rebondit(direction y)
  if ball_y < 20
    ball_y -= dy
    dy = -dy
  end

  #Jugement de collision avec barre
  if (ball_y + ball_height) >  (480 - bar_height)  &&
     (ball_y + ball_height) <= (480 - bar_height + dy.abs)  &&
     (ball_x + ball_width)  >  bar_x               &&
     ball_x                 <  (bar_x + bar_width)

    ball_y -= dy
    dy = -dy
  end


  #Dessin d'écran
  Window.draw_box_fill(  0,   0,  20, 480, C_WHITE)
  Window.draw_box_fill(620,   0, 640, 480, C_WHITE)
  Window.draw_box_fill(  0,   0, 640,  20, C_WHITE)

  Window.draw(bar_x, bar_y, img_bar)
  Window.draw(ball_x, ball_y, img_ball)

  blocks.each do |block|
    Window.draw(block.x, block.y, block.image)
  end
end
2-29. Les boules et les barres doivent aussi être une «classe d'article» (rb_block29.html)
En y réfléchissant bien, les attributs de la balle et de la barre sont presque les mêmes que ceux de la ʻItem class, alors faisons-en la ʻItem class.
Cela rend également le programme plus facile à lire.
rb_block29.rb
include DX
#Code pour le réglage initial(your setup code here)
Window.width   = 640
Window.height  = 480
Window.bgcolor = C_BLACK

#Épaisseur de paroi: gauche, droite, haut; 20

#Les balles, barres et blocs doivent être dans la classe Item#◇ Changement (les balles et les barres sont également refaites dans la classe Item)
class Item
  def initialize(x, y, image)
    @x = x
    @y = y
    @image  = image
    @width  = image.width
    @height = image.height
  end
  attr_accessor :x, :y, :image, :width, :height
end

#Préparation du bar
img_bar = Image.load("bar.png ")
bar = Item.new(250, 480 - img_bar.height, img_bar)  #◇ Changer (remake à la classe Item)

#Préparation du ballon
img_ball = Image.load("ball.png ")
ball = Item.new(300, 400, img_ball)                 #◇ Changer (remake à la classe Item)
dx =  2   #Vitesse de la balle (direction x)#◇ Changement (alignement des caractères, ajout de commentaires)
dy = -2   #Vitesse de la balle (direction y)#◇ Changement (alignement des caractères, ajout de commentaires)

#Préparation du bloc
img_block = Image.load("block.png ")

#Initialisation des blocs
blocks = []
10.times do |x|
  5.times do |y|
    blocks << Item.new(21 + (img_block.width + 2) * x, 21 + (img_block.height + 2) * y, img_block)
  end
end

#Définition du nombre de dessins par seconde (valeur initiale: 60)
#Window.fps = 30


#Boucle principale
Window.loop do
  #Déplacer la barre
  #bar.x += Input.x * 4       #Pour les touches gauche et droite#◇ Changer (bar.à x)
  bar.x = Input.mouse_x       #Pour la souris#◇ Changer (bar.à x)
  if bar.x < 20                                #◇ Changer (bar.à x)
    bar.x = 20                                 #◇ Changer (bar.à x)
  elsif bar.x > 640 - 20 - bar.width           #◇ Changer (bar.x、bar.à la largeur)
    bar.x = 640 - 20 - bar.width               #◇ Changer (bar.x、bar.à la largeur)
  end

  #Déplacez la balle
  ball.x += dx                                 #◇ Changer (balle.à x)
  ball.y += dy                                 #◇ Changer (balle.jouet)

  #S'il heurte un mur, il rebondit (direction x)
  if ball.x < 20 || (ball.x + ball.width) > 620  #◇ Changer (balle.x、ball.à la largeur)
    ball.x -= dx                               #◇ Changer (balle.à x)
    dx = -dx
  end

  #S'il touche le mur, il rebondit(direction y)
  if ball.y < 20                               #◇ Changer (balle.jouet)
    ball.y -= dy                               #◇ Changer (balle.jouet)
    dy = -dy
  end

  #Jugement de collision avec barre
  if (ball.y + ball.height) >  (480 - bar.height)  &&                #◇ Changer (balle.y、ball.height、bar.à hauteur)
     (ball.y + ball.height) <= (480 - bar.height + dy.abs)  &&       #◇ Changer (balle.y、ball.height、bar.à hauteur)
     (ball.x + ball.width)  >  bar.x               &&                #◇ Changer (balle.x、ball.width、bar.à x)
     ball.x                 <  (bar.x + bar.width)                   #◇ Changer (balle.x、bar.x、bar.à la largeur)

    ball.y -= dy                               #◇ Changer (balle.jouet)
    dy = -dy
  end


  #Dessin d'écran
  Window.draw_box_fill(  0,   0,  20, 480, C_WHITE)
  Window.draw_box_fill(620,   0, 640, 480, C_WHITE)
  Window.draw_box_fill(  0,   0, 640,  20, C_WHITE)

  Window.draw(bar.x, bar.y, bar.image)        #◇ Changer (bar.x、bar.y、bar.À l'image)
  Window.draw(ball.x, ball.y, ball.image)     #◇ Changer (balle.x、ball.y、ball.À l'image)

  blocks.each do |block|
    Window.draw(block.x, block.y, block.image)
  end
end
2-30. Créer un jugement de collision collision? (Rb_block30.html)
Dans le futur, non seulement la barre mais aussi le bloc seront jugés plusieurs fois, alors faites un jugement de collision "collision?". Ici, nous allons considérer les carrés.
Considérant les deux rectangles ʻitem_a et ʻitem_b;
--Coordonnées de ʻitem_a; en haut à gauche (ʻa_x0, ʻa_y0), en bas à droite (ʻa_x1, ʻa_y1`)
―― Coordonnées de ʻitem_b; en haut à gauche (b_x0, b_y0), en bas à droite (b_x1, b_y1`)
La coordonnée x de ʻitem_a est ʻa_x0 à a_x1, et la coordonnée y est ʻa_y0 à a_y1`.
ʻItem_b a des coordonnées x de b_x0 à b_x1et des coordonnées y deb_y0 à b_y1`
En considérant chaque coordonnée (x, y), les conditions dans lesquelles les deux se heurtent (se heurtent) sont les suivantes.
a_x0 < b_x1 et
a_x1 > b_x0 et

a_y0 < b_y1 et
a_y1 > b_y0
Lorsque cela est codé, cela ressemble à ceci: (ʻItem_a et ʻitem_b sont une ʻItem class`)
def collision?(item_a, item_b)
  a_x0 = item_a.x
  a_x1 = item_a.x + item_a.width
  a_y0 = item_a.y
  a_y1 = item_a.y + item_a.height

  b_x0 = item_b.x
  b_x1 = item_b.x + item_b.width
  b_y0 = item_b.y
  b_y1 = item_b.y + item_b.height

  if a_x0 < b_x1 &&
     a_x1 > b_x0 &&
     a_y0 < b_y1 &&
     a_y1 > b_y0

    true
  end
end
collision? Renvoie true s'il y a un conflit.
(Pour d'autres idées de jugement de collision (cercle, couleur), voir ci-dessous;
→ ・ DXRuby: Faisons un "jugement" par vous-même - Qiita https://qiita.com/noanoa07/items/b7d647bba20116c41a77 )
De plus, comme il est nécessaire de considérer la direction du rebond («direction x», «direction y»), le mouvement de la balle est divisé en «direction x» et «direction y», et un jugement de collision est effectué pour chacun.
rb_block30.rb
include DX
#Code pour le réglage initial(your setup code here)
Window.width   = 640
Window.height  = 480
Window.bgcolor = C_BLACK

#Épaisseur de paroi: gauche, droite, haut; 20

#Les balles, barres et blocs doivent être dans la classe Item
class Item
  def initialize(x, y, image)
    @x = x
    @y = y
    @image  = image
    @width  = image.width
    @height = image.height
  end
  attr_accessor :x, :y, :image, :width, :height
end

#Jugement de collision#◆ Ajout
def collision?(item_a, item_b)      #◆ Ajout
  a_x0 = item_a.x                   #◆ Ajout
  a_x1 = item_a.x + item_a.width    #◆ Ajout
  a_y0 = item_a.y                   #◆ Ajout
  a_y1 = item_a.y + item_a.height   #◆ Ajout
                                    #◆ Ajout
  b_x0 = item_b.x                   #◆ Ajout
  b_x1 = item_b.x + item_b.width    #◆ Ajout
  b_y0 = item_b.y                   #◆ Ajout
  b_y1 = item_b.y + item_b.height   #◆ Ajout
                                    #◆ Ajout
  if a_x0 < b_x1 &&                 #◆ Ajout
     a_x1 > b_x0 &&                 #◆ Ajout
     a_y0 < b_y1 &&                 #◆ Ajout
     a_y1 > b_y0                    #◆ Ajout
                                    #◆ Ajout
    true                            #◆ Ajout
  end                               #◆ Ajout
end                                 #◆ Ajout

#Préparation du bar
img_bar = Image.load("bar.png ")
bar = Item.new(250, 480 - img_bar.height, img_bar)

#Préparation du ballon
img_ball = Image.load("ball.png ")
ball = Item.new(300, 400, img_ball)
dx =  2   #Vitesse de la balle (direction x)
dy = -2   #Vitesse de la balle (direction y)

#Préparation du bloc
img_block = Image.load("block.png ")

#Initialisation des blocs
blocks = []
10.times do |x|
  5.times do |y|
    blocks << Item.new(21 + (img_block.width + 2) * x, 21 + (img_block.height + 2) * y, img_block)
  end
end

#Définition du nombre de dessins par seconde (valeur initiale: 60)
#Window.fps = 30


#Boucle principale
Window.loop do
  #Déplacer la barre
  #bar.x += Input.x * 4       #Pour les touches gauche et droite
  bar.x = Input.mouse_x       #Pour la souris
  if bar.x < 20
    bar.x = 20
  elsif bar.x > 640 - 20 - bar.width
    bar.x = 640 - 20 - bar.width
  end


  #Déplacez la balle dans la direction y#◇ Changer (uniquement dans la direction y)
  ball.y += dy                   #◇ Changer (uniquement dans la direction y)

  #Jugement de collision avec barre
  if collision?(ball, bar)       #◇ Changer (réécrire)
    if ball.y + ball.height  <=  480 - bar.height + dy.abs  #◇ Changer (réécrire)
      ball.y -= dy               #◇ Changer (réécrire)
      dy = -dy                   #◇ Changer (réécrire)
    end                          #◇ Changer (réécrire)
  end                            #◇ Changer (réécrire)

  #S'il touche le mur, il rebondit(direction y)
  if ball.y < 20
    ball.y -= dy
    dy = -dy
  end


  #Déplacez la balle dans la direction x#◇ Changement (uniquement dans la direction x)
  ball.x += dx                   #◇ Changement (uniquement dans la direction x)

  #S'il heurte un mur, il rebondit (direction x)
  if ball.x < 20 || (ball.x + ball.width) > 620
    ball.x -= dx
    dx = -dx
  end


  #Dessin d'écran
  Window.draw_box_fill(  0,   0,  20, 480, C_WHITE)
  Window.draw_box_fill(620,   0, 640, 480, C_WHITE)
  Window.draw_box_fill(  0,   0, 640,  20, C_WHITE)

  Window.draw(bar.x, bar.y, bar.image)
  Window.draw(ball.x, ball.y, ball.image)

  blocks.each do |block|
    Window.draw(block.x, block.y, block.image)
  end
end

2-31. Faire de collision? Une méthode de ʻItem class` (rb_block31.html)
Dans Ruby, la notation ʻitem_a.collision? (Item_b) est utilisée plus souvent que la notation collision? (Item_a, item_b) `(orientée objet).
Pour ce faire, faites de collision? Une méthode de la ʻItem class` (plus précisément, une méthode d'instance).
Comment le faire est comme suit.
class Item
def La méthode que vous souhaitez ajouter
    #Contenu de la méthode
  end
end
Ici, l'équivalent de ʻitem_a est écrit comme self`.
class Item

  def collision?(item_b)
    a_x0 = self.x
    a_x1 = self.x + self.width
    a_y0 = self.y
    a_y1 = self.y + self.height

    b_x0 = item_b.x
    b_x1 = item_b.x + item_b.width
    b_y0 = item_b.y
    b_y1 = item_b.y + item_b.height

    if a_x0 < b_x1 &&
       a_x1 > b_x0 &&
       a_y0 < b_y1 &&
       a_y1 > b_y0

      true
    end
  end
end
Maintenant, au lieu d'écrire collision? (Ball, bar), vous pouvez écrire ball.collision? (Bar).
rb_block31.rb
include DX
#Code pour le réglage initial(your setup code here)
Window.width   = 640
Window.height  = 480
Window.bgcolor = C_BLACK

#Épaisseur de paroi: gauche, droite, haut; 20

#Les balles, barres et blocs doivent être dans la classe Item
class Item
  def initialize(x, y, image)
    @x = x
    @y = y
    @image  = image
    @width  = image.width
    @height = image.height
  end
  attr_accessor :x, :y, :image, :width, :height

  #Jugement de collision#◇ Changer (à la méthode de la classe Item)
  def collision?(item_b)              #◇ Changer (réécrire)
    a_x0 = self.x                     #◇ Changer (réécrire)
    a_x1 = self.x + self.width        #◇ Changer (réécrire)
    a_y0 = self.y                     #◇ Changer (réécrire)
    a_y1 = self.y + self.height       #◇ Changer (réécrire)
                                      #◇ Changer (réécrire)
    b_x0 = item_b.x                   #◇ Changer (réécrire)
    b_x1 = item_b.x + item_b.width    #◇ Changer (réécrire)
    b_y0 = item_b.y                   #◇ Changer (réécrire)
    b_y1 = item_b.y + item_b.height   #◇ Changer (réécrire)
                                      #◇ Changer (à la méthode de la classe Item)
    if a_x0 < b_x1 &&                 #◇ Changer (à la méthode de la classe Item)
       a_x1 > b_x0 &&                 #◇ Changer (à la méthode de la classe Item)
       a_y0 < b_y1 &&                 #◇ Changer (à la méthode de la classe Item)
       a_y1 > b_y0                    #◇ Changer (à la méthode de la classe Item)
                                      #◇ Changer (à la méthode de la classe Item)
      true                            #◇ Changer (à la méthode de la classe Item)
    end                               #◇ Changer (à la méthode de la classe Item)
  end                                 #◇ Changer (à la méthode de la classe Item)
end                                   #◇ Changer (à la méthode de la classe Item)


#Préparation du bar
img_bar = Image.load("bar.png ")
bar = Item.new(250, 480 - img_bar.height, img_bar)

#Préparation du ballon
img_ball = Image.load("ball.png ")
ball = Item.new(300, 400, img_ball)
dx =  2   #Vitesse de la balle (direction x)
dy = -2   #Vitesse de la balle (direction y)

#Préparation du bloc
img_block = Image.load("block.png ")

#Initialisation des blocs
blocks = []
10.times do |x|
  5.times do |y|
    blocks << Item.new(21 + (img_block.width + 2) * x, 21 + (img_block.height + 2) * y, img_block)
  end
end

#Définition du nombre de dessins par seconde (valeur initiale: 60)
#Window.fps = 30


#Boucle principale
Window.loop do
  #Déplacer la barre
  #bar.x += Input.x * 4       #Pour les touches gauche et droite
  bar.x = Input.mouse_x       #Pour la souris
  if bar.x < 20
    bar.x = 20
  elsif bar.x > 640 - 20 - bar.width
    bar.x = 640 - 20 - bar.width
  end


  #Déplacez la balle dans la direction y
  ball.y += dy

  #Jugement de collision avec barre
  if ball.collision?(bar)        #◇ Changer (réécrire)
    if ball.y + ball.height  <=  480 - bar.height + dy.abs
      ball.y -= dy
      dy = -dy
    end
  end

  #S'il touche le mur, il rebondit(direction y)
  if ball.y < 20
    ball.y -= dy
    dy = -dy
  end


  #Déplacez la balle dans la direction x
  ball.x += dx

  #S'il heurte un mur, il rebondit (direction x)
  if ball.x < 20 || (ball.x + ball.width) > 620
    ball.x -= dx
    dx = -dx
  end


  #Dessin d'écran
  Window.draw_box_fill(  0,   0,  20, 480, C_WHITE)
  Window.draw_box_fill(620,   0, 640, 480, C_WHITE)
  Window.draw_box_fill(  0,   0, 640,  20, C_WHITE)

  Window.draw(bar.x, bar.y, bar.image)
  Window.draw(ball.x, ball.y, ball.image)

  blocks.each do |block|
    Window.draw(block.x, block.y, block.image)
  end
end
2-32. Jugement de collision avec le bloc (le bloc frappé disparaît) (rb_block32.html)
Jugez la collision avec le bloc.
ʻArray.delete_if` est une instruction pour récupérer les éléments du tableau un par un et les supprimer du tableau si les conditions sont remplies.
Par conséquent, vous pouvez supprimer le bloc qui est devenu "vrai" dans le jugement de collision du tableau de groupe de blocs "blocs".
blocks.delete_if do |block|
  if ball.collision?(block)
    true
  end
end
Le code qui l'utilise est le suivant.
rb_block32.rb
include DX
#Code pour le réglage initial(your setup code here)
Window.width   = 640
Window.height  = 480
Window.bgcolor = C_BLACK

#Épaisseur de paroi: gauche, droite, haut; 20

#Les balles, barres et blocs doivent être dans la classe Item
class Item
  def initialize(x, y, image)
    @x = x
    @y = y
    @image  = image
    @width  = image.width
    @height = image.height
  end
  attr_accessor :x, :y, :image, :width, :height

  #Jugement de collision
  def collision?(item_b)
    a_x0 = self.x
    a_x1 = self.x + self.width
    a_y0 = self.y
    a_y1 = self.y + self.height

    b_x0 = item_b.x
    b_x1 = item_b.x + item_b.width
    b_y0 = item_b.y
    b_y1 = item_b.y + item_b.height

    if a_x0 < b_x1 &&
       a_x1 > b_x0 &&
       a_y0 < b_y1 &&
       a_y1 > b_y0

      true
    end
  end
end


#Préparation du bar
img_bar = Image.load("bar.png ")
bar = Item.new(250, 480 - img_bar.height, img_bar)

#Préparation du ballon
img_ball = Image.load("ball.png ")
ball = Item.new(300, 400, img_ball)
dx =  2   #Vitesse de la balle (direction x)
dy = -2   #Vitesse de la balle (direction y)

#Préparation du bloc
img_block = Image.load("block.png ")

#Initialisation des blocs
blocks = []
10.times do |x|
  5.times do |y|
    blocks << Item.new(21 + (img_block.width + 2) * x, 21 + (img_block.height + 2) * y, img_block)
  end
end

#Définition du nombre de dessins par seconde (valeur initiale: 60)
#Window.fps = 30


#Boucle principale
Window.loop do
  #Déplacer la barre
  #bar.x += Input.x * 4       #Pour les touches gauche et droite
  bar.x = Input.mouse_x       #Pour la souris
  if bar.x < 20
    bar.x = 20
  elsif bar.x > 640 - 20 - bar.width
    bar.x = 640 - 20 - bar.width
  end


  #Déplacez la balle dans la direction y
  ball.y += dy

  #Jugement de collision avec barre
  if ball.collision?(bar)
    if ball.y + ball.height  <=  480 - bar.height + dy.abs
      ball.y -= dy
      dy = -dy
    end
  end

  #Jugement de collision avec bloc (direction y)#◆ Ajout
  blocks.delete_if do |block|        #◆ Ajout
    if ball.collision?(block)        #◆ Ajout
      true                           #◆ Ajout
    end                              #◆ Ajout
  end                                #◆ Ajout

  #S'il touche le mur, il rebondit(direction y)
  if ball.y < 20
    ball.y -= dy
    dy = -dy
  end


  #Déplacez la balle dans la direction x
  ball.x += dx

  #Jugement de collision avec bloc (direction x)#◆ Ajout
  blocks.delete_if do |block|        #◆ Ajout
    if ball.collision?(block)        #◆ Ajout
      true                           #◆ Ajout
    end                              #◆ Ajout
  end                                #◆ Ajout

  #S'il heurte un mur, il rebondit (direction x)
  if ball.x < 20 || (ball.x + ball.width) > 620
    ball.x -= dx
    dx = -dx
  end


  #Dessin d'écran
  Window.draw_box_fill(  0,   0,  20, 480, C_WHITE)
  Window.draw_box_fill(620,   0, 640, 480, C_WHITE)
  Window.draw_box_fill(  0,   0, 640,  20, C_WHITE)

  Window.draw(bar.x, bar.y, bar.image)
  Window.draw(ball.x, ball.y, ball.image)

  blocks.each do |block|
    Window.draw(block.x, block.y, block.image)
  end
end

2-33. S'il touche un bloc, il rebondit; c'est terminé (rb_block33.html)
Lorsqu'il touche le bloc, il rebondit.
S'il entre en collision avec un bloc, ajoutez simplement le code de rebond.
#Jugement de collision avec bloc (direction y)
blocks.delete_if do |block|
  if ball.collision?(block)
    ball.y -= dy                      #◆ Ajout
    dy = -dy                          #◆ Ajout
    true
  end
end
Avec cela, la "rupture de bloc" est terminée pour le moment!
rb_block33.rb
include DX
#Code pour le réglage initial(your setup code here)
Window.width   = 640
Window.height  = 480
Window.bgcolor = C_BLACK

#Épaisseur de paroi: gauche, droite, haut; 20

#Les balles, barres et blocs doivent être dans la classe Item
class Item
  def initialize(x, y, image)
    @x = x
    @y = y
    @image  = image
    @width  = image.width
    @height = image.height
  end
  attr_accessor :x, :y, :image, :width, :height

  #Jugement de collision
  def collision?(item_b)
    a_x0 = self.x
    a_x1 = self.x + self.width
    a_y0 = self.y
    a_y1 = self.y + self.height

    b_x0 = item_b.x
    b_x1 = item_b.x + item_b.width
    b_y0 = item_b.y
    b_y1 = item_b.y + item_b.height

    if a_x0 < b_x1 &&
       a_x1 > b_x0 &&
       a_y0 < b_y1 &&
       a_y1 > b_y0

      true
    end
  end
end


#Préparation du bar
img_bar = Image.load("bar.png ")
bar = Item.new(250, 480 - img_bar.height, img_bar)

#Préparation du ballon
img_ball = Image.load("ball.png ")
ball = Item.new(300, 400, img_ball)
dx =  2   #Vitesse de la balle (direction x)
dy = -2   #Vitesse de la balle (direction y)

#Préparation du bloc
img_block = Image.load("block.png ")

#Initialisation des blocs
blocks = []
10.times do |x|
  5.times do |y|
    blocks << Item.new(21 + (img_block.width + 2) * x, 21 + (img_block.height + 2) * y, img_block)
  end
end

#Définition du nombre de dessins par seconde (valeur initiale: 60)
#Window.fps = 30


#Boucle principale
Window.loop do
  #Déplacer la barre
  #bar.x += Input.x * 4       #Pour les touches gauche et droite
  bar.x = Input.mouse_x       #Pour la souris
  if bar.x < 20
    bar.x = 20
  elsif bar.x > 640 - 20 - bar.width
    bar.x = 640 - 20 - bar.width
  end


  #Déplacez la balle dans la direction y
  ball.y += dy

  #Jugement de collision avec barre
  if ball.collision?(bar)
    if ball.y + ball.height  <=  480 - bar.height + dy.abs
      ball.y -= dy
      dy = -dy
    end
  end

  #Jugement de collision avec bloc (direction y)
  blocks.delete_if do |block|
    if ball.collision?(block)
      ball.y -= dy                      #◆ Ajout
      dy = -dy                          #◆ Ajout
      true
    end
  end

  #S'il touche le mur, il rebondit(direction y)
  if ball.y < 20
    ball.y -= dy
    dy = -dy
  end


  #Déplacez la balle dans la direction x
  ball.x += dx

  #Jugement de collision avec bloc (direction x)
  blocks.delete_if do |block|
    if ball.collision?(block)
      ball.x -= dx                      #◆ Ajout
      dx = -dx                          #◆ Ajout
      true
    end
  end

  #S'il heurte un mur, il rebondit (direction x)
  if ball.x < 20 || (ball.x + ball.width) > 620
    ball.x -= dx
    dx = -dx
  end


  #Dessin d'écran
  Window.draw_box_fill(  0,   0,  20, 480, C_WHITE)
  Window.draw_box_fill(620,   0, 640, 480, C_WHITE)
  Window.draw_box_fill(  0,   0, 640,  20, C_WHITE)

  Window.draw(bar.x, bar.y, bar.image)
  Window.draw(ball.x, ball.y, ball.image)

  blocks.each do |block|
    Window.draw(block.x, block.y, block.image)
  end
end

Problème d'application
Améliorons et développons la "rupture de bloc"
Améliorons et développons la "rupture de bloc".
Ce qui suit n'est qu'un exemple. N'hésitez pas à le développer vous-même.
A. Améliorer le fonctionnement
Essayez de déplacer le "disjoncteur de bloc" créé et fixez la partie où vous vous inquiétez du mouvement.
B. Étendre la fonctionnalité
Développons-le en ajoutant la fonction de "blocage de bloc".
B-1. Afficher les caractères à l'écran (rb_block34.html)
Affichons les caractères à l'écran.
Tout d'abord, préparez la police par défaut.
font = Font.new(24)
Les caractères sont affichés comme suit.
Window.draw_font (position x, position y, chaîne de caractères, police, {: color => couleur des caractères)
Pour connaître le nombre de blocs restants, vérifiez le nombre d'éléments dans le tableau de blocs blocks, utilisez donc blocks.size.
rb_block34.rb
include DX
#Code pour le réglage initial(your setup code here)
Window.width   = 640
Window.height  = 480
Window.bgcolor = C_BLACK

#Épaisseur de paroi: gauche, droite, haut; 20

#Les balles, barres et blocs doivent être dans la classe Item
class Item
  def initialize(x, y, image)
    @x = x
    @y = y
    @image  = image
    @width  = image.width
    @height = image.height
  end
  attr_accessor :x, :y, :image, :width, :height

  #Jugement de collision
  def collision?(item_b)
    a_x0 = self.x
    a_x1 = self.x + self.width
    a_y0 = self.y
    a_y1 = self.y + self.height

    b_x0 = item_b.x
    b_x1 = item_b.x + item_b.width
    b_y0 = item_b.y
    b_y1 = item_b.y + item_b.height

    if a_x0 < b_x1 &&
       a_x1 > b_x0 &&
       a_y0 < b_y1 &&
       a_y1 > b_y0

      true
    end
  end
end


#Préparation du bar
img_bar = Image.load("bar.png ")
bar = Item.new(250, 480 - img_bar.height, img_bar)

#Préparation du ballon
img_ball = Image.load("ball.png ")
ball = Item.new(300, 400, img_ball)
dx =  2   #Vitesse de la balle (direction x)
dy = -2   #Vitesse de la balle (direction y)

#Préparation du bloc
img_block = Image.load("block.png ")

#Initialisation des blocs
blocks = []
10.times do |x|
  5.times do |y|
    blocks << Item.new(21 + (img_block.width + 2) * x, 21 + (img_block.height + 2) * y, img_block)
  end
end

#Préparation des polices#◆ Ajout
font = Font.new(24)                                    #◆ Ajout

#Définition du nombre de dessins par seconde (valeur initiale: 60)
#Window.fps = 30


#Boucle principale
Window.loop do
  #Déplacer la barre
  #bar.x += Input.x * 4       #Pour les touches gauche et droite
  bar.x = Input.mouse_x       #Pour la souris
  if bar.x < 20
    bar.x = 20
  elsif bar.x > 640 - 20 - bar.width
    bar.x = 640 - 20 - bar.width
  end


  #Déplacez la balle dans la direction y
  ball.y += dy

  #Jugement de collision avec barre
  if ball.collision?(bar)
    if ball.y + ball.height  <=  480 - bar.height + dy.abs
      ball.y -= dy
      dy = -dy
    end
  end

  #Jugement de collision avec bloc (direction y)
  blocks.delete_if do |block|
    if ball.collision?(block)
      ball.y -= dy
      dy = -dy
      true
    end
  end

  #S'il touche le mur, il rebondit(direction y)
  if ball.y < 20
    ball.y -= dy
    dy = -dy
  end


  #Déplacez la balle dans la direction x
  ball.x += dx

  #Jugement de collision avec bloc (direction x)
  blocks.delete_if do |block|
    if ball.collision?(block)
      ball.x -= dx
      dx = -dx
      true
    end
  end

  #S'il heurte un mur, il rebondit (direction x)
  if ball.x < 20 || (ball.x + ball.width) > 620
    ball.x -= dx
    dx = -dx
  end


  #Dessin d'écran
  Window.draw_box_fill(  0,   0,  20, 480, C_WHITE)
  Window.draw_box_fill(620,   0, 640, 480, C_WHITE)
  Window.draw_box_fill(  0,   0, 640,  20, C_WHITE)

  Window.draw(bar.x, bar.y, bar.image)
  Window.draw(ball.x, ball.y, ball.image)

  blocks.each do |block|
    Window.draw(block.x, block.y, block.image)
  end

  #Affichage des caractères#◆ Ajout
  string = "Les blocs restants#{blocks.size}C'est un individu."                      #◆ Ajout
  Window.draw_font(20, 200, string, font, {:color => C_YELLOW})     #◆ Ajout
end
B-2. Ajouter un jeu sur l'écran (rb_block35.html)
Ajoutons un jeu sur écran.
Lorsque la «position y» («balle.y») de la balle est plus grande que la largeur verticale de la fenêtre «480», le «jeu sur l'écran» est affiché.
Le game over screen se fait comme suit.
-
Dessinez un carré blanc de la même taille que la taille de la fenêtre (640, 480) (
Window.draw_box_fill (0, 0, 640, 480, C_WHITE)) -
Affichez le mot "Game Over" (
Window.draw_font (200, 200," Game Over ", font, {: color => C_BLACK}))
C'est le code ajouté.
rb_block35.rb
include DX
#Code pour le réglage initial(your setup code here)
Window.width   = 640
Window.height  = 480
Window.bgcolor = C_BLACK

#Épaisseur de paroi: gauche, droite, haut; 20

#Les balles, barres et blocs doivent être dans la classe Item
class Item
  def initialize(x, y, image)
    @x = x
    @y = y
    @image  = image
    @width  = image.width
    @height = image.height
  end
  attr_accessor :x, :y, :image, :width, :height

  #Jugement de collision
  def collision?(item_b)
    a_x0 = self.x
    a_x1 = self.x + self.width
    a_y0 = self.y
    a_y1 = self.y + self.height

    b_x0 = item_b.x
    b_x1 = item_b.x + item_b.width
    b_y0 = item_b.y
    b_y1 = item_b.y + item_b.height

    if a_x0 < b_x1 &&
       a_x1 > b_x0 &&
       a_y0 < b_y1 &&
       a_y1 > b_y0

      true
    end
  end
end


#Préparation du bar
img_bar = Image.load("bar.png ")
bar = Item.new(250, 480 - img_bar.height, img_bar)

#Préparation du ballon
img_ball = Image.load("ball.png ")
ball = Item.new(300, 400, img_ball)
dx =  2   #Vitesse de la balle (direction x)
dy = -2   #Vitesse de la balle (direction y)

#Préparation du bloc
img_block = Image.load("block.png ")

#Initialisation des blocs
blocks = []
10.times do |x|
  5.times do |y|
    blocks << Item.new(21 + (img_block.width + 2) * x, 21 + (img_block.height + 2) * y, img_block)
  end
end

#Préparation des polices
font = Font.new(24)

#Définition du nombre de dessins par seconde (valeur initiale: 60)
#Window.fps = 30


#Boucle principale
Window.loop do
  #Déplacer la barre
  #bar.x += Input.x * 4       #Pour les touches gauche et droite
  bar.x = Input.mouse_x       #Pour la souris
  if bar.x < 20
    bar.x = 20
  elsif bar.x > 640 - 20 - bar.width
    bar.x = 640 - 20 - bar.width
  end


  #Déplacez la balle dans la direction y
  ball.y += dy

  #Jugement de collision avec barre
  if ball.collision?(bar)
    if ball.y + ball.height  <=  480 - bar.height + dy.abs
      ball.y -= dy
      dy = -dy
    end
  end

  #Jugement de collision avec bloc (direction y)
  blocks.delete_if do |block|
    if ball.collision?(block)
      ball.y -= dy
      dy = -dy
      true
    end
  end

  #S'il touche le mur, il rebondit(direction y)
  if ball.y < 20
    ball.y -= dy
    dy = -dy
  end


  #Déplacez la balle dans la direction x
  ball.x += dx

  #Jugement de collision avec bloc (direction x)
  blocks.delete_if do |block|
    if ball.collision?(block)
      ball.x -= dx
      dx = -dx
      true
    end
  end

  #S'il heurte un mur, il rebondit (direction x)
  if ball.x < 20 || (ball.x + ball.width) > 620
    ball.x -= dx
    dx = -dx
  end


  #Dessin d'écran
  Window.draw_box_fill(  0,   0,  20, 480, C_WHITE)
  Window.draw_box_fill(620,   0, 640, 480, C_WHITE)
  Window.draw_box_fill(  0,   0, 640,  20, C_WHITE)

  Window.draw(bar.x, bar.y, bar.image)
  Window.draw(ball.x, ball.y, ball.image)

  blocks.each do |block|
    Window.draw(block.x, block.y, block.image)
  end

  #Affichage des caractères
  string = "Les blocs restants#{blocks.size}C'est un individu."
  Window.draw_font(20, 200, string, font, {:color => C_YELLOW})

  #Jeu sur écran#◆ Ajout
  if ball.y >= 480                                                          #◆ Ajout
    Window.draw_box_fill(0, 0, 640, 480, C_WHITE)                           #◆ Ajout
    Window.draw_font(200, 200, "Jeu terminé", font, {:color => C_BLACK})   #◆ Ajout
  end                                                                       #◆ Ajout

end
B-3. Redémarrez à partir du jeu sur l'écran (rb_block36.html)
Depuis l'écran du jeu, appuyez sur une touche spécifique pour redémarrer le jeu.
Vérifiez ʻInput.key_down? (Constante du clavier) `pour voir si une touche a été enfoncée.
Après cela, vous êtes libre de définir l'écran de redémarrage. (Ici, les blocs restants sont laissés tels quels et la balle est remise dans les conditions initiales.)
rb_block36.rb
include DX
#Code pour le réglage initial(your setup code here)
Window.width   = 640
Window.height  = 480
Window.bgcolor = C_BLACK

#Épaisseur de paroi: gauche, droite, haut; 20

#Les balles, barres et blocs doivent être dans la classe Item
class Item
  def initialize(x, y, image)
    @x = x
    @y = y
    @image  = image
    @width  = image.width
    @height = image.height
  end
  attr_accessor :x, :y, :image, :width, :height

  #Jugement de collision
  def collision?(item_b)
    a_x0 = self.x
    a_x1 = self.x + self.width
    a_y0 = self.y
    a_y1 = self.y + self.height

    b_x0 = item_b.x
    b_x1 = item_b.x + item_b.width
    b_y0 = item_b.y
    b_y1 = item_b.y + item_b.height

    if a_x0 < b_x1 &&
       a_x1 > b_x0 &&
       a_y0 < b_y1 &&
       a_y1 > b_y0

      true
    end
  end
end


#Préparation du bar
img_bar = Image.load("bar.png ")
bar = Item.new(250, 480 - img_bar.height, img_bar)

#Préparation du ballon
img_ball = Image.load("ball.png ")
ball = Item.new(300, 400, img_ball)
dx =  2   #Vitesse de la balle (direction x)
dy = -2   #Vitesse de la balle (direction y)

#Préparation du bloc
img_block = Image.load("block.png ")

#Initialisation des blocs
blocks = []
10.times do |x|
  5.times do |y|
    blocks << Item.new(21 + (img_block.width + 2) * x, 21 + (img_block.height + 2) * y, img_block)
  end
end

#Préparation des polices
font = Font.new(24)

#Définition du nombre de dessins par seconde (valeur initiale: 60)
#Window.fps = 30


#Boucle principale
Window.loop do
  #Déplacer la barre
  #bar.x += Input.x * 4       #Pour les touches gauche et droite
  bar.x = Input.mouse_x       #Pour la souris
  if bar.x < 20
    bar.x = 20
  elsif bar.x > 640 - 20 - bar.width
    bar.x = 640 - 20 - bar.width
  end


  #Déplacez la balle dans la direction y
  ball.y += dy

  #Jugement de collision avec barre
  if ball.collision?(bar)
    if ball.y + ball.height  <=  480 - bar.height + dy.abs
      ball.y -= dy
      dy = -dy
    end
  end

  #Jugement de collision avec bloc (direction y)
  blocks.delete_if do |block|
    if ball.collision?(block)
      ball.y -= dy
      dy = -dy
      true
    end
  end

  #S'il touche le mur, il rebondit(direction y)
  if ball.y < 20
    ball.y -= dy
    dy = -dy
  end


  #Déplacez la balle dans la direction x
  ball.x += dx

  #Jugement de collision avec bloc (direction x)
  blocks.delete_if do |block|
    if ball.collision?(block)
      ball.x -= dx
      dx = -dx
      true
    end
  end

  #S'il heurte un mur, il rebondit (direction x)
  if ball.x < 20 || (ball.x + ball.width) > 620
    ball.x -= dx
    dx = -dx
  end


  #Dessin d'écran
  Window.draw_box_fill(  0,   0,  20, 480, C_WHITE)
  Window.draw_box_fill(620,   0, 640, 480, C_WHITE)
  Window.draw_box_fill(  0,   0, 640,  20, C_WHITE)

  Window.draw(bar.x, bar.y, bar.image)
  Window.draw(ball.x, ball.y, ball.image)

  blocks.each do |block|
    Window.draw(block.x, block.y, block.image)
  end

  #Affichage des caractères
  string = "Les blocs restants#{blocks.size}C'est un individu."
  Window.draw_font(20, 200, string, font, {:color => C_YELLOW})

  #Jeu sur écran
  if ball.y >= 480
    Window.draw_box_fill(0, 0, 640, 480, C_WHITE)
    Window.draw_font(200, 200, "Jeu terminé", font, {:color => C_BLACK})
    Window.draw_font(200, 230, "Continuer avec la touche espace", font, {:color => C_BLACK})  #◆ Ajout
    if Input.key_down?(K_SPACE)                                               #◆ Ajout
      ball.x = 300                                                            #◆ Ajout
      ball.y = 400                                                            #◆ Ajout
      dx =  2                                                                 #◆ Ajout
      dy = -2                                                                 #◆ Ajout
    end                                                                       #◆ Ajout
  end

end
C'est la fin du texte.
Après cela, essayez de le développer de différentes manières!
Recommended Posts