I was able to convert my GMS app to G + H support within 10 minutes using ToolKit
Overview
In the previous article, I gave you an overview of how to convert your existing Android app to HMS-enabled. In this article, I would like to introduce how to convert a GMS application to an application that can be operated on both GMS and HMS terminals using the automatic code conversion tool (ToolKit) provided by Huawei.
Introducing ToolKit
First, I would like to briefly introduce the outline and principle of Toolkit.
What is ToolKit
ToolKit is a plugin tool for Android Studio that includes features such as coding assistants for HMS development, cloud debugging, cloud testing and automatic code conversion.
ToolKit's automatic code conversion tool (GitHub link) ) Is a tool that detects the GMS API used in the original app and automatically converts it to G + H support, and supports both Kotlin and Java. This time, I used an automatic code conversion tool (Convertor) to convert an existing GMS application to G + H compatible, so I would like to share how to do it.
The cost of conversion is less than I expected, and it took less than 10 minutes to convert, excluding preparatory work, so if you are interested, you can try it yourself.
Convertor Overview of conversion principle
The principle of Convertor is described in Huawei official site like this.
· Add HMS API: Adds the xmsAdapter, an adapter code module, based on the original code for calling third-party APIs. The adapter code can call third-party APIs or HMS APIs based on the scheduling policy. The scheduling policy is determined. by you. · To HMS API: Replaces the third-party API code in the app code with the to-be called HMS API code. The converted code directly calls the HMS APIs.
In addition, this page has more detailed principles.
I understood the conversion logic in my own way and made an image diagram. The middle is the original app, the left is the app after G + H conversion, and the right is the app after G2H conversion. If you don't understand G + H and G2H because they have been introduced in the previous article, please refer to this article.

In the case of G2H conversion, it is relatively easy, and Converter replaces all GMS APIs and packages in the app with the corresponding HMS (“App after G2H conversion” in the above figure).
In the case of G + H ("App after G + H conversion"), it is a little complicated, and when converting using Converter, a new module (xmsadaptor) depends on the GMS API used by Converter in the original application. ) Is generated (green part in the above figure). And all the GMS APIs used in the original code are converted to XMS APIs.
When a certain API is called, this xmsadaptor judges the availability of GMS / HMS of the terminal and uses the API of the SDK of the corresponding GMS / HMS according to the judgment result.
Description of demo app for conversion
To try the conversion, I created a simple demo app using GMS.
The demo app uses Google Maps and the Location SDK to display a map of the user's current location when the app is launched.

When you install the pre-conversion app on your HMS device, you will see a dialog like this that Google Play developer services cannot be used.

I gave the pre-conversion app to GitHub for the time being. If you are interested, please try to convert using this directly. (You need an API key for the Google Maps API issued by your own Google Cloud Platform) GitHub: https://github.com/vptsama/GHDemo_BeforeConversion
Preparation
Before doing the actual conversion, you first need to prepare for using the HMS Map SDK & Location SDK and Toolkit.
Preparation # 1: Settings for using HMS Map and Location SDK
Step 1: Get a Huawei Developer Account (Free)
To use the HMS SDK, you need to have a Huawei developer account. There are two main steps to applying for an account:
- Get a Huawei ID
- Developer certification
In 2 developer certification, there are two options, personal developer certification and corporate developer certification, but I authenticated with a personal account and the examination was completed in about one day. Also, I'm grateful that you can apply for free.
For a detailed guide, please refer to the following site (English). Huawei ID Application Guide: https://developer.huawei.com/consumer/en/doc/10104 Developer certification (for individuals): https://developer.huawei.com/consumer/en/doc/10122
Step 2: Create an app project and set information on Appgallery Connect
AppGallery Connect (https://developer.huawei.com/consumer/en/console) is Huawei's developer console.

Like Google, to use the HMS SDK, you first need to make various settings on the console.
The general flow is as follows.
- 1. Creating an app project
- You can create it by entering "My apps" in the above figure and clicking "New app" at the top right of the next screen. 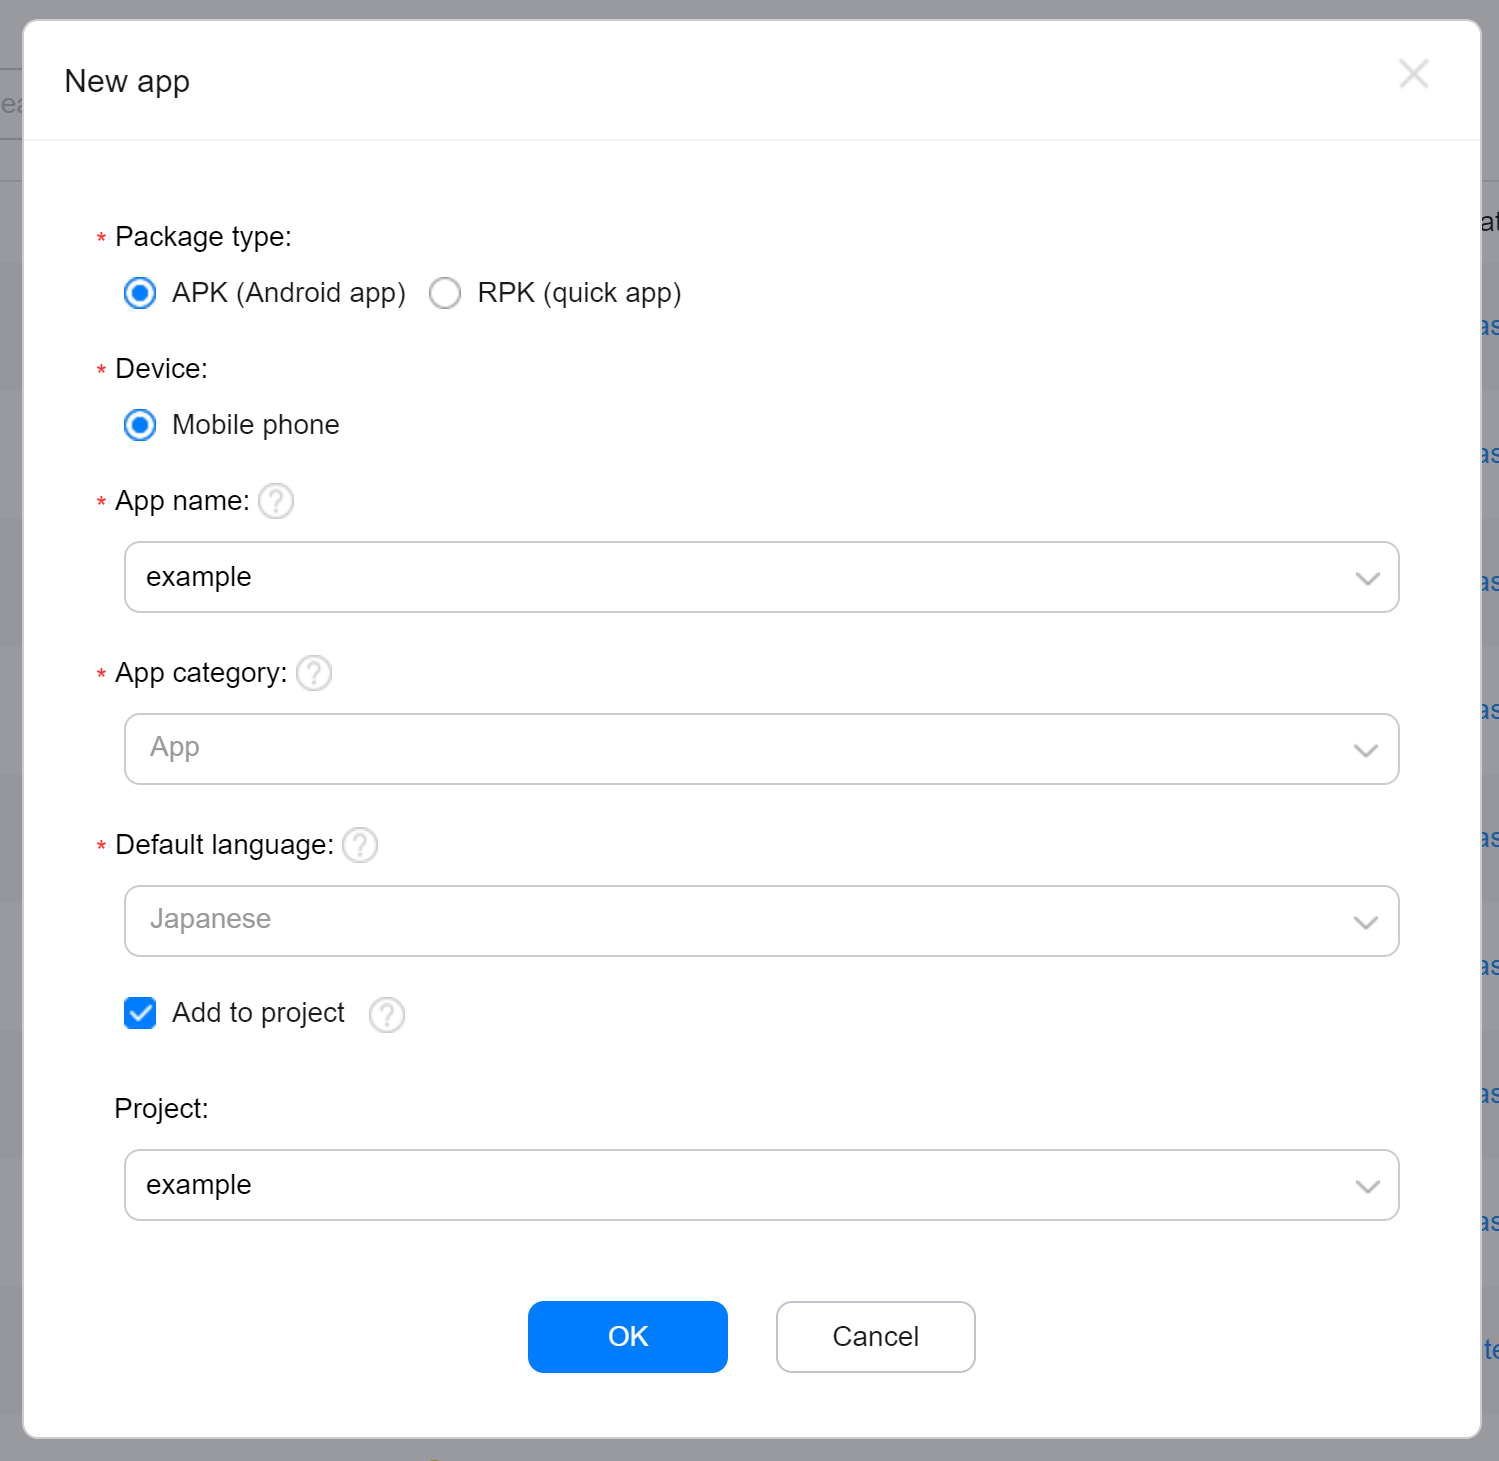
- 2. Register signature information on the detailed project settings page "My apps" is displayed in the upper left of the
- page, and select "My projects" from there to enter the detailed information input page of the project. You can register the signature information of the app under "App information" on the General information page.
- 3. Enable the API you want to use
- Next, select "Manage APIs" at the top of the page and switch on the API you want to use. 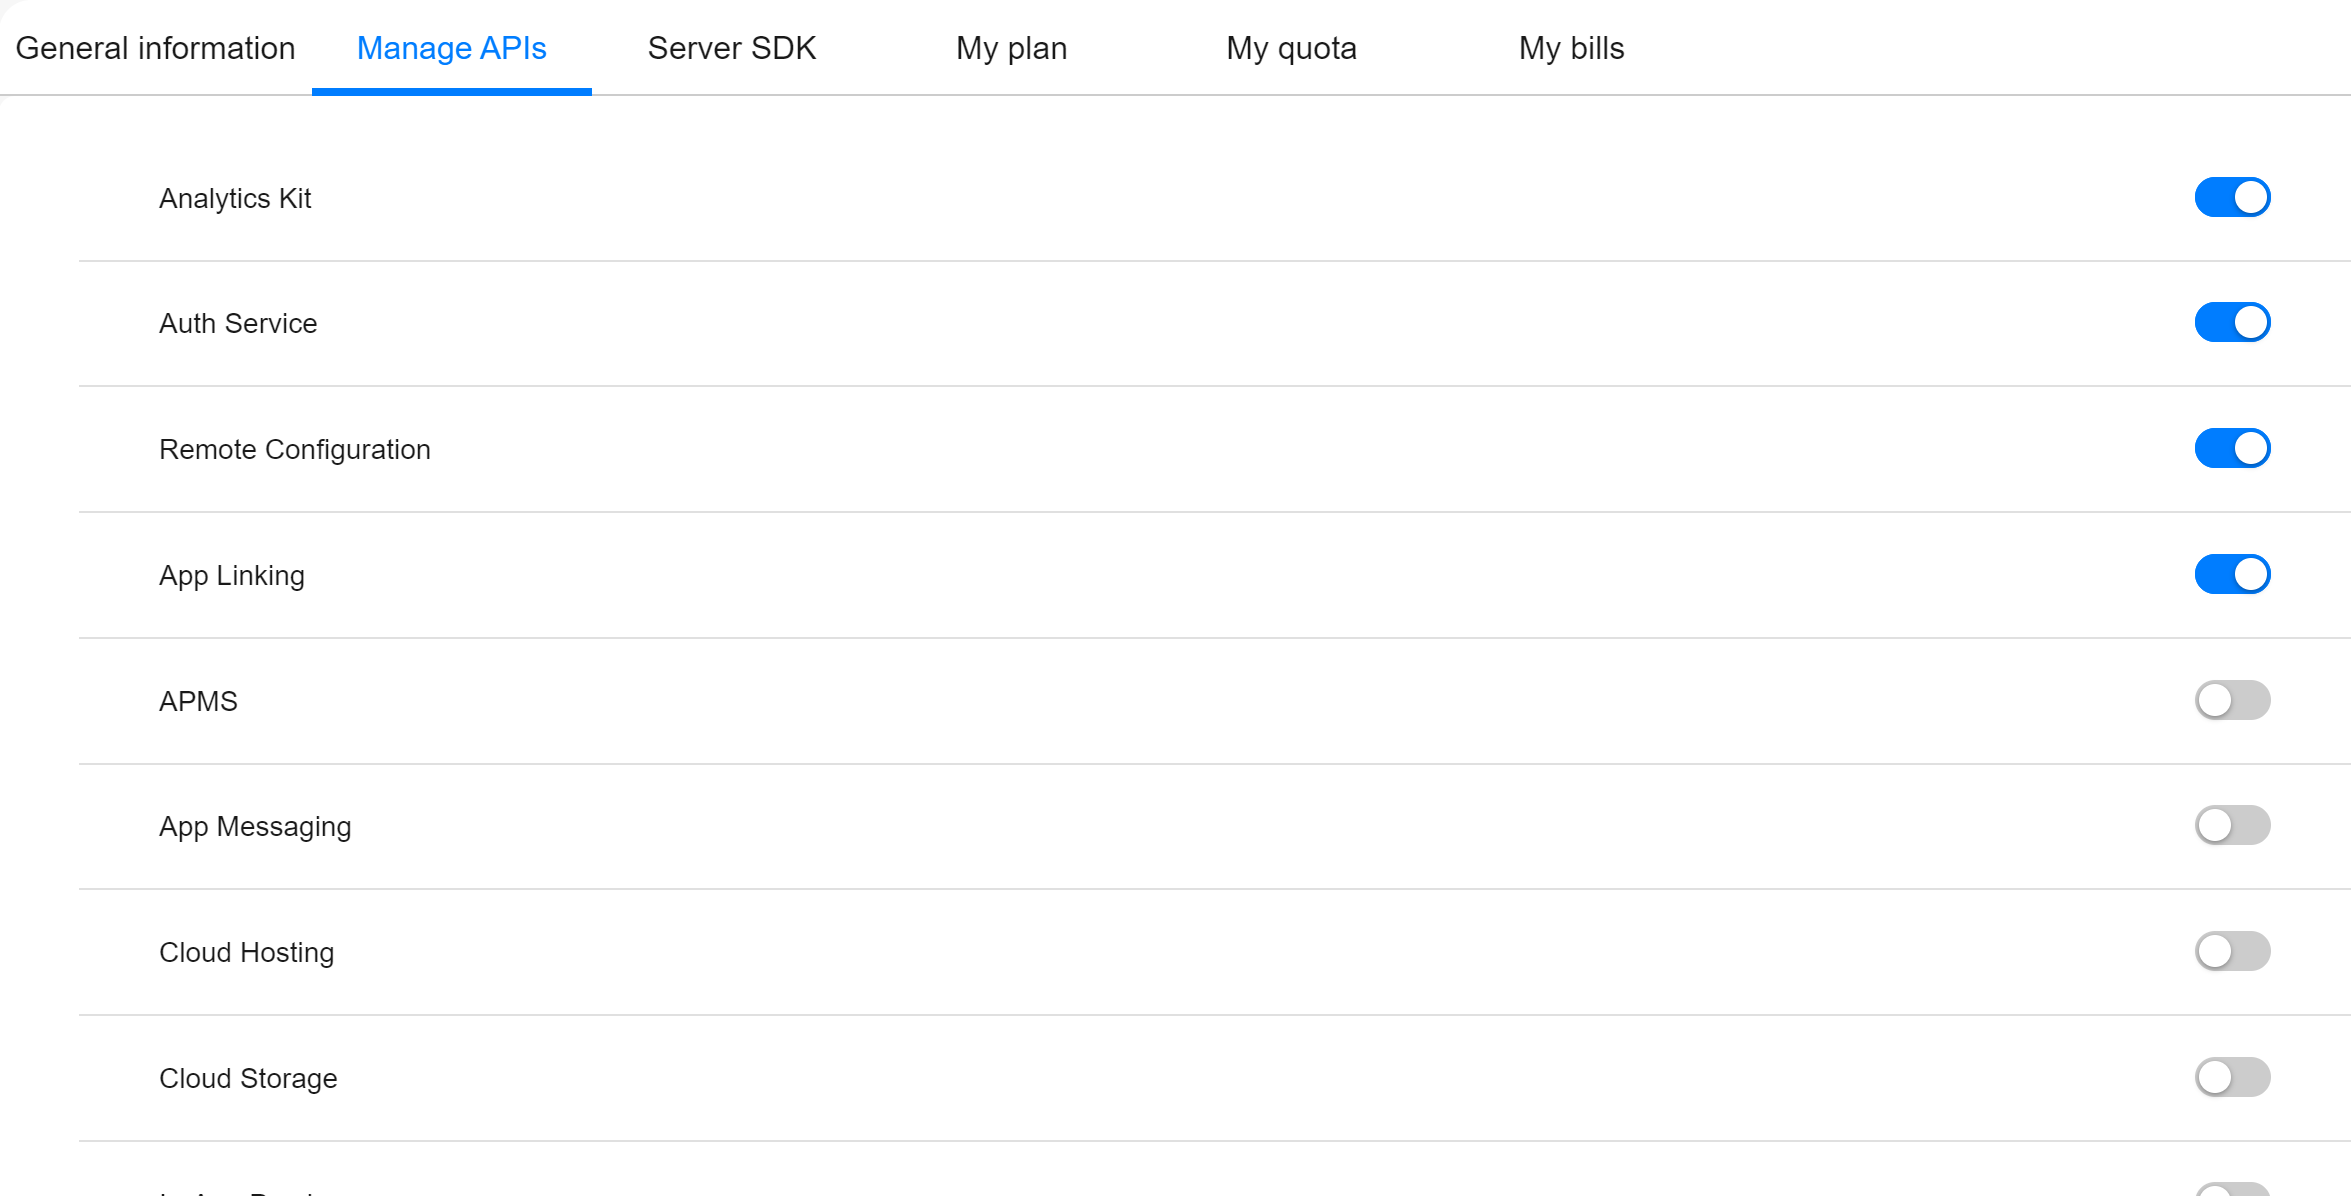
- 4. Add agconnect-services.json file to your project
- After all the above settings are completed, it is necessary to finally install the config file (agconnect-services.json) in the project. There is a button on the General information page under "App information" where you can download agconnect-services.json, which you can click to download. Copy the last downloaded file to the app root directory to complete the setup.
For a detailed guide, please refer to the following site (English). App information setting guide: https://developer.huawei.com/consumer/en/doc/development/HMS-Guides/hms-map-configuringinagc
Preparation # 2: Installing the ToolKit
The ToolKit can be installed directly in Android Studio.
If you search for HMS in File> Settings> Plugins> Marketplace, it will appear and you can easily install it.

For a detailed guide, please refer to the following site (English). ToolKit Installation Guide: https://developer.huawei.com/consumer/en/doc/development/Tools-Guides/installation-0000001050145206
Conversion flow
From here, we will start the actual conversion.
Start conversion
First, open the project you want to convert in Android Studio, and you can start the conversion by selecting Converter → New Conversion from "HMS" on the toolbar. Click New Conversion and the following screen will be displayed.

Now select the backup directory and click Next.
Scan results and conversion solution selection
Click Next to start the scan and after a while you will see the results.

Looking at the scan results, you can see how many GMS APIs are used in the current file and the number of APIs that can be converted automatically. In this case, 100% of the GMS API can be automatically converted to HMS (Auto Rate: 100%).
Finally, select the conversion solution (Add HMS or To HMS) and click Analyze to start the analysis. This time, I chose Add HMS API (GMS API First). If this is selected, it will be converted to preferentially determine whether GMS can be used, and if GMS can be used, GMS will be used, and if GMS cannot be used, HMS will be used.
Conversion operation
When the analysis is finished, the "README.md" file that describes the operation method is displayed first. And the result of the analysis is displayed at the bottom.

If you look at the analysis results, you can see that all the GMSs in the project are being asked.
Repair gradle file
Before you can convert the code, you first need to convert the gradle file. Specify build.gradle in the File filter, check the blank at the right end of the item, and click "Convert" to automatically add HMS repositories and dependencies.

Next, select app / build.gradle and add dependencies etc. with the same feeling.

The part in red cannot be converted automatically, so you need to manually correct it according to the instructions written in the Description.
Finally, set the filter to setting.gradle and perform automatic conversion.

Once the conversion of the gradle file is completed, sync the project once.
Code conversion
After syncing, perform the code conversion. Set the File filter to All, check all the items except gradle, and execute the conversion.

This completes all project conversions.
For a detailed guide, please refer to the following site (English). Convertor Guide: https://developer.huawei.com/consumer/en/doc/development/Tools-Guides/convertor-0000001050147221
Check the operation of the converted app
I installed the converted app on both HMS and GMS terminals.
If you open it on a GMS device, Google Map will be displayed as in the original app.

The Huawei Map is now displayed correctly when opened on an HMS device.

In this way, the ToolKit Converter makes it surprisingly easy to convert existing Android apps to HMS support.
Also, the size of the APK before and after the conversion you care about, Before conversion: 2.4MB After conversion: 3.9MB Will be. Since the increase is only about 1.5MB corresponding to the two SDKs (Map, Location), I think that the increase in size due to G + H support is also within the allowable range.
The converted app is also posted on GitHub, so if you want to see the converted code, please refer to this directly. (In order to display the Huawei Map, you need to do the work described in "Preparation 1" by yourself) GitHub: https://github.com/vptsama/GHDemo_AfterConversion
in conclusion
Huawei is the world's second-largest smartphone maker, with a market share of about 20% in Europe and about 50%, especially in China. So, if you are thinking of expanding your app overseas, I think we are in an era where it is inevitable to make your app compatible with HMS and register it in the App Gallery. The actual conversion can be completed in a considerably short time by using this ToolKit, so you can also make your current app HMS compatible and release it to AppGallery, and while expanding the number of users, you can become a Huawei user all over the world. Would you like to distribute the app?
Recommended Posts