[Development environment] Python with Xcode [With screen transition]
To run Python in Xcode ...
This time, I will introduce the procedure of Python development environment in Xcode with images.
Previously, I posted the procedure for executing C language in Xcode: C language on Mac, but the search results are quite good for this procedure as well. I didn't have it, so I summarized the procedure with ** screen transition **.
Recommended for people like this
・ ** People who really want to learn Python with Xcode. ・ People who want to try programming on Mac but prefer a simple language. ・ People who want to try Python because I heard rumors that it is strong in artificial intelligence.
Things necessary
・ Mac and Xcode
Prepare the development environment
1-1.
Launch Xcode and select Create a New Xcode Project.

1-2.
A screen will open, select Other> External Build System.
It's an item that you would never select if you were developing an application with Swift (laughs).

1-3.
Decide on a Product Name and enter / usr / bin / python in the Build Tool. In addition, enter something in the Organization identifier. ** Don't think about why you need to enter it ** It's better to go ahead. Think you need it to do it.

Save the created Project File to any location. (This time I saved it on my desktop)
2-1.
Select File> New> File ... at the top left of the screen to create a Python file.

2-2.
Choose Other> Empty.

2-3.
Decide on a File name and make sure that Targets contains Check. Don't forget the extension (.py).

Make sure that the file you created is added in the upper left.

3-1.
From here it gets a little confusing.
Select Product> Scheme> Edit Scheme.

3-2.
Select Run> info> Executable> Other.

3-3.
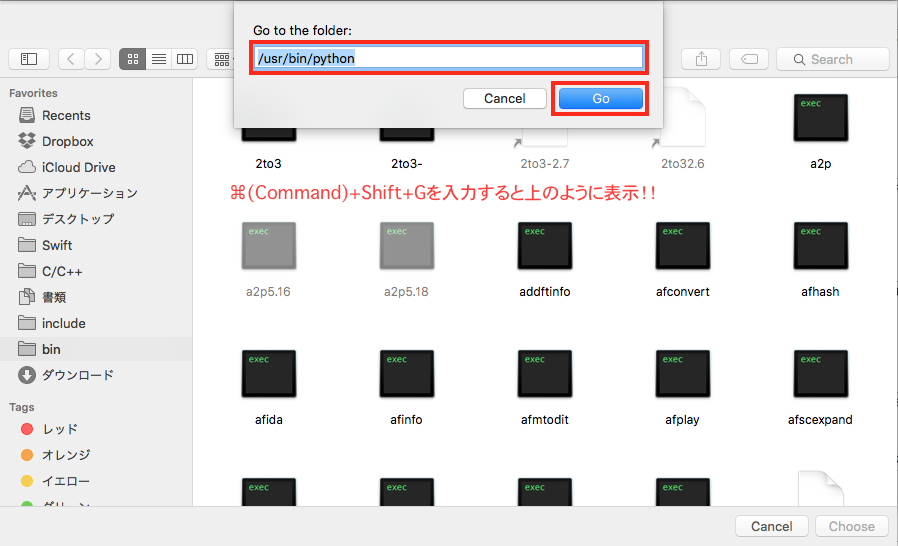
** Enter Command + Shift + G on your keyboard. ** Then, Go to the folder: will be displayed. Enter / usr / bin / python and press Go.
3-4.
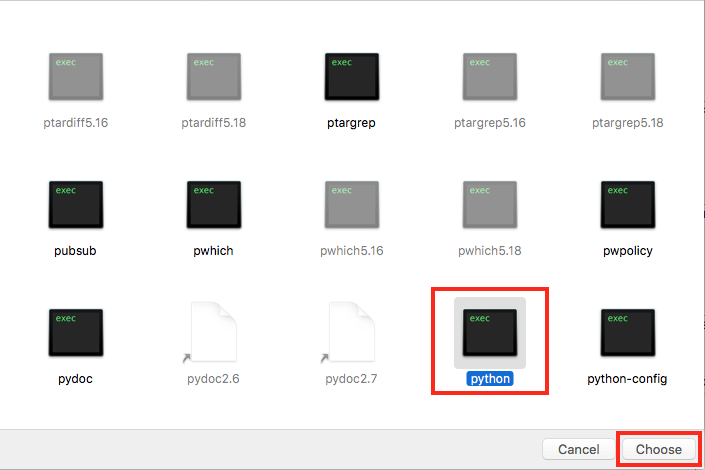
Make sure Python is selected in light gray, then select Choose.
3-5.
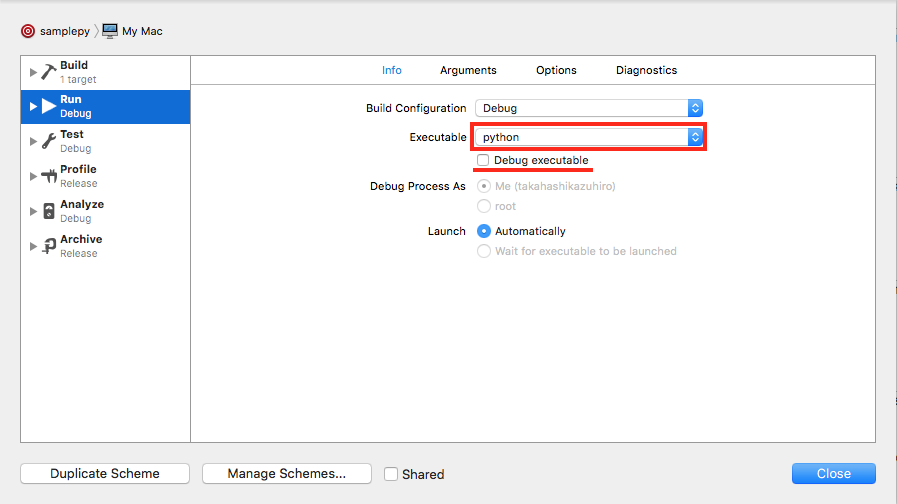
After confirming that python is displayed in Executable, uncheck Debug executable. Do not press Close at the bottom right of the screen yet.
3-6.
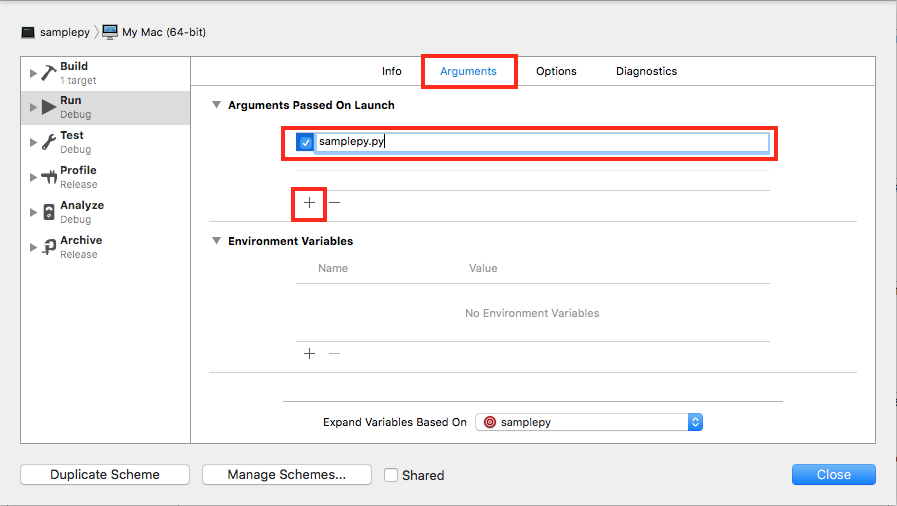
Arguments> +> Enter the name of the created file.
3-7.
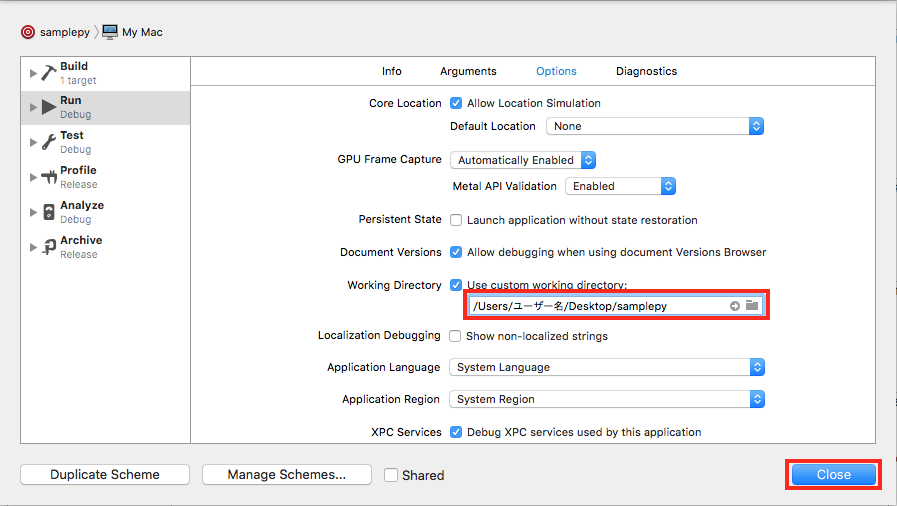
Click the Options> Working Directory> Folder icon.

Select the created Project File.

3-8.
When you select Project File, confirm that it is displayed like an image (your user name is displayed for the part labeled as user name), and press Close.
4. In the created file,
print "Hello, World!!"
When I enter and execute it ...
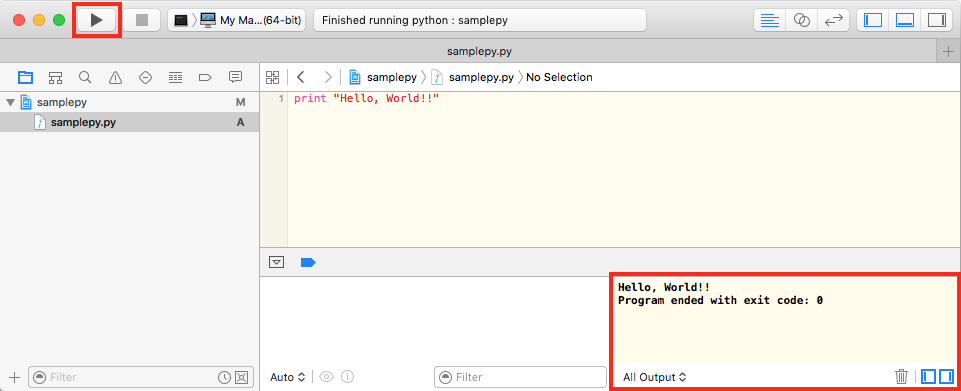
** Displayed safely! !! ** **
** * Supplement **
If you see the screen below instead of Hello, World !! when you run it, review the Product settings.

that's all. This time it was Python, but if you do the same in other languages, it seems that you can run it in Xcode (I haven't tried it, I'm sorry).
Postscript 2019.3.9
The UI of Xcode may have changed a little, but I confirmed that it can be created by following the same procedure. At that time, it's a mystery why I tried to run Python in Xcode so far. Maybe I didn't know the existence of Jupyter. I think it's definitely easier to install Anaconda.
Recommended Posts