[JAVA] The road to Web service creation (Part 2)
Last synopsis
We talked about the process of creating a Web service and the outline of the service outline. For more information, click here "The Road to Web Service Creation (Part 1)".
Contents of this time
This time, I will post the work of building the server environment. The work contents are as follows. ・ OS installation -JDK installation -Installation of tomcat and Apache httpd and automatic start setting ・ Web application manager settings for easy deployment to tomcat ・ Cooperation between tomcat and Apache httpd Allow processing to be handed over to tomcat by accessing Apache
Why did you choose Apache instead of the trendy Nginx? That's because I thought Apache was preferable as a result of considering the service content and functions this time. Nginx seems to have been created to solve Apache's C10K problem, but this service is not a service that can be accessed by 10,000 people at the same time. And although event-driven Nginx consumes less memory and processes faster, it doesn't have many features from the beginning. This is because Apache has abundant functions as a Web server from the beginning, so I thought it would be easy for me, who is inexperienced, to build it without the work man-hours.
Environment
OS installation
Follow the steps in the link above to install CentOS on VMware. I usually use CentOS as the main OS. It may be Ubuntu if it is popular, but since Linux is used only for server purposes in the first place, GUI is not used mainly. Therefore, I don't find Ubuntu attractive. Also, I feel uneasy about Ubuntu, which is updated frequently. CentOS is a stable RHEL clone and is frequently used by companies for enterprise use, so I want to get used to it for the future. However, the main reason is that it is the easiest to use with RHEL in the field.
JDK installation
# yum -y install java-1.8.0-openjdk java-1.8.0-openjdk-devel
tomcat user created
Create a dedicated user for tomcat for security without creating a login shell
# useradd -s /sbin/nologin tomcat
download tomcat
# cd /opt
# wget http://ftp.riken.jp/net/apache/tomcat/tomcat-9/v9.0.8/bin/apache-tomcat-9.0.8.tar.gz
You can install it with yum, but tomcat7 is installed by default. You can install the latest version by editing the yum repository, but it's a hassle, so download the package directly and unpack it.
Deploy tomcat
# tar -xvzf apache-tomcat-9.0.8.tar.gz
Create symbolic links
Manage tomcat directory with symbolic links in consideration of version change
# ln -s /opt/apache-tomcat-9.0.8 /opt/tomcat
Setting environment variables
Added the following contents
# vi /etc/profile
export JAVA_HOME=/usr/lib/jvm/java-1.8.0-openjdk-1.8.0.171-8.b10.el7_5.x86_64
export JRE_HOME=/usr/lib/jvm/java-1.8.0-openjdk-1.8.0.171-8.b10.el7_5.x86_64/jre
export CATALINA_HOME=/opt/tomcat
Reflect
# source /etc/profile
Reflection confirmation
# /opt/tomcat/bin/version.sh

Using CATALINA_BASE:   /opt/tomcat
Using CATALINA_HOME:   /opt/tomcat
Using CATALINA_TMPDIR: /opt/tomcat/temp
Using JRE_HOME:        /usr/lib/jvm/java-1.8.0-openjdk-1.8.0.171-8.b10.el7_5.x86_64/jre
Using CLASSPATH:       /opt/tomcat/bin/bootstrap.jar:/opt/tomcat/bin/tomcat-juli.jar
Server version: Apache Tomcat/9.0.8
Server built:   Apr 27 2018 19:32:00 UTC
Server number:  9.0.8.0
OS Name:        Linux
OS Version:     3.10.0-693.el7.x86_64
Architecture:   amd64
JVM Version:    1.8.0_171-b10
JVM Vendor:     Oracle Corporation
firewall settings
Check the current settings
# firewall-cmd --list-services --zone=public --permanent

ssh dhcpv6-client
Add tomcat here
Service addition Create a new file and add the following contents
# vi /etc/firewalld/services/tomcat.xml
Reflect the settings
# firewall-cmd --add-service=tomcat --zone=public --permanent
# firewall-cmd --reload
Verification
# firewall-cmd --list-services --zone=public --permanent
ssh dhcpv6-client tomcat
SELinux disabled
Changed SELINUX to disabled
# vi /etc/selinux/config
# This file controls the state of SELinux on the system.
# SELINUX= can take one of these three values:
#     enforcing - SELinux security policy is enforced.
#     permissive - SELinux prints warnings instead of enforcing.
#     disabled - No SELinux policy is loaded.
SELINUX=disabled
# SELINUXTYPE= can take one of three two values:
#     targeted - Targeted processes are protected,
#     minimum - Modification of targeted policy. Only selected processes are protected.
#     mls - Multi Level Security protection.
SELINUXTYPE=targeted
Reboot
# reboot
Check settings after restarting
# getenforce
  Disabled
start tomcat
# /opt/tomcat/bin/startup.sh
Using CATALINA_BASE:   /opt/tomcat
Using CATALINA_HOME:   /opt/tomcat
Using CATALINA_TMPDIR: /opt/tomcat/temp
Using JRE_HOME:        /usr/lib/jvm/java-1.8.0-openjdk-1.8.0.171-8.b10.el7_5.x86_64/jre
Using CLASSPATH:       /opt/tomcat/bin/bootstrap.jar:/opt/tomcat/bin/tomcat-juli.jar
Tomcat started.
Confirm startup even in the browser
http://localhost:8080

tomcat auto start setting
Create tomcat service file with new file
# vi /etc/systemd/system/tomcat.service
[Unit] Description=Apache Tomcat 9 After=network.target
[Service] User=tomcat Group=tomcat Type=oneshot PIDFile=/opt/tomcat/tomcat.pid RemainAfterExit=yes
ExecStart=/opt/tomcat/bin/startup.sh ExecStop=/opt/tomcat/bin/shutdown.sh ExecReStart=/opt/tomcat/bin/shutdown.sh;/opt/tomcat/bin/startup.sh
[Install] WantedBy=multi-user.target
Reflect
systemctl daemon-reload
Auto start enabled
systemctl enable tomcat
user, group changed to tomcat
chown -R tomcat:tomcat /opt/tomcat
Confirmation of automatic startup
reboot
Check the status after restarting. Must be active.
systemctl status tomcat
● tomcat.service - Apache Tomcat 9 Loaded: loaded (/etc/systemd/system/tomcat.service; enabled; vendor preset: disabled) Active: active (exited)
 Just in case, check the display with a pc browser
 http://[IPアドレス]:8080

### Web application manager settings
 Enable the GUI to deploy and manage web applications.
 Add the following description to the file. * XXXX is the administrator name and path you want to set


#### **`# vi /opt/tomcat/conf/tomcat-users.xml `**
```xml
Allows access from external terminals. Currently, it can only be accessed from localhost, so modify the allow setting.
# vi /opt/tomcat/webapps/manager/META-INF/context.xml
Reboot and reflect the settings
systemctl restart tomcat
Access from the outside
http://IPアドレス:8080/manager/html
[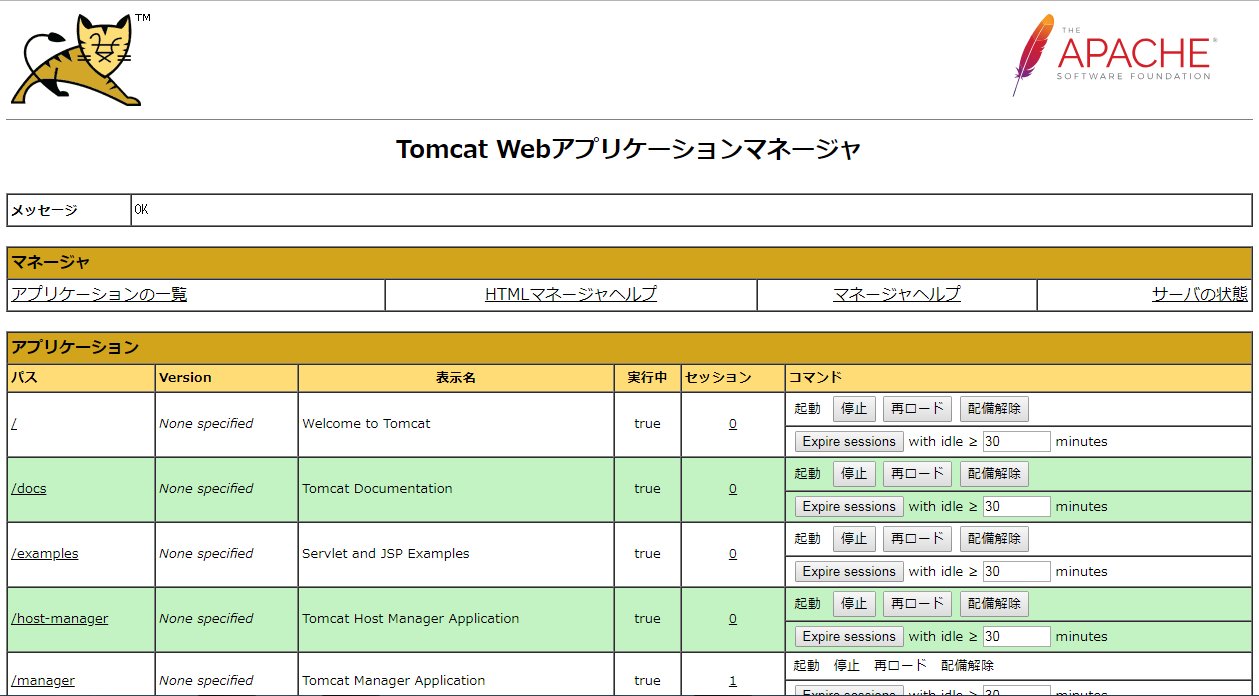](https://gyazo.com/fd312f8dc485aa6a6e44b7270cc5b0a7)
If it is displayed safely, it is OK
### Apache httpd installation and configuration
Installation
yum install httpd
Verification
httpd -version
Server version: Apache/2.4.6 (CentOS) Server built: Apr 20 2018 18:10:38
firewall settings
firewall-cmd --add-service=http --permanent
firewall-cmd --reload
Apache autostart settings
systemctl enable httpd
 Check settings
 Make sure it is enabled
systemctl status httpd
● httpd.service - The Apache HTTP Server Loaded: loaded (/usr/lib/systemd/system/httpd.service; enabled; vendor preset: disabled) Active: inactive (dead)
 Service start confirmation
 Check the status after reboot
systemctl status httpd
● httpd.service - The Apache HTTP Server Loaded: loaded (/usr/lib/systemd/system/httpd.service; enabled; vendor preset: disabled) Active: active (running)
### Cooperation between apache and tomcat using AJP protocol

 Make sure you have AJP protocol settings


#### **`# view /opt/tomcat/conf/server.xml`**
```xml
Module enable setting Check the following two modules. If it is commented, take a comment.
# vi /etc/httpd/conf.modules.d/00-proxy.conf
LoadModule proxy_module modules/mod_proxy.so LoadModule proxy_ajp_module modules/mod_proxy_ajp.so
With this alone, I just enabled it, so I added a setting to pass all Apache httpd requests to tomcat.
ProxyPass / ajp://localhost:8009/
Restart Apache httpd and confirm the startup
systemctl restart httpd
[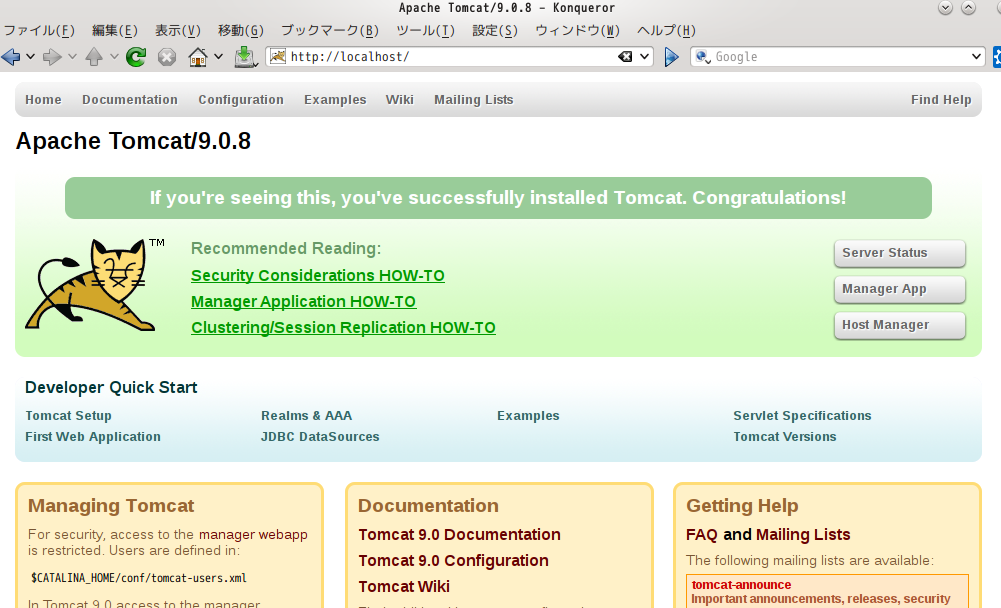](https://gyazo.com/2fe182fbafc4bd9b07cbbe83609221ed)
Confirm that it is passed from Apache httpd and tomcat can be started without setting the port to 8080
For this work, the external access of tomcat's web application manager was the key point. Most of the settings files were stored in the wrong place, but I consulted with my experienced boss and finally solved it.
This completes the server-side environment construction. Regarding the database, table design is also involved, so we will do it collectively at the time of java development.
Next time, I will post the work around html and Bootstrap together.
Recommended Posts