Put OpenCV in OS X with Homebrew and input / output video with python
I wanted to move OpenCV a little, so I tried installing it on a mac, so I got stuck, so it is an article until I display the AVI file instead of a memorandum and save it.
What to do in this article
- Introduce OpenCV to OS X Mavericks using Homebrew
- OpenCV2 + Read and save AVI file with Python
What you don't understand in this article
- How to install Homebrew
Installation
Keep Homebrew up to date.
The python environment seems to be incompatible with opencv installation via Homebrew in the case of the environment where the version of pyenv is switched, and the compilation did not pass.
I gave up on pyenv and installed python from Homebrew. OpenCV is not provided in the default Homebrew, so you need to install the library for computer science.
Reference 1: How to install OpenCV with Homebrew
Well then, I would like to install it, but before installing OpenCV, I will install this and that for handling videos. If you don't do this, the still image is fine, but I'm having trouble processing the video with an error.
Reference 2: Building an OpenCV + Python environment with virtualenvwrapper (2) Reference 3: [How to install FFmpeg and make WebM videos on Mac OS X](http://kujirahand.com/blog/index.php?Mac+OS+X%E3%81%A7FFmpeg%E3%81%AE% E3% 82% A4% E3% 83% B3% E3% 82% B9% E3% 83% 88% E3% 83% BC% E3% 83% AB% E3% 81% A8WebM% E5% 8B% 95% E7% 94% BB% E3% 81% AE% E4% BD% 9C% E3% 82% 8A% E6% 96% B9)
If you start from the place where python is not included, it will be as follows. If numpy is not included, OpenCV installation may fail, so I included it first.
There may be a little excess around ffmpeg. For the time being, I don't like OpenCV if an error occurs later, so I've listed all the options.
$ brew tap homebrew/science
$ brew install python
$ pip install numpy
$ brew install cmake automake celt faac fdk-aac git lame libass libtool libvorbis libvpx libvo-aacenc opencore-amr openjpeg opus sdl schroedinger shtool speex texi2html theora wget x264 xvid yasm
$ brew install ffmpeg --with-fdk-aac --with-libvo-aacenc --with-libvorbis --with-libvpx --with-openjpeg --with-theora --with-opencore-amr
$ brew install eigen
$ brew install jasper
$ brew install tbb
$ brew install qt
$ brew install opencv --with-eigen --with-jasper --with-libtiff --with-qt --with-tbb --with-ffmpeg
It takes a long time to compile OpenCV (about 10 minutes in MacBook Air environment), but wait patiently.
Display video (AVI file)
Detailed explanation In the OpenCV sample, there is an example of reading an AVI file and displaying it with a slider (track bar) on the screen, so implement this in Python.
example2-3.py
# coding: UTF-8
import numpy as np
import cv2

#Implementation reference http://www.beechtreetech.com/opencv-exercises-in-python
#Changed to use cv2

updatelock = False #Lock flag during track bar processing
windowname = 'frame' #Window name
trackbarname = 'Position' #The name of the track bar

#Read AVI file
#avi picks up a sample of suitable length from the internet
#reference:http://www.engr.colostate.edu/me/facil/dynamics/avis.htm
cap = cv2.VideoCapture('drop.avi')

#Definition of the callback function that is called when the track bar is moved
def onTrackbarSlide(pos):
	updatelock = True
	cap.set(cv2.cv.CV_CAP_PROP_POS_FRAMES, pos)
	updatelock = False

#Define a named window
cv2.namedWindow(windowname, cv2.WINDOW_NORMAL)

#Get the number of frames in an AVI file
frames = int(cap.get(cv2.cv.CV_CAP_PROP_FRAME_COUNT))

#If the number of frames is 1 or more, set it in the track bar
if (frames > 0):
	cv2.createTrackbar(trackbarname, windowname, 0, frames, onTrackbarSlide)

#Repeat while opening the AVI file (end after reading to the last frame)
while(cap.isOpened()):

	#Do not draw while updating the track bar
	if (updatelock):
		continue

	#Read 1 frame
	ret, frame = cap.read()

	#If you can't read it, exit
	if ret == False:
		break

	#Display on screen
	cv2.imshow(windowname,frame)

	#Get the current frame number
	curpos = int(cap.get(cv2.cv.CV_CAP_PROP_POS_FRAMES))

	#Set in the track bar (callback function is called)
	cv2.setTrackbarPos(trackbarname, windowname, curpos)

	#Press q to exit
	if cv2.waitKey(1) & 0xFF == ord('q'):
		break

#Release AVI file
cap.release()

#Close Window
cv2.destroyAllWindows()
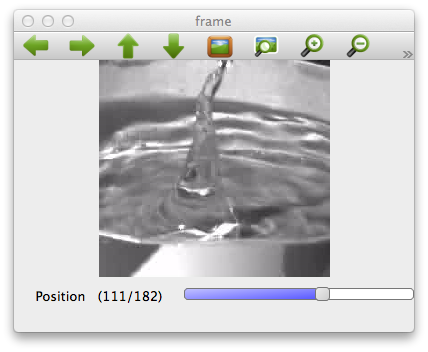
If the OpenCV installation is successful, the window will open and the video will be displayed without any error at runtime. It will end automatically when you reach the end. When you operate the track bar, the continuation will be played from that scene.

Save the camera image as a video (AVI file)
The following is a sample that uses the built-in camera of Mac to save the camera image as it is.
example_cam.py
# coding: UTF-8
import numpy as np
import cv2

#Capture designation from the camera
cap = cv2.VideoCapture(0)

#Codec specification
fourcc = cv2.cv.CV_FOURCC('m', 'p', '4', 'v')

#Specify save file, frame rate and size
out = cv2.VideoWriter('output.m4v',fourcc, 30, (640,480))

#Process all the time the camera is open
while(cap.isOpened()):

    #Extract the captured image
    ret, frame = cap.read()

    #Exit if there is no data
    if ret==False:
        break

    #Write image to file
    out.write(frame)

    #Output image to screen
    cv2.imshow('frame',frame)

    # "q"Exit when is pressed
    if cv2.waitKey(1) & 0xFF == ord('q'):
        break

#Clean up
cap.release()
out.release()
cv2.destroyAllWindows()
The image from the camera is output on the screen. At the same time, the file is being written. The output file can be read directly from the mac in m4v format, so let's see if it can be played.
Filter videos
At the end, like OpenCV, let's filter the loaded video. The original avi file is input, and the image after processing result is output information, both of which are displayed on the screen.
example2-6.py
# coding: UTF-8
import numpy as np
import cv2
import cv2.cv as cv

updatelock = False #Lock flag during track bar processing
windowname_in = 'inframe' # Window(The original image)s name
windowname_out = 'outframe' # Window(Converted image)s name
trackbarname = 'Position' #The name of the track bar

#Read AVI file
cap = cv2.VideoCapture('drop.avi')

#Definition of the callback function that is called when the track bar is moved
def onTrackbarSlide(pos):
	updatelock = True
	cap.set(cv.CV_CAP_PROP_POS_FRAMES, pos)
	updatelock = False

#Canny edge detection
def doCanny(img):
	#Convert color image to gray image
	gray = cv2.cvtColor(img, cv2.COLOR_BGR2GRAY)
	return cv2.Canny(gray, 100, 200)


#Define a named window
cv2.namedWindow(windowname_in, cv2.WINDOW_NORMAL)
cv2.namedWindow(windowname_out, cv2.CV_WINDOW_AUTOSIZE)

#Get the number of frames in an AVI file
frames = int(cap.get(cv2.cv.CV_CAP_PROP_FRAME_COUNT))

#If the number of frames is 1 or more, set it in the track bar
if (frames > 0):
	cv2.createTrackbar(trackbarname, windowname_in, 0, frames, onTrackbarSlide)

#Repeat while opening AVI file
while(cap.isOpened()):

	#Do not draw while updating the track bar
	if (updatelock):
		continue

	#Read 1 frame
	ret, frame = cap.read()

	#If you can't read it, exit
	if ret == False:
		break

	#Display on screen
	cv2.imshow(windowname_in,frame)
	cv2.imshow(windowname_out,doCanny(frame))

	#Get the current frame number
	curpos = int(cap.get(cv.CV_CAP_PROP_POS_FRAMES))

	#Set in the track bar (callback function is called)
	cv2.setTrackbarPos(trackbarname, windowname_in, curpos)

	#Press q to exit
	if cv2.waitKey(1) & 0xFF == ord('q'):
		break

#Release AVI file
cap.release()

#Close Window
cv2.destroyAllWindows()
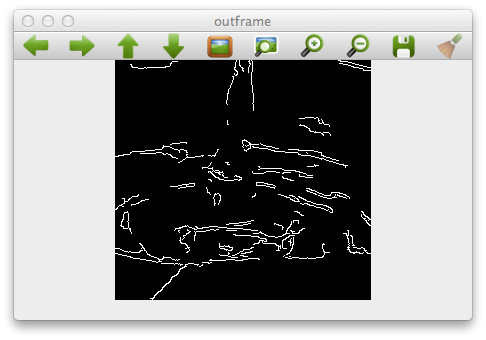
Detects the edge of the video and displays it in the outframe Window.

Summary
- OpenCV + Python is convenient for a little trial because you can easily display and process still images and videos.
- If you get stuck at the beginning of video input / output, it will be half the fun, so make sure it works.
- On the Internet, the OpenCV1 + Python sample and the OpenCV2 + Python sample are confusing (the former seems to be the most common), so be careful not to make a mistake.
Recommended Posts