Continuous integration on Alibaba Cloud ECS Ubuntu instance with Jenkins
This tutorial will show you how to use Jenkins to set up a continuous integration delivery environment on your ** Alibaba Cloud ECS ** Ubuntu instance.
- This blog is a translation from the English version. You can check the original from here. We use some machine translation. We would appreciate it if you could point out any translation errors. *
What is Alibaba Cloud's Elastic Compute Service (ECS)?
Alibaba Cloud's Elastic Compute Service (ECS) (https://www.alibabacloud.com/product/ecs?spm=a2c65.11461447.0.0.385169d8AH7djy) is simpler and more efficient than physical servers. , A resilient cloud-based server product. Create instances, add memory and storage, scale as much as you need when you need it, build complex connected VPCs in different regions, and make it an essential component of Alibaba Cloud's vast cloud products and services. You can use it.
What is Jenkins?
Jenkins is a continuous integration build tool that builds and releases application code after changes have been made to the code and pushed into the code base. Jenkins saves development time by running automated tests on your code for every change pushed to the repository. Bugs are quickly discovered and the entire team can notice build failures.
Jenkins is an open source CI tool and is just one of open source and proprietary continuous integrated build tools. Jenkins can also be used as a simple CI server, but for large projects it often acts as a central hub for continuous delivery.
Continuous integration tools solve problems related to workflow fragmentation by allowing large teams of programmers and developers to make changes to different parts of the application code at the same time. Unexpected issues are discovered incredibly quickly, allowing teams to effectively address build failures and address them before changes are added to further problems with the application. I will.
Jenkins is extensible and offers a wide range of plugins for integration with any product in the world of continuous integration and delivery.
Prerequisites
You need an Alibaba Cloud account. If you don't have it yet, go to Alibaba Cloud Free Trial Page for $ 300-1200 Get Alibaba Cloud products and play with Alibaba Cloud Free Trial.
Now, let's install Jenkins on Alibaba Cloud Ubuntu ECSs.
Build and configure Alibaba Cloud ECS instance
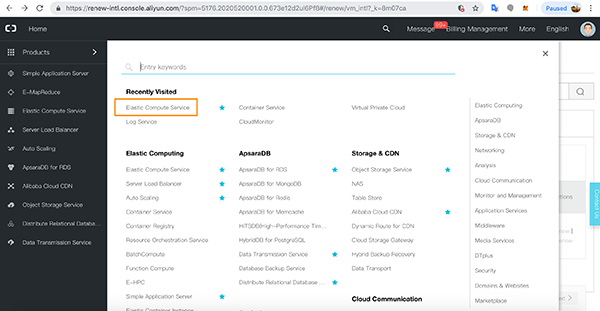
First, spin up your Alibaba Cloud ECS instance in your favorite region. Click to go to the Elastic Compute Service product page.
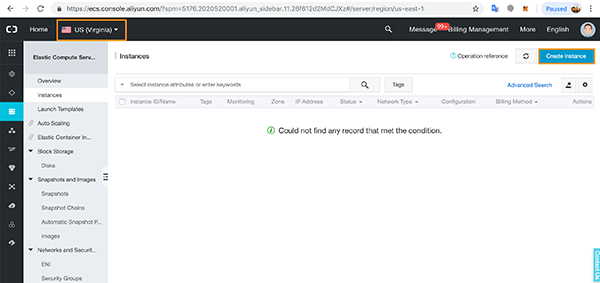
In your favorite region, click Create Instance.
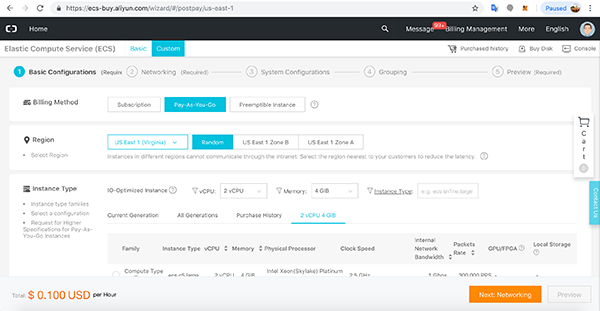
Select the basic configuration details and click Next> Networking.
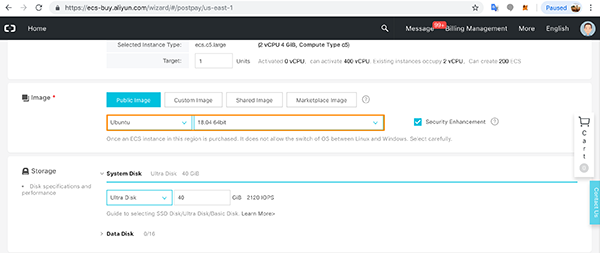
I chose the latest version of Ubuntu as the OS.
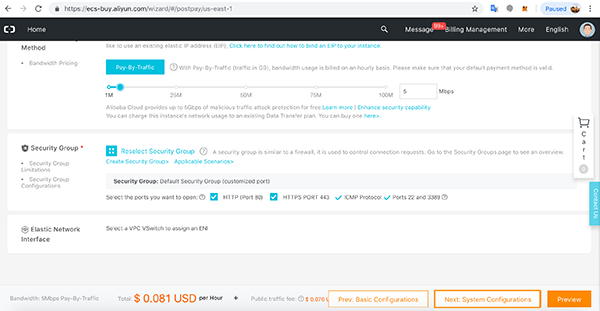
On the Networking page, assign a public IP address and open HTTP and HTTPS ports in your instance's Security Group.
When you're ready, click System Configurations.
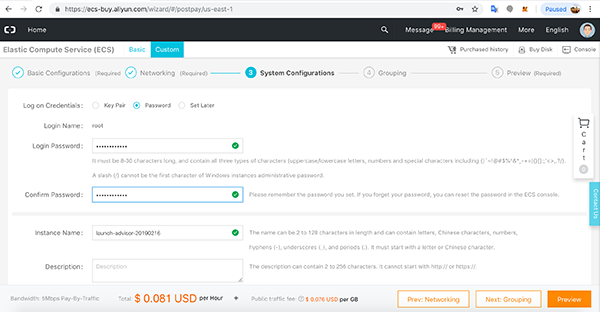
On the system settings page, set a password or key pair for root access.
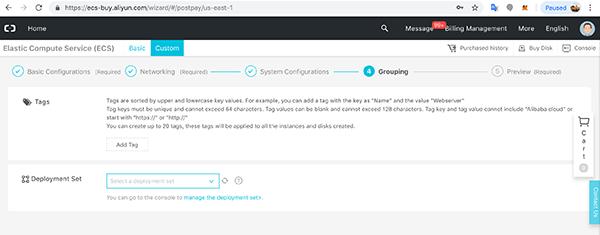
Leave the grouping as is and proceed to the preview.
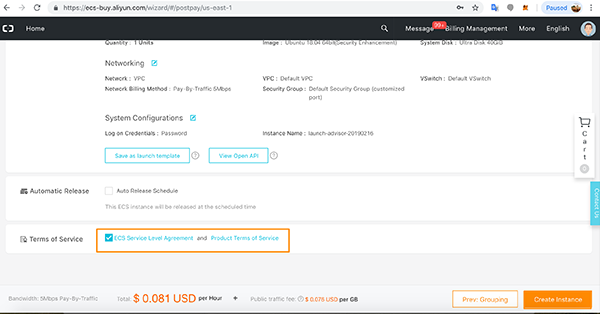
On the preview page, review all the ECS configuration details, accept the terms, and click Create Instance.
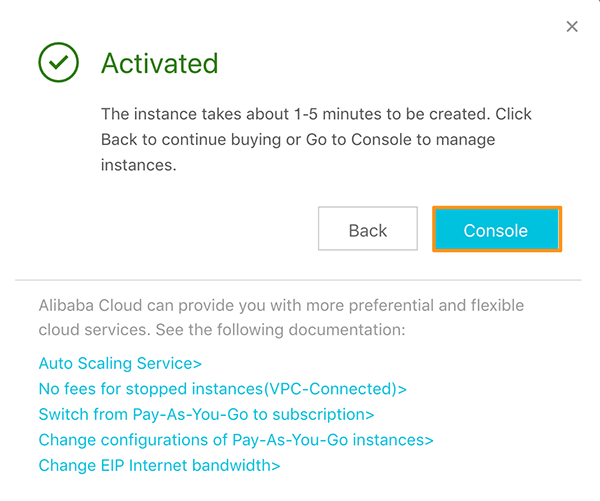
A success message is displayed. Click Return to Console.
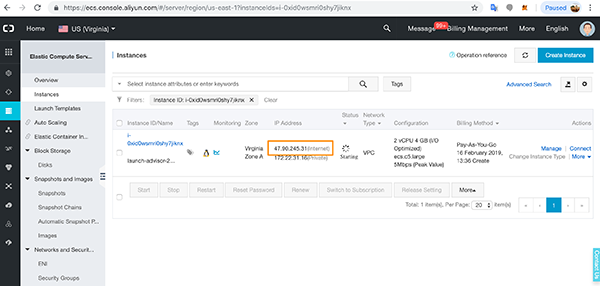
You can see that the instance is running in the instance list. Make a note of the public IP.
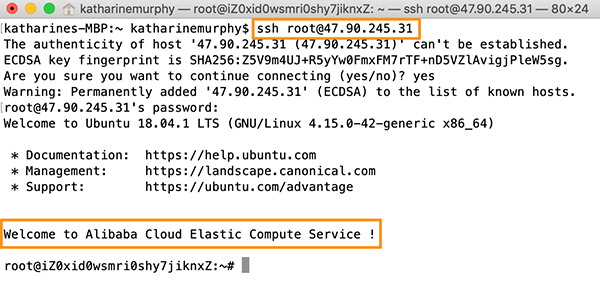
Once the instance is up, access it via ssh and install the software from the terminal.
Install Java on Ubuntu 18.04
Must be installed. Connect to the instance with ssh.
Update the instance.
apt update
Install Java 8.
apt install openjdk-8-jre-headless
Make sure that the Java Runtime Environment is installed correctly.
java -version
Then install the Java development kit.
apt install openjdk-8-jdk
Make sure the JDK is installed correctly.
java -version
Update your package now.
apt update

apt upgrade
Set the environment variable JAVA_HOME. First, check the available paths.
update-alternatives --config java
Then open the environment file and add the path variable.
nano /etc/environment

JAVA_HOME="/usr/lib/jvm/java-8-openjdk-amd64/jre/bin/“
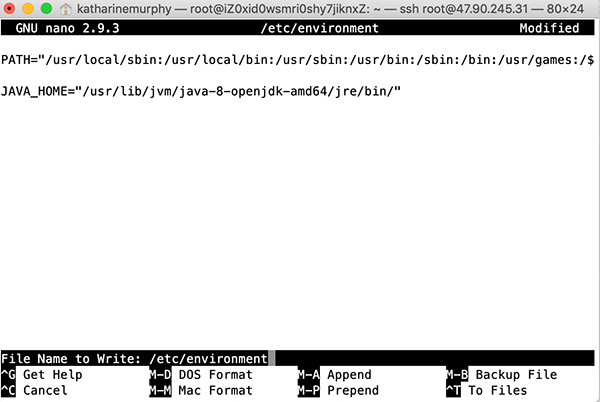
Reload the file to apply the changes.
source /etc/environment
Make sure the variables are set correctly.
echo $JAVA_HOME
Update the installation just in case.
apt update
Now you are ready to install Jenkins.
Install Jenkins on Ubuntu
Connect to the instance with ssh.
Let's create a non-root user.
adduser jenkins_user
Give the new user administrative sudo privileges.
usermod -aG sudo jenkins_user
Now add a firewall to your instance, enable it, and see if the firewall is enabled.
ufw allow OpenSSH
ufw enable
ufw status
Now you are ready to install Jenkins. First, add the repository key to the package.
wget -q -O - https://pkg.jenkins.io/debian/jenkins.io.key | sudo apt-key add –
Add the Debian package repository address to the instance's sources.list.
sudo sh -c 'echo deb http://pkg.jenkins.io/debian-stable binary/ > /etc/apt/sources.list.d/jenkins.list’
This will update and install Jenkins.
apt update
apt install jenkins
Let's start the Jenkins service and check the status.
sudo systemctl start jenkins

sudo systemctl status jenkins
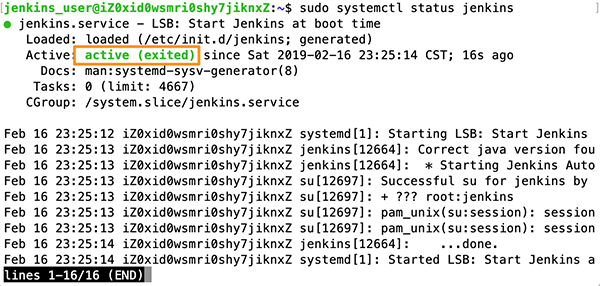
By default, Jenkins works on port 8080. Open the port with ufw and check the status.
sudo ufw allow 8080

Check the Jenkins log.
tail -f /var/log/jenkins/jenkins.log
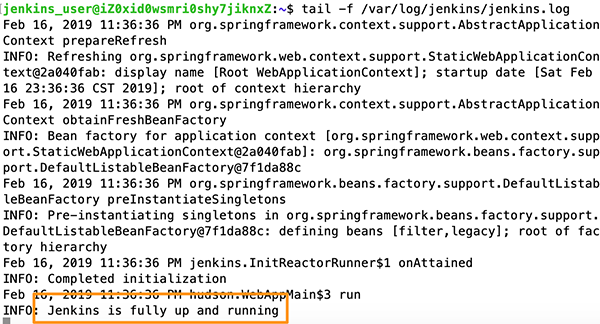
Open inbound and outbound on port 808080 in your instance's security group.

Reboot the instance. Once the instance is restarted, you will be able to access Jenkins using your public IP and port 8080. Go to your browser window and type:
http://<<Public IP Address>>:8080
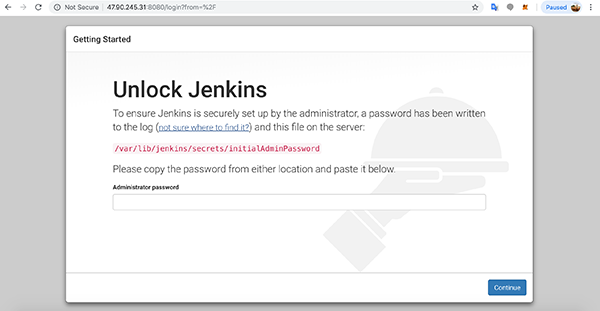
Follow the onscreen instructions to configure Jenkins.
Find and enter the administrator password.
nano /var/lib/Jenkins/secrets/initialAdminPassword

Install the suggested plugin.
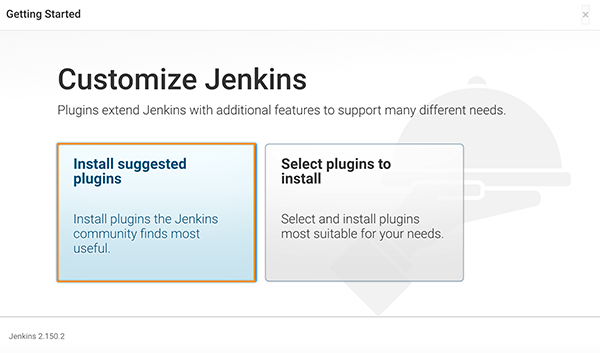
The details of the plug-in installation procedure are displayed.
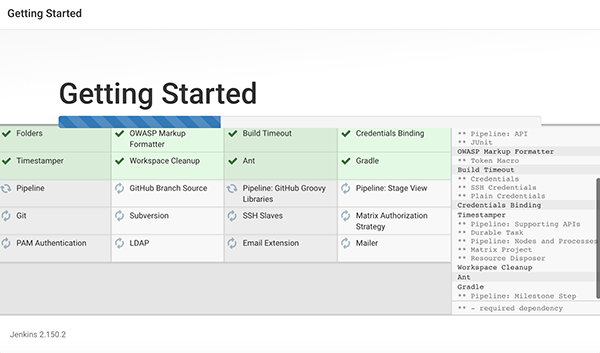
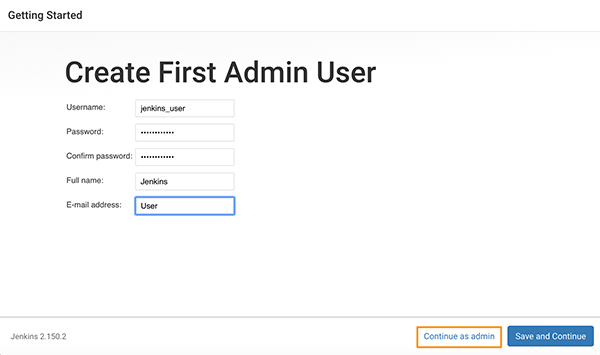
When you're done, you'll be prompted to set up a Jenkins user, but you can continue as an administrator.
This time I continued as an administrator user.
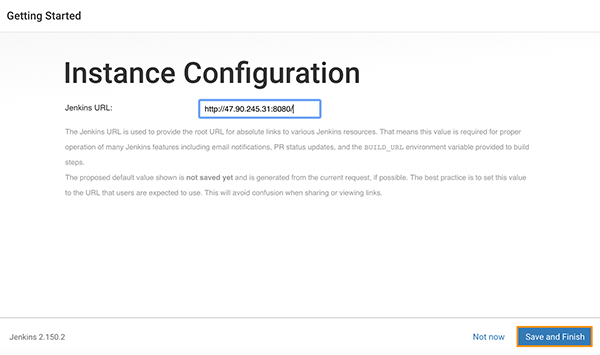
This will save the Jenkins URL.
Now you can start using Jenkins.
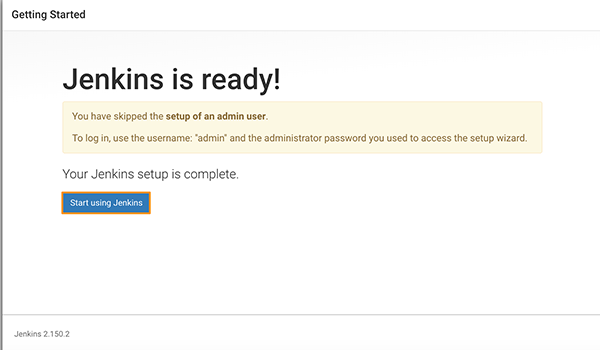
When you see a blank screen, restart Jenkins.
sudo service jenkins stop

sudo service jenkins start
You can now log in with your administrator information and start creating jobs.
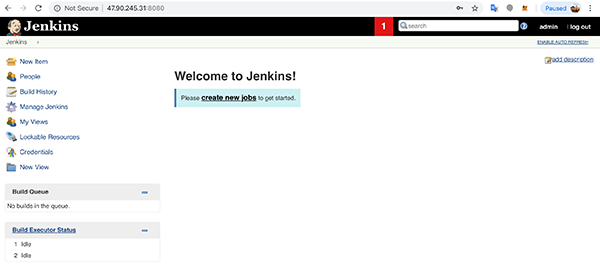
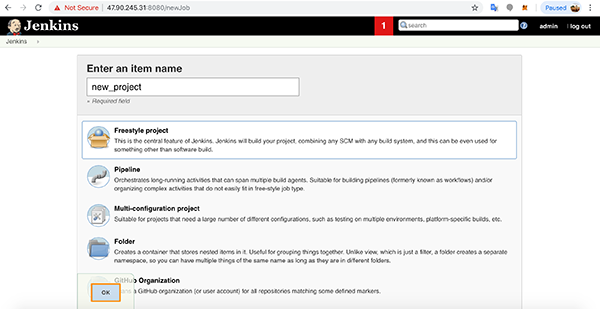
Set up Jenkins to manage project releases.
Overview
In summary, we talked about Alibaba Cloud's Elastic Compute Service (https://www.alibabacloud.com/product/ecs?spm=a2c65.11461447.0.0.385169d8AH7djy) (ECS) and Jenkins' continuous integration building tools. .. I told you how to create an Ubuntu 18.04 instance of ECS, how to log in with ssh, and how to install Java and Jenkins. Finally, I confirmed that Jenkins was installed correctly via the browser window and made the initial settings.
今後もアリババクラウドの製品やサービスに関するチュートリアルは、www.alibabacloud.com/blog
- Alibaba Cloud is the No. 1 (2019 Gartner) cloud infrastructure operator in the Asia Pacific region with two data centers in Japan and more than 60 availability zones in the world. Click here for more information on Alibaba Cloud. Alibaba Cloud Japan Official Page *
Recommended Posts