Preparation for scraping with python [Chocolate flavor]
Chocolatey installation
First of all, it is too troublesome without Chocolatey, so install it. If you have already installed it, skip it.
Start powershell with administrator privileges.
Try running choco before installing.
Administrator's-Powershell
$> choco
choco :the term'choco'Is not recognized as the name of a cmdlet, function, script file, or operable program. Make sure the name is written correctly and if the path is included, its pa
Make sure it is correct and try again.
Location line:One character:1
+ choco
+ ~~~
    + CategoryInfo          : ObjectNotFound: (choco:String) [], CommandNotFoundException
    + FullyQualifiedErrorId : CommandNotFoundException
You can see that it is not installed.
Then execute the following installation command.
Administrator's-Powershell
Set-ExecutionPolicy Bypass -Scope Process -Force; [System.Net.ServicePointManager]::SecurityProtocol = [System.Net.ServicePointManager]::SecurityProtocol -bor 3072; iex ((New-Object System.Net.WebClient).DownloadString('https://chocolatey.org/install.ps1'))
Note: Look for new installation commands in "Installing Chocolatey".
Reopen powershell with administrator privileges.
Run choco again to see the version and how to get the help menu.
Administrator's-Powershell
$> choco
Chocolatey v0.10.15
Please run 'choco -?' or 'choco <command> -?' for help menu.
When you reach this point, proceed to the next.
Visual Studio Code installation
Start powershell with administrator privileges. Execute the following command.
Administrator's-Powershell
choco install vscode
If you execute two commands, refreshenv and code, vscode will open.
Visual Studio Code Extension Pack installation
Install the following two install extensions. I've listed only the required extensions. Recommended extensions are not mentioned here.
- Japanese Language Pack for Visual Studio Code --Used to display the UI in Japanese.
- Python --This is required to debug Python.
Recommended extension settings
If you create .vscode/extentions.json as follows, you can save a lot of installation trouble.
Besides, it is easy to share on Github.
json-doc:.vscode/extentions.json
{
	// See https://go.microsoft.com/fwlink/?LinkId=827846 to learn about workspace recommendations.
	// Extension identifier format: ${publisher}.${name}. Example: vscode.csharp

	// List of extensions which should be recommended for users of this workspace.
	"recommendations": [
		"coenraads.bracket-pair-colorizer-2",
		"github.vscode-pull-request-github",
		"ms-python.python",
		"mechatroner.rainbow-csv",
	],
	// List of extensions recommended by VS Code that should not be recommended for users of this workspace.
	"unwantedRecommendations": [

	]
}
Miniconda3 installation
Start powershell with administrator privileges Execute the following command.
Administrator's-Powershell
choco install miniconda3
In the start menu Anaconda Powershell Prompt (miniconda3) If there is, it is a success.
Create virtual environment
In the start menu Anaconda Powershell Prompt (miniconda3) There should be, so start it. Execute the following command to create a virtual environment.
Anaconda-Powershell-Prompt-(miniconda3)
conda create --name scraping-env-name
Note: See Command Reference for command details (https://docs.conda.io/projects/conda/en/latest/commands.html) Note: scraping-env-name is a placeholder.
At this point, if you open the file with the extension .py with VS Code, you can select the virtual environment you just created.

Virtual environment activation
Anaconda-Powershell-Prompt-(miniconda3)
conda activate scraping-env-name
Note: See Command Reference for command details (https://docs.conda.io/projects/conda/en/latest/commands.html)
Add conda-forge as a channel
For example, in the same library called numpy, which repository channel does numpy use? That becomes a problem.
By default, it's from the anaconda channel, but I like conda-forge, so I'll switch to this.
Added conda-forge to the repository channel
Anaconda-Powershell-Prompt-(miniconda3)
conda config --add channels conda-forge
conda config --set channel_priority strict
Library package installation
Execute the following command with the virtual environment you want to use for development activated. The library will be installed in a blank virtual environment.
Anaconda-Powershell-Prompt-(miniconda3)
conda install python lxml beautifulsoup4 selenium pylint yapf
python
Without this nothing will start. Python. 3 series will be installed.
lxml
A parser library for working with xml and html.
beautifulsoup4
beautifulsoup is a wrapper library that wraps the parser to make it easier to use.
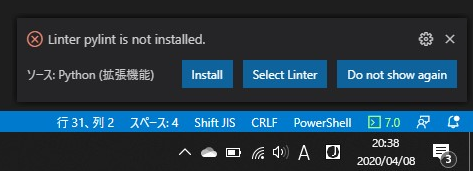
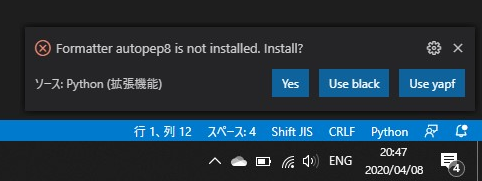
A character named Mock Turtle sings at ʻAlice in Wonderland It seems thatbeautiful Soup!Appears frequently inTurtle Soup. selenium [Selenium](https://www.selenium.dev/) is a browser automation tool, a library of the same name for working with it. pylint Be careful of VScode linter, so put it in advance.  yapf Be careful when selecting "Format Document" from the right-click menu of VScode, so enter it in advance.  You will be asked, "I don't have a formatter called ʻautopep8, can I put it in?"
However, I'm a boy who loves Google, so I'll put in yapf.
This is the decision! 3 strongest automatic code formatting tools!
Even if the library installation is in no particular order
By the way, the order in which the libraries are installed does not matter. Rest assured that library dependencies will be resolved automatically.
Installing WebDriver
Selenium will automatically operate your browser. I want to operate Chrome automatically, so install the Chrome driver. At this time, you do not need to install Google Chrome.
Administrator's-Powershell
choco install selenium-chrome-driver
- For other WebDrivers, see this Quick Reference.
Workspace settings
If you go through all the settings up to this point, you should see the workspace settings as follows.
json-doc:.vscode/settings.json
{
    "python.pythonPath": "C:\\tools\\miniconda3\\envs\\scraping-env-name\\python.exe",
    "python.formatting.provider": "yapf"
}
I just installed the formatter yapf.
If you want to switch to ʻautopep8 or black` later, you can switch here.

miniconda path
If you install miniconda3 using chocolatey, when you run the program
conda: The term 'conda' is not recognized as the name of a cmdlet, function, script file, or operable program. Check the spelling of the name, or if a path was included, verify that the path is correct and try again.
Message is displayed. There is no problem with the operation as it is, but I am worried about it, so set it properly.
Add " python.condaPath": "C: \\ tools \\ miniconda3 \\ Scripts" to the configuration file .vscode / settings.json
json-doc:.vscode/settings.json
{
    "python.pythonPath": "C:\\tools\\miniconda3\\envs\\scraping-env-name\\python.exe",
    "python.formatting.provider": "yapf",
    "python.condaPath": "C:\\tools\\miniconda3\\Scripts"
}
have become.
Operation check
For the time being, write a code like this.
If you press the F5 key and there is no error message, you are ready to go.
test001.py
import lxml
from bs4 import BeautifulSoup

from selenium.webdriver import Chrome, ChromeOptions
from selenium.webdriver.common.keys import Keys

options = ChromeOptions()
# options.add_argument('--headless')
driver = Chrome(options=options)
Firewall settings
The first time you run a Python program, the firewall blocks Python.
Check the current Internet connection settings in advance, and select either private or public.
After making your selection, click "Allow access".
 This will create a firewall rule,
Python in this virtual environment will not be blocked and will be able to communicate normally.
If you make a mistake, you can check and change it with wf.msc.

Or you can do it from "Allowed apps". "Control Panel \ All Control Panel Items \ Windows Defender Firewall \ Allowed Apps"
Or, I think you can make full use of Get-NetFirewallRule, New-NetFirewallRule, and Set-NetFirewallRule.
Well then
Aim to be a wonderful scraping master
Excelsior!
Reference material
https://docs.conda.io/projects/conda/en/latest/commands.html
Recommended Posts