[Java] Let's create a mod for Minecraft 1.14.4 [Introduction]
TL;DR ・ I want to make something with a feeling of "** moving **" ・ Let's try the popular game ** Minecraft MOD Creation ! ・ ** Surprisingly easy ** Graphical ones are created, so it's perfect! ・ Let's actually make a tutorial ・ I want the neighborhood to become more exciting ( urgent **)
(This article is an introduction to a series of commentary articles)
Introduction
Hello everyone! Do you enjoy writing code? Congratulations to those who have fun writing! great! Not so much ... Welcome to all of you! Please read the article and find new excitement.
From now on, I would like to introduce the mod creation of Minecraft, which is a very popular game that is known in a series of articles.
Needless to say, unknown people
A game where you can survive, build buildings, and live freely in a world composed of cubic blocks. Developed by Mojang. ([Official](https://www.minecraft.net/ja-jp/about-minecraft))
What is a mod?
Abbreviation for Modification. Mod. Remodeling data mainly used in PC games. Remodeling in Japanese may give you the impression that you want to blame it, but it is a more popular culture overseas [citation needed] as it encourages users to participate in the game. Please be assured that the use of mods is [officially permitted](https://www.minecraft.net/ja-jp/terms/r3/#4-minecraft-java-edition) in Minecraft.
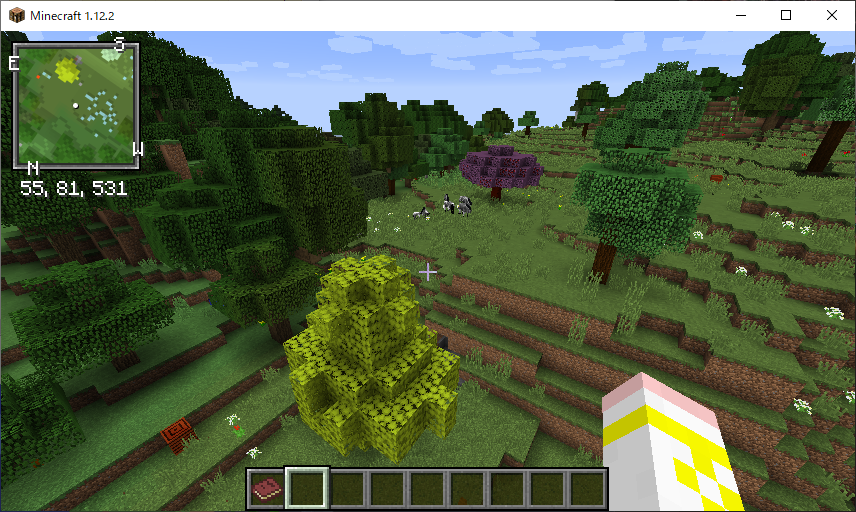
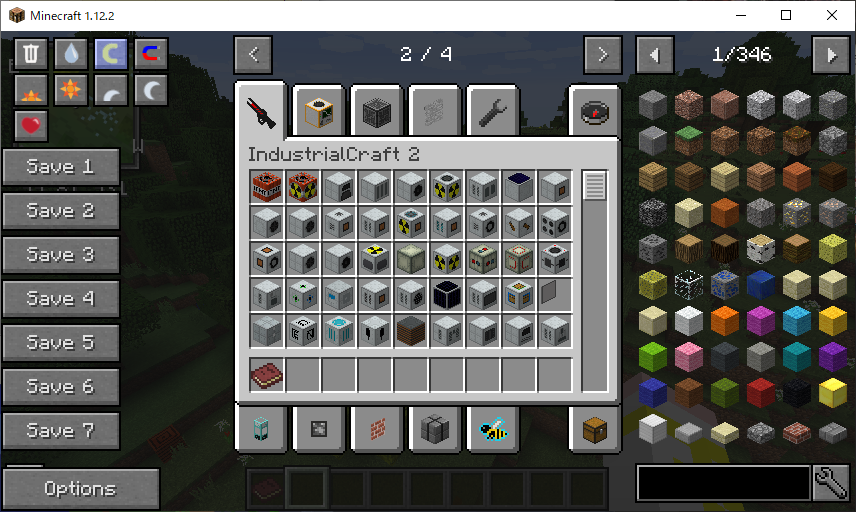 ** New ones are increasing due to various mods **
Some people may find it difficult to make a game ... **, but in reality, creating a mod is "introducing something that works on the game", so we don't make a game * * It's not as difficult as you think **. I think it's important to touch it first without being prepared.
Also, in this article, I will try to write gently for beginners (please feel free to ask questions if you have any questions!).
The goal is to create a tutorial mod for the first time from 0 and actually introduce it to Minecraft. The goal is to be able to see what to do for the mod you want to make when you're done.
Finally, before moving on to the explanation, I would like to mention a few important points.
First of all, when working on Modding from now on, ** Be sure to check your development environment and the version of Minecraft itself and Minecraft Forge (described later) of the site you refer to **. Different versions have (sometimes significantly) different implementations. Unfortunately, all I can share here is the knowledge of modding in one not-so-new version. Unless you have a clear goal, we recommend this because adapting to the environment in this article will avoid unnecessary troubles.
Secondly, I'm sorry to remove the ladder, but unfortunately, the current situation ** Minecraft's modding reference materials are far from complete **. Especially ** There is almost no Japanese material **. Therefore, it may be difficult to find what you want to know. I will write tips for such cases in another article, but since problem-solving ability is also an engineer's background, please do your best. And hopefully (including this article) ** Please keep a record of your findings! ** Even if you treat the same thing, it's worth reprinting in your own words. It will help someone someday.
And thirdly, I am a beginner in Java, so please understand that it may be inaccurate in terms of language.
The introduction has become long, but let's start modding from the next section!
Environment
environment
First, let's prepare a development environment. This article uses the following versions of the tools.
tool / library
version
OS
Winsows 10 Home
JDK
8u212
Minecraft
1.14.4
Minecraft Forge
1.14.4 (28.1.0)
InteliJ IDEA
2020.1.3 (CE)
Each one uses a fairly old version, including the version of Minecraft, because it was done in the same environment as the reference article. You can use a newer version if you need to (if you're confident), but you'll have to deal with compatibility issues yourself. Also, please read the article on the assumption that some or all of the following descriptions do not apply.
JDK (Java Development Kit)
Minecraft (Java edition) runs on Java, so you need a Java development environment.
After agreeing to the terms, download from here.
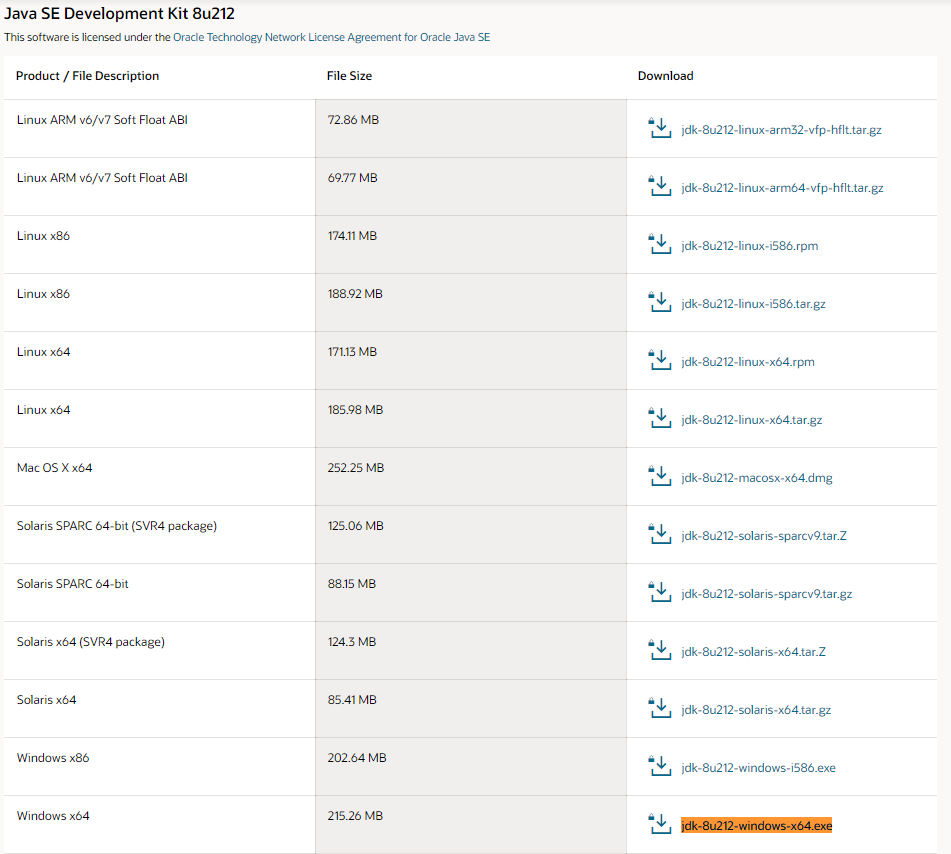 (It's quite down)
However, you need ** Oracle profile (account) ** to download, so if you don't have it (or maybe not), create one. ~~ Men d ~~
When registering, you will be asked to enter the company name and department, but if you are a student, you can use "student" for the department / job title, the school name for the company name, and the school address for the address.
Execute the downloaded exe to install it.
InteliJ IDEA
Next, get the integrated development environment.
After agreeing to the terms, download from here. 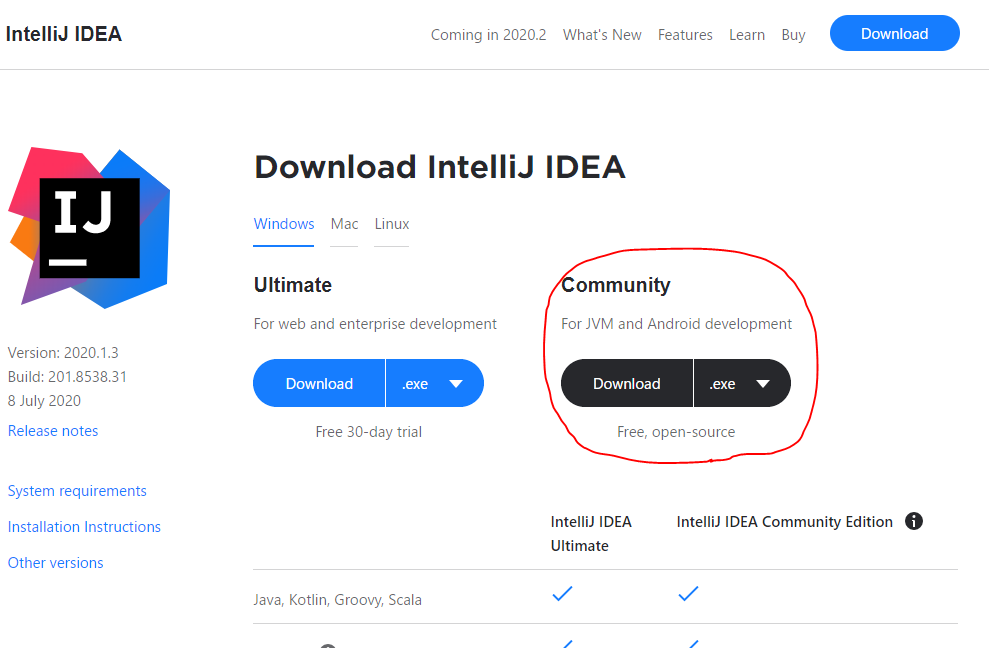
Execute the downloaded exe to install it.
I can't get a detailed screen because it's a hassle to install again (sorry), but basically nothing needs to be changed.
The initial setting screen will appear at the first startup, but this is also appropriate and okay. You may want to turn off the provision of data for improving functions.
Also, since the language is English by default, let's translate it into Japanese if necessary (→ Reference article). After that, I will proceed with the story as it has been translated into Japanese.
Minecraft Forge MDK
Finally, get the Minecraft Forge Development Kit, the de facto standard prerequisite mod in the Minecraft mod neighborhood. Forge is an API that comprehensively provides various functions used when developing and introducing mods.
After agreeing to the terms, download from here.
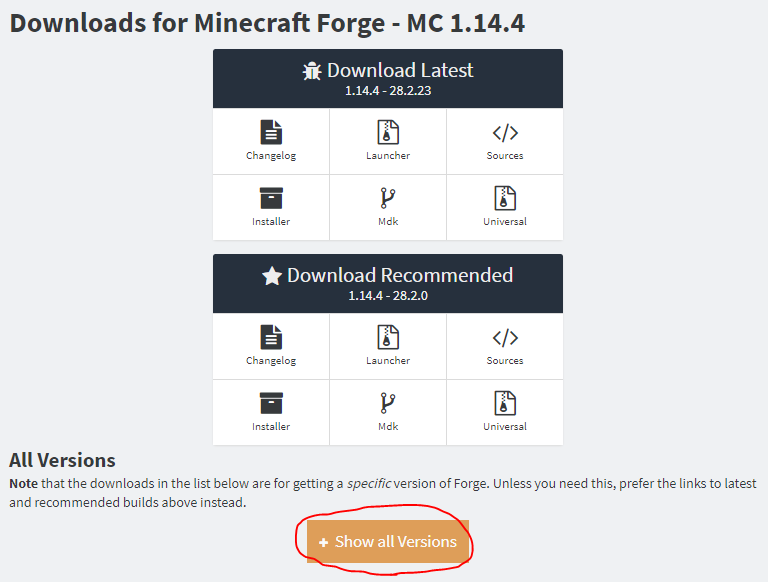 I think it's okay (or better) to be Recommended, but as mentioned above, I'll match the version to the reference article. Click Show all Versions at the bottom to expand it.
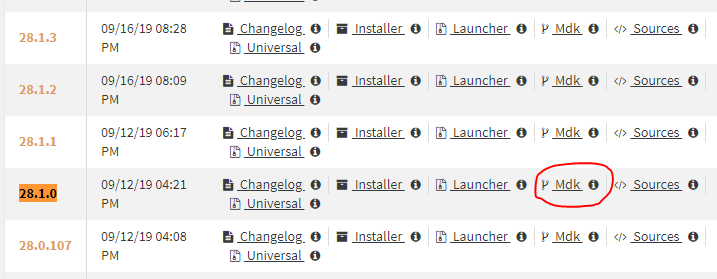 Download the relevant Mdk. Extract the downloaded Zip file.
Create a project folder anywhere (for example, D: \ projects \ mc_example_mod, then replace the path as needed).
Copy the following items from the Forge folder you just extracted to the project folder. (You can copy or rename the expanded folder and use it as it is. Here, README etc. are excluded.)
D:\projects\mc_example_mod
 ├ build.gradle
 ├ gradlew
 ├ gradlew.bat
 ├ gradle
 │ └ wrapper
 │   └ gradle-wrapper.jar
 │   └ gradle-wrapper.properties
 └ src
   └ main
     ├ java
     │  └ com
     │     └ example
     │        └ examplemod
     │           └ ExampleMod.java
     └ resources
        ├ META-INF
        │   └ mods.toml
        └ pack.mcmeta
Execution configuration
Create an execution configuration for IntelliJ IDEA. Start PowerShell, change to the project directory and execute the following command.
PS D:\projects\mc_example_mod> .\gradlew genIntellijRuns
When BUILD SUCCESS FUL is displayed, the process is complete. It will take some time, so be patient.
Gradle project import
Start Intel iJ and click "Open" to open the project directory.
You will be prompted to "Import Gradle project" in the pop-up notification at the bottom right or the event log at the bottom, so click on it.
If you lose sight of the notification
Open Search for Actions with ctrl + shift + "a" and search for "Import Gradle Project" and select it.
Click "OK" without making any changes in the opened window. The import will start, so let's wait.
When finished is displayed and the import is completed, you should see Gradle on the right side of the screen.
Start-up
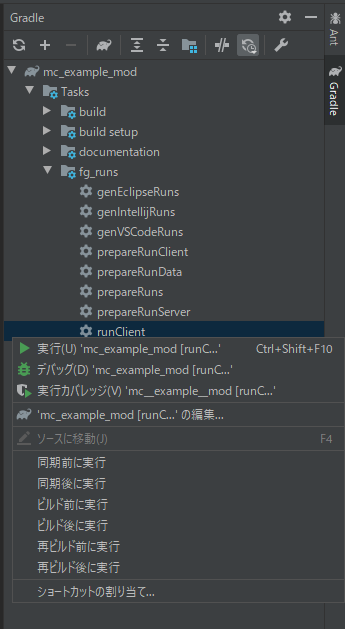
Right-click on mc_example_mod \ Tasks \ fg_runs \ runClient from the Gradle menu-> Run, and finally Minecraft, which is displayed for debugging, will be launched instead of the familiar Minecraft screen.
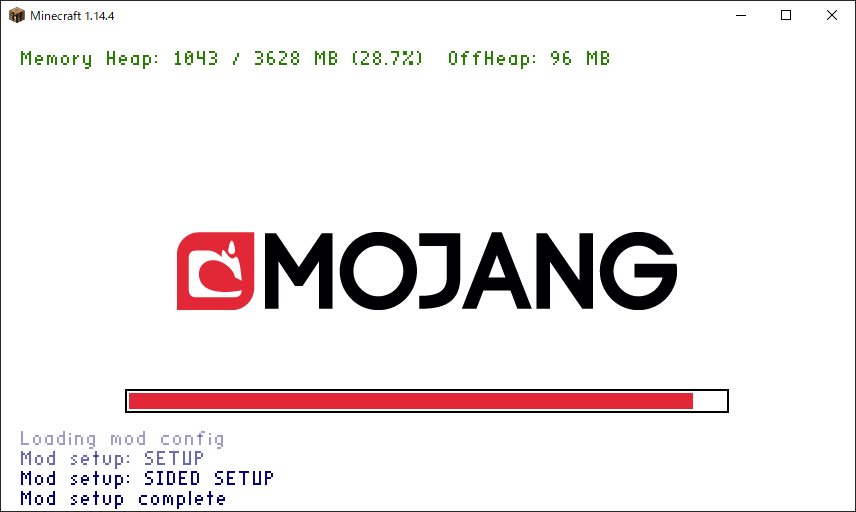
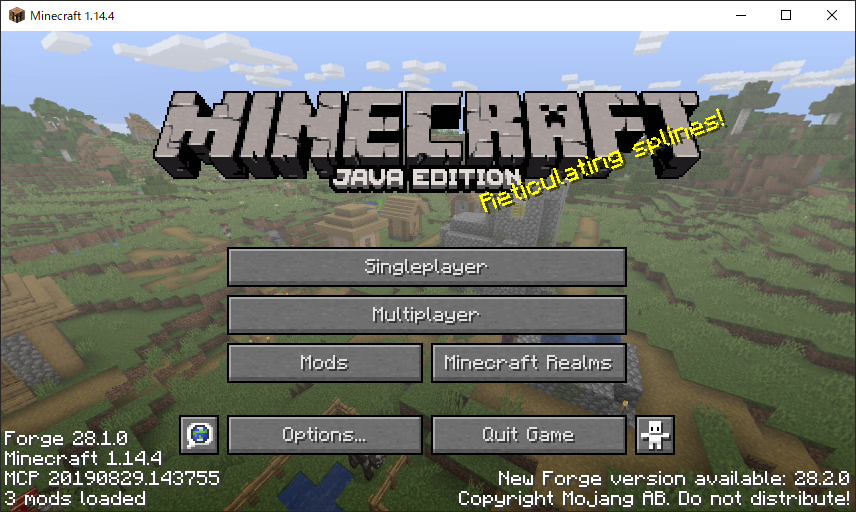
**Congratulations! !! You are also a great Modder! ** **
Summary
First of all, I introduced the preparation of the development environment as a preliminary preparation. We will finally proceed with mod creation, but if you write everything, the article will be too long, so we will make it a separate article for each topic. We will connect links to each article one by one, so we hope you will read them one by one.
Digression
Folding
Actually, I had tried Moding before (probably around 1.7), but at that time I was frustrated. When I was feeling like I wanted to do something, I came across [Reference article](https://qiita.com/Hiroya_W/items/2af8fcacab5feaf880b6) and decided to try again. Thanks to the very careful writing, I was able to learn the basic contents without frustration this time. thank you very much.
By the way, if you go beyond the basics of copying sutras and try to do what you want to do, you will not find a tutorial and there are articles that may be helpful. Moreover, if you notice, Minecraft's unofficial Japan Forum may be closed. As a Micra kids at the time, I was very shocked. I think that the mod creator was originally a small community, but I felt lonely because I couldn't feel the liveliness of the neighborhood as a whole without the forum.
That's why I am writing this article with all my heart. I hope there is anyone who is interested in reading this.
I'm not confident that I'll complete the mod, but I'd like to play around with it for a while and hopefully release the completed mod.
Reference article
Creation of Minecraft 1.14.4 Forge Mod Part 1 [Preparation of development environment IntelliJ IDEA]
Each commentary table of contents
[Introduction] ← Imakoko
0. Basic file
1. Add items
2. Add block
3. Add creative tab
4. Add tools
5. Add armor
6. Add recipe
7. Add progress
8. Addition and generation of ore
9. Add and generate trees
99. Mod output
[Extra edition]
~~ Explanation of plans to be added ~~
~~ ・ Addition of food
・ Add (separate) tags
・ Addition of features (separation)
・ Addition of Config ~~
→ ** I plan to write a commentary article for 1.16.1, with the 1.14.4 article as a break. ** **
What is a mod?
Abbreviation for Modification. Mod. Remodeling data mainly used in PC games. Remodeling in Japanese may give you the impression that you want to blame it, but it is a more popular culture overseas [citation needed] as it encourages users to participate in the game. Please be assured that the use of mods is [officially permitted](https://www.minecraft.net/ja-jp/terms/r3/#4-minecraft-java-edition) in Minecraft.

 ** New ones are increasing due to various mods **
Some people may find it difficult to make a game ... **, but in reality, creating a mod is "introducing something that works on the game", so we don't make a game * * It's not as difficult as you think **. I think it's important to touch it first without being prepared.
Also, in this article, I will try to write gently for beginners (please feel free to ask questions if you have any questions!).
The goal is to create a tutorial mod for the first time from 0 and actually introduce it to Minecraft. The goal is to be able to see what to do for the mod you want to make when you're done.
Finally, before moving on to the explanation, I would like to mention a few important points.
First of all, when working on Modding from now on, ** Be sure to check your development environment and the version of Minecraft itself and Minecraft Forge (described later) of the site you refer to **. Different versions have (sometimes significantly) different implementations. Unfortunately, all I can share here is the knowledge of modding in one not-so-new version. Unless you have a clear goal, we recommend this because adapting to the environment in this article will avoid unnecessary troubles.
Secondly, I'm sorry to remove the ladder, but unfortunately, the current situation ** Minecraft's modding reference materials are far from complete **. Especially ** There is almost no Japanese material **. Therefore, it may be difficult to find what you want to know. I will write tips for such cases in another article, but since problem-solving ability is also an engineer's background, please do your best. And hopefully (including this article) ** Please keep a record of your findings! ** Even if you treat the same thing, it's worth reprinting in your own words. It will help someone someday.
And thirdly, I am a beginner in Java, so please understand that it may be inaccurate in terms of language.
The introduction has become long, but let's start modding from the next section!
Environment
environment
First, let's prepare a development environment. This article uses the following versions of the tools.
tool / library
version
OS
Winsows 10 Home
JDK
8u212
Minecraft
1.14.4
Minecraft Forge
1.14.4 (28.1.0)
InteliJ IDEA
2020.1.3 (CE)
Each one uses a fairly old version, including the version of Minecraft, because it was done in the same environment as the reference article. You can use a newer version if you need to (if you're confident), but you'll have to deal with compatibility issues yourself. Also, please read the article on the assumption that some or all of the following descriptions do not apply.
JDK (Java Development Kit)
Minecraft (Java edition) runs on Java, so you need a Java development environment.
After agreeing to the terms, download from here.
 (It's quite down)
However, you need ** Oracle profile (account) ** to download, so if you don't have it (or maybe not), create one. ~~ Men d ~~
When registering, you will be asked to enter the company name and department, but if you are a student, you can use "student" for the department / job title, the school name for the company name, and the school address for the address.
Execute the downloaded exe to install it.
InteliJ IDEA
Next, get the integrated development environment.
After agreeing to the terms, download from here. 
Execute the downloaded exe to install it.
I can't get a detailed screen because it's a hassle to install again (sorry), but basically nothing needs to be changed.
The initial setting screen will appear at the first startup, but this is also appropriate and okay. You may want to turn off the provision of data for improving functions.
Also, since the language is English by default, let's translate it into Japanese if necessary (→ Reference article). After that, I will proceed with the story as it has been translated into Japanese.
Minecraft Forge MDK
Finally, get the Minecraft Forge Development Kit, the de facto standard prerequisite mod in the Minecraft mod neighborhood. Forge is an API that comprehensively provides various functions used when developing and introducing mods.
After agreeing to the terms, download from here.
 I think it's okay (or better) to be Recommended, but as mentioned above, I'll match the version to the reference article. Click Show all Versions at the bottom to expand it.
 Download the relevant Mdk. Extract the downloaded Zip file.
Create a project folder anywhere (for example, D: \ projects \ mc_example_mod, then replace the path as needed).
Copy the following items from the Forge folder you just extracted to the project folder. (You can copy or rename the expanded folder and use it as it is. Here, README etc. are excluded.)
D:\projects\mc_example_mod
├ build.gradle
├ gradlew
├ gradlew.bat
├ gradle
│ └ wrapper
│ └ gradle-wrapper.jar
│ └ gradle-wrapper.properties
└ src
└ main
├ java
│ └ com
│ └ example
│ └ examplemod
│ └ ExampleMod.java
└ resources
├ META-INF
│ └ mods.toml
└ pack.mcmeta
Execution configuration
Create an execution configuration for IntelliJ IDEA. Start PowerShell, change to the project directory and execute the following command.
PS D:\projects\mc_example_mod> .\gradlew genIntellijRuns
When BUILD SUCCESS FUL is displayed, the process is complete. It will take some time, so be patient.
Gradle project import
Start Intel iJ and click "Open" to open the project directory.
You will be prompted to "Import Gradle project" in the pop-up notification at the bottom right or the event log at the bottom, so click on it.
If you lose sight of the notification
Open Search for Actions with ctrl + shift + "a" and search for "Import Gradle Project" and select it.
Click "OK" without making any changes in the opened window. The import will start, so let's wait.
When finished is displayed and the import is completed, you should see Gradle on the right side of the screen.
Start-up
Right-click on mc_example_mod \ Tasks \ fg_runs \ runClient from the Gradle menu-> Run, and finally Minecraft, which is displayed for debugging, will be launched instead of the familiar Minecraft screen.


**Congratulations! !! You are also a great Modder! ** **
Summary
First of all, I introduced the preparation of the development environment as a preliminary preparation. We will finally proceed with mod creation, but if you write everything, the article will be too long, so we will make it a separate article for each topic. We will connect links to each article one by one, so we hope you will read them one by one.
Digression
Folding
Actually, I had tried Moding before (probably around 1.7), but at that time I was frustrated. When I was feeling like I wanted to do something, I came across [Reference article](https://qiita.com/Hiroya_W/items/2af8fcacab5feaf880b6) and decided to try again. Thanks to the very careful writing, I was able to learn the basic contents without frustration this time. thank you very much.
By the way, if you go beyond the basics of copying sutras and try to do what you want to do, you will not find a tutorial and there are articles that may be helpful. Moreover, if you notice, Minecraft's unofficial Japan Forum may be closed. As a Micra kids at the time, I was very shocked. I think that the mod creator was originally a small community, but I felt lonely because I couldn't feel the liveliness of the neighborhood as a whole without the forum.
That's why I am writing this article with all my heart. I hope there is anyone who is interested in reading this.
I'm not confident that I'll complete the mod, but I'd like to play around with it for a while and hopefully release the completed mod.
Reference article
Creation of Minecraft 1.14.4 Forge Mod Part 1 [Preparation of development environment IntelliJ IDEA]
Each commentary table of contents
[Introduction] ← Imakoko
0. Basic file
1. Add items
2. Add block
3. Add creative tab
4. Add tools
5. Add armor
6. Add recipe
7. Add progress
8. Addition and generation of ore
9. Add and generate trees
99. Mod output
[Extra edition]
~~ Explanation of plans to be added ~~
~~ ・ Addition of food
・ Add (separate) tags
・ Addition of features (separation)
・ Addition of Config ~~
→ ** I plan to write a commentary article for 1.16.1, with the 1.14.4 article as a break. ** **

 ** New ones are increasing due to various mods **
 (It's quite down)
 I think it's okay (or better) to be Recommended, but as mentioned above, I'll match the version to the reference article. Click Show all Versions at the bottom to expand it.
 Download the relevant Mdk. Extract the downloaded Zip file.
D: \ projects \ mc_example_mod, then replace the path as needed).
Copy the following items from the Forge folder you just extracted to the project folder. (You can copy or rename the expanded folder and use it as it is. Here, README etc. are excluded.)D:\projects\mc_example_mod
├ build.gradle
├ gradlew
├ gradlew.bat
├ gradle
│ └ wrapper
│ └ gradle-wrapper.jar
│ └ gradle-wrapper.properties
└ src
└ main
├ java
│ └ com
│ └ example
│ └ examplemod
│ └ ExampleMod.java
└ resources
├ META-INF
│ └ mods.toml
└ pack.mcmeta
PS D:\projects\mc_example_mod> .\gradlew genIntellijRuns
If you lose sight of the notification
Open Search for Actions with ctrl + shift + "a" and search for "Import Gradle Project" and select it.
Click "OK" without making any changes in the opened window. The import will start, so let's wait.
When finished is displayed and the import is completed, you should see Gradle on the right side of the screen.
Start-up
Right-click on mc_example_mod \ Tasks \ fg_runs \ runClient from the Gradle menu-> Run, and finally Minecraft, which is displayed for debugging, will be launched instead of the familiar Minecraft screen.


**Congratulations! !! You are also a great Modder! ** **
Summary
First of all, I introduced the preparation of the development environment as a preliminary preparation. We will finally proceed with mod creation, but if you write everything, the article will be too long, so we will make it a separate article for each topic. We will connect links to each article one by one, so we hope you will read them one by one.
Digression
Folding
Actually, I had tried Moding before (probably around 1.7), but at that time I was frustrated. When I was feeling like I wanted to do something, I came across [Reference article](https://qiita.com/Hiroya_W/items/2af8fcacab5feaf880b6) and decided to try again. Thanks to the very careful writing, I was able to learn the basic contents without frustration this time. thank you very much.
By the way, if you go beyond the basics of copying sutras and try to do what you want to do, you will not find a tutorial and there are articles that may be helpful. Moreover, if you notice, Minecraft's unofficial Japan Forum may be closed. As a Micra kids at the time, I was very shocked. I think that the mod creator was originally a small community, but I felt lonely because I couldn't feel the liveliness of the neighborhood as a whole without the forum.
That's why I am writing this article with all my heart. I hope there is anyone who is interested in reading this.
I'm not confident that I'll complete the mod, but I'd like to play around with it for a while and hopefully release the completed mod.
Reference article
Creation of Minecraft 1.14.4 Forge Mod Part 1 [Preparation of development environment IntelliJ IDEA]
Each commentary table of contents
[Introduction] ← Imakoko
0. Basic file
1. Add items
2. Add block
3. Add creative tab
4. Add tools
5. Add armor
6. Add recipe
7. Add progress
8. Addition and generation of ore
9. Add and generate trees
99. Mod output
[Extra edition]
~~ Explanation of plans to be added ~~
~~ ・ Addition of food
・ Add (separate) tags
・ Addition of features (separation)
・ Addition of Config ~~
→ ** I plan to write a commentary article for 1.16.1, with the 1.14.4 article as a break. ** **
mc_example_mod \ Tasks \ fg_runs \ runClient from the Gradle menu-> Run, and finally Minecraft, which is displayed for debugging, will be launched instead of the familiar Minecraft screen.


