Erstellen eines Ev3-Funkcontrollers mit JavaFx und leJOS [Teil 2]
Einführung
In diesem Artikel wird davon ausgegangen, dass eine leJOS-Entwicklungsumgebung vorhanden ist. Weitere Informationen finden Sie in diesem Artikel.
[LeJOS] Programmieren wir mindstorm-EV3 mit Java [Umgebungskonstruktion erster Teil]
[LeJOS] Programmieren wir mindstorm-EV3 mit Java [Umgebungskonstruktion Teil 2]
Überblick
Dieser Artikel ist eine Fortsetzung des folgenden Artikels: Ich werde die Entwicklung einer GUI-Anwendung erklären, die Ev3 mit der Fernbedienungsklasse remoteEv3 von leJOS und JavaFx steuert.
Erstellen eines Ev3-Funkcontrollers mit JavaFx und leJOS [Teil 1]
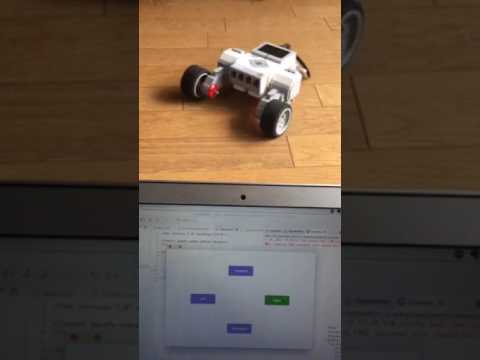
Die diesmal erstellte ist eine einfache Funksteuerungsanwendung.
(Klicken, um das Video abzuspielen)
Programm
Die Dateistruktur ist wie folgt.
Der Projektname lautet JavaFxEv3.

Form.fxml Schreiben Sie hier die GUI. Sie können es mit SceneBuilder bearbeiten.
Form.fxml
<?xml version="1.0" encoding="UTF-8"?>

<?import javafx.scene.control.Button?>
<?import javafx.scene.layout.Pane?>

<Pane maxHeight="-Infinity" maxWidth="-Infinity" minHeight="-Infinity" minWidth="-Infinity" prefHeight="400.0" prefWidth="600.0" xmlns="http://javafx.com/javafx/8.0.111" xmlns:fx="http://javafx.com/fxml/1" fx:controller="application.FormController">
   <children>
      <Button fx:id="LeftButton" layoutX="100.0" layoutY="180.0" mnemonicParsing="false" onMousePressed="#LeftButtonPressed" onMouseReleased="#LeftButtonReleased" prefHeight="40.0" prefWidth="100.0" text="Left" />
      <Button fx:id="RightButton" layoutX="400.0" layoutY="180.0" mnemonicParsing="false" onMousePressed="#RightButtonPressed" onMouseReleased="#RightButtonReleased" prefHeight="40.0" prefWidth="100.0" text="Right" />
      <Button fx:id="ForwardButton" layoutX="250.0" layoutY="62.0" mnemonicParsing="false" onMousePressed="#ForwardButtonPressed" onMouseReleased="#ForwardButtonReleased" prefHeight="40.0" prefWidth="100.0" text="Forward" />
      <Button fx:id="BackwardButton" layoutX="250.0" layoutY="300.0" mnemonicParsing="false" onMousePressed="#BackwardButtonPressed" onMouseReleased="#BackwardButtonReleased" prefHeight="40.0" prefWidth="100.0" text="Backward" />
   </children>
</Pane>
Kommentar
Jede Taste verfügt über eine registrierte Methode, die aufgerufen wird, wenn die Maus gedrückt und die Maus losgelassen wird. Registrieren Sie die Methode, wenn die Schaltfläche in onMousePressed gedrückt wird, und die Methode, wenn die Schaltfläche in onMouseReleased losgelassen wird.

application.css Sie können die GUI gestalten.
application.css
/*Hintergrundfarbeneinstellung*/
.root{
	-fx-background-color: white;
}
/*Farbeinstellungen der Tasten*/
.button {
    -fx-background-color: slateblue; -fx-text-fill: white;
}
/*Farbeinstellung bei gedrückter Maustaste*/
.button:hover{
    -fx-background-color: green; -fx-text-fill: white;
}
Main.java
Main.java
package application;

import java.net.MalformedURLException;
import java.rmi.NotBoundException;
import java.rmi.RemoteException;

import javafx.application.Application;
import javafx.event.EventHandler;
import javafx.stage.Stage;
import javafx.stage.WindowEvent;
import lejos.remote.ev3.RMIRegulatedMotor;
import lejos.remote.ev3.RemoteEV3;
import javafx.scene.Scene;
import javafx.scene.layout.Pane;
import javafx.fxml.FXMLLoader;


public class Main extends Application {
	public RemoteEV3 ev3 = null;
	public RMIRegulatedMotor leftMotor = null;
	public RMIRegulatedMotor rightMotor = null;

	@Override
	public void start(Stage primaryStage) {
		try {
			//Instanziierung zur Fernbedienung
			ev3 = new RemoteEV3("192.168.2.91");
			ev3.setDefault();
			//Motorobjekterstellung
			leftMotor = ev3.createRegulatedMotor("A", 'L');
			rightMotor = ev3.createRegulatedMotor("B", 'L');
		} catch (RemoteException | MalformedURLException | NotBoundException e) {
			// TODO Auto-generated catch block
			e.printStackTrace();
		}

		try {
			FXMLLoader loader = new FXMLLoader(getClass().getResource("Form.fxml"));
			Pane root = (Pane)loader.load();
			Scene scene = new Scene(root,600,400);
			scene.getStylesheets().add(getClass().getResource("application.css").toExternalForm());

			//Übergeben Sie das Motorobjekt an die Steuerung
			FormController controller = loader.getController();
			controller.setThisLeftMotor(leftMotor);
			controller.setThisRightMotor(rightMotor);

			//Bildschirmanzeige
			primaryStage.setScene(scene);
			primaryStage.show();

			//Verarbeitung bei geschlossenem Bildschirm
			primaryStage.setOnCloseRequest(new EventHandler<WindowEvent>() {
		          public void handle(WindowEvent we) {
		              System.out.println("Stage is closing");
		              try {
						leftMotor.close();
						rightMotor.close();
		              } catch (RemoteException e) {
						// TODO Auto-generated catch block
						e.printStackTrace();
		              }
		          }
		     });
		} catch(Exception e) {
			e.printStackTrace();
		}
	}

	public static void main(String[] args) {
		launch(args);
	}
}
Kommentar
Erstellen Sie mit der RemoteEv3-Klasse ein Objekt für den Zugriff auf den Motor.
			ev3 = new RemoteEV3("192.168.2.91");
			ev3.setDefault();
			//Motorobjekterstellung
			leftMotor = ev3.createRegulatedMotor("A", 'L');
			rightMotor = ev3.createRegulatedMotor("B", 'L');
Übergeben Sie das Motorobjekt an die Steuerung.
            //Übergeben Sie das Motorobjekt an die Steuerung
            FormController controller = loader.getController();
            controller.setThisLeftMotor(leftMotor);
            controller.setThisRightMotor(rightMotor);
Stellen Sie sicher, dass der Zugang zum Motor am Ende des Programms geschlossen ist. Wenn dies nicht eingestellt ist, tritt beim Neustart des Programms ein Fehler auf.
            primaryStage.setOnCloseRequest(new EventHandler<WindowEvent>() {
                  public void handle(WindowEvent we) {
                      System.out.println("Stage is closing");
                      try {
                        leftMotor.close();
                        rightMotor.close();
                      } catch (RemoteException e) {
                        // TODO Auto-generated catch block
                        e.printStackTrace();
                      }
                  }
             });
FormController.java Dies ist der Controller-Teil. Verknüpfen Sie die GUI mit der Methode.
FormController.java
package application;

import java.rmi.RemoteException;
import javafx.fxml.FXML;
import javafx.scene.control.Button;
import javafx.scene.input.MouseEvent;
import lejos.remote.ev3.RMIRegulatedMotor;

public class FormController {
	public RMIRegulatedMotor thisLeftMotor = null;
	public RMIRegulatedMotor thisRightMotor = null;

	public void setThisLeftMotor(RMIRegulatedMotor leftMotor) {
        thisLeftMotor = leftMotor;
    }

	public void setThisRightMotor(RMIRegulatedMotor rightMotor) {
        thisRightMotor = rightMotor;
    }

	@FXML
	Button LeftButton;
	@FXML
	Button RightButton;
	@FXML
	Button ForwardButton;
	@FXML
	Button BackwardButton;

	@FXML
    void initialize() {
        System.out.println("Initialisierungsprozess");
    }

	@FXML
	public void LeftButtonPressed(MouseEvent actionEvent) {
		try {
            thisLeftMotor.forward();
            thisRightMotor.backward();
        } catch (RemoteException e) {
            // TODO Auto-generated catch block
            e.printStackTrace();
        }
	}

	@FXML
	public void LeftButtonReleased(MouseEvent actionEvent) {
		try {
            thisLeftMotor.stop(true);
            thisRightMotor.stop(true);
        } catch (RemoteException e) {
            // TODO Auto-generated catch block
            e.printStackTrace();
        }
	}

	@FXML
	public void RightButtonPressed(MouseEvent actionEvent) {
		try {
			thisLeftMotor.backward();
            thisRightMotor.forward();
        } catch (RemoteException e) {
            // TODO Auto-generated catch block
            e.printStackTrace();
        }
	}

	@FXML
	public void RightButtonReleased(MouseEvent actionEvent) {
		try {
			thisLeftMotor.stop(true);
            thisRightMotor.stop(true);
        } catch (RemoteException e) {
            // TODO Auto-generated catch block
            e.printStackTrace();
        }
	}

	@FXML
	public void ForwardButtonPressed(MouseEvent actionEvent) {
		try {
            thisLeftMotor.forward();
            thisRightMotor.forward();
        } catch (RemoteException e) {
            // TODO Auto-generated catch block
            e.printStackTrace();
        }
	}

	@FXML
	public void ForwardButtonReleased(MouseEvent actionEvent) {
		try {
            thisLeftMotor.stop(true);
            thisRightMotor.stop(true);
        } catch (RemoteException e) {
            // TODO Auto-generated catch block
            e.printStackTrace();
        }
	}

	@FXML
	public void BackwardButtonPressed(MouseEvent actionEvent) {
		try {
            thisLeftMotor.backward();
            thisRightMotor.backward();
        } catch (RemoteException e) {
            // TODO Auto-generated catch block
            e.printStackTrace();
        }
	}

	@FXML
	public void BackwardButtonReleased(MouseEvent actionEvent) {
		try {
            thisLeftMotor.stop(true);
            thisRightMotor.stop(true);
        } catch (RemoteException e) {
            // TODO Auto-generated catch block
            e.printStackTrace();
        }
	}

}
Kommentar
Definieren Sie einen Setter für den Zugriff auf das Motorobjekt innerhalb der Steuerung.
	public void setThisLeftMotor(RMIRegulatedMotor leftMotor) {
        thisLeftMotor = leftMotor;
    }

	public void setThisRightMotor(RMIRegulatedMotor rightMotor) {
        thisRightMotor = rightMotor;
    }
Der folgende Code definiert beispielsweise die LeftButtonPressed-Methode, die beim Drücken des LeftButton aufgerufen wird, und die LeftButtonReleased-Methode, die beim Loslassen des LeftButton aufgerufen wird.
    @FXML
    public void LeftButtonPressed(MouseEvent actionEvent) {
        try {
            thisLeftMotor.forward();
            thisRightMotor.backward();
        } catch (RemoteException e) {
            // TODO Auto-generated catch block
            e.printStackTrace();
        }
    }

    @FXML
    public void LeftButtonReleased(MouseEvent actionEvent) {
        try {
            thisLeftMotor.stop(true);
            thisRightMotor.stop(true);
        } catch (RemoteException e) {
            // TODO Auto-generated catch block
            e.printStackTrace();
        }
    }
Zusammenfassung
Ich habe vorgestellt, wie eine GUI-Anwendung mit der RemoteEv3-Klasse von JavaFx und leJOS entwickelt wird. Wenn Sie dies verwenden, können Sie den Sensorwert auch abrufen und auf der GUI visualisieren. Weitere Informationen zur RemoteEv3-Klasse finden Sie in diesem Artikel.
[LeJOS] Lassen Sie uns den EV3-Motor mit Java fernsteuern
[LeJOS] EV3-Sensorwert per Fernzugriff mit Java abrufen
Recommended Posts