Pytorch execution environment with Docker
Introduction
Build a Jupyter Notebook environment that can use Pytorch.
I wanted an environment where Pytorch can be used easily, and I often forget the contents and options of Dockerfile and yml file, so I wrote this article as a reminder.
- Please install Docker.
Create a Docker image
Use jupyter/datascience-notebook as the base image.
This time, in addition to this, install pytorch.
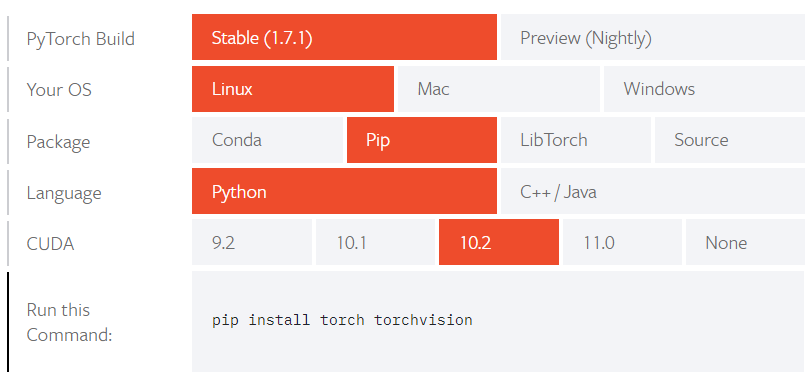
Check the pip command here (https://pytorch.org/get-started/locally/).
I selected it as shown in the figure below.

Next, create a container image from Dockerfile. Dockerfile looks like this
FROM jupyter/datascience-notebook

USER root

RUN pip install torch torchvision

USER jovyan
WORKDIR /home/jovyan
--Image build (Docker build)
docker build -t Favorite image name.
--Container creation (Docker run)
docker run -p 80:8888 -v ./:/home/jovyan/work image name
--Specify the port with the p option. --Specify a free port on the host side --- p "Container side": "Host side" --v Optional mount the host-side directory. --- v "Host side": "Container side" --Please put the source code in the "host side" directory.
After running docker run, you should see the jupyter notebook at http: // localhost: 8888.
However, as it is, it is troublesome to specify various options every time Docker run, so make it possible to execute parameters at once with docker-compose.
Run with docker-compose
Create docker-compose.yml like this,
version: "3"
services:
  jupyterlab:
    build:
      context: .
    user: root
    ports:
      - "80:8888"
    volumes:
      - "./:/home/jovyan/work"
    environment:
      GRANT_SUDO: "yes"
    command: start-notebook.sh --NotebookApp.token=""
Execute docker-compose up --build to create and start the container.
--You can create a container using Dockerfile with build.
--This time it's context: . so I'm using Dockerfile in the current directory
--Specify the ports with ports.
--"Container side": "Host side"
--Specify the directory to mount with volumes
--"Host side": "Container side"
--Specify the command when starting the container with command
--Use start-notebook.sh to start jupyter notebook
--If you add the option --NotebookApp.token =" " `, you will not be able to confirm the Token when accessing.
Now you should be able to use the jupyter notebook by accessing http: // localhost: 8888.
After that, let's implement various models with pytorch.
that's all.
Recommended Posts