[JAVA] [Jakarta EE 8 application development with Gradle] 1. Environment construction
Introduction
I am developing an enterprise application using Jakarta EE (Java EE) in my business. Until now, I have learned and developed while reading reference books, but I did not have a document that suits me, from environment construction to development procedures, so I would like to summarize my knowledge so far in a serial format. ..
environment
- Selected based on the version as of March 2020.
| item | Contents |
|---|---|
| OpenJDK build | Azul Zulu 11 |
| Framework | Jakarta EE 8 |
| AP server | payara server 5.201 |
| DB server | PostgreSQL 12 |
| Build tool | Gradle 6.2.2 |
| IDE | Eclipse 2020-03 (Pleiades All in One) |
| OS | Windows 10 |
1. Environment construction
OpenJDK 11 installation
This time I will use Azul Zulu.
Since payara server 5.192 supports Java 11, it is set to OpenJDK 11.
https://jp.azul.com/downloads/zulu-community/?&architecture=x86-64-bit&package=jdk
From the link above, click to download the Java 11 (LTS) Windows version of the msi.

Run the downloaded MSI file.
Click Next, leave the installation folder at its default, and click Next.

Click Install to start the installation.
When the installation is complete, the screen below will be displayed. Click Finish.

Then set the environment variables.
Search for "environment variables" in the Windows settings and select "Edit system environment variables".
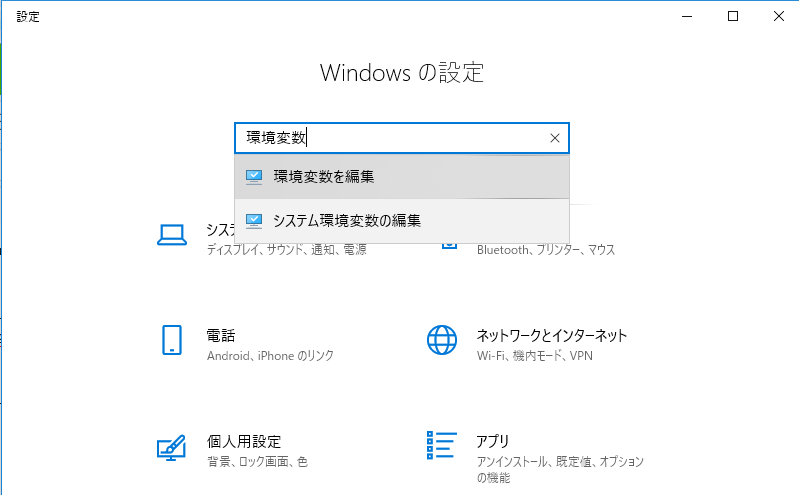
Click the environment variable.
Click New system environment variable.
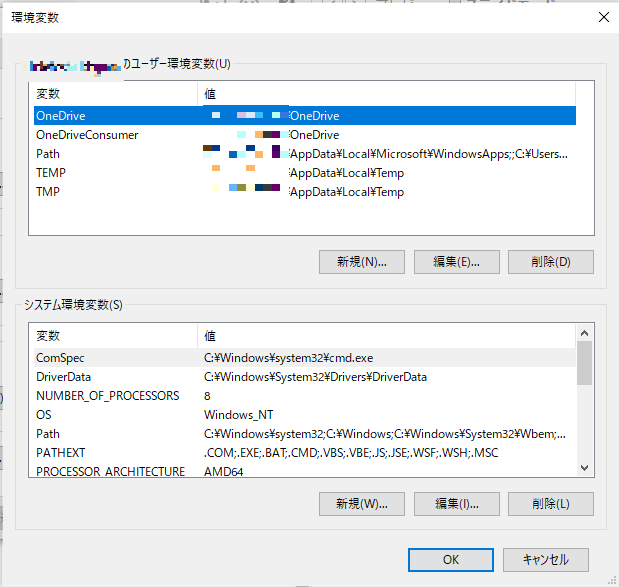
Set the following system environment variables. Enter as shown in the table below and click OK.
| Variable name | Variable value |
|---|---|
| JAVA_HOME | C:\Program Files\Zulu\zulu-11 |


Start the command prompt, execute "java -version", and if the following result is displayed, the installation is complete.

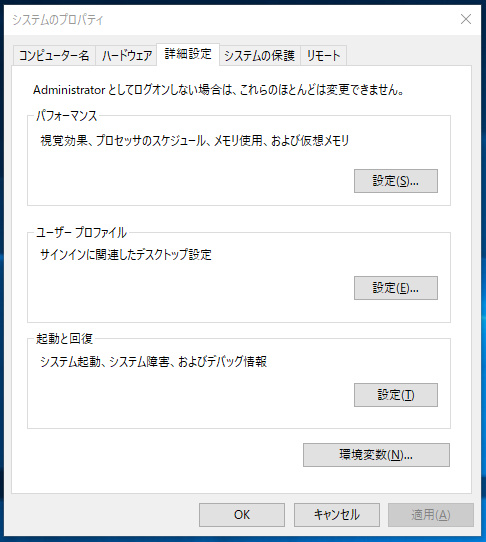
If you have another JDK installed, you may not get the above results. In that case, open the system environment variable settings and the beginning of Path is
\Program Files\Zulu\zulu-11\bin
Please change it to.
## PostgreSQL 12 installation
Use PostgreSQL as the database server.
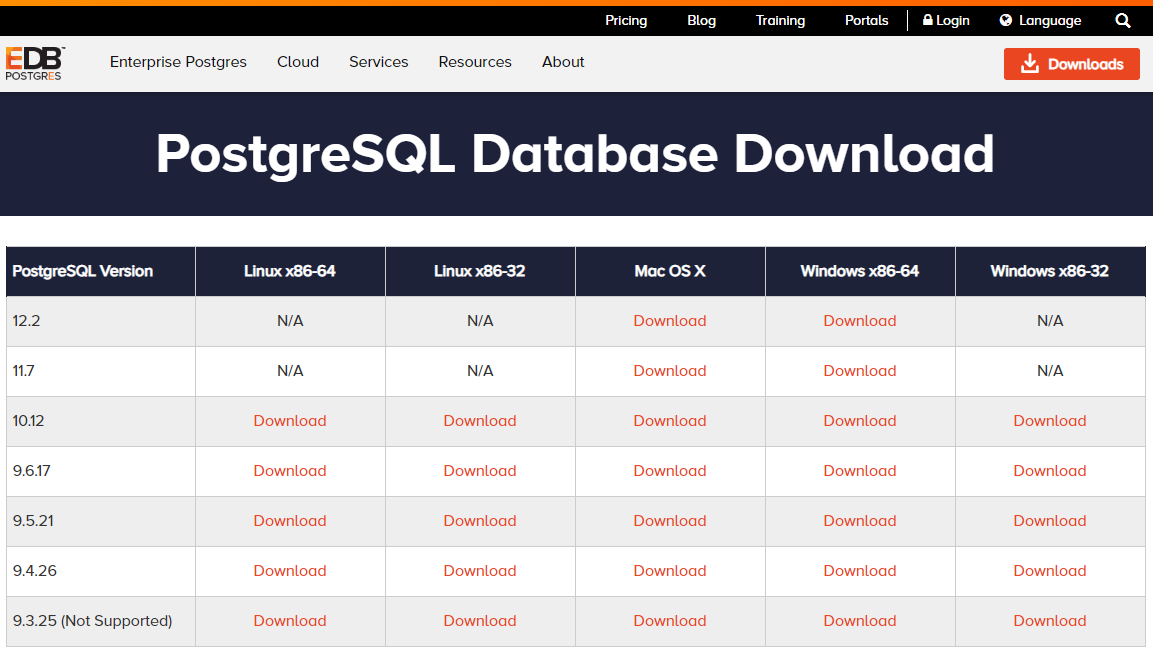
https://www.enterprisedb.com/downloads/postgres-postgresql-downloads
Click Download for Windows x86-64 12.2 to download.
Execute the downloaded exe file.
Click Next, leave the installation folder at its default, and click Next.
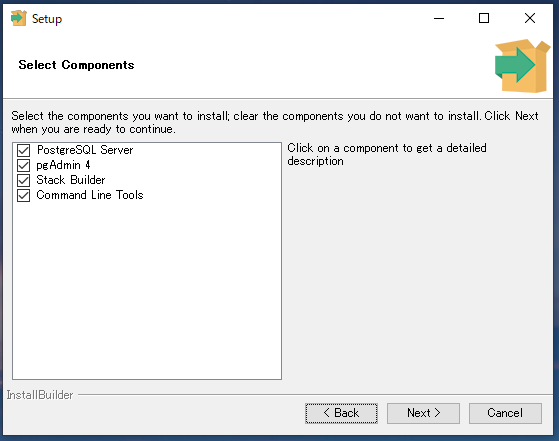
Leave the components at their defaults and click Next.
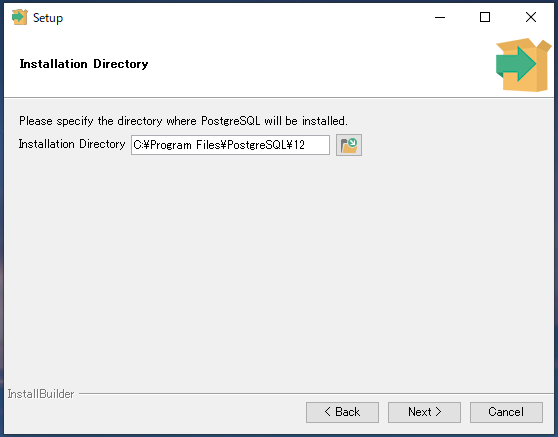
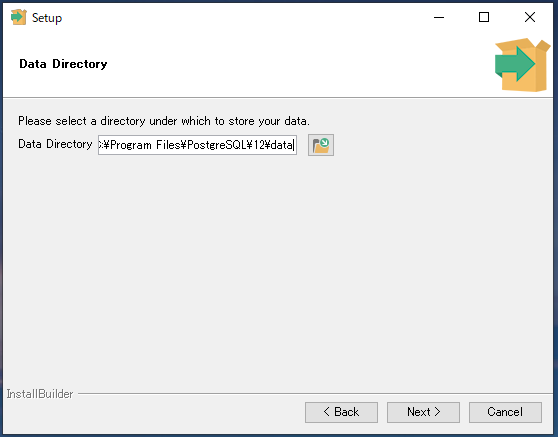
Specify the data storage destination. For development, use the default if you do not wish. Click Next.
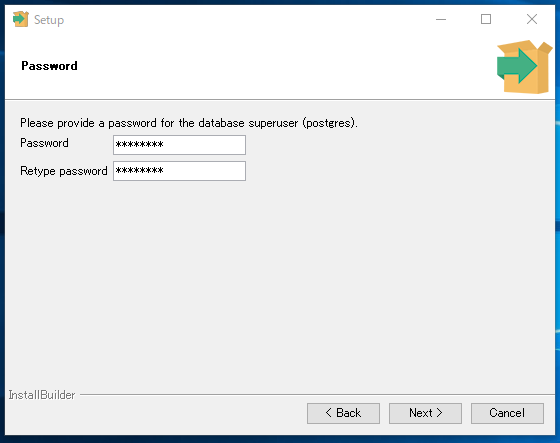
Enter the password for the admin user "postgres". Click Next when you are done.
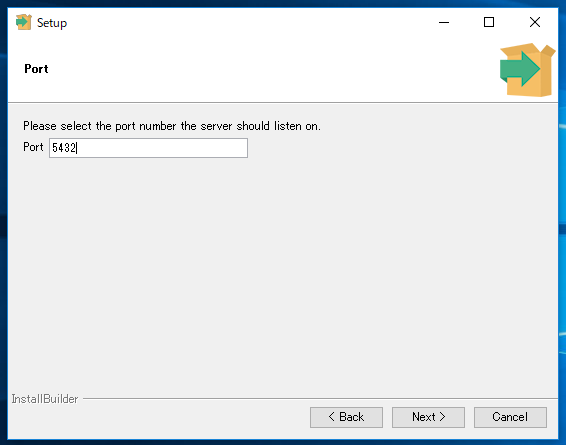
Set the connection port. Click Next with the defaults unless you have the number specified.
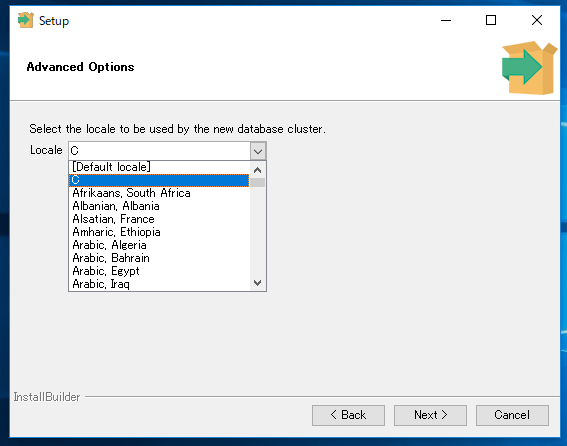
Set the locale. Select C and click Next.
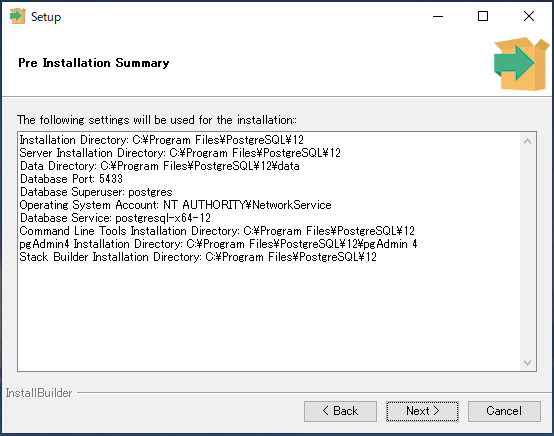
The Summary will be displayed. Click Next.
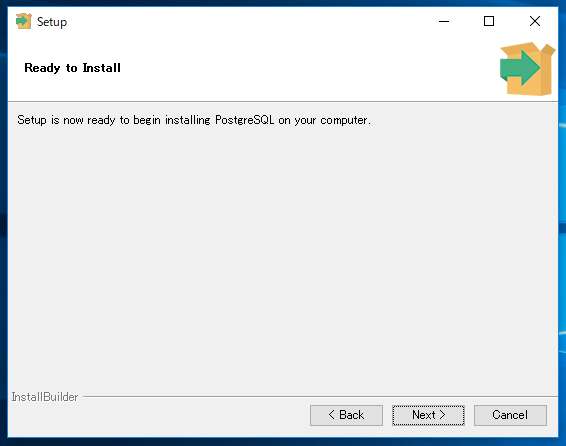
Click Next to start the installation.
When the installation is complete, the screen below will be displayed. Uncheck it and click Finish.
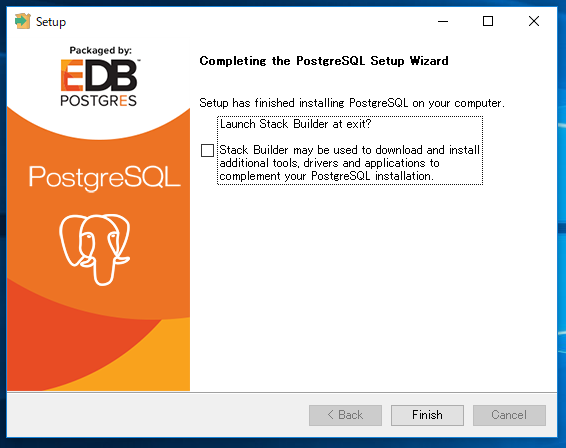
This completes the PostgreSQL installation.
## payara server 5 installation
Use payara server as the Java EE application server.
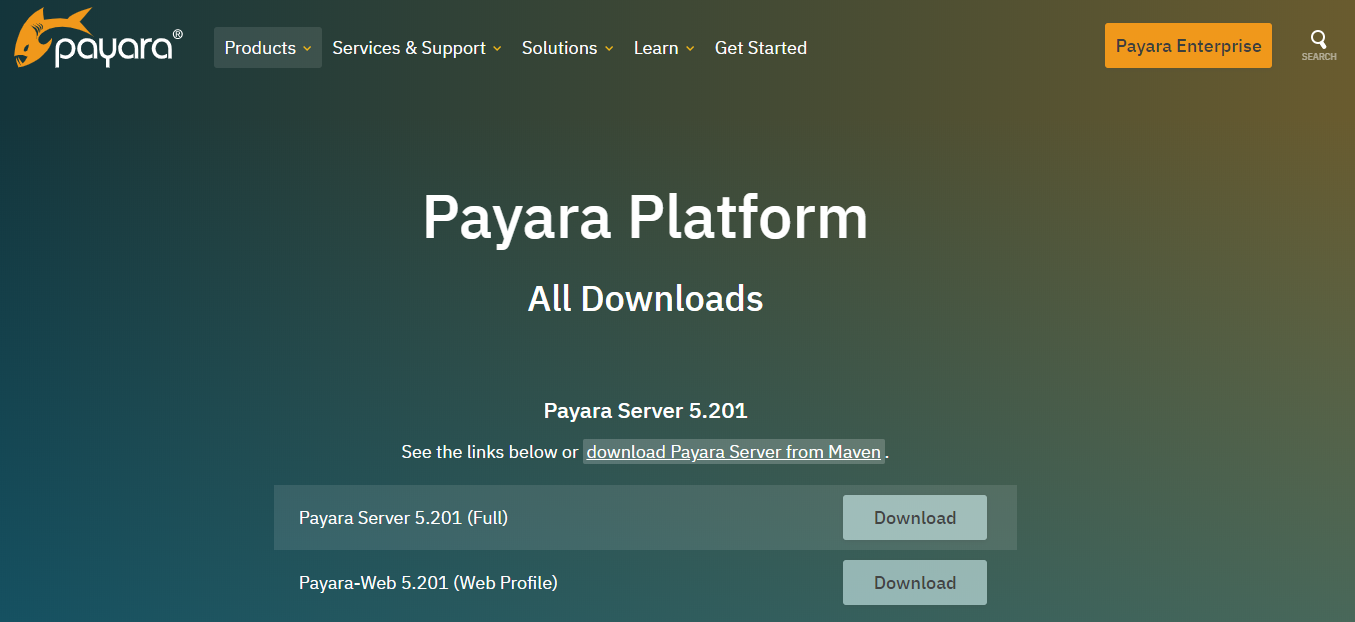
https://www.payara.fish/software/downloads/all-downloads/
Install Full here.
Click Payara Server 5.201 (Full) Download to download the zip file.
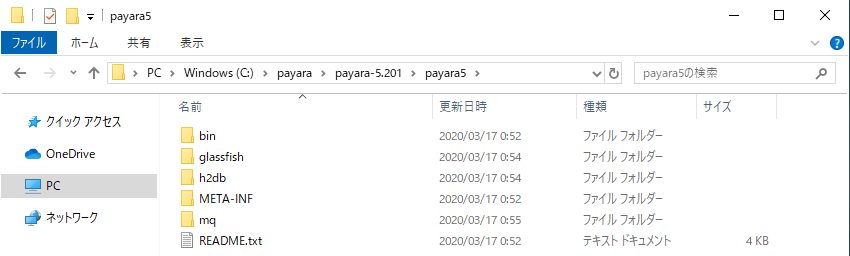
Create a payara folder directly under the C drive, and create a payara-5.201 folder in it.
* 201 part is this version
Unzip the downloaded file and place the unzipped payara5 folder inside the payara-5.201 folder. The contents of the `C: \ payara \ payara-5.201 \ payara5` folder after placement will be as shown in the screen below.
Next, make the initial settings for payara server.
Start a command prompt and go to the `C: \ payara \ payara-5.201 \ payara5 \ bin` folder.
Start payara server.
Type ʻasadmin start-domain` to run it.
c:\payara\payara-5.201\payara5\bin>asadmin start-domain Waiting for domain1 to start ...................... Successfully started the domain : domain1 domain Location: C:\payara\payara-5.201\payara5\glassfish\domains\domain1 Log File: C:\payara\payara-5.201\payara5\glassfish\domains\domain1\logs\server.log Admin Port: 4848 Command start-domain executed successfully.
 Log in as an administrator.
 Type ʻasadmin login` to run it.
 The login user is left blank because it is the default.
 If you log in successfully, a `[user folder] \ .gfclient \ pass` file will be created.
 * Binary file containing password information
c:\payara\payara-5.201\payara5\bin>asadmin login Enter admin user name [Enter to accept default]> Admin login information for host [localhost] and port [4848] is being overwritten with credentials provided. This is because the --savelogin option was used during create-domain command. Login information relevant to admin user name [admin] for host [localhost] and admin port [4848] stored at [C:\Users[User name].gfclient\pass] successfully. Make sure that this file remains protected. Information stored in this file will be used by administration commands to manage associated domain. Command login executed successfully.
 Change the administrator password.
 Type ʻasadmin change-admin-password` to run it.
 The user name is blank because it is the default, and the password is not set, so proceed with the blank and enter the new password.
c:\payara\payara-5.201\payara5\bin>asadmin change-admin-password Enter admin user name [default: admin]>← Press Enter without typing anything Enter the admin password>← Press Enter without typing anything Enter the new admin password>← Enter the new password and press the Enter key Enter the new admin password again>← Enter the new password and press the Enter key Command change-admin-password executed successfully.
 Log in as an administrator again.
 Type ʻasadmin login` to run it.
 The login user is left blank because it is the default, and the password is the new password you entered earlier.
 After a successful login, the `[user folder] \ .gfclient \ pass` file will be updated.
c:\payara\payara-5.201\payara5\bin>asadmin login Enter admin user name [Enter to accept default]>← Press Enter without typing anything Enter admin password>← Enter the new password and press the Enter key Admin login information for host [localhost] and port [4848] is being overwritten with credentials provided. This is because the --savelogin option was used during create-domain command. Login information relevant to admin user name [admin] for host [localhost] and admin port [4848] stored at [C:\Users[User name].gfclient\pass] successfully. Make sure that this file remains protected. Information stored in this file will be used by administration commands to manage associated domain. Command login executed successfully.
 Make the management console available.
 Type ʻasadmin enable-secure-admin` to run it.
c:\payara\payara-5.201\payara5\bin>asadmin enable-secure-admin You must restart all running servers for the change in secure admin to take effect. Command enable-secure-admin executed successfully.
 You will be prompted to restart, so restart payara server.
 Type ʻasadmin restart-domain` to run it.
c:\payara\payara-5.201\payara5\bin>asadmin restart-domain Successfully restarted the domain Command restart-domain executed successfully.
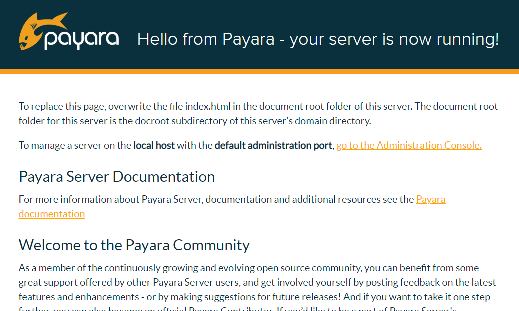
Start a web browser, access `http: // localhost: 8080 /`, and check if the screen below is displayed.
Go to `https: // localhost: 4848 /` and check if the login screen of the management console is displayed.
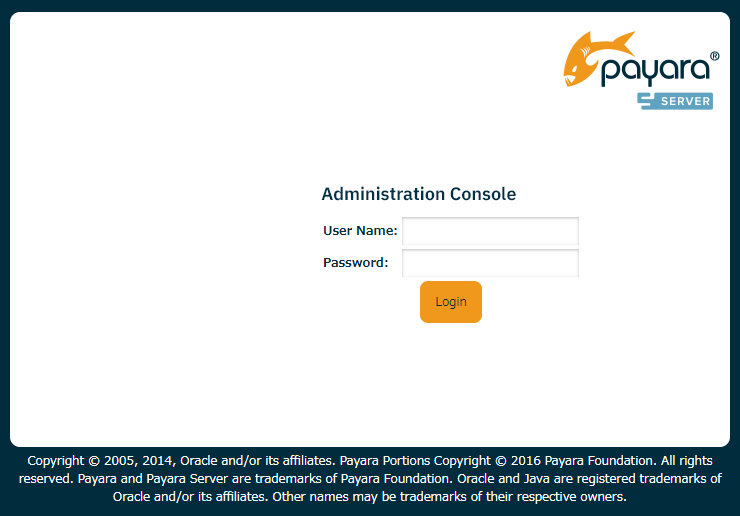
On the login screen, enter admin in User Name (upper) and the password you set earlier in Password (lower).
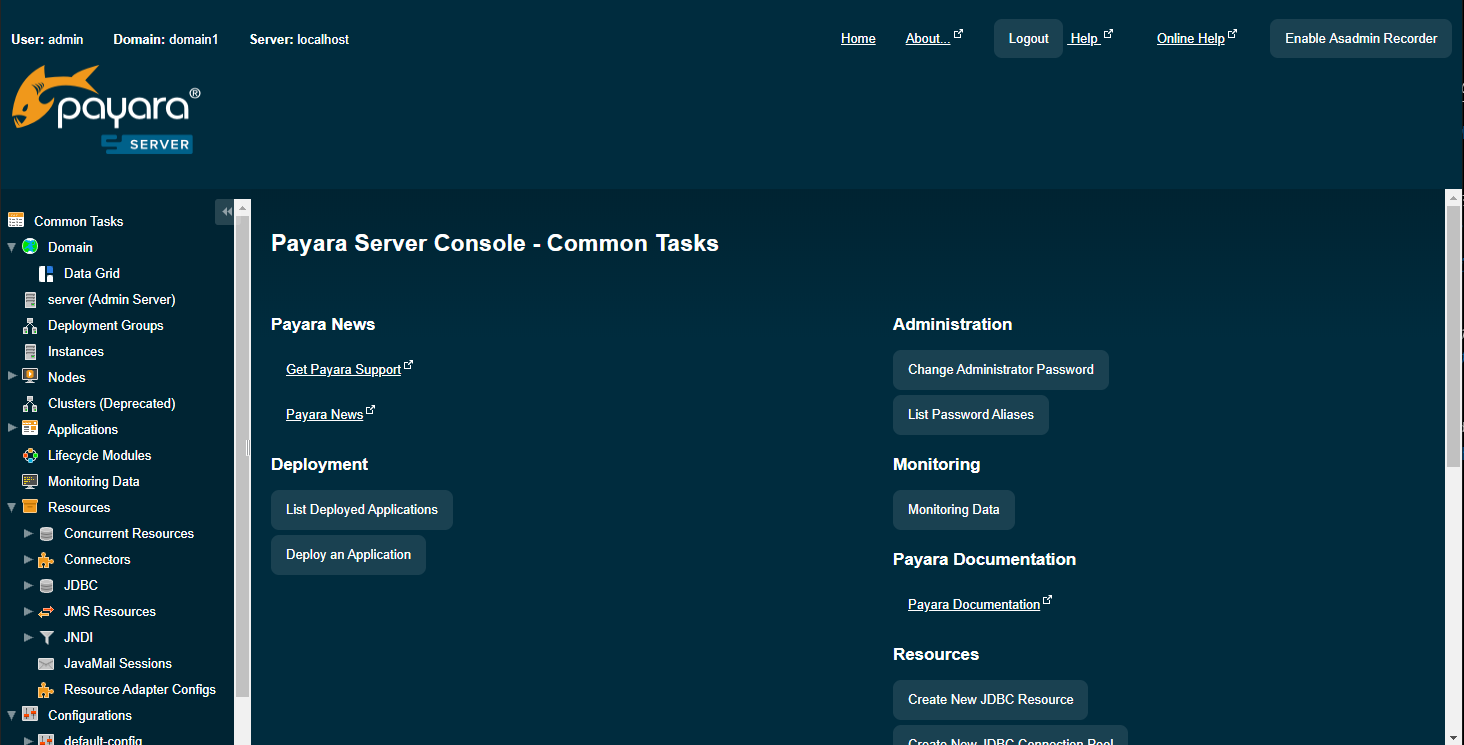
When you have successfully logged in and the screen below is displayed, the installation and initial settings of payara server are complete.
## Gradle installation
Download the latest version.
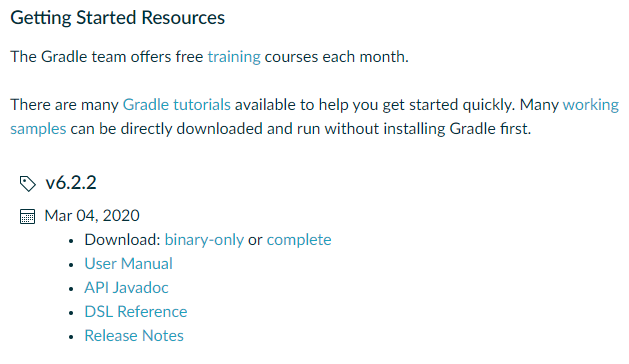
https://gradle.org/releases/
Click the v6.2.2 binary-only link at the bottom of the destination screen to download the zip file.
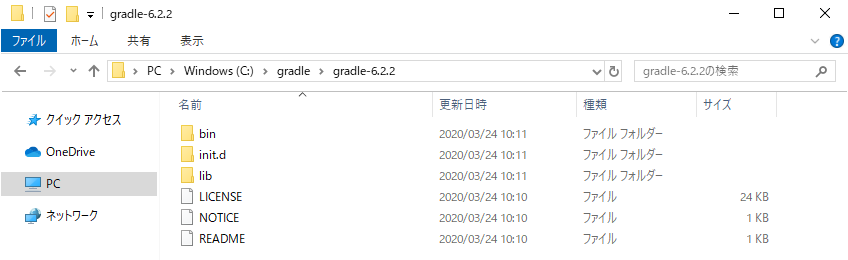
Create a gradle folder directly under the C drive.
Unzip the downloaded file and place the gradle-6.2.2 folder in the unzipped folder inside the gradle folder. The contents of the `c: \ gradle \ gradle-6.2.2` folder after placement will be as shown in the screen below.
Set environment variables.
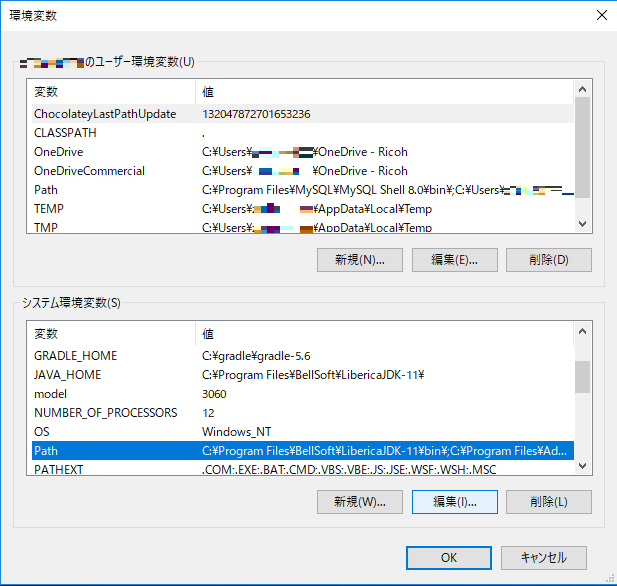
Search for "environment variables" in the Windows settings and select "Edit system environment variables".

Click the environment variable.

Click New system environment variable.

Set the following system environment variables.
Enter as shown in the table below and click OK.
|Variable name|Variable value|
|:---|:---|
| GRADLE_HOME| C:\gradle\gradle-6.2.2 |
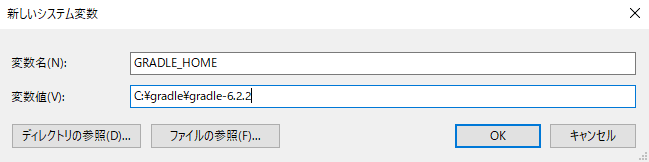
Add the system environment variable Path.
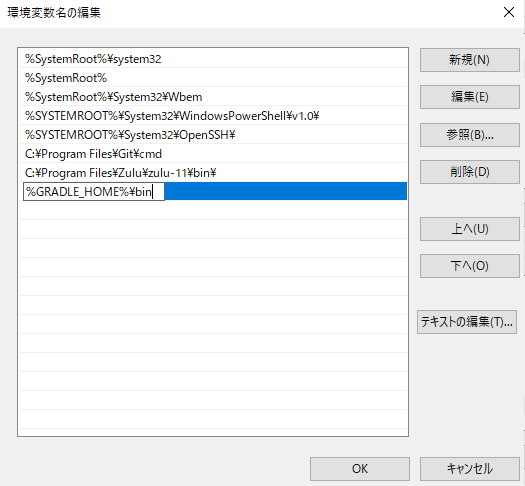
Select Path and click Edit.
Click New, type% GRADLE_HOME% \ bin, and click OK.
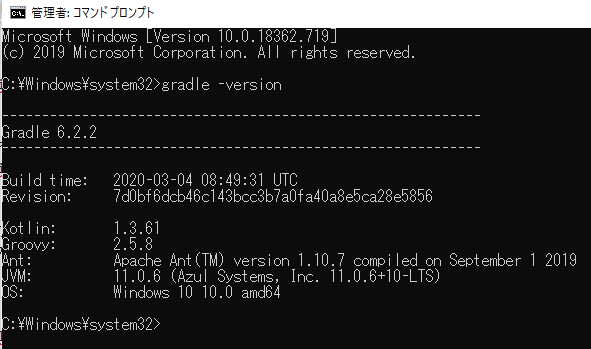
After closing the environment variable edit screen, start the command prompt, execute "gradle -version", and if the following result is displayed, the installation is complete.
## Eclipse installation / initial settings
This also installs the latest version. (I think Java Full Edition is good)
http://mergedoc.osdn.jp/
Unzip the downloaded zip file and place the pleiades folder directly under the C drive.
* Please use 7-zip to decompress.
Once deployed, double-click `c: \ pleiades \ eclipse \ eclipse.exe` to launch Eclipse.
After selecting the workspace and launching Eclipse, select Help> Eclipse Marketplace.
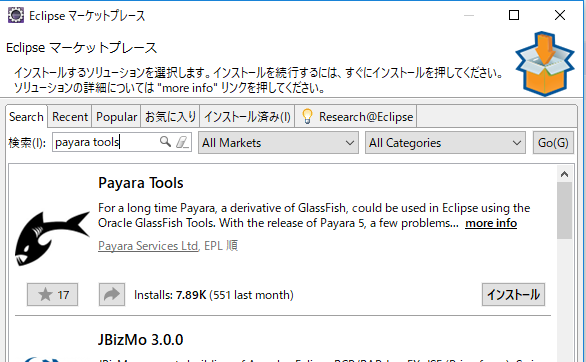
When the Eclipse Marketplace starts, type "payara tools" and press Enter to install payara tools from the search results.
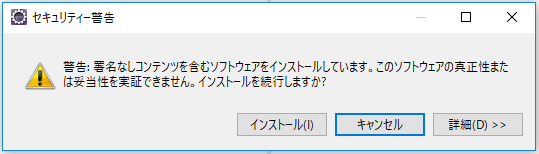
If the following dialog is displayed, click Install.
After the installation is complete, restart Eclipse.
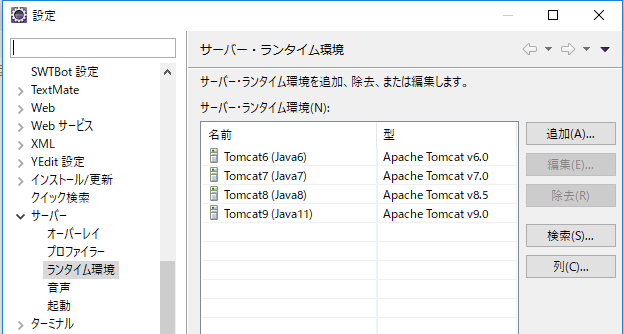
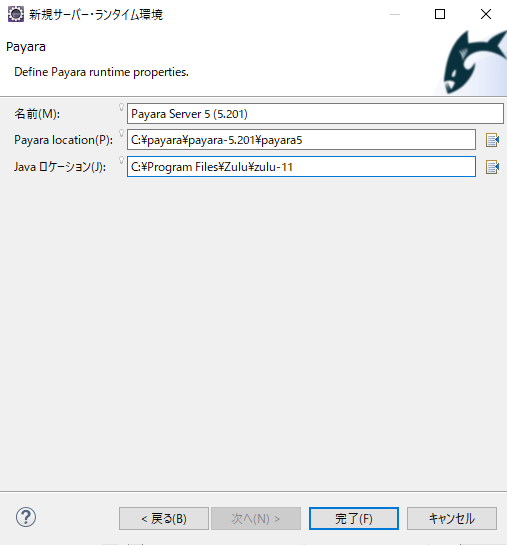
After the reboot is complete, open Window> Settings, select Server> Runtime Environment, and configure the development server settings.
Click Add.
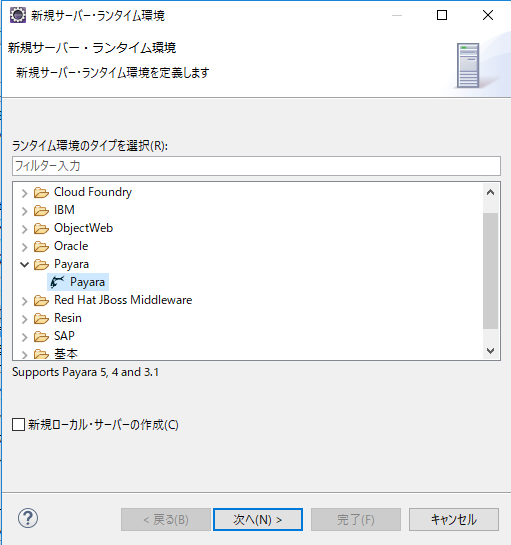
Select Payara and click Next.
Set the payara server installation folder to Payara Location, set the JDK installation folder to the Java location, and click Finish. Then click Apply and Close to close the settings dialog.
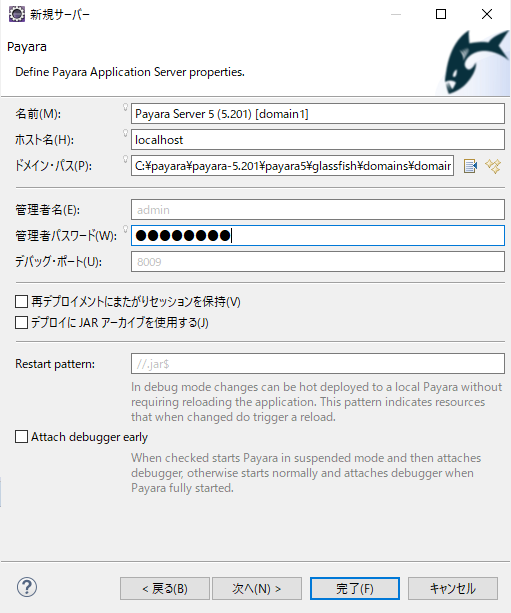
Open the server view and click the link.

Click Payara> Payara and click Next.
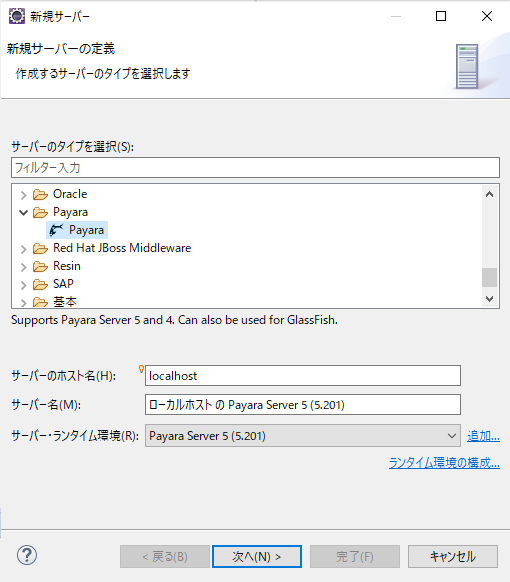
Enter your password and click Finish.
Payara Server is added to the server view.

This completes the environment construction.
In the next chapter, you will create a project.
Recommended Posts