From 0 to Ruby on Rails environment construction [macOS] (From Homebrew installation to Rails installation)
[MacOS] Ruby on Rails 6.1 environment construction (Ruby 3.0)
This article is an article that explains how to build a Ruby on Rails environment so that even beginners can do it without hesitation.
Ruby on Rails is used in extensive development. It is often adopted by Japanese startups, and tabelog, note, accounting software freee, etc. are also developed by Ruby on Rails.
For such Ruby on Rails, version 6.0.0 was released in August 2019, and version 6.1.0 was released in December 2020. In addition, Ruby itself has undergone a major update to version 3.0 in December 2020, adding new features.
In this article, I will explain how to build an environment for ** Ruby 3.0 ** and ** Ruby on Rails 6.1.1 **.
environment
--macOS (not compatible with Windows) --Environment construction article using Cloud9 for Windows is also available. --Terminal uses bash --In the case of zsh, there are some parts that do not work.
Install Homebrew
To simplify the software installation, install ** Homebrew **, a package management system for macOS.
Install Homebrew from the following link.
When you access the link, the next page will be displayed.
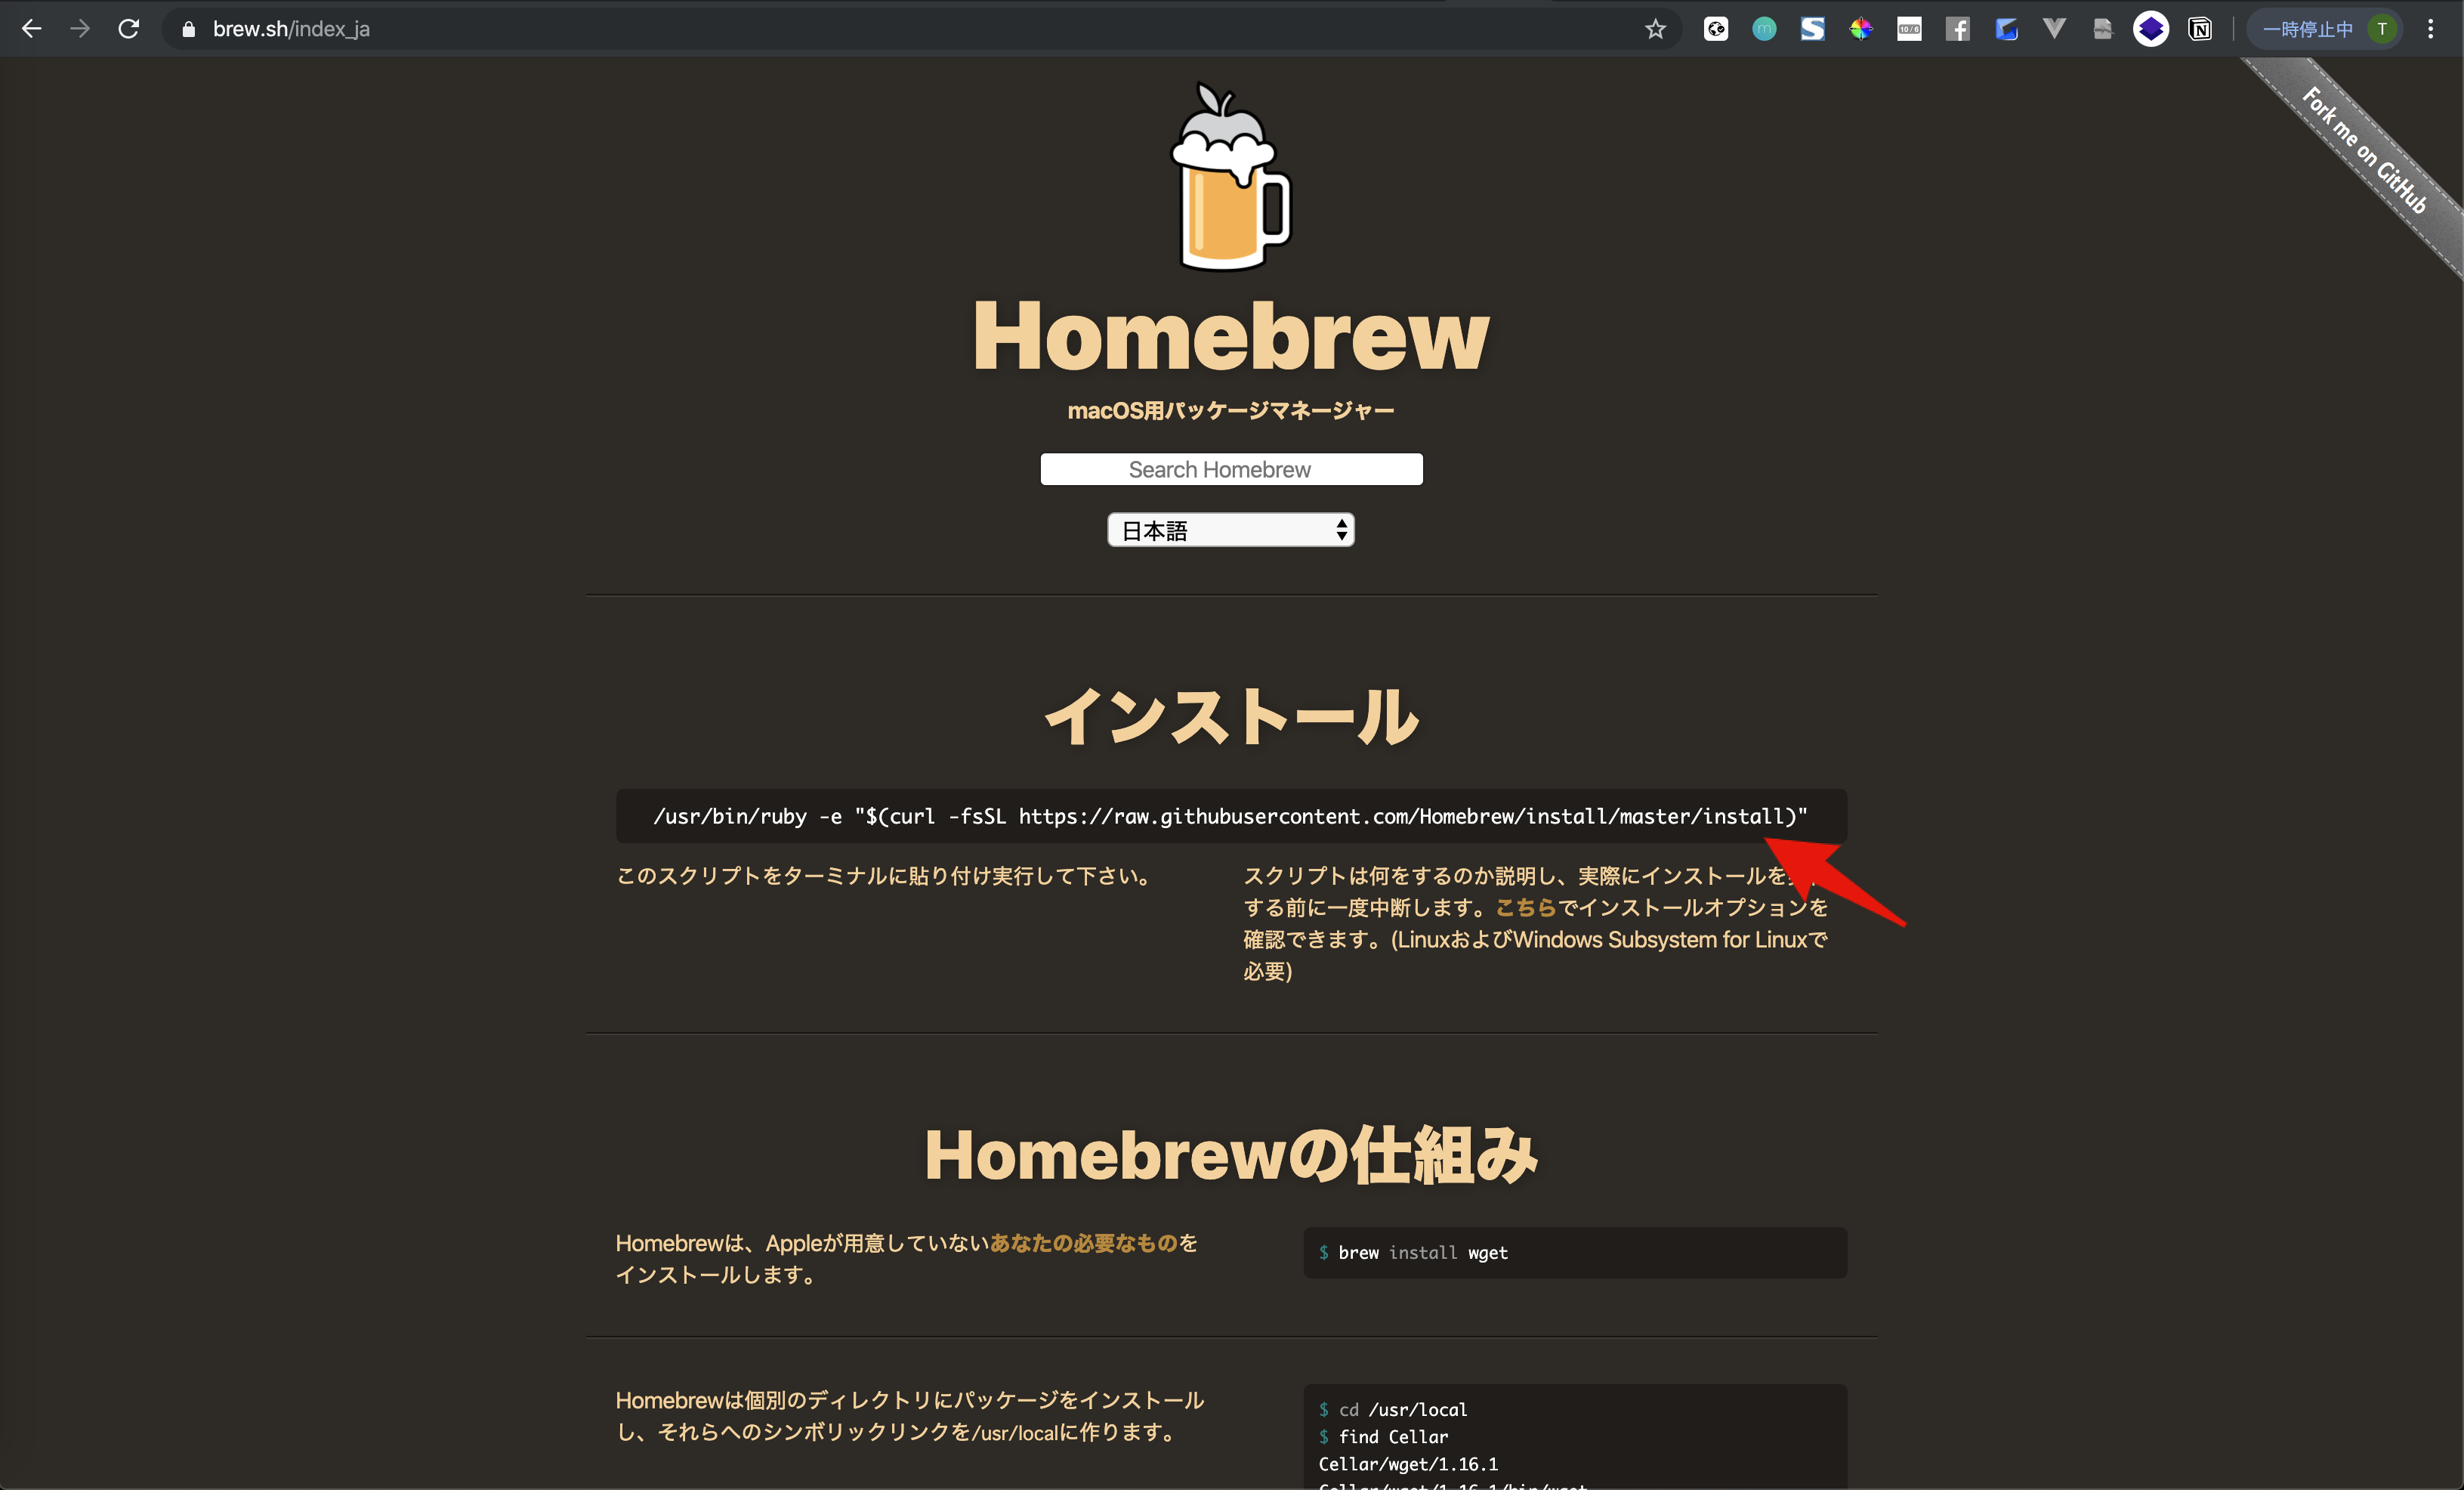
Copy and paste the script line under the "Install" heading into your macOS terminal.
Running it in your terminal will start the Homebrew installation.
The installation will take a few minutes to 10 minutes. You will be asked for a password several times along the way, so enter the password for the computer you are using.
After installing Homebrew, check if it was installed successfully.
To check after installation, start a terminal and enter the following command.
brew -v
After typing, press the enter key to execute the command.
When the command is executed, the following screen will be displayed.
Homebrew 2.7.1
Homebrew/homebrew-core (git revision 9adfd; last commit 2021-01-05)
Homebrew/homebrew-cask (git revision 3d3c93; last commit 2021-01-05)
The version is displayed as "Homebrew 2.7.1", confirming that Homebrew is installed.
(At the time of writing, "2.7.1" was displayed, but if "2.7.2" etc. is displayed, it means that the latest version has been installed.)
Install rbenv
Next, install ** rbenv **, which allows you to easily switch between Ruby versions.
Now, enter the following command in the terminal and execute it.
brew install rbenv
After executing the command, check if rbenv is actually installed.
Check the version of rbenv you have installed by entering this command:
rbenv --version
When you run the command, the version information is displayed as shown below.
rbenv --version
rbenv 1.1.2
In this display, " rbenv 1.1.2 "and version information are displayed.
I was able to confirm that rbenv was installed.
PATH to rbenv
To use the rbenv command, put ** PATH in rbenv **.
"Put in PATH" is specified to check the location of the command executable file.
Reference: What is PATH? (Mac OS X)
The following three commands are prepared to pass the PATH of the rbenv command.
echo 'export PATH="$HOME/.rbenv/bin:$PATH"' >> ~/.bash_profile
echo 'if which rbenv > /dev/null; then eval "$(rbenv init -)"; fi' >> ~/.bash_profile
source ~/.bash_profile
Enter these commands line by line and execute them.
First is the first command.
Add the script to .bash_profile.
echo 'export PATH="$HOME/.rbenv/bin:$PATH"' >> ~/.bash_profile
Added the script to .bash_profile with >> ~/.bash_profile.
Then enter and execute the second command.
echo 'if which rbenv > /dev/null; then eval "$(rbenv init -)"; fi' >> ~/.bash_profile
By adding this command, rbenv will be started automatically when the terminal is started.
Finally, reflect what you added using the command source.
source ~/.bash_profile
I was able to reflect what I added to .bash_profile.
You now have the PATH required to use the rbenv command.
Ruby environment construction
Then install ** Ruby **.
Before installing Ruby, check which version of Ruby you can install.
Enter the following command using the rbenv you just installed.
rbenv install -l
When you run the command, the latest stable version will be listed.
rbenv install -l
2.5.8
2.6.6
2.7.2
3.0.0
jruby-9.2.13.0
maglev-1.0.0
mruby-2.1.2
rbx-5.0
truffleruby-20.2.0
truffleruby+graalvm-20.2.0

Only latest stable releases for each Ruby implementation are shown.
Use 'rbenv install --list-all' to show all local versions.
- To display all installable ruby versions, execute the command
rbenv install -las shown in the above execution result.
Looking at the version number, the latest version of the stable version at the time of writing (January 2021) is "3.0.0", so install 3.0.0.
Reference: Ruby Download
If you don't see the latest version, you need to update rbenv and ruby -build to the latest version.
Reference: rbenv Upgrading with Homebrew
Now, enter the following command to install Ruby 3.0.0.
rbenv install 3.0.0
Execute the command to start the installation. It may take a few minutes to complete the installation.
Ruby is now installed.
Specify the version of Ruby to use locally
In addition, execute the following command to specify the version of Ruby to be used locally.
rbenv local 3.0.0
This will use the 3.0.0 version of Ruby locally.
Using local in this way, you can specify the Ruby version for each project.
If you want to use the same version in common on your PC (server), use global instead of local.
Next, check the version information of Ruby. Enter the following command:
ruby -v
When you run the command, you'll see the version as shown below.
ruby -v
ruby 3.0.0p137 (2020-10-01 revision 5445e04352) [x86_64-darwin19]
The specified "3.0.0" is displayed. Now you can confirm the specified Ruby version.
Install Bundler
After installing Ruby, then install ** Bundler **.
Ruby uses a library called ** Gem ** to manage packages.
You can easily install and uninstall with the Gem command, but if you use multiple Gem, a dependency will be created between the Gem and problems will occur due to different versions.
Therefore, Bundler accurately tracks and manages each version of Gem to provide a consistent environment for Ruby projects.
reference:
Now let's install Bundler. Enter the following command.
gem install bundler
Run the command to start the installation.
Check the version of Blundler installed.
Enter the following command:
bundler -v
After running the command, you should see something like this:
bundler -v
Bundler version 2.2.3
"Version 2.2.3" and version information are displayed.
You have now confirmed that Blendler is installed.
install yarn
Then install ** yarn **.
yarn is a package manager required to use JavaScript libraries.
There is also a package manager called npm that is compatible with yarn. However, Rails 6 requires yarn because Webpacker has become the standard.
Now let's install yarn.
Enter the following command:
brew install yarn
Running the Homebrew command will install yarn.
To see if yarn was actually installed, enter the following command:
yarn -v
When I run the command, I get the following:
yarn -v
1.22.10
Here, " 1.22.10 "was displayed. If the version information is displayed, you can confirm that yarn has been installed.
Install Ruby on Rails
Finally, install Rails.
When installing Rails, you can specify the version as " -v version number ".
This time, install version " 6.1.1 ".
Reference: History of all versions of rails
Enter the following command:
gem install rails -v 6.1.1
Run the command to start the installation. It may take a few minutes to complete the installation.
Check Rails version
After installing Rails, enter the following command to check your Rails version:
rails -v
When you run the command, you will see the following screen.
rails -v
Rails 6.1.1
" Rails 6.1.1 "is displayed.
This completes the installation of Ruby on Rails.
- This article is a partial modification of the teaching materials of Techpit.
reference
-Ruby --Download -History of all versions of rails
Recommended Posts