Implementation of CRUD using REST API with Python + Django Rest framework + igGrid
Hello. I'm Nakae from the technical consulting team of Infragistics Japan Co., Ltd. Our main business is to provide technical support and training content to our customers.
Infragistics (IG) is a software vendor of development tools. We mainly develop and provide UI components for various platforms. This time, I will introduce a product called Ignite UI for jQuery that can introduce IG's rich UI components to web applications regardless of the backend language.
Ignite UI for jQuery https://jp.infragistics.com/products/ignite-ui
One of the most frequently used UI component groups in IG is the grid component. A grid component is a component that displays data in a table. Ignite UI for jQuery's igGrid has the following built-in features:
- Column aggregation
- Grouping
- Sort
- Filtering
- Paging
- Fixed columns
- Move columns
- Add new lines, update (edit), delete lines
- Merge cells
- Multi-line layout
- Virtualization
In this article, I'll show you how to combine a web application built with Python + Django with Ignite UI for jQuery to implement igGrid with CRUD functionality.
Django has a framework called the Django REST framework that makes it fairly easy to implement a web API.
Django REST framework https://www.django-rest-framework.org/
In addition, it is possible to bind the data acquired by REST as a data source to the igGrid of Ignite UI for jQuery. Take appropriate action against REST based on what new rows are added, updated, or deleted on the grid.
REST update (igGrid) https://jp.igniteui.com/help/iggrid-rest-updating
By combining these two functions (Django REST framework and igGrid that can be linked with REST), it is possible to implement igGrid with CRUD functions very easily.
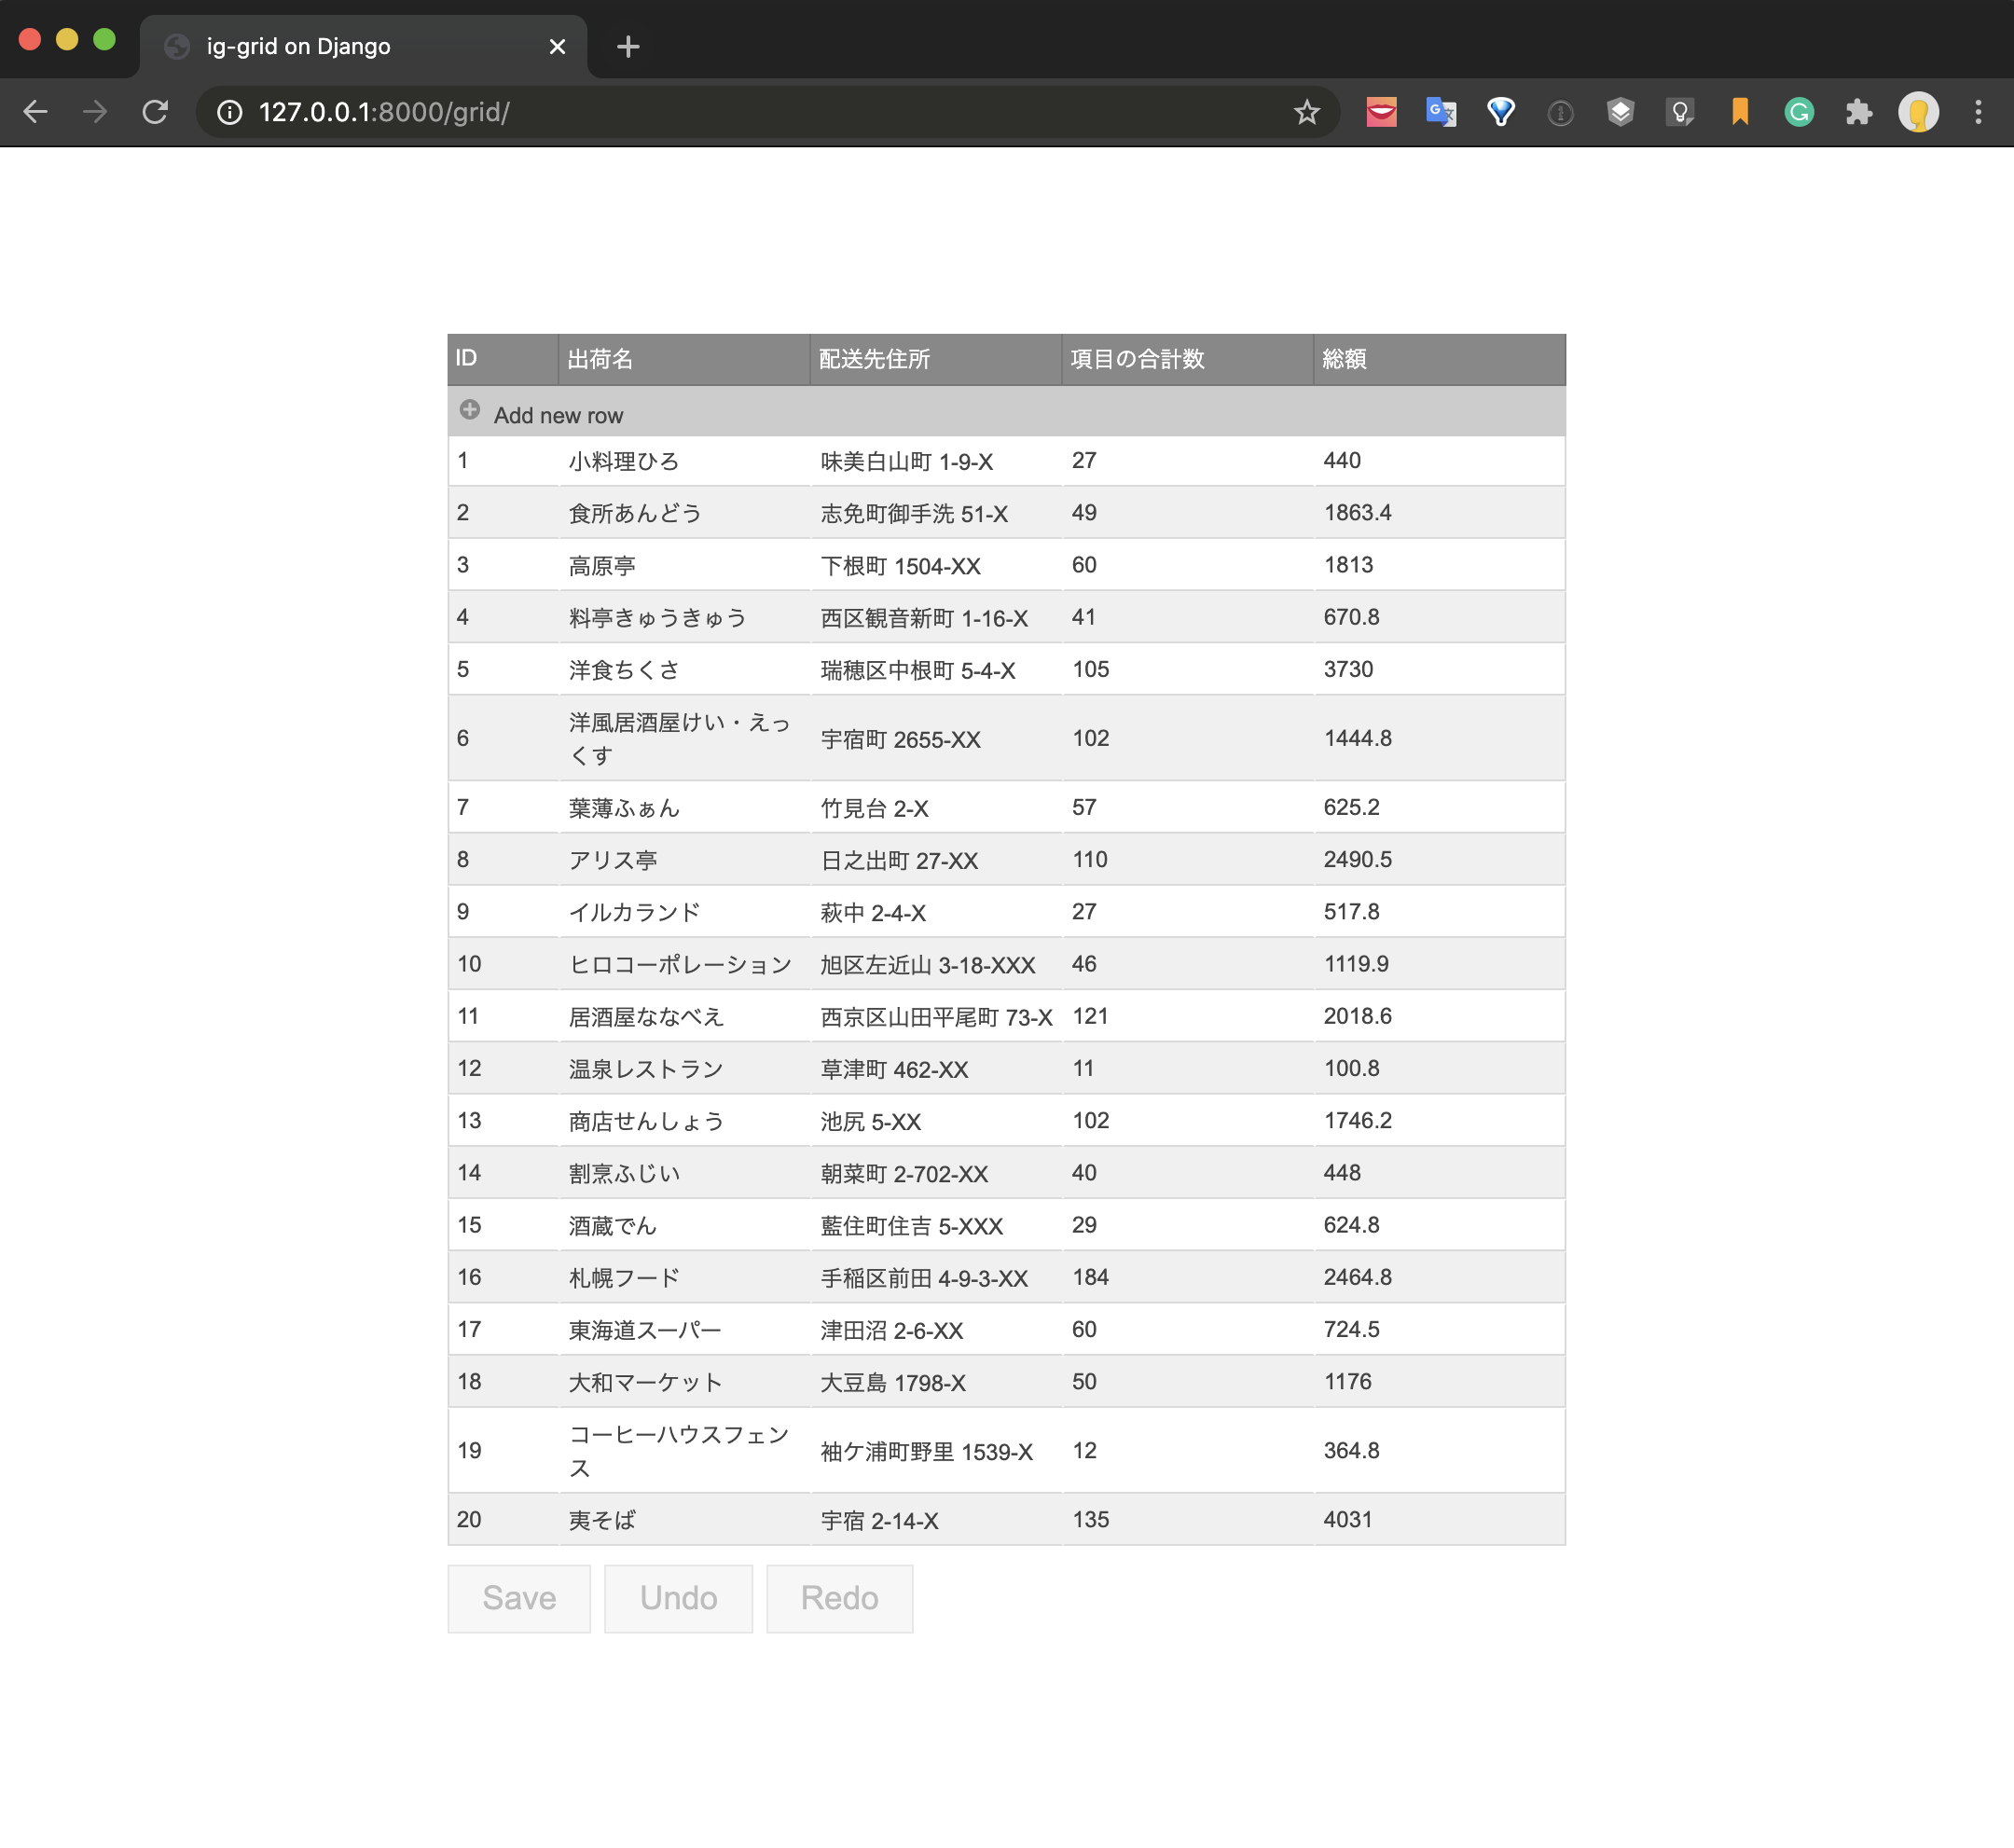
The final realization image is as follows.
The data is listed using the grid component, and the process of adding new, updating, and deleting is operated by the UI. When you click the Save button, each process is executed by the API and the database is updated.
Implement REST with Python + Django
In Django, we will proceed on the assumption that we can implement the linkage between the database and the application. If you're new to Django this time, please refer to the documentation below and proceed with the steps up to "Creating your first Django app, part 2" before reading the rest of the story.
Django 2.2 documentation https://docs.djangoproject.com/ja/2.2/contents/
Also this time
- python 3.7
- Django 2.2.14
- Ignite UI for jQuery 20.1
It is implemented at.
Django REST framework installation and initialization
Install django-filter as well.
$ pip install djangorestframework
$ pip install django-filter
settting.py
INSTALLED_APPS = [
    ...
    'rest_framework',
]
Create an app for the API
$ python manage.py startapp api
Model settings
This time, I created the following model for order management.
api/models.py
from django.db import models
# Create your models here.
class Ordering(models.Model):
    Shop = models.CharField(max_length=100) #Shipping name
    Address = models.CharField(max_length=200) #Shipping address
    TotoalNumber = models.IntegerField(default=0) #Total number of items
    TotalPrice = models.FloatField(default=0) #the amount
In addition, we will proceed on the assumption that the demo data has already included the following.
| id | Shop | Address | TotoalNumber | TotalPrice |
|---|---|---|---|---|
| 1 | Small dish Hiro | Ajiyoshihakusancho 1-9-X | 27 | 440 |
| 2 | Eating place Ando | Shime Town Mitarai 51-X | 49 | 1863.4 |
| ... | ... | ... | ... | ... |
Definition of Serializer
Create a new file called serializer.py and set it as follows.
api/serializer.py
# coding: utf-8
from rest_framework import serializers
from .models import Ordering
class orderingSerializer(serializers.ModelSerializer):
    class Meta:
        model = Ordering
        fields = ('id', 'Shop', 'Address', 'TotoalNumber', 'TotalPrice')
View settings
In View, define a ViewSet that combines the model and the Serializer prepared earlier.
api/views.py
# coding: utf-8
import django_filters
from rest_framework import viewsets, filters
from .models import Ordering
from .serializer import orderingSerializer
class orderingViewSet(viewsets.ModelViewSet):
    queryset = Ordering.objects.all()
    serializer_class = orderingSerializer
URL settings
Set the URL. First, create a new api / urls.py and write as follows.
api/urls.py
# coding: utf-8
from rest_framework import routers
from .views import orderingViewSet
router = routers.DefaultRouter()
router.register(r'order', orderingViewSet)
Make the following routing settings in the route urls.py.
urls.py
from django.contrib import admin
from django.conf.urls import url, include
from django.urls import include, path
from api.urls import router as api_router
urlpatterns = [
    path('admin/', admin.site.urls),
    url(r'^api/', include(api_router.urls)),
]
Now you can exchange data using API. Start the server and try to access the following URL.
http://127.0.0.1:8000/api/order/
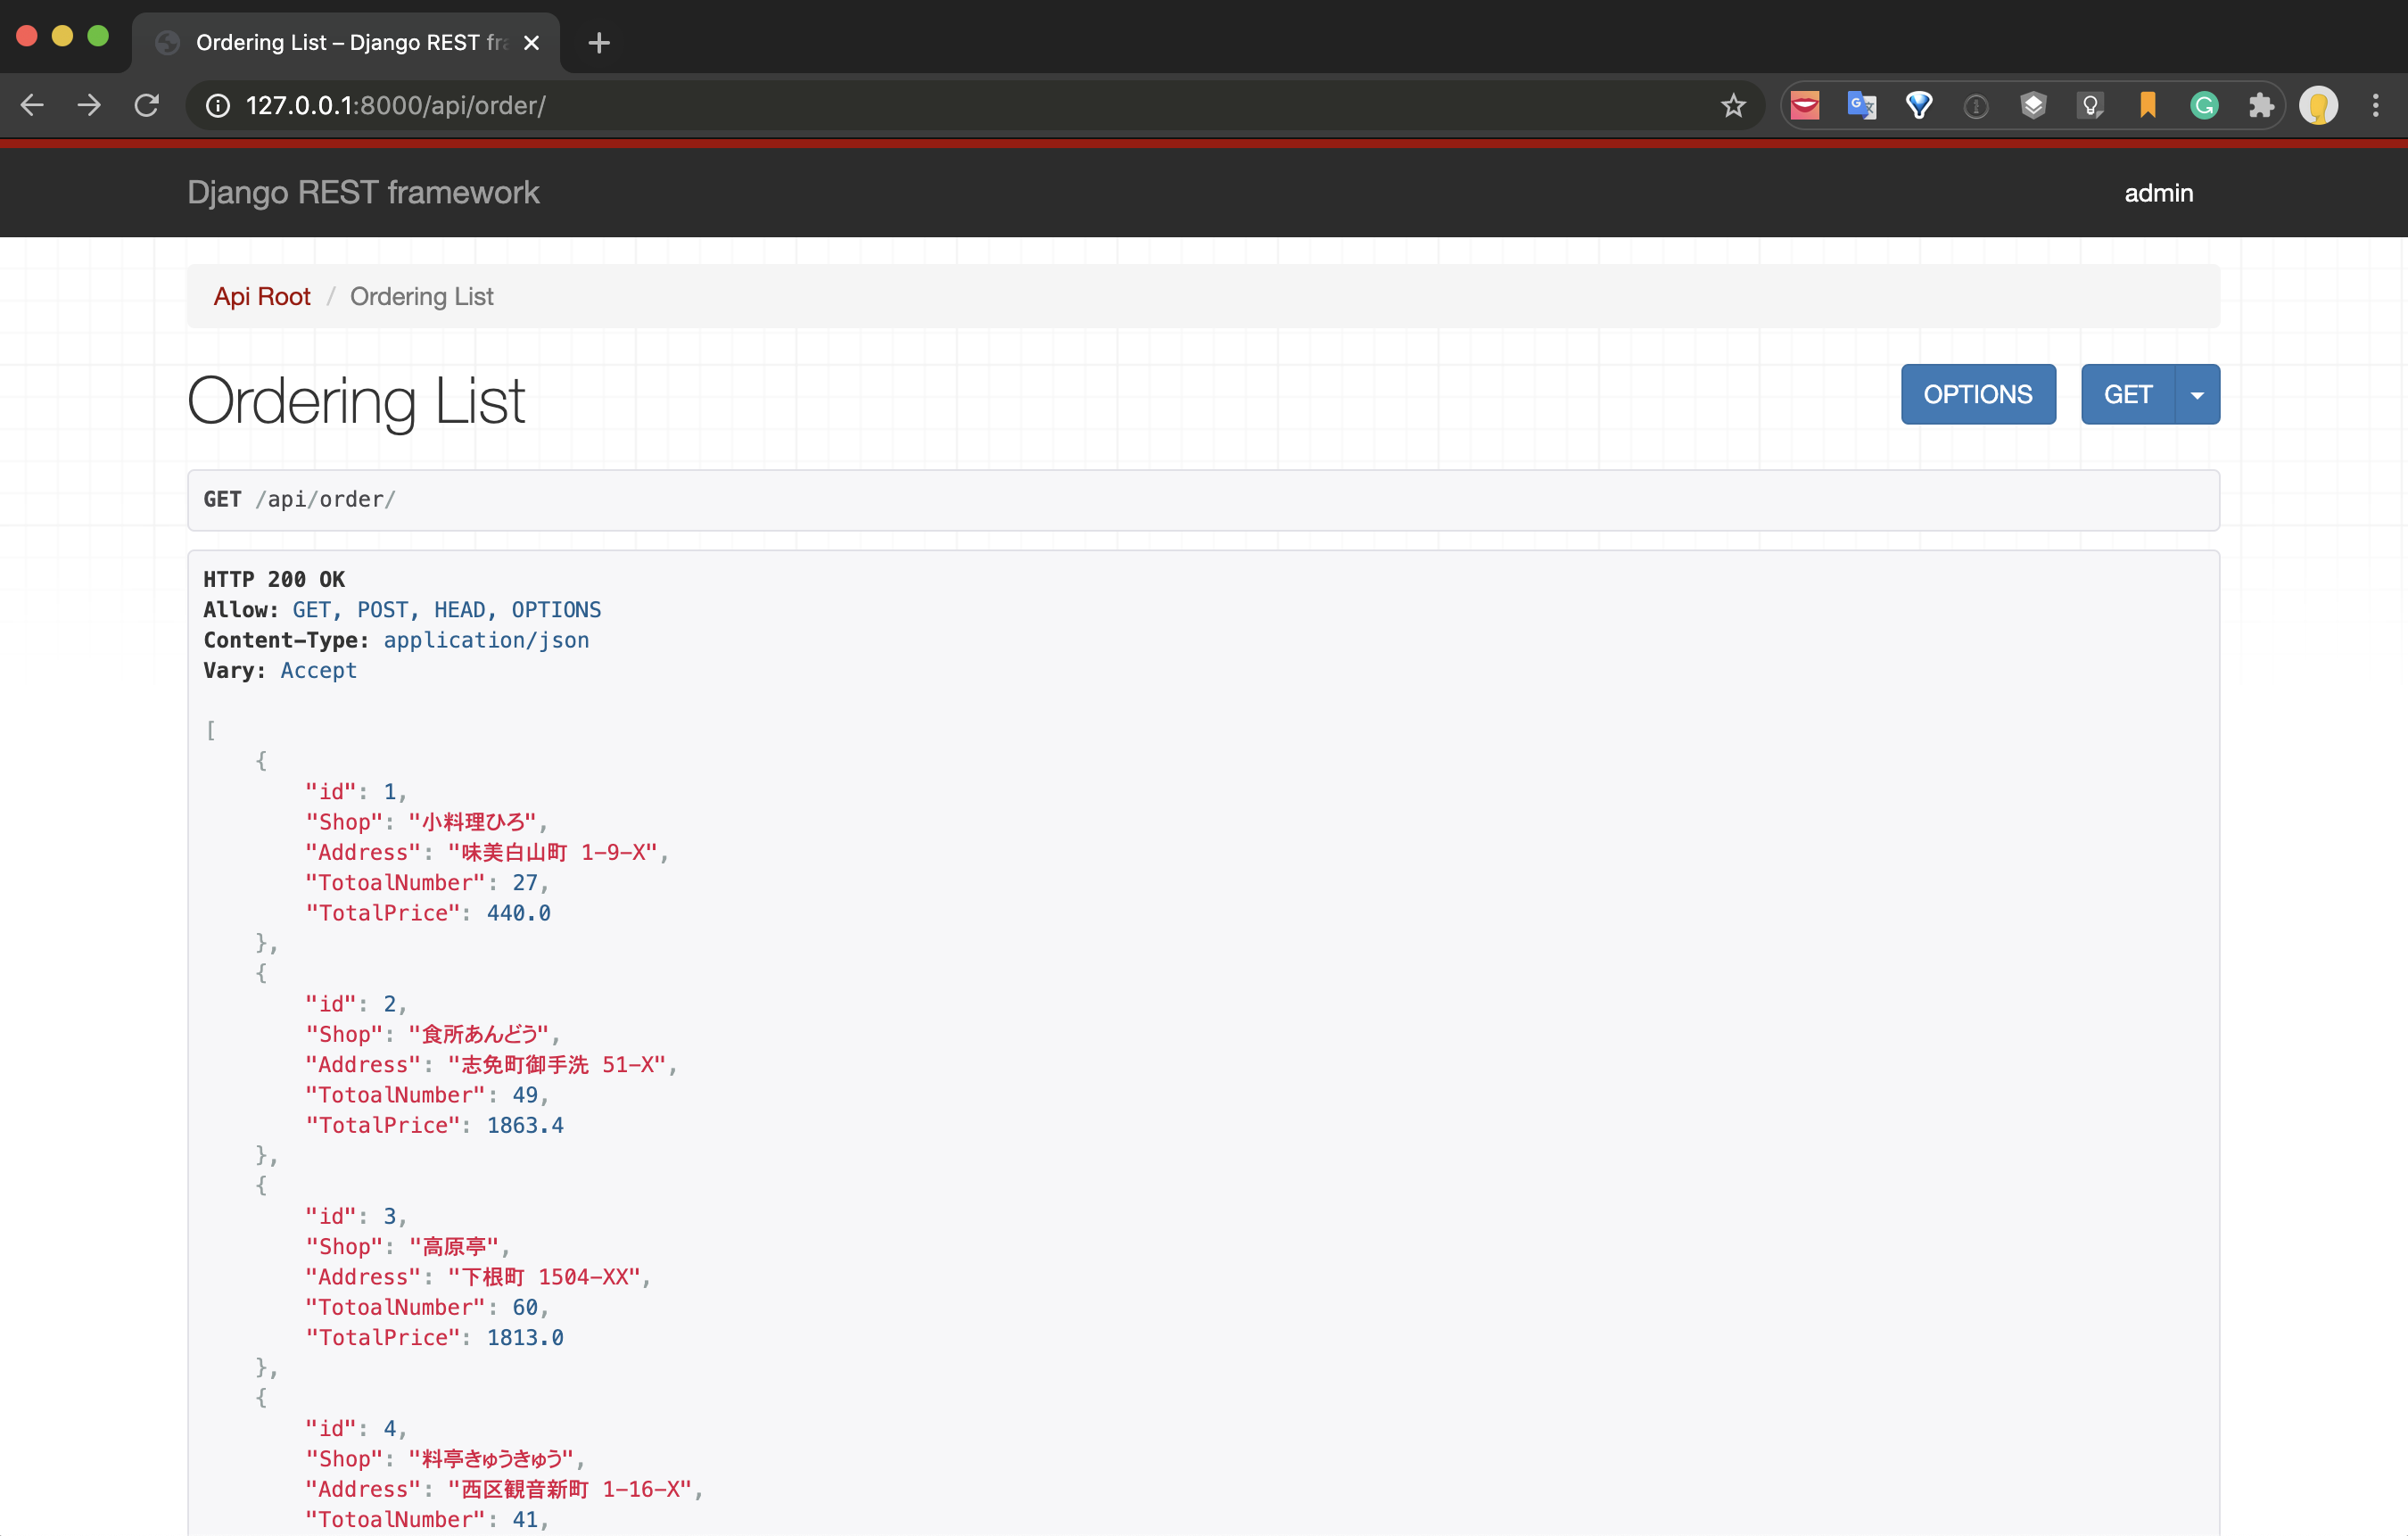
You can confirm that you can get all the data in JSON format.
In the same way, if you access the URL with the ID specified as follows,
http://127.0.0.1:8000/api/order/1
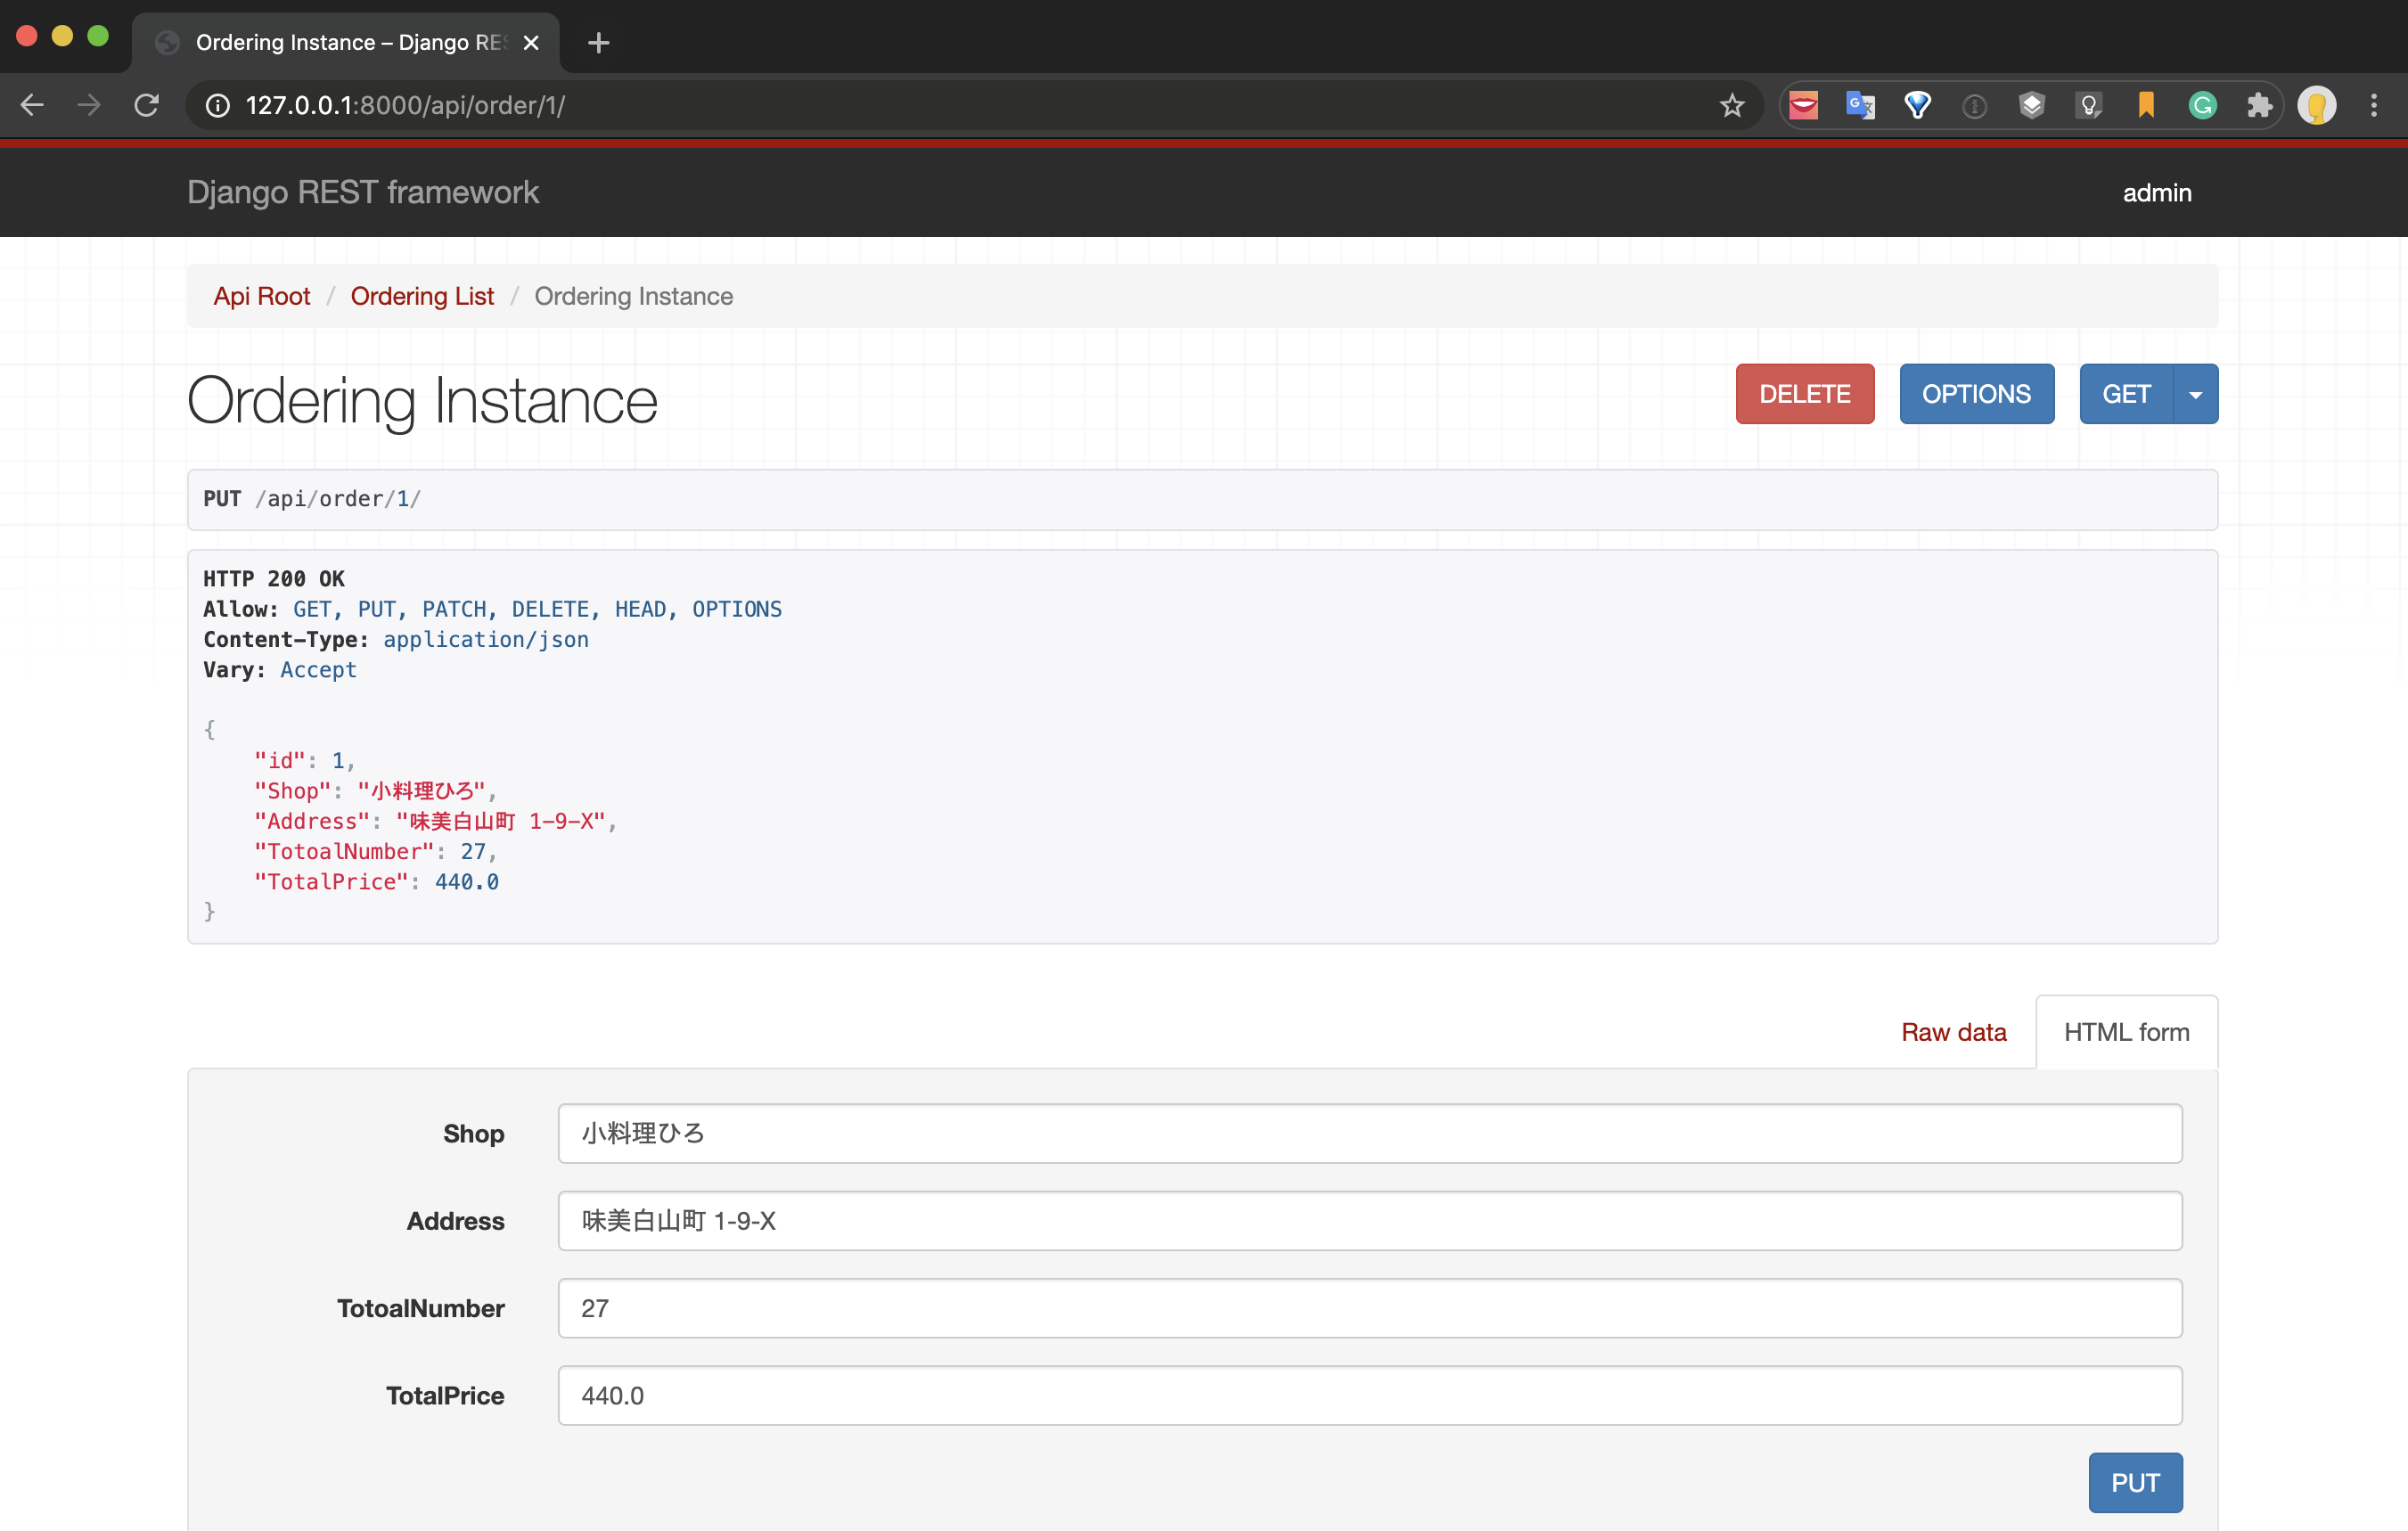
Only the relevant data can be displayed, information can be updated by PUT and deleted by DELETE on this screen, and it also supports linkage with the database.
Now that Django is ready, let's move on to implementing igGrid.
Implementation of igGrid and cooperation with REST
Now that the backend is ready to be accepted, we will start incorporating the frontend. First, add a new app for igGrid.
Create an app for igGrid
$ python manage.py startapp grid
Create template for igGrid
Create a new template html in the grid / templates / grid directory and edit it. This time, we will describe everything in one index.html without processing such as dividing the
part and the script into parts.First of all, the necessary libraries are loaded from the CDN as follows.
grid/templates/grid/index.html
<!DOCTYPE html>
<html lang="ja">
  <head>
    <meta http-equiv="Content-type" content="text/html; charset=utf-8" />
    <meta http-equiv="X-UA-Compatible" content="IE=edge">
    <meta name="viewport" content="width=device-width, initial-scale=1">
    <title>ig-grid on Django</title>
    <link href="https://cdn-na.infragistics.com/igniteui/2020.1/latest/css/themes/infragistics/infragistics.theme.css" rel="stylesheet">
    <link href="https://cdn-na.infragistics.com/igniteui/2020.1/latest/css/structure/infragistics.css" rel="stylesheet">
    <link href="https://igniteui.github.io/help-samples/css/apiviewer.css" rel="stylesheet" type="text/css">
    <style type="text/css">
        input.button-style
        {
            margin-top: 10px;
        }
    </style>
  </head>
  <body>
  ...
    <script src="https://ajax.aspnetcdn.com/ajax/modernizr/modernizr-2.8.3.js"></script>
    <script src="https://code.jquery.com/jquery-2.1.3.min.js"></script>
    <script src="https://code.jquery.com/ui/1.10.3/jquery-ui.min.js"></script>
    <script src="https://cdn-na.infragistics.com/igniteui/2020.1/latest/js/i18n/infragistics-ja.js"></script>
    <script src="https://cdn-na.infragistics.com/igniteui/2020.1/latest/js/infragistics.core.js"></script>
    <script src="https://cdn-na.infragistics.com/igniteui/2020.1/latest/js/infragistics.lob.js"></script>
    <script src="https://igniteui.github.io/help-samples/js/apiviewer.js"></script>
    <script src="https://cdn-na.infragistics.com/igniteui/2020.1/latest/js/modules/i18n/regional/infragistics.ui.regional-ja.js"></script>
    <!-- Used to add modal loading indicator for igGrid -->
    <script src="https://www.igniteui.com/js/grid-modal-loading-inicator.js"></script>
  </body>
</html>
In addition, as the implementation method this time, the changes to each row of the grid are temporarily retained, and all the changes are collectively committed to the database by clicking the save button. In this article, I will omit the explanation about batch commit. The details are described in the following documents, so please refer to them.
Grid-edit https://jp.igniteui.com/grid/basic-editing
Update Summary (igGrid) https://jp.igniteui.com/help/iggrid-updating
Data binding of REST data
Data binding to the grid with RESTDataSource extended from DataSource to support REST.
ig.RESTDataSource https://jp.igniteui.com/help/api/2020.1/ig.restdatasource
grid/templates/grid/index.html
<script type="text/javascript">
    $(function () {
        var ds = new $.ig.RESTDataSource({
            dataSource : "/api/order/",
            restSettings: {
                create: {
                    url: "/api/order/", //Specify API endpoint
                },
            }
        });
        var grid = $("#grid").igGrid({
            dataSource: ds, //Bind RESTDataSource
            type: "json",
            columns: [
                ...
            ],
            primaryKey: "id",
            autoGenerateColumns: false,
In the above example, / api / order / is specified as the endpoint of create in restSettings, so when a new row is created in the grid, POST will be performed to / api / order /. Also, even if you do not specify any other endpoint, DELETE, PUT, etc. will interpret the endpoint as / api / order / 1 as appropriate.
Adjust the routing and test once in this state.
I was able to display a list of data on the grid. This means that the GET process was successful with REST.
But what about POST processing? Let's test the process of adding a new line.

POST processing will result in an error. This is an error due to security protection on Django's side when POSTing through ajax. When using ajax for cross-site request forgery (CSRF) measures, it is necessary to generate and grant a token.
However, ig.RESTDataSource does not have a built-in option to specify a token, so it needs to be implemented in another way.
CSRF token settings
By using the beforeSend parameter of jQuery's ajaxSetup () method, it is possible to set the processing before ajax communication occurs. Specify the token for X-CSRFToken in the request header as shown below.
Since Django comes with a template tag from the beginning that makes it easy to get a token for CSRF countermeasures, add the following description to the script.
grid/templates/grid/index.html
$.ajaxSetup({
    beforeSend: function(xhr, settings) {
        xhr.setRequestHeader("X-CSRFToken", "{{ csrf_token }}");
    }
});
Let's test it again.
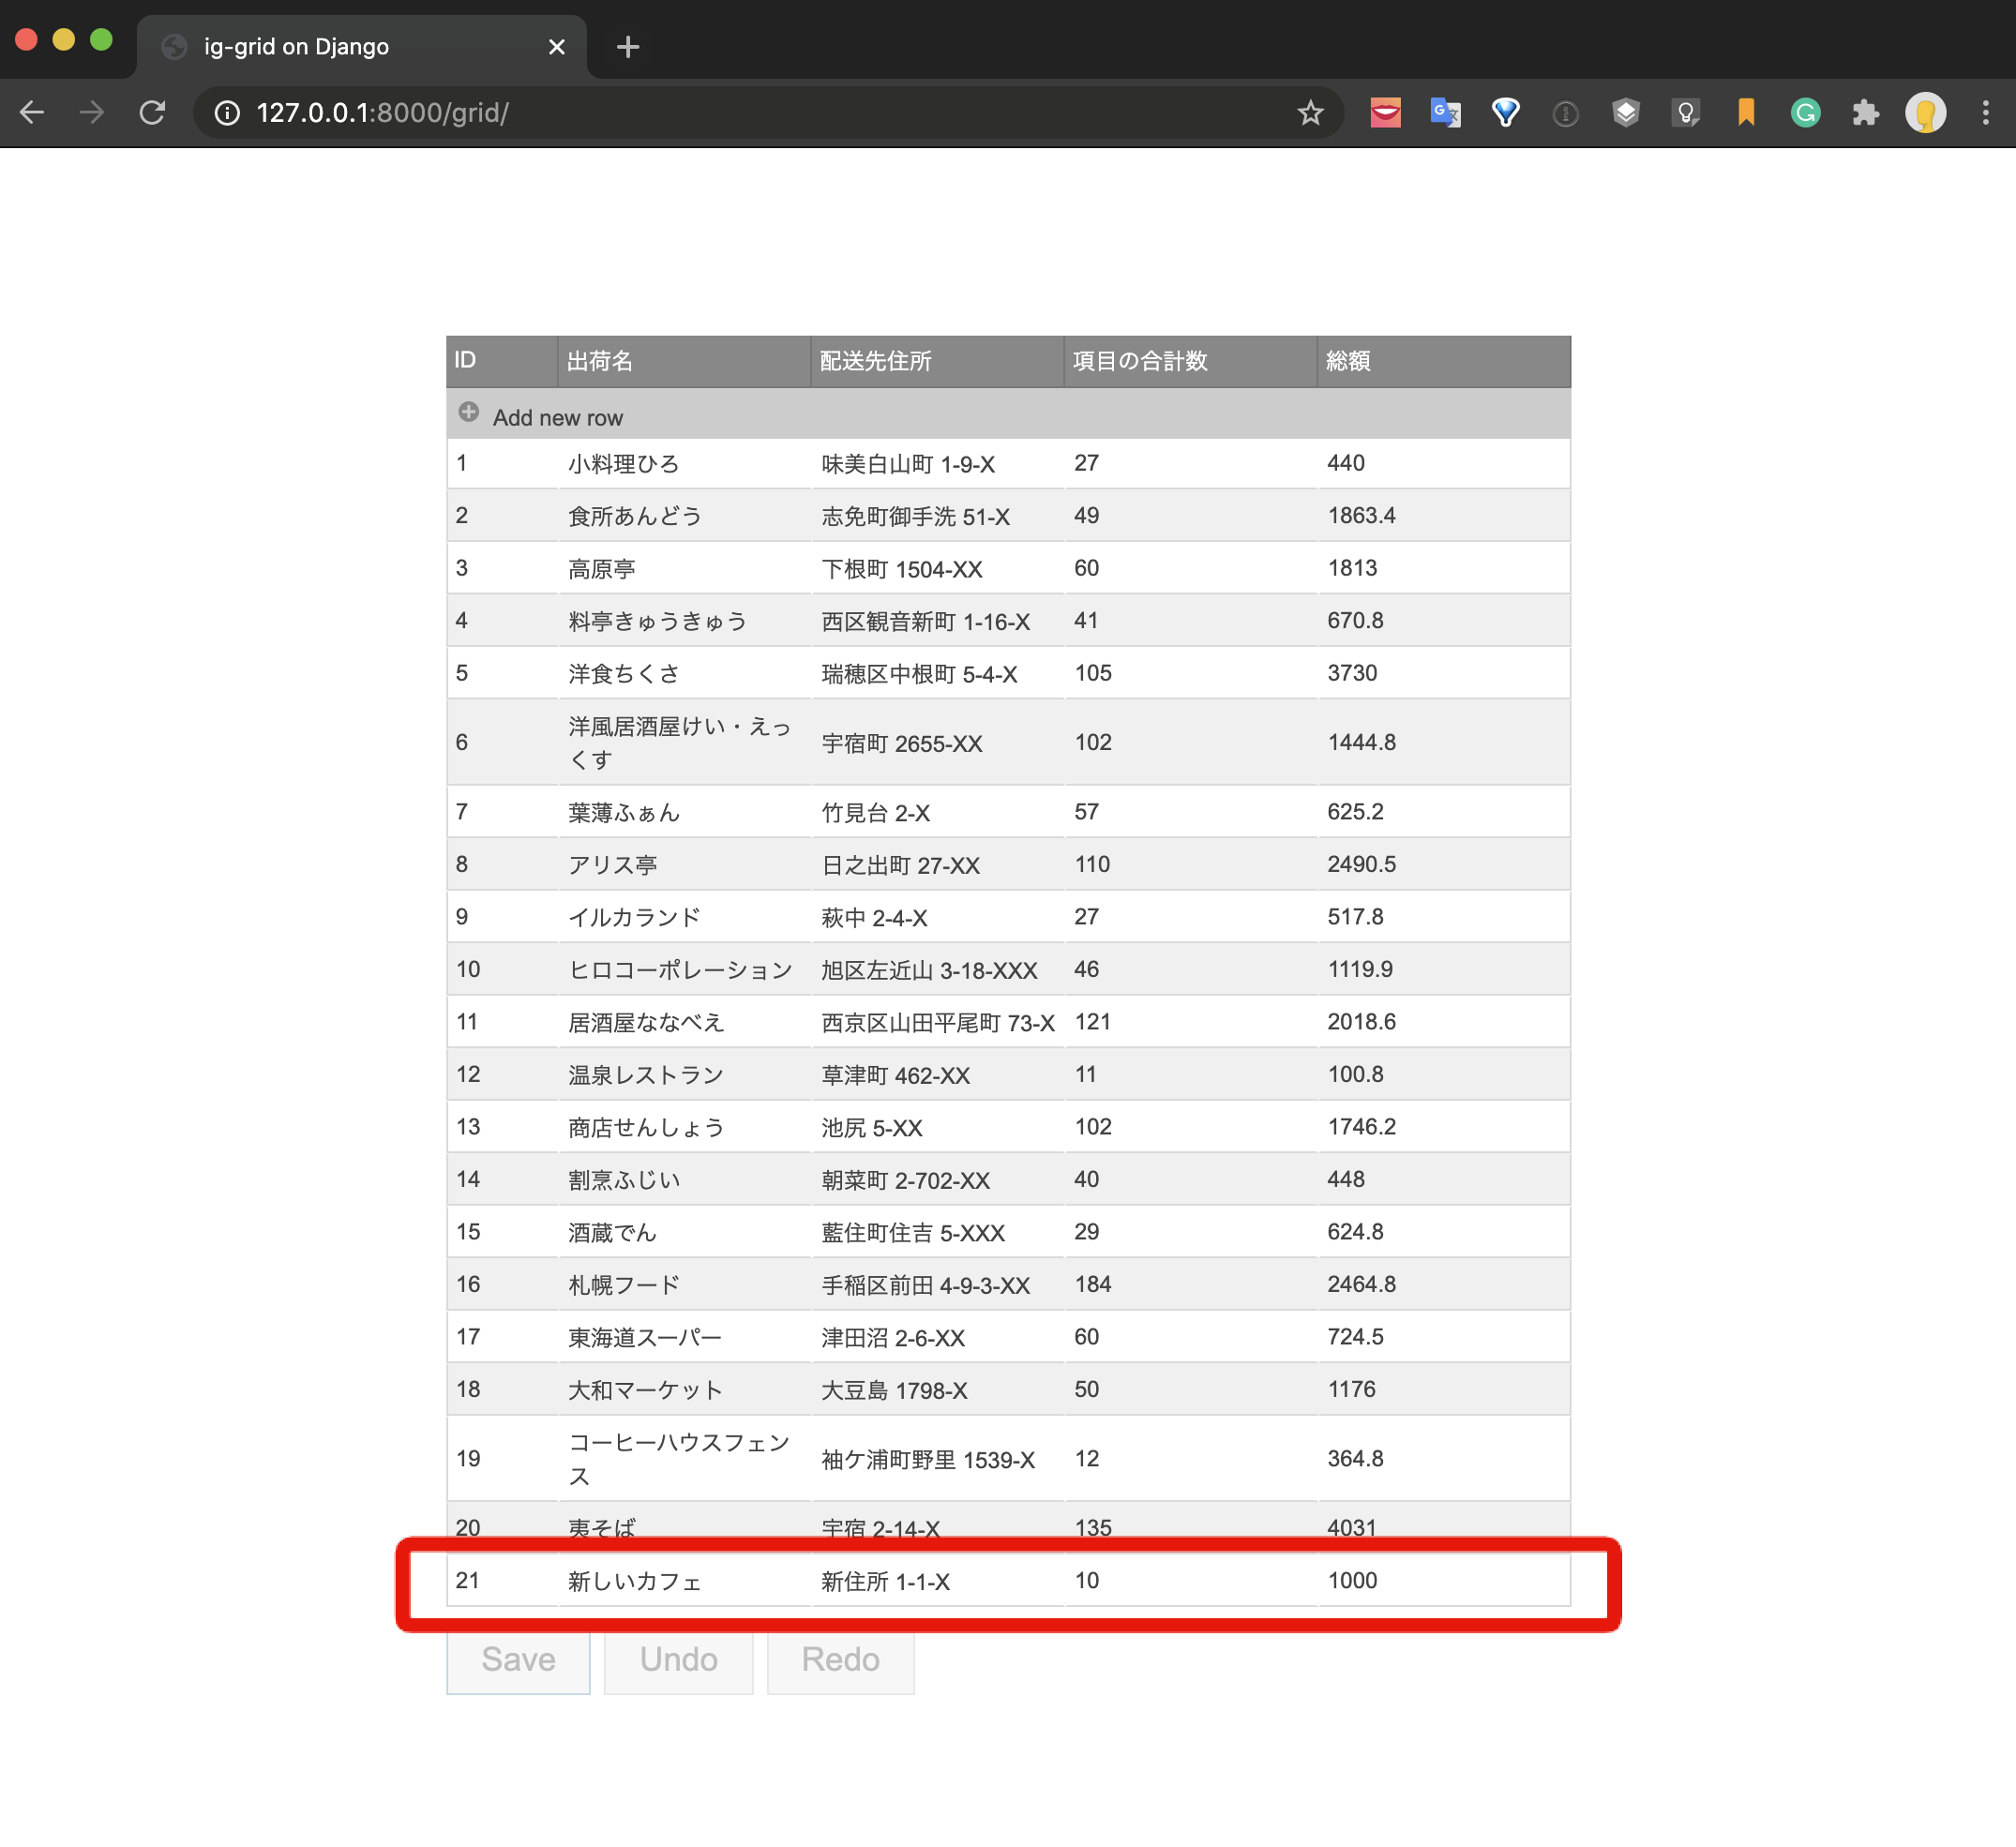
The new data has been successfully POSTed. You can also check the existence of new data in the database.
% python manage.py shell
>>> from api.models import Ordering
>>> Ordering.objects.filter(id=21)
<QuerySet [<Ordering: Ordering object (21)>]>
Next, test the operation of PUT and DELETE.
Delete the newly added data and change the total amount of data for ID20.
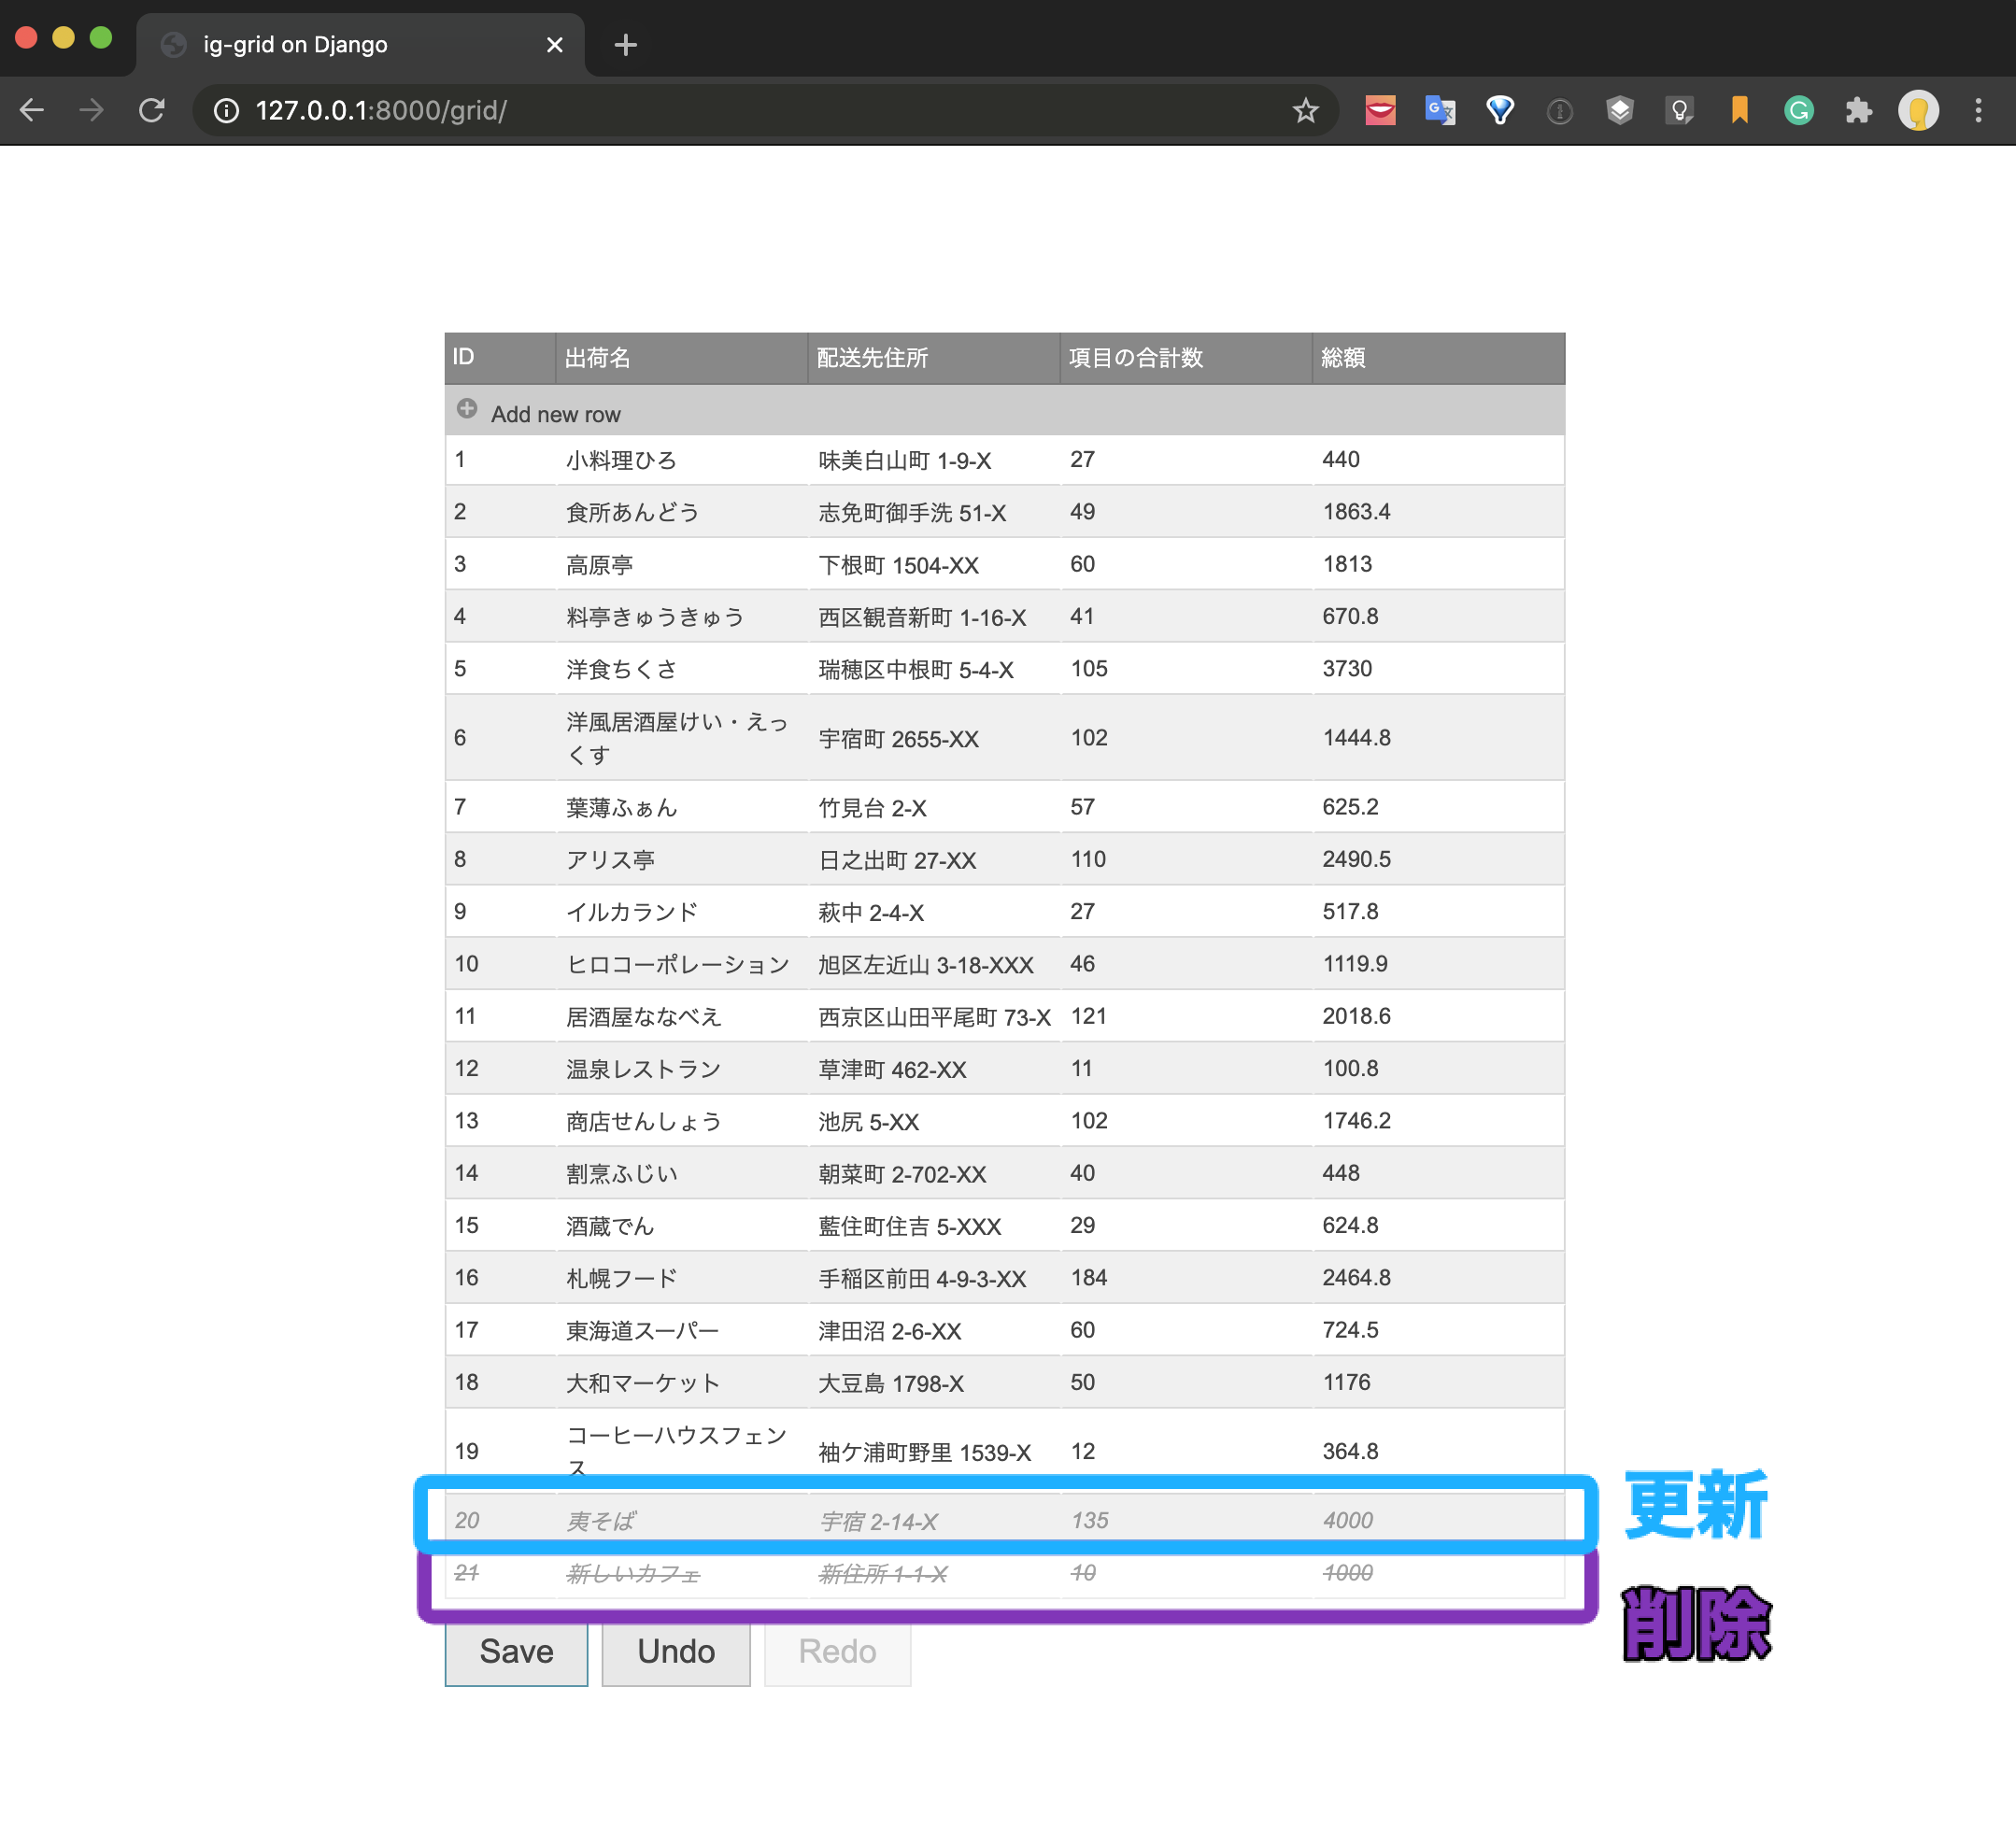
If you click the Save button and commit, you can see that there is an error in the PUT processing with the following error statement.
You called this URL via PUT, but the URL doesn't end in a slash and you have APPEND_SLASH set. Django can't redirect to the slash URL while maintaining PUT data. Change your form to point to 127.0.0.1:8000/api/order/20/ (note the trailing slash), or set APPEND_SLASH=False in your Django settings.
Django will return an error if the PUT endpoint URL doesn't end with a slash. I also get this error because the default PUT endpoint for ig.RESTDataSource is shaped like / api / order / 20 without a slash at the end.
It's possible to accept no slashes by changing the settings on the Django side, but ig.RESTDataSource can also customize the endpoint template, so we'll modify ig.RESTDataSource.
Changed restSettings in ig.RESTDataSource to match Django specs
grid/templates/grid/index.html
var ds = new $.ig.RESTDataSource({
    dataSource : "/api/order/",
    type: "json",
    restSettings: {
        create: {
            url: "/api/order/",
            template: "/api/order/"
        },
        update: {
            template: "/api/order/${id}/" //Change to a form ending with a slash
        },
        remove: {
            url: "/api/order/"
        }
    }
});
At this time, the template settings made for update extend to create, so specify the same URL as the endpoint originally given to create as the template URL.
Finally, add the following two lines as the processing when the save button is pressed.
grid/templates/grid/index.html
grid.igGrid("commit");
grid.igGrid("dataBind");
The ID column in the grid corresponds to the id that is the primary key on the database table, but the id assigned on the front end does not always match the id that should be assigned on the database. Therefore, by committing to the database and then performing data binding again, the id assigned on the database is reflected in the grid.
Let's take a look at the final behavior of the demo we created this time.
GET, POST, PUT, and DELETE can now be processed smoothly and collectively with REST and igGrid. Also, I think that the feature is that the roles of the back end and the front end can be divided by using the Django REST framework this time.
The demo application created this time is uploaded below, so if you are interested, please feel free to touch it. https://github.com/igjp-kb/Ignite-UI-for-JavaScript/tree/master/igGrid/rest_iggrid
Recommended Posts