Measure temperature and humidity with Raspberry Pi3 and visualize with Ambient
Temperature and humidity were measured with sensors called Raspberry Pi3 and HDC1000, and sent to IoT data visualization service "Ambient" for visualization (graphing). The program was written in Python.

Access HDC1000 from Raspberry Pi 3 with Python
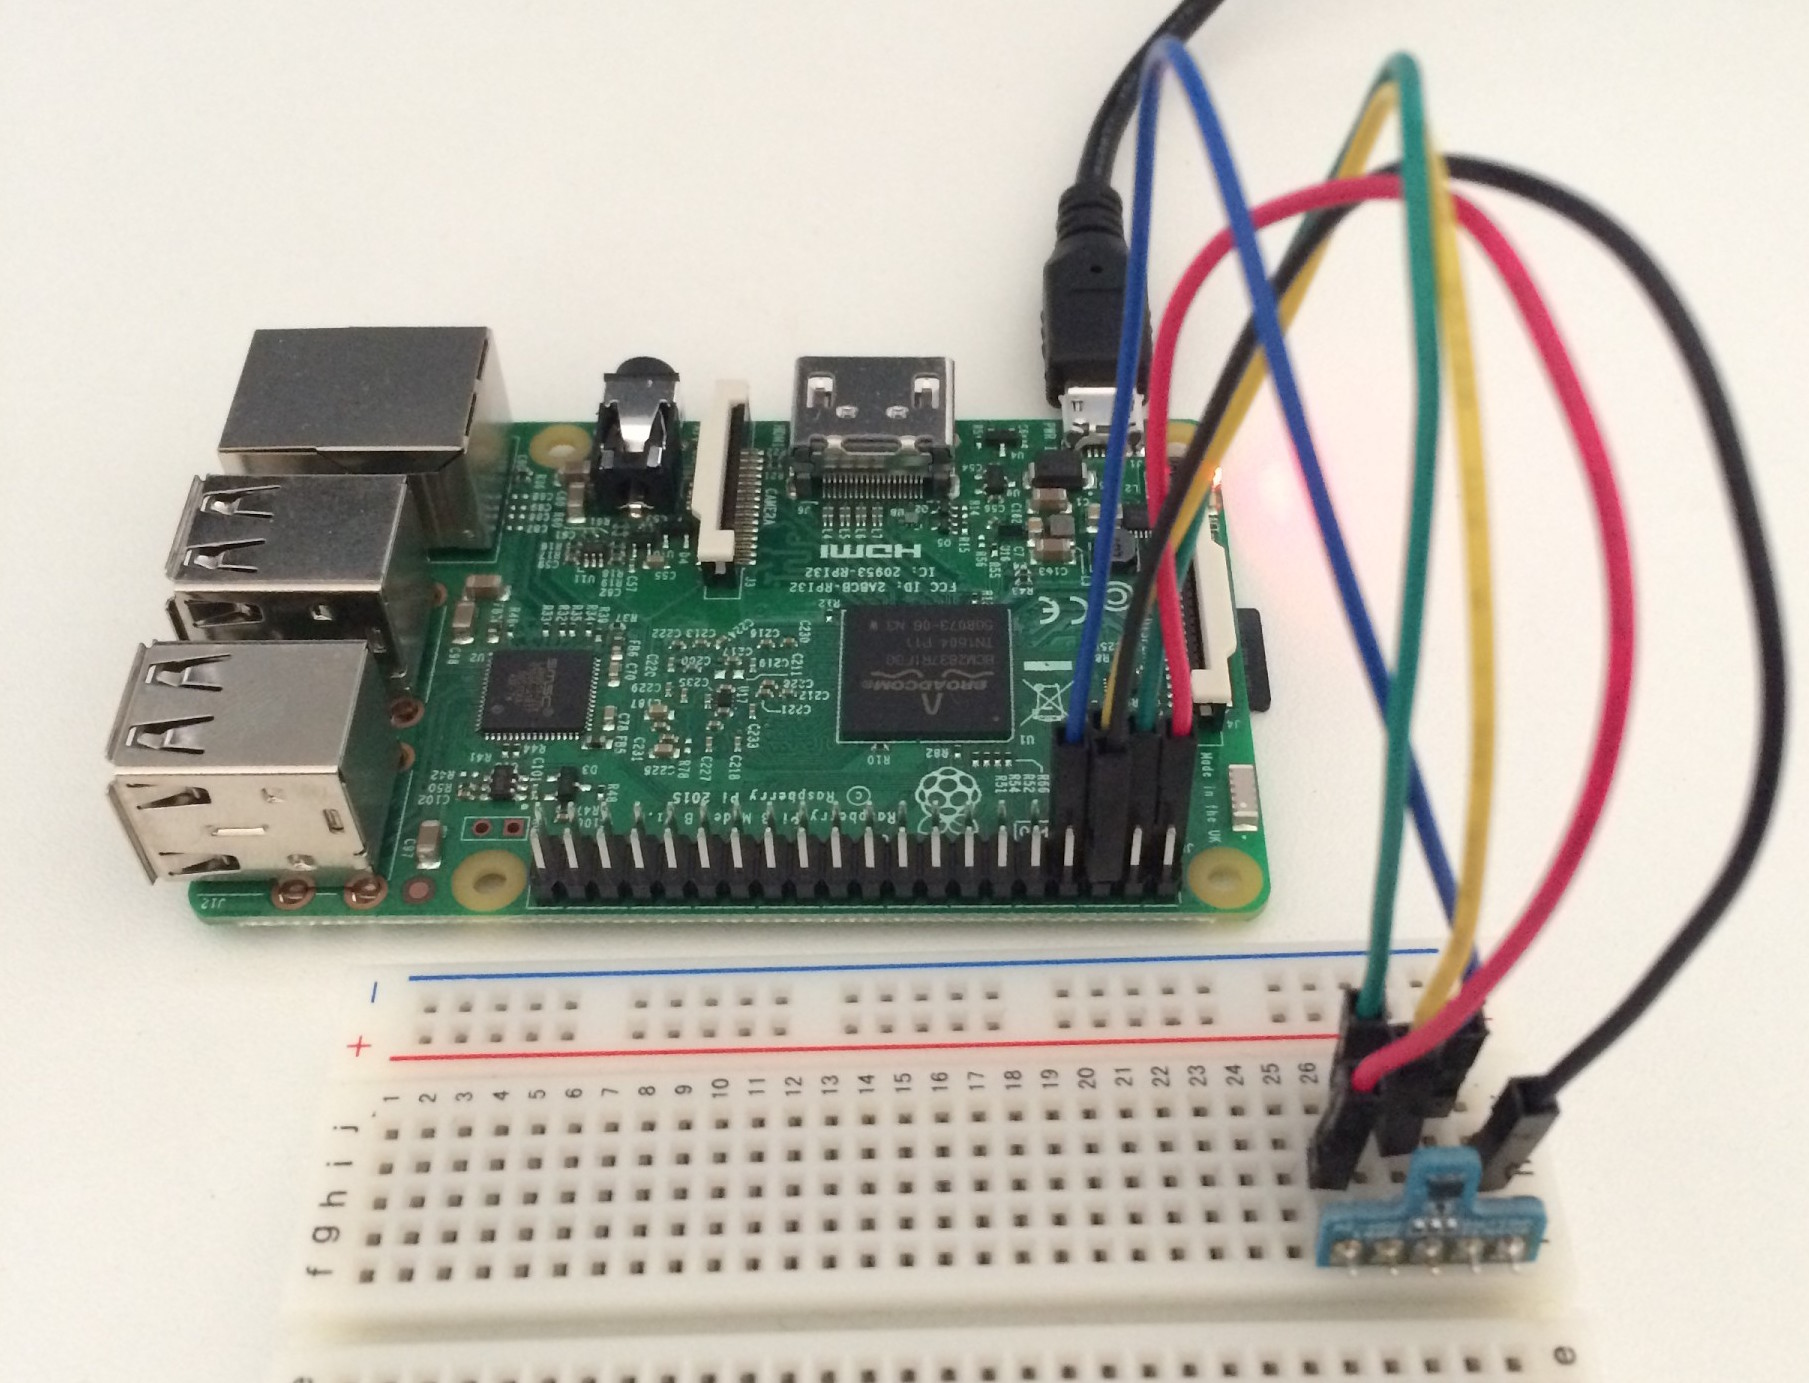
Connection of Raspberry Pi 3 and HDC1000
The HDC1000 is a sensor chip that measures temperature and humidity. It can be accessed via an interface called I2C. This time, I used "HDC1000 temperature / humidity sensor module" by Akizuki Denshi, who has this HDC1000.
Connect the Raspberry Pi 3 and HDC1000 as follows.
| Raspberry Pi | HDC1000 |
|---|---|
| 01(3.3v) | 1(+V) |
| 03(GPIO02) | 2(SDA) |
| 05(GPIO03) | 3(SCL) |
| 07(GPIO04) | 4(RDY) |
| 06(Ground) | 5(GND) |
- V, SDA, SCL, and GND are signal lines defined by I2C, and HDC1000 also has a pin called RDY. HDC1000 takes about 2.5msec to 6.5msec to measure temperature and humidity. Time depends on resolution. The RDY pin goes HIGH during measurement and LOW when measurement is completed, so I connected it to Pin7 (GPIO04) of Raspberry Pi to confirm the completion of measurement.
Preparing the Raspberry Pi 3
Connect the Raspberry Pi 3 to WiFi by referring to Until you buy Raspberry Pi 3 and connect to WiFi and SSH using Mac.
Next, enable I2C by referring to How to enable I2C on Raspberry Pi (2015 version). I will. HDC1000 was detected at address 0x40 as follows:
pi$ sudo i2cdetect -y 1
     0  1  2  3  4  5  6  7  8  9  a  b  c  d  e  f
00:          -- -- -- -- -- -- -- -- -- -- -- -- --
10: -- -- -- -- -- -- -- -- -- -- -- -- -- -- -- --
20: -- -- -- -- -- -- -- -- -- -- -- -- -- -- -- --
30: -- -- -- -- -- -- -- -- -- -- -- -- -- -- -- --
40: 40 -- -- -- -- -- -- -- -- -- -- -- -- -- -- --
50: -- -- -- -- -- -- -- -- -- -- -- -- -- -- -- --
60: -- -- -- -- -- -- -- -- -- -- -- -- -- -- -- --
70: -- -- -- -- -- -- -- --
I decided to write the program in Python, so I installed a module called WiringPi for Python that accesses I2C with Python.
pi$ sudo apt-get install python-dev python-setuptools swig

pi$ git clone --recursive https://github.com/WiringPi/WiringPi-Python.git
pi$ cd WiringPi-Python
pi$ ./build.sh

pi$ pip freeze | grep wir
wiringpi==2.32.1
This will build and install Python. The version I built was 2.32.1.
HDC1000 module for Python
I wrote a module to access the HDC1000. The init method looks like this.
import wiringpi
import os
import struct

class Hdc1000:
    def __init__(self, addr, rdyPin):
        wiringpi.wiringPiSetup() #setup wiringpi

        self.i2c = wiringpi.I2C() #get I2C
        self.dev = self.i2c.setup(addr) #setup I2C device
        self.rdy = rdyPin

        wiringpi.pinMode(self.rdy, 0) # set ready pin to INPUT

        self.i2c.writeReg16(self.dev, 0x02, 0x0000)
        #Set Config reg MODE=0 Read temperature and humidity individually
When the Mode bit of the configuration register (0x02) is set to 0, the temperature and humidity 16 bits are read individually, and when it is set to 1, the temperature and humidity are read as 32-bit data at once. This time I read it individually. By the way, in the I2C library of wiringpi, it seems that the upper and lower bytes are read and written upside down. The Mode bit of HDC1000 is bit 12 when the least significant bit is 0, and when it is set to 1, it becomes 0x1000 for 16 bits, but when writing with the I2C library, 0x0010 is written.
The method to get the temperature looks like this.
    def getTemp(self):
        self.i2c.writeReg8(self.dev, 0x00, 0x00)

        while wiringpi.digitalRead(self.rdy) == 1:
            pass

        data = struct.unpack('BB', os.read(self.dev, 2))
        temp = (data[0] << 8) | data[1]
        temp = temp * 165.0 / 65536.0 - 40.0
        return temp
The HDC1000 will start measuring temperature when you write something in register 0x00, the RDY pin will be HIGH (1), and when the measurement is complete it will be LOW (0). In Python, writeReg8 () writes 0x00 to register 0x00 and waits until the RDY pin becomes 0 in the next while statement. When the RDY pin becomes 0, the register 0x00 is read, but the data cannot be read by readReg8 () or readReg16 () of the I2C library of wiringpi. Instead, the data is read by reading 2 bytes with the os.read () function. Was able to be read.
The usage is like this. Create an instance by specifying the I2C address (0x40) of the HDC1000 and the pin number (7) of the RDY pin, and read the temperature and humidity with getTemp () and getHumid ().
import hdc1000

hdc1000 = hdc1000.Hdc1000(0x40, 7)

temp = hdc1000.getTemp()
humid = hdc1000.getHumid()
print 'temp: %.1f, humid: %.1f' % (temp, humid)
Send data from Raspberry Pi 3 to Ambient and visualize it
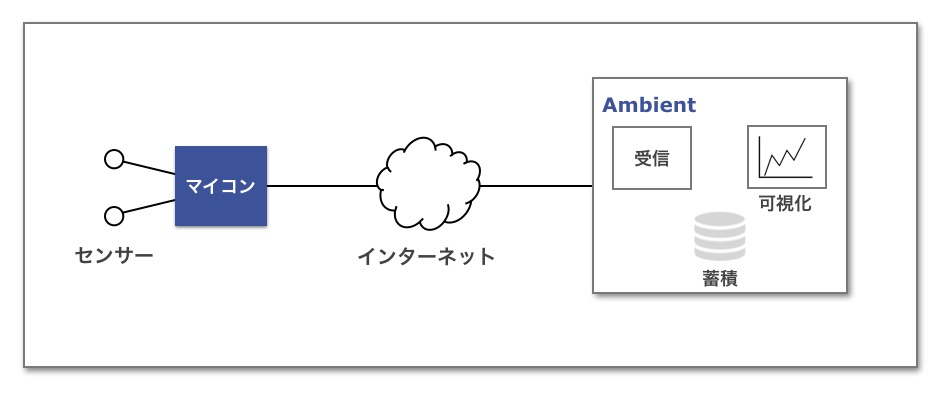
Ambient is an IoT cloud service that receives, accumulates, and visualizes (graphs) data sent from microcomputers.

There are C library for Arduino, C library for mbed, node.js library, Node-RED node as SDK to send data to Ambient, but in addition to this, I made a Python library.
Installing the Ambient Python library
Ambient's Python library has been published on Github. You can install the library from Github as follows. The example was run on a Raspberry Pi 3, but you can install and use it on Python on your Mac as well.
pi$ sudo pip install git+https://github.com/AmbientDataInc/ambient-python-lib.git

pi$ pip freeze | grep ambient
ambient==0.1.0
How to use in Python
import ambient

ambi = ambient.Ambient(100, "your_writeKey") #Replace with your channel ID, write key

r = ambi.send({"d1": temp, "d2": humid})
First, import the ambient library, specify the channel Id and write key to send the data, create an instance, and send the data with the send () method. Data is passed in the above dictionary format. The key specifies one of "d1" to "d8".
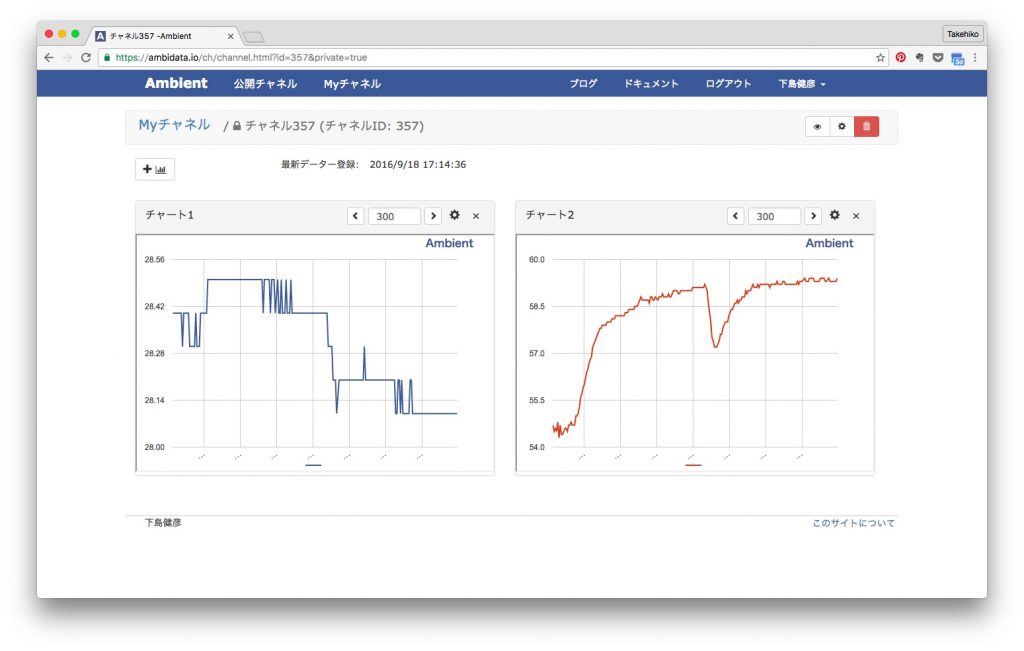
When Ambient receives data, it accumulates the data with a time stamp at the time of reception and graphs it in real time. For example, if you send temperature and humidity at 5-minute intervals, you can check the time-series transition of temperature and humidity in the graph as shown below.

Summary
We have released a Python library for sending data to Ambient and a sample program for measuring temperature and humidity with HDC1000 on Github.
Recommended Posts