[JAVA] Spigot (Paper) Introduction to how to make a plug-in for 2020 # 01 (Environment construction)
This time, I would like to make an original plug-in using a custom server called Spigot MC (hereinafter, Spigot) of Minecraft. I hope it helps you to understand the whole picture of plug-in making while creating the original plug-in concretely.
I'd like to explain it as carefully as possible, but I think there are some parts that require prior knowledge. While finishing the Java environment construction on other introductory sites, I vaguely understood the basic grammar of Java, control syntax such as if statement and for statement, classes and methods, and issued Hello World, but I do not know what to do next. !! We aim for such content so that those who say that can take a step forward. (For those who are not confident and haven't finished yet, Easy introduction to Java, Introduction to Java -net.or.jp/~yf8k-kbys/newjava0.html) Let's read it with one hand!)
Please point out any mistakes in this article! Let's get started!
- This article is being edited ....
Next article → (Spigot (Paper) Introduction to how to make a plug-in for 2020 # 02 (subtitle undecided))
Goal of this article
--You can build an environment for Spigot plugins. --Creating a project
Environment
It is the environment construction of the demon gate ...!
I think that the basic Java development environment is complete, but if you have never done it before, please refer to the Java introductory article and build a Java development environment once. The following is a summary of points to note when building a development environment for the Spigot (Paper) plug-in. Let's do it slowly without rushing!
About the editor (IDE)
Any editor is fine.
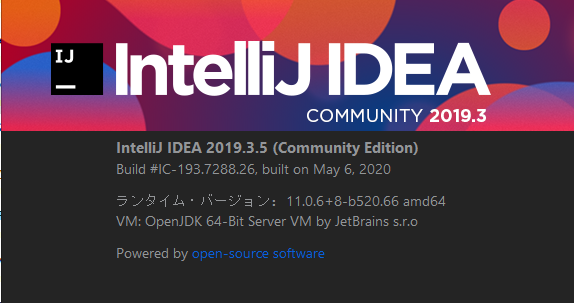
This article uses IntelliJ IDEA 2019.3.5.
The latest IntelliJ IDEA 2020.1.1 has been released at the time of writing, but if it doesn't work, IntelliJ Please go to IDEA 2019.3.5.
JDK version notes
There are roughly two types of JDK used for development, Oracle's JDK and OpenJDK, but either one is fine. But the version needs to be careful. (important!)
__ ① Java version that executes Spigot ≧ ② Java (javac) version used when compiling the plug-in __
It needs to be. If the version of Java used for compilation is higher, the plug-in may not load properly. If there is a person who says "I was able to build the plug-in, but an error occurs when loading the plug-in and it does not load normally", please review the Java version. (Some people stumbled here ...) That said, basically (1) Java SE 7 or lower should not be used in the execution of Spigot (as of May 30, 2020), so (2) Java (javac) used when compiling the plug-in should be Java SE 8 If you select Oracle JDK (download link), you should not have any problems. I'm not sure! If so, download and install Oracle JDK for Java SE 8.
How to check the version of Java (① Java that executes Spigot)
Launch a command prompt and run java -version.
It's 1.8.0, but it's Java 8.
C:\Users\username>java -version
java version "1.8.0_251"
Java(TM) SE Runtime Environment (build 1.8.0_251-b08)
Java HotSpot(TM) 64-Bit Server VM (build 25.251-b08, mixed mode)
If you don't see the version The path to the java command may not be in place. (Refer to https://www.javadrive.jp/start/install/index4.html for how to pass the path to the java command)
C:\Users\username>java -version
'java'Is an internal or external command,
It is not recognized as an operable program or batch file.
How to check the version of Java (② Java used when compiling the plug-in)
The IntelliJ IDEA Community allows you to choose a JDK for each project.
A project is a directory that holds everything that makes up an application. (Quoted from https://pleiades.io/help/idea/working-with-projects.html)
-
- Open the project for which you want to check the JDK version.
- From the menu above, open File → Project Structure → Project.

Gradle In the introduction, you may have compiled and executed a class file using javac command etc., but it is difficult to manage because there are many dependencies and necessary files when creating a plugin. So use Gradle for the build. Gradle is a tool for managing various source files and dependencies and compiling and building them into a single jar file.
Gradle comes with IntelliJ IDEA from the beginning, so you don't need to install it again.
Preparing a test server
You need a server to test the plugin you created. This article uses Spigot. The latest version is 1.15.2. There is Paper MC on the fork, but that is fine. (See https://blog.mkserver.jp/2019/05/19/spigot-server-build/ for how to build the Spigot server)
Environment at the time of writing
This is the environment at the time of my writing.
| Tool item | Name | version |
|---|---|---|
| IDE | IntelliJ IDEA Community Edition | 2019.3.5 |
| JDK | Oracle JDK | 1.8.0_251" |
| Build tool | Gradle | |
| Test server | Spigot MC | 1.15.2 |
| OS | Windows 10 | 1909 |
Create a new Spigot plugin project
Let's start making plugins for Spigot! This time, the goal is to put out Hello Minecraft Plugin !! in the chat column when logging in to Minecraft.
Install Minecraft Development
If you don't have Minecraft Development installed, install it before you start development.
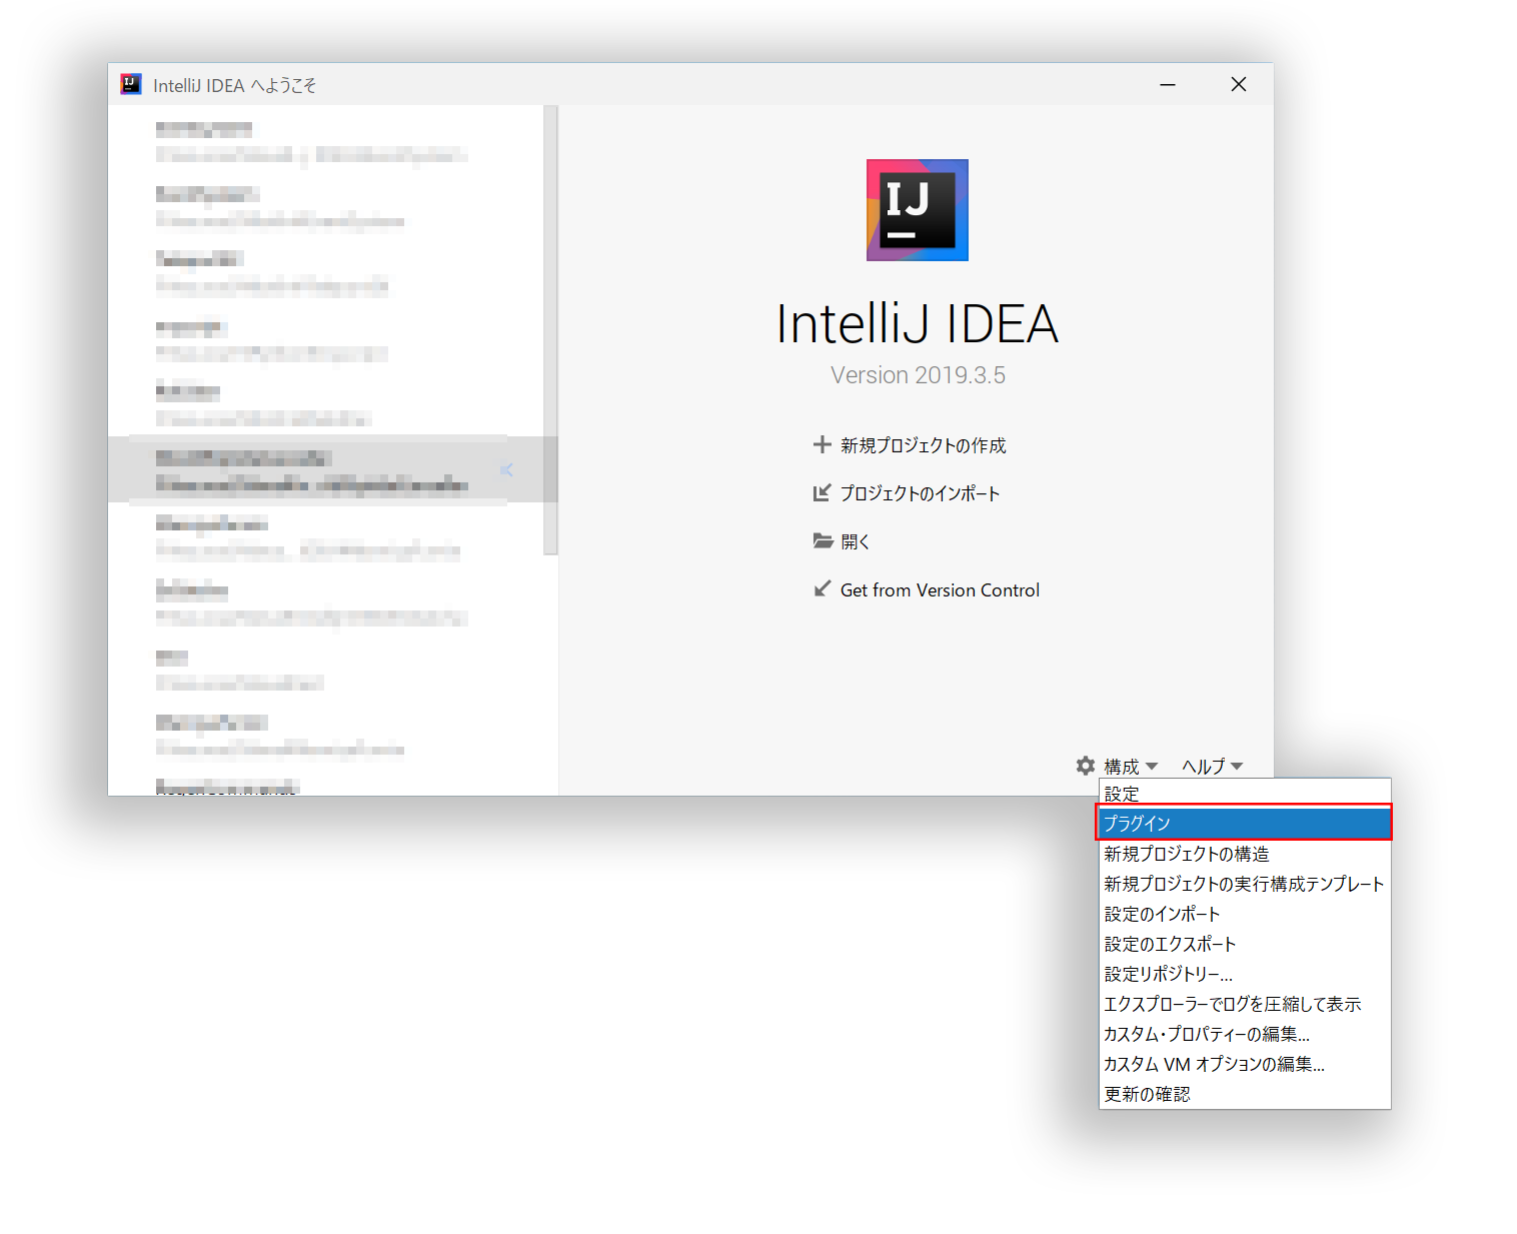
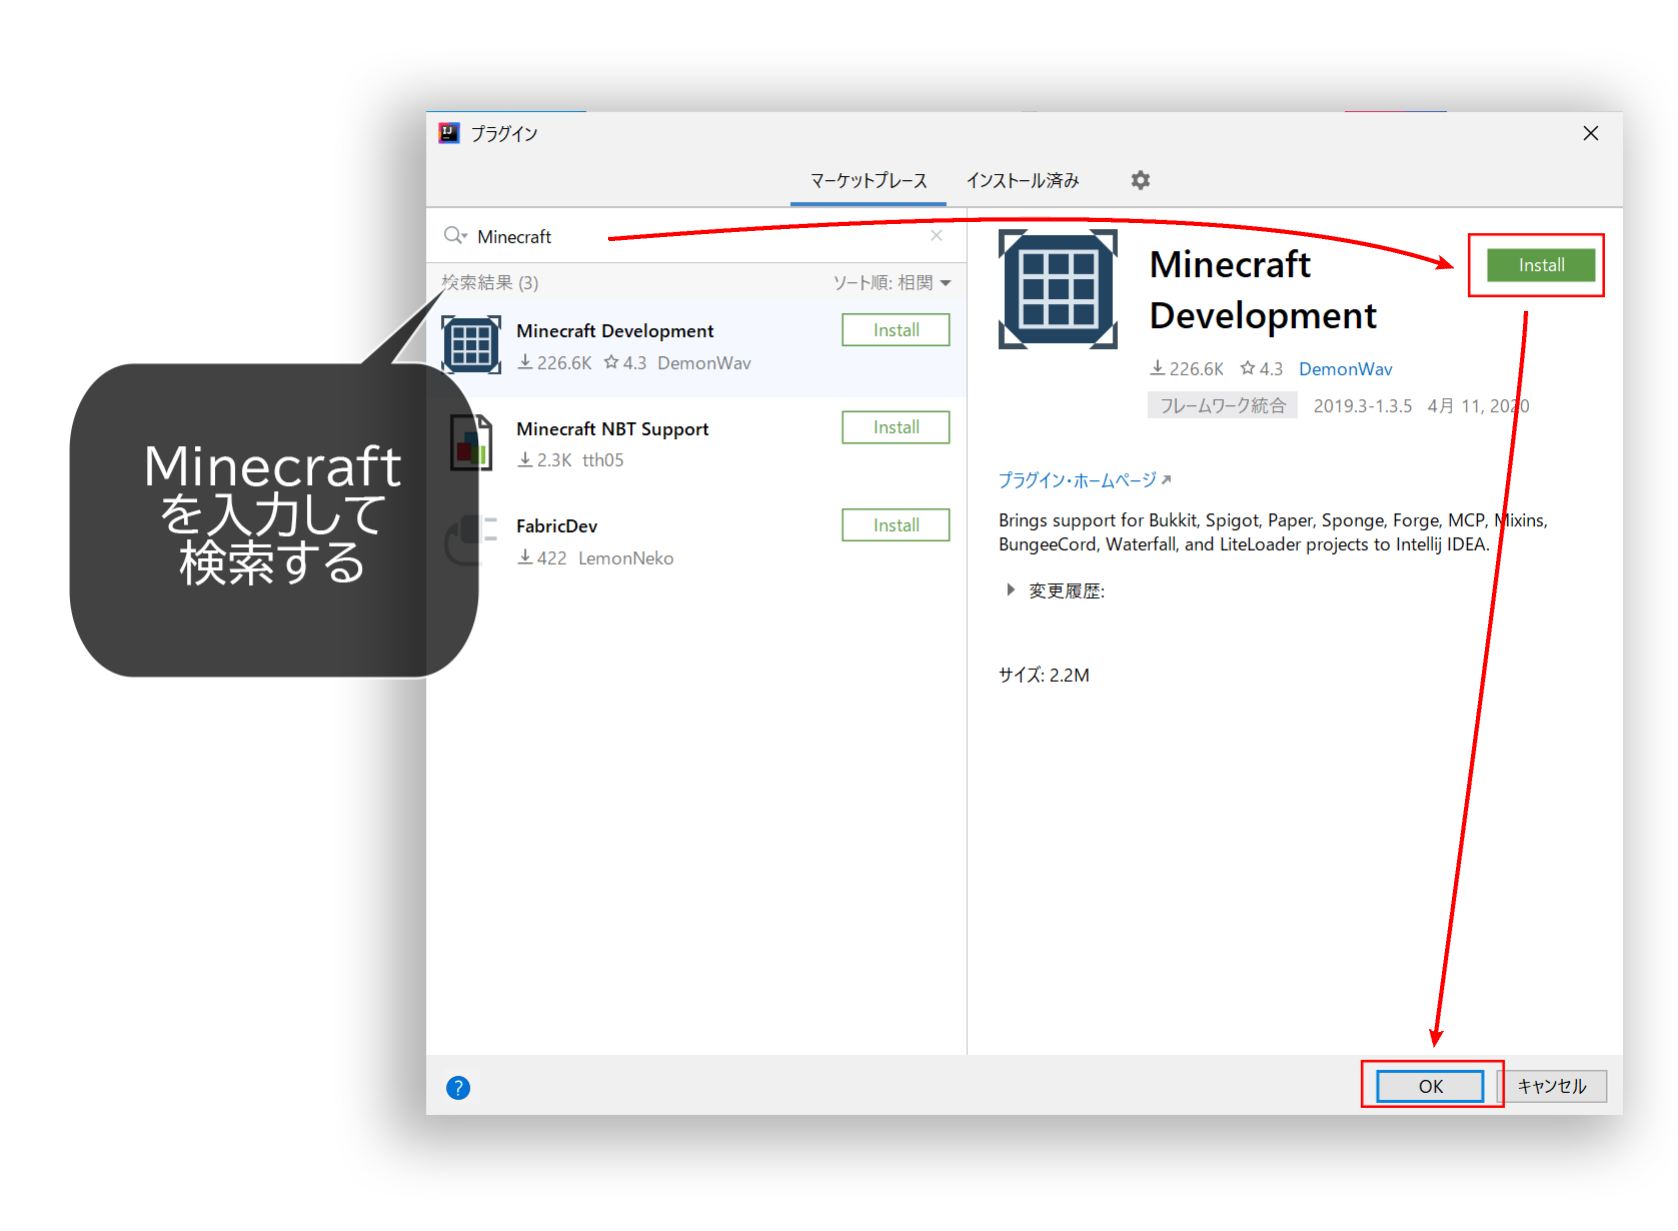 If you search for "Minecraft" and find Minecraft Evelopment, click Install to install it.
Once the installation is complete, quit IntelliJ IDEA and restart.
Minecraft Development is an extension of IntelliJ IDEA that creates a template for the Spigot plugin.
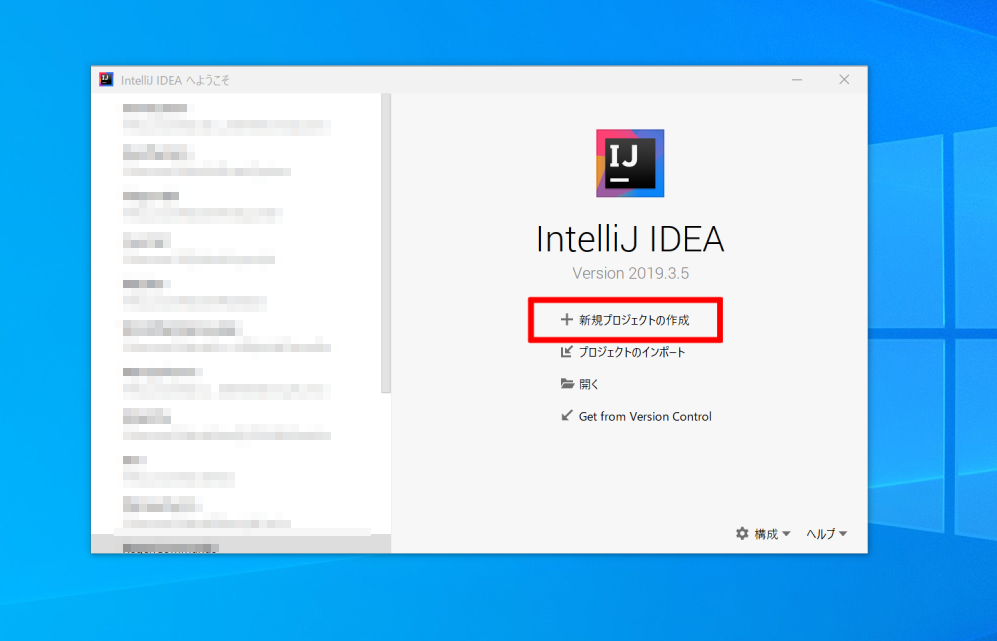
Open IntelliJ IDEA
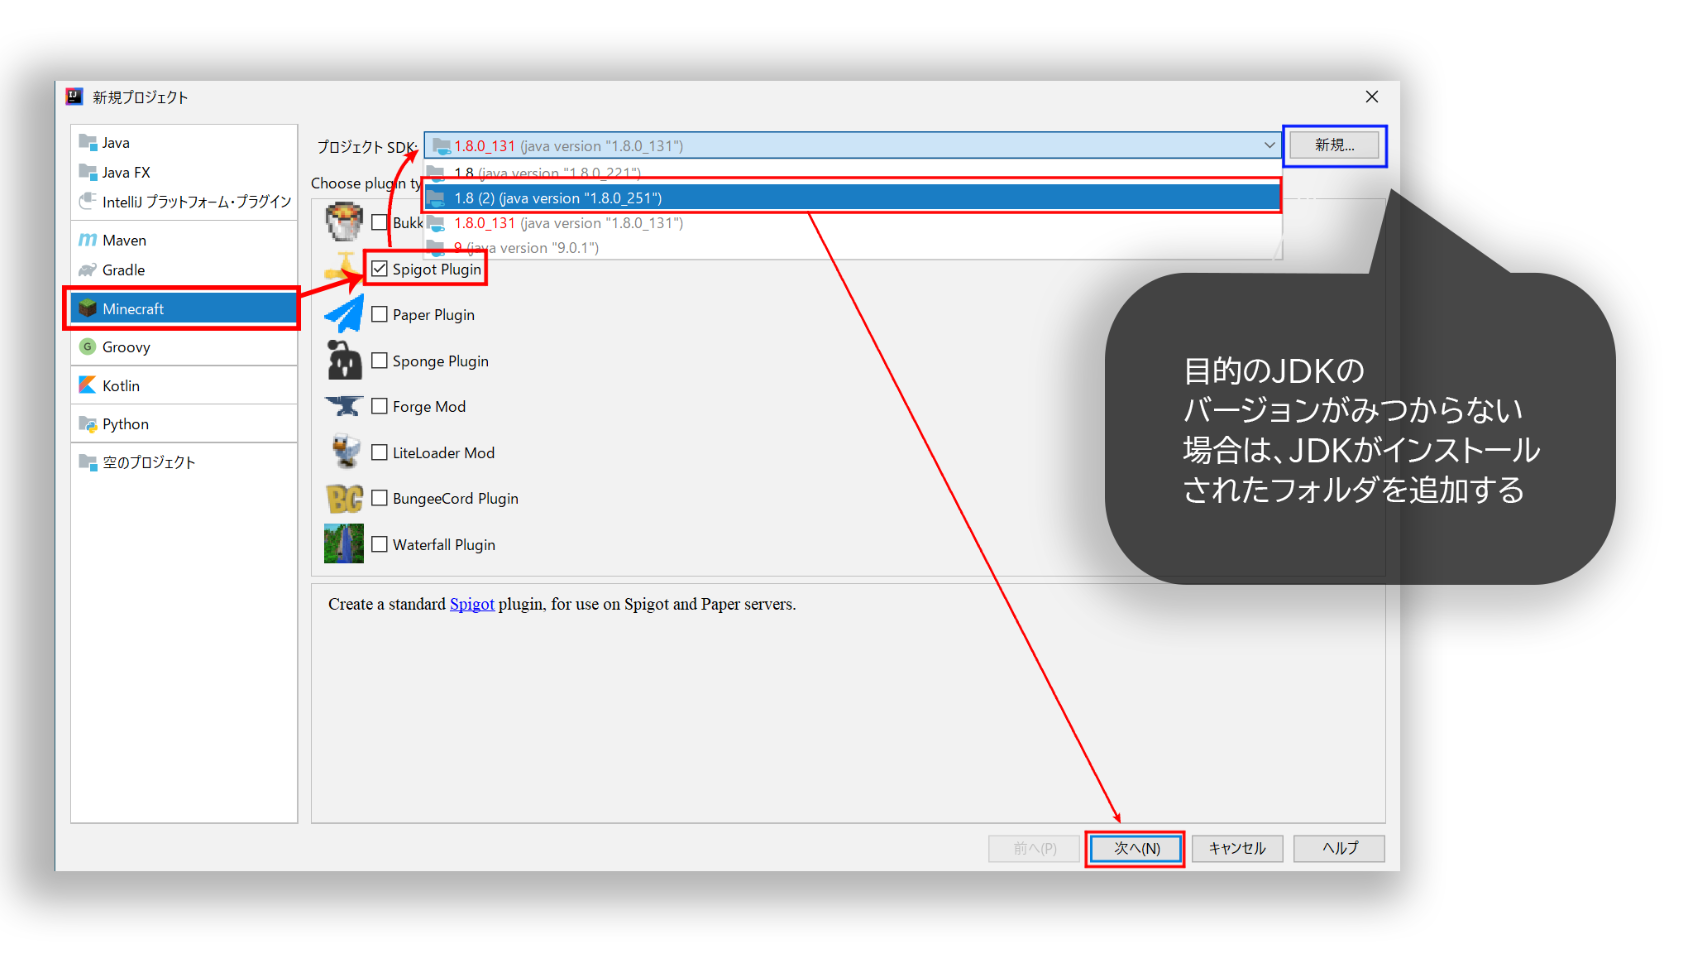
Open IntelliJ IDEA! Click `Create new project`.
Creating a new Spigot plugin
Check Spigot Plugin and select the desired JDK from `Project SDK:`.
The JDK selected here is Java used when compiling the plug-in.
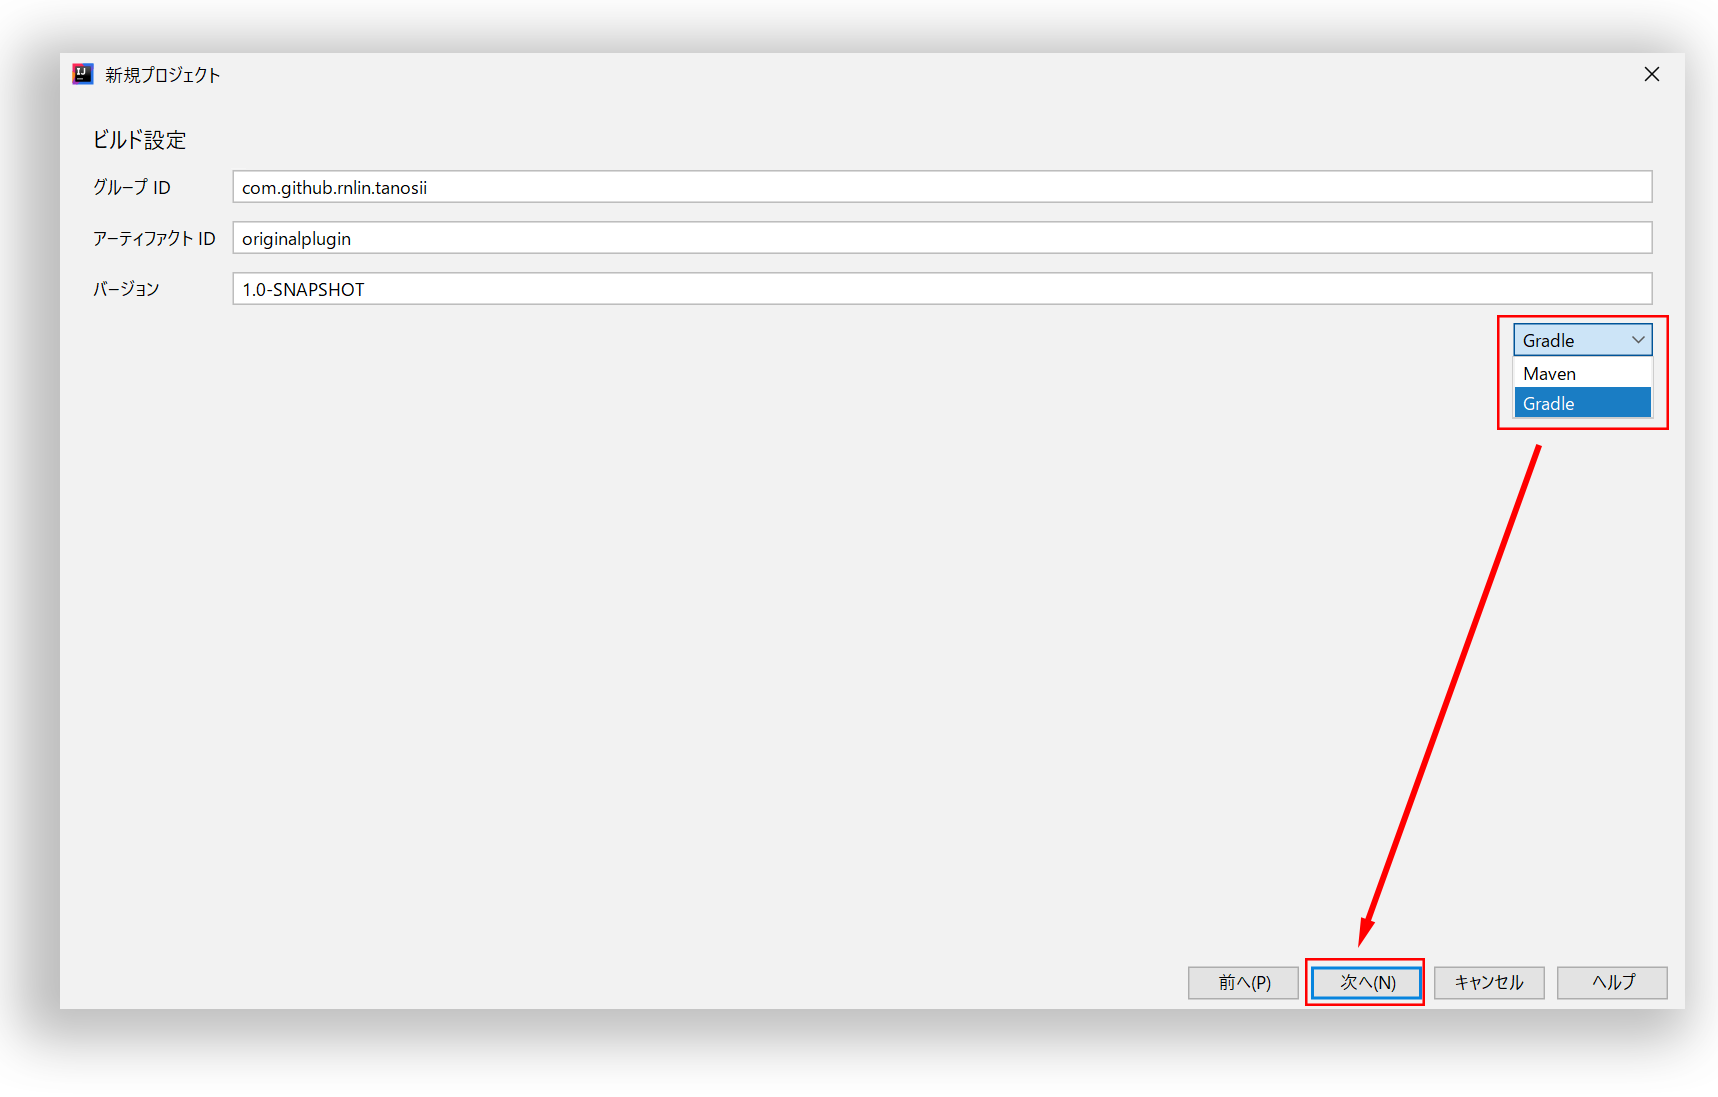
--Group ID is the name of the group to which the plugin belongs. Don't let the name overlap with other plugins. ⇒ I changed it to `` `com.github.rnlin.tanosii```.
--Artif ID is a name that distinguishes plugins.
⇒ I changed it to originalplugin.
--The version is an early version of the plugin. If you are not particular about it, you can leave it as it is. By the way, SNAPSHOT is customarily used in the sense that this version is still under development.
Finally, select Maven → Gradle and click Next.
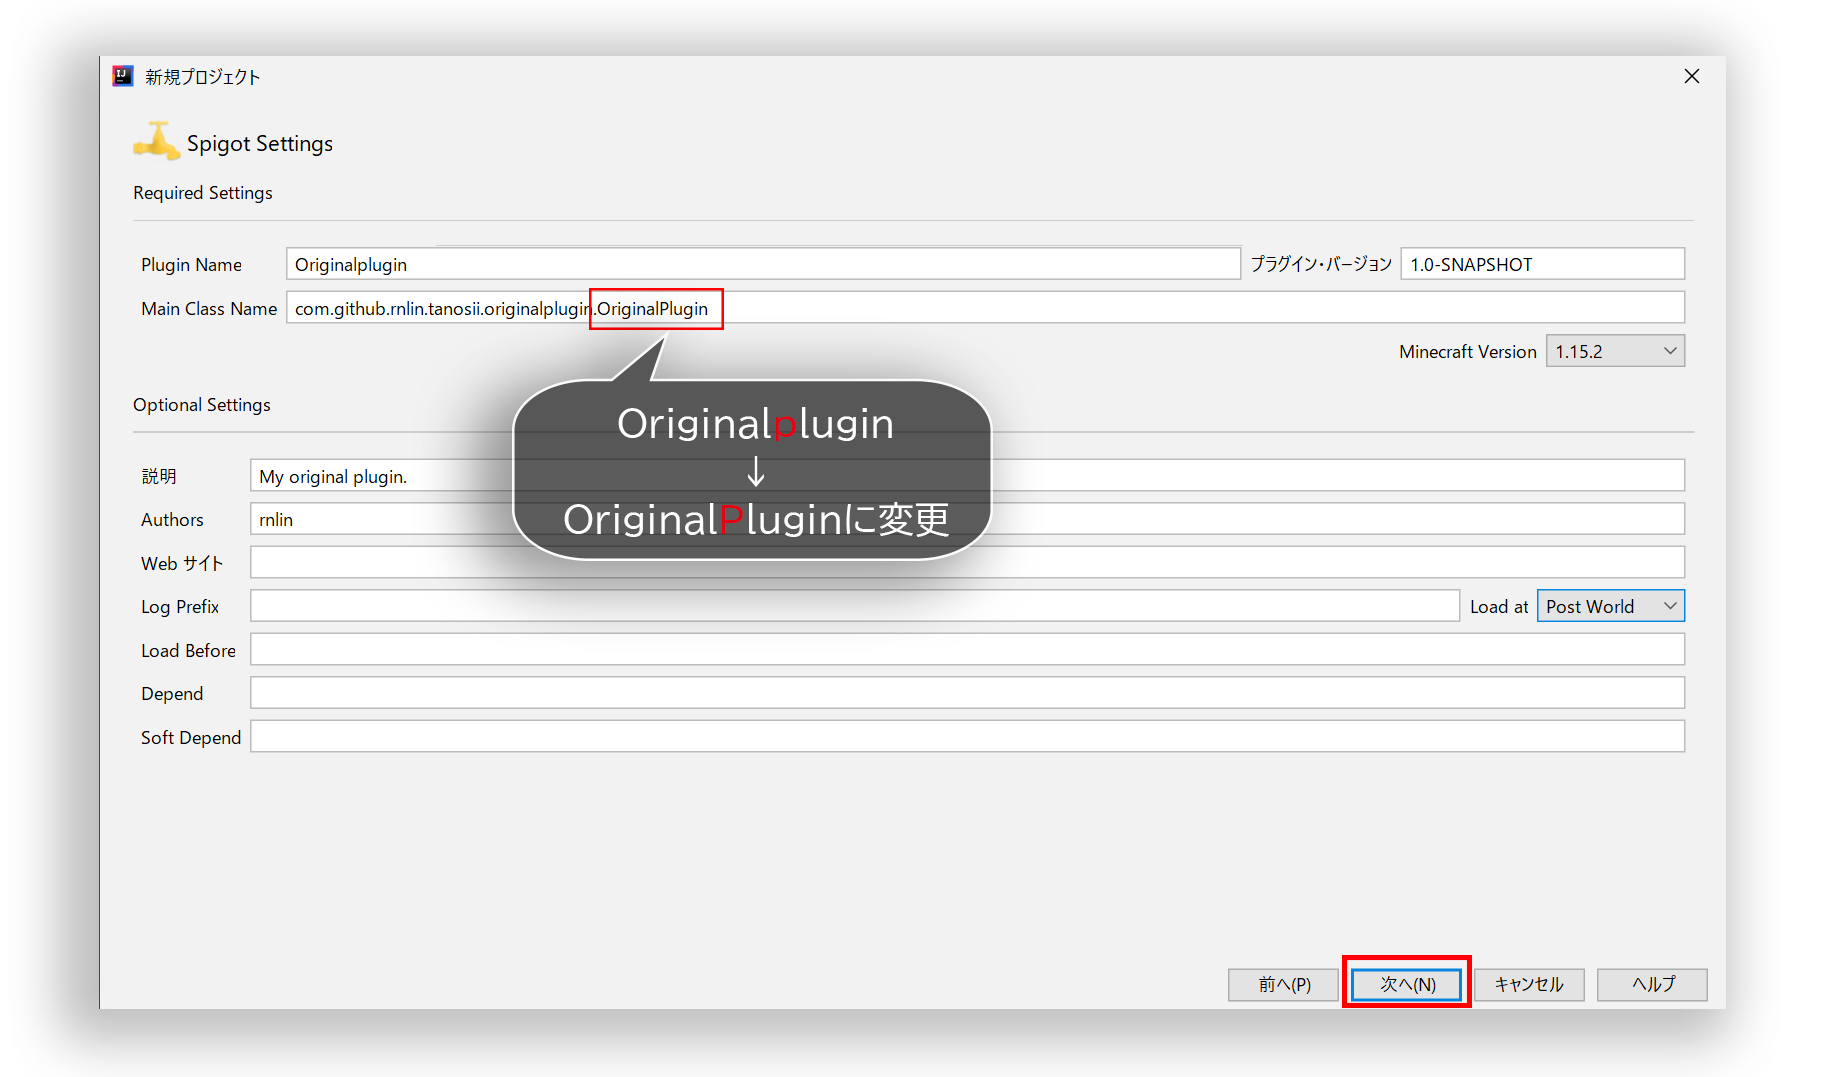
You don't have to change much.
In only one place, Main Class Name` `` is `` `com.github.rnlin.tanosii.originalplugin.Originalplugin, but change it to OriginalPlugin.
Since it's a big deal, I adjusted it to the Java coding standard! Let's get into the habit of seeing the coding conventions ...! (I will do my best too ...)
(See Java naming conventions: https://future-architect.github.io/coding-standards/documents/forJava/)
Please set the Original Setting below to your liking.
This item is a setting item written to plugin.yml and can be changed later.
I only set description` `and` `Autohrs!
nextClick.
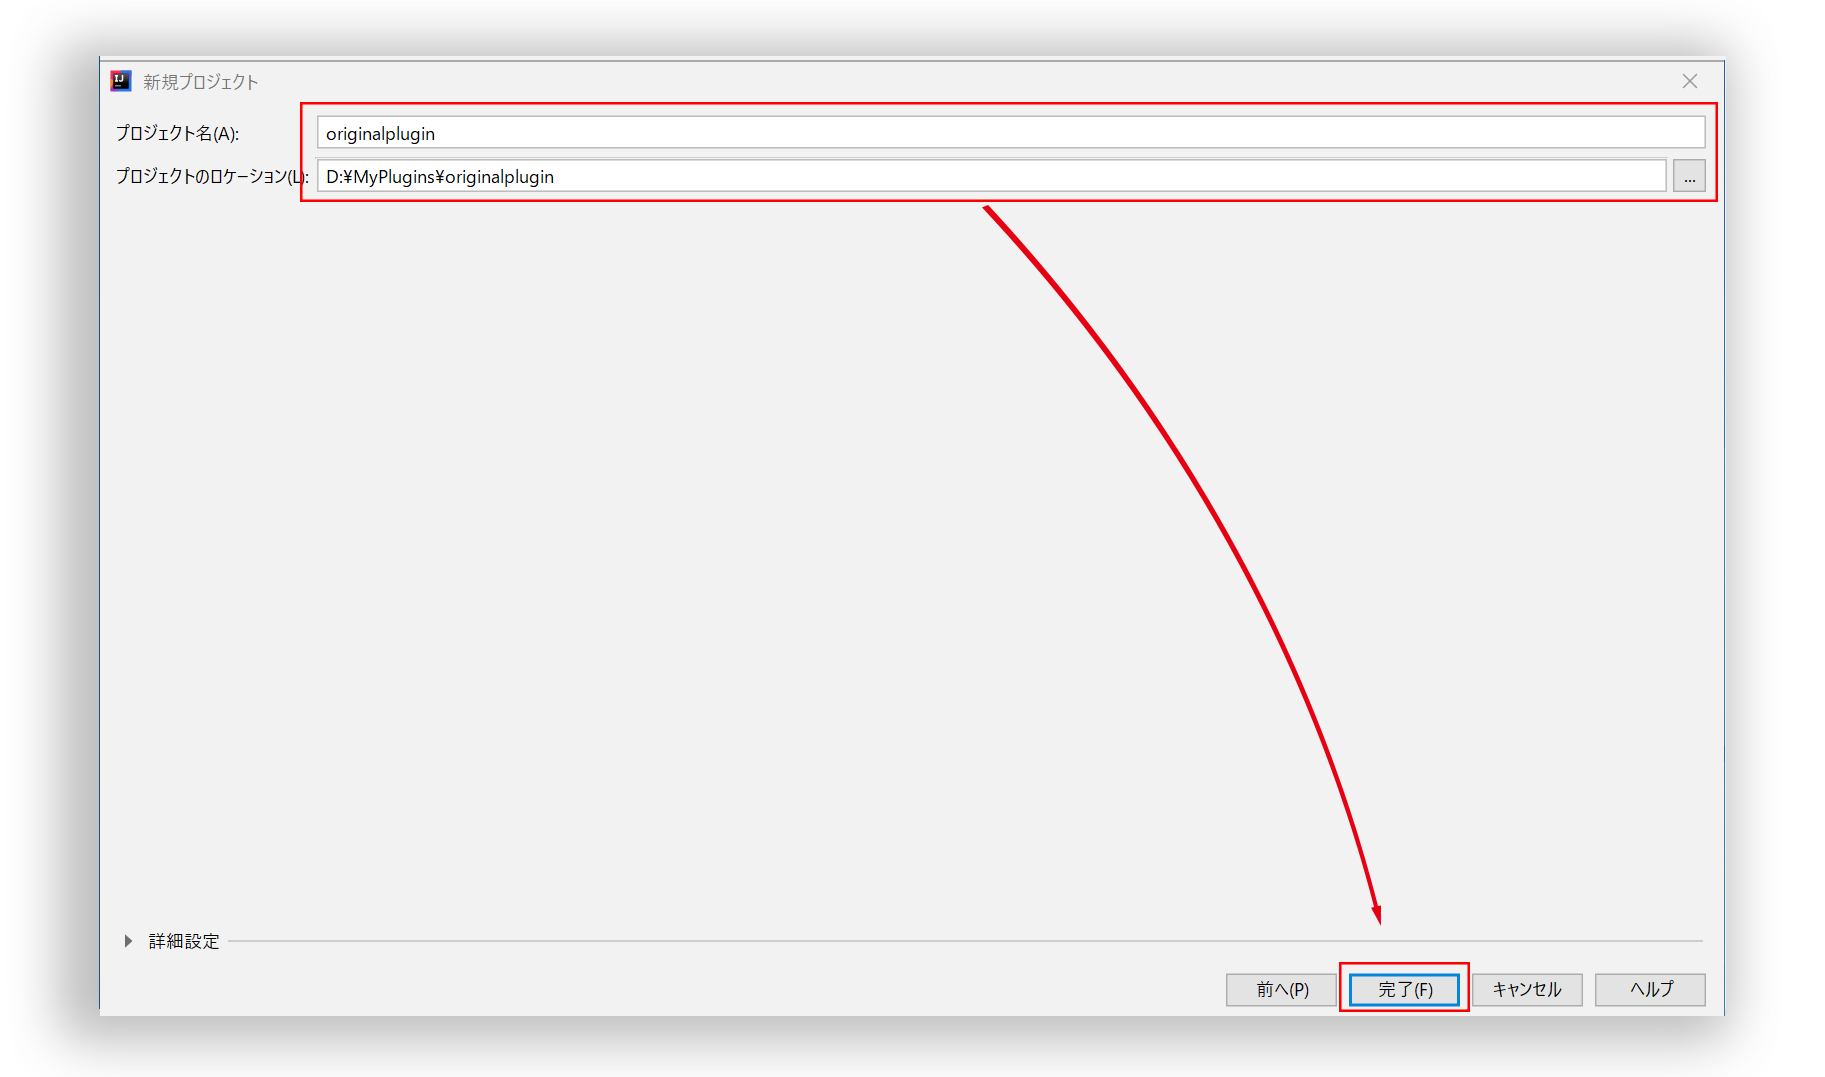 Set the project name and the folder to save the project.
The project name is the same as the artifact ID (originalplugin).
Make the save folder easy to understand!
DoneClick.
Congratulations! !! This is the end of environment construction and project creation!
Recommended Posts