[Introduction] Installation of Docker Desktop for Mac for the first time and setup of virtual environment construction of CentOS
Nowadays, it's becoming easier to use a Linux container with the free Docker Desktop (for Mac and Windows) when you want to use the Linux environment. This time, we will introduce the procedure for installing Doker Desktop for Mac on a MacBook and building a virtual environment for CentOS from the beginning.
In addition, we will explain Docker commands in detail on the way, so if you are new to Docker and want to build a virtual environment of CentOS, we would appreciate it if you could refer to it.
--Prerequisites
- Advance preparation --Installing Docker Desktop for Mac --Building a CentOS container (virtual environment) --Maintenance of CentOS container (virtual environment) --Saving a working CentOS container (virtual environment)
For the procedure to install Doker Desktop for Windows on a Windows 10 notebook PC and build a CentOS virtual environment, see "[Introduction] First Docker Desktop for Windows installation and CentOS virtual environment construction setup. ) ”I would like you to refer to it.
Prerequisites
See here (https://docs.docker.jp/docker-for-mac/install.html#mac-what-to-know-before-you-install) for more information on system requirements.
The specifications of the device installed this time and the specifications of Windows are as follows.

- MacBook Pro (13-inch, 2016, Four Thunderbolt 3 Ports) --Processor 2.9 GHz dual core Intel Core i5 --Memory 16 GB 2133 MHz LPDDR3 --Edition Windows 10 Pro --macOS Big Sur version 11.0.1
Install Docker Desktop for Mac
Installation
Download the installer
For installation, you can download and install the Docker for Mac installer at the following site. https://www.docker.com/products/docker-desktop
 Click the Download button for Download for Mac.
 You can now download the [Docker.dmg] file. There is only one file.
This completes the download to your MacBook machine.
Install on MacBook machine
Next, install it. Double-click the downloaded [Docker.dmg] file to run the installer.
 Drag and drop the "Docker" icon on the left to the "Appllications" folder on the right.

 Check the application list, and if Docker.app is included, the installation is complete.
Start Docker
Click "Docker.app" from the application to start it.
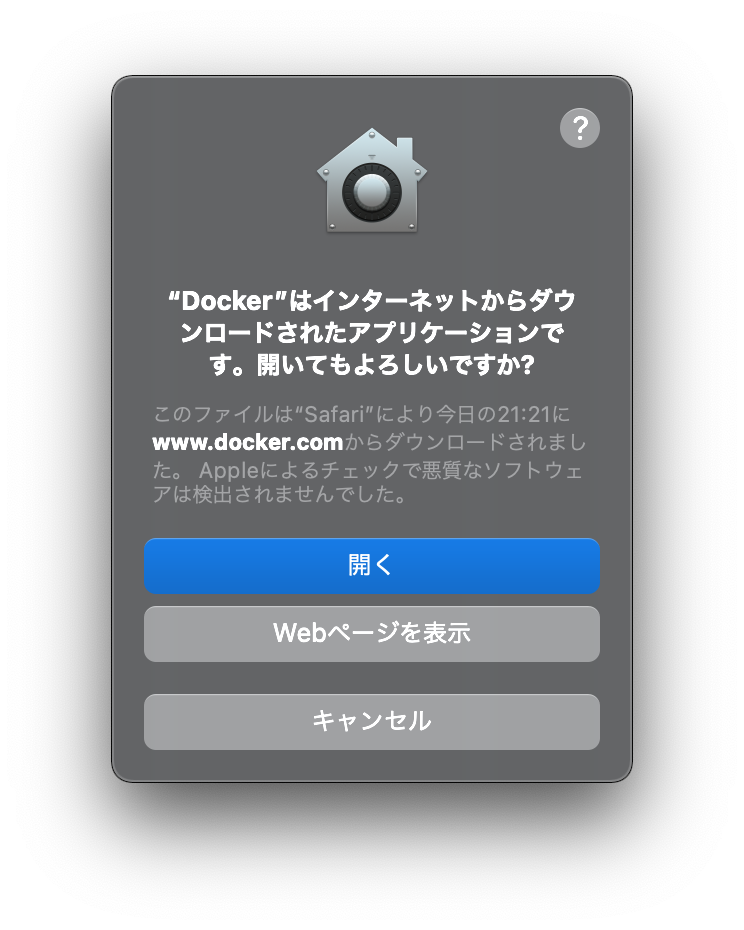
Click "Open" when a security warning appears at the first startup.
 When a window appears asking you to access the network components, press "OK" and enter the password for your MacBook for permission.
 The tutorial will be displayed on the dashboard the first time you launch it. For now, click on "Skip tutorial".
 The following screen is a normal Docker Dashboard.
 The dashboard can also be started from the navigation if Docker is running.

Operation check
Check the version of Docker
First, let's check the version of Docker installed. Start a terminal and use the docker version command to display version information.
python
$ docker version
Client: Docker Engine - Community
 Cloud integration: 1.0.4
 Version:           20.10.0
 API version:       1.41
 Go version:        go1.13.15
 Git commit:        7287ab3
 Built:             Tue Dec  8 18:55:43 2020
 OS/Arch:           darwin/amd64
 Context:           default
 Experimental:      true

Server: Docker Engine - Community
 Engine:
  Version:          20.10.0
  API version:      1.41 (minimum version 1.12)
  Go version:       go1.13.15
  Git commit:       eeddea2
  Built:            Tue Dec  8 18:58:04 2020
  OS/Arch:          linux/amd64
  Experimental:     false
 containerd:
  Version:          v1.4.3
  GitCommit:        269548fa27e0089a8b8278fc4fc781d7f65a939b
 runc:
  Version:          1.0.0-rc92
  GitCommit:        ff819c7e9184c13b7c2607fe6c30ae19403a7aff
 docker-init:
  Version:          0.19.0
  GitCommit:        de40ad0
Let's move Hello World
Now, let's try hello world, which is familiar to programmers. The docker run command is a command to start a container from an image.
$ docker run hello-world
In the case of the above command, it means to create and start a container from the image hello-world. However, since there is no hello-world image locally, the Docker daemon downloads the hello-world image from Docker Hub (a Docker Registry service operated by Docker that publishes and shares images on the Internet) from the image. Start the container. In general, an image consists of a file system, applications, middleware, and parameters needed at run time.
This container exits with standard output similar to the following:
$ docker run hello-world
Unable to find image 'hello-world:latest' locally
latest: Pulling from library/hello-world
0e03bdcc26d7: Pull complete
Digest: sha256:1a523af650137b8accdaed439c17d684df61ee4d74feac151b5b337bd29e7eec
Status: Downloaded newer image for hello-world:latest

Hello from Docker!
This message shows that your installation appears to be working correctly.

To generate this message, Docker took the following steps:
 1. The Docker client contacted the Docker daemon.
 2. The Docker daemon pulled the "hello-world" image from the Docker Hub.
    (amd64)
 3. The Docker daemon created a new container from that image which runs the
    executable that produces the output you are currently reading.
 4. The Docker daemon streamed that output to the Docker client, which sent it
    to your terminal.

To try something more ambitious, you can run an Ubuntu container with:
 $ docker run -it ubuntu bash

Share images, automate workflows, and more with a free Docker ID:
 https://hub.docker.com/

For more examples and ideas, visit:
 https://docs.docker.com/get-started/

$
: warning: Attention: warning:
If you encounter an error similar to the following, it may be a network-related configuration issue such as Proxy.
$ docker run hello-world
Unable to find image 'hello-world:latest' locally
docker: Error response from daemon: Get https://registry-1.docker.io/v2/: dial tcp: lookup registry-1.docker.io on 192.168.65.1:53: no such host.
See 'docker run --help'.
Select [setting] from the Docker Desktop menu, and try setting the Proxy in [PROXIES] on the [Resources] tab of the [setting] dialog.

Build a CentOS container (virtual environment)
You can see from the hello-world example above that you can easily get an image and create / start / run a container from the command line. Now, let's get the image of CentOS of the main subject, create and start the CentOS container (virtual environment).
Get CentOS image
Get an image
Images of CentOS containers are also managed in the Docker Hub CentOS repository, tagged with each version of CentOS. Now let's get the CentOS7 Docker image. Use the docker pull command to get the Docker image. Since you have already obtained a Docker ID and logged in, you can use this DokerHub service.
$ docker pull centos:centos7
centos7: Pulling from library/centos
2d473b07cdd5: Pull complete
Digest: sha256:0f4ec88e21daf75124b8a9e5ca03c37a5e937e0e108a255d890492430789b60e
Status: Downloaded newer image for centos:centos7
docker.io/library/centos:centos7
$
This completes the download of the CentOS image. It depends on the environment, but it will finish in tens of seconds. Note that the pull command "centos: centos7" means an image of the centos repository with the centos7 tag. Once you understand this, you will be able to download different images from different repositories.
Check the acquired image
The acquired Docker images can be listed with the docker images command.
$ docker images
REPOSITORY    TAG       IMAGE ID       CREATED         SIZE
centos        centos7   8652b9f0cb4c   6 weeks ago     204MB
hello-world   latest    bf756fb1ae65   11 months ago   13.3kB
$
It shows that the centos7-tagged image in the centos repository is stored under IMAGE ID 8652b9f0cb4c, and the latest-tagged image in the hello-world repository used to run Hello World is stored under IMAGE ID bf756fb1ae65. ..
Create / start CentOS container
Create and start a container
Once you have an image of CentOS7, let's create a CentOS container and start it.
Use the docker run command to create and launch a container from a Docker image. Execute the docker run command as follows to create and start the container. Here, the newly created container is named "centos7f". Create a CentOS7 container from the CentOS7 image, start the container at the same time, log in automatically at that time, and connect to the bash shell as it is.
$ docker run -it --name="centos7f" centos:centos7 /bin/bash
#
In this way, the Centos container is suddenly started and you are logged in. If you execute the exit command as it is, this container will be stopped.
# exit
exit
$
Start or check existing containers
Try running the docker ps command.
The docker ps command is a command to display and get the container list. It will list the currently started or existing containers. If there is no option, it will display the currently running container.
$ docker ps
CONTAINER ID   IMAGE     COMMAND   CREATED   STATUS    PORTS     NAMES
$
This time, it's stopped, so no container is currently running.
If you add the -a and --all options as shown below, all containers including stopped containers will be displayed.
$ docker ps -a
CONTAINER ID   IMAGE            COMMAND       CREATED          STATUS                      PORTS     NAMES
b84088954f9f   centos:centos7   "/bin/bash"   30 seconds ago   Exited (0) 24 seconds ago             centos7f
770fe29e2224   hello-world      "/hello"      10 minutes ago   Exited (0) 10 minutes ago             festive_chatelet
$
From the image centos: centos7, a container was created and started with the name "centos7f", and the bin/sh command was executed to indicate that it is currently stopped.
Resume / connect Centos container (virtual environment)
Resume a stopped container
You can restart a stopped container with the docker start command.
"centos7f" will be restarted.
$ docker start centos7f
centos7f
$
Make sure the container "centos7f" is restarting with the docker ps command.
$ docker ps
CONTAINER ID   IMAGE            COMMAND       CREATED         STATUS          PORTS     NAMES
b84088954f9f   centos:centos7   "/bin/bash"   2 minutes ago   Up 13 seconds             centos7f
$
Connect to a running container
To connect to the started container and operate it, use the docker attach command or the docker exec command.
For the docker attach command:
$ docker attach centos7f
#
However, if you connect to the container with the docker attach command and then disconnect from the connection with the exit command, the container will stop. If you want to keep the container running, you need to press Ctrl + P, Ctrl + Q in succession to exit.
Here, press Ctrl + P and Ctrl + Q in succession to exit the container while it is still running. The following message is output.
# read escape sequence
$
Now let's check the status of the container with the docker ps command. The CentOS container "centos7f" is up and running.
$ docker ps -a
CONTAINER ID   IMAGE            COMMAND       CREATED          STATUS                      PORTS     NAMES
b84088954f9f   centos:centos7   "/bin/bash"   3 minutes ago    Up About a minute                     centos7f
770fe29e2224   hello-world      "/hello"      13 minutes ago   Exited (0) 13 minutes ago             festive_chatelet
In this state, you can connect to the CentOS container (centos7f) again.
Now let's connect and operate the container using the docker exec command instead of the docker attach command. However, there are subtle differences in behavior.
$ docker exec -it centos7f /bin/bash
#
The differences in behavior between the docker attach command and the docker exec command are as follows:
| attach command | exec command |
|---|---|
| PID running in a running container=Standard I / O for one process(STDIN/STDOUT)Connect to(attach)To do. | You cannot connect unless the shell is running inside the container. |
| If you exit with the attach command, the container will stop. | The container does not stop even if you exit with the exit command |
Create / start Centos container (virtual environment) (background)
Create a container and start it in the background
Launch another terminal. Let's run the docker run command with -d to create a container and start it in the background behind the command prompt:
Here, the newly created container is named "centos7b". Create a container from the centos7 image and start it in the background.
Last login: Mon Dec 14 19:43:55 on ttys000

The default interactive shell is now zsh.
To update your account to use zsh, please run `chsh -s /bin/zsh`.
For more details, please visit https://support.apple.com/kb/HT208050.
$ docker run -it -d --name="centos7b" centos:centos7 /bin/bash
019e36aeb68989da7abfaf6ae3a5dd5c4fc0de375a049eee79201d08a35fae10
$
Stop / delete CentOS container (virtual environment)
To delete a container, first stop the running container and then delete it.
Now let's see which container is running with the docker ps command.
$ docker ps
CONTAINER ID   IMAGE            COMMAND       CREATED          STATUS          PORTS     NAMES
019e36aeb689   centos:centos7   "/bin/bash"   23 seconds ago   Up 23 seconds             centos7b
b84088954f9f   centos:centos7   "/bin/bash"   6 minutes ago    Up 4 minutes              centos7f
$
You should be able to see the container "centos7f" that was left running and the container "centos7b" that was just started in the background by pressing Ctrl + P, Ctrl + Q in succession.
Stop the running container
Now, use the docker stop command to stop the running container.
$ docker stop centos7b centos7f
centos7b
centos7f
$
Use the docker ps command to check the current operating status of the container.
As mentioned earlier, if you add the -a and --all options, it will show you all containers, including stopped containers.
$ docker ps -a
CONTAINER ID   IMAGE            COMMAND       CREATED              STATUS                        PORTS     NAMES
019e36aeb689   centos:centos7   "/bin/bash"   About a minute ago   Exited (137) 16 seconds ago             centos7b
b84088954f9f   centos:centos7   "/bin/bash"   7 minutes ago        Exited (137) 16 seconds ago             centos7f
770fe29e2224   hello-world      "/hello"      17 minutes ago       Exited (0) 17 minutes ago               festive_chatelet
You can see that there are currently three existing containers: "centos7b", "centos7f", and "festive_chatelet". The name of the container "festive_chatelet" happened to be unique when the container was created and started from the image hello-world. So you may see a different name.
Now let's delete the three containers with the docker rm command.
Delete the container (virtual environment)
$ docker rm centos7b centos7f festive_chatelet
centos7b
centos7f
festive_chatelet
When the deletion is completed, the name of the container to be deleted will be output.
$ docker ps -a
CONTAINER ID   IMAGE     COMMAND   CREATED   STATUS    PORTS     NAMES
You have now deleted all the containers.
Delete image
To delete a Docker image, use the docker rmi command.
Before that, you can list the obtained Docker images with the docker images command.
$ docker images
REPOSITORY    TAG       IMAGE ID       CREATED         SIZE
centos        centos7   8652b9f0cb4c   6 weeks ago     204MB
hello-world   latest    bf756fb1ae65   11 months ago   13.3kB
$
Use the docker rmi command to delete the obtained Docker image.
$ docker rmi centos:centos7 hello-world:latest
Untagged: centos:centos7
Untagged: centos@sha256:0f4ec88e21daf75124b8a9e5ca03c37a5e937e0e108a255d890492430789b60e
Deleted: sha256:8652b9f0cb4c0599575e5a003f5906876e10c1ceb2ab9fe1786712dac14a50cf
Deleted: sha256:174f5685490326fc0a1c0f5570b8663732189b327007e47ff13d2ca59673db02
Untagged: hello-world:latest
Untagged: hello-world@sha256:1a523af650137b8accdaed439c17d684df61ee4d74feac151b5b337bd29e7eec
Deleted: sha256:bf756fb1ae65adf866bd8c456593cd24beb6a0a061dedf42b26a993176745f6b
Deleted: sha256:9c27e219663c25e0f28493790cc0b88bc973ba3b1686355f221c38a36978ac63
Now all the images have been deleted from docker.
Maintenance of CentOS container (virtual environment)
The image of centos: centos7 seems to be a CentOS7 environment installed with the minimum configuration (?), So in order to actually use it, you have to install what is required individually for the built CentOS container and work on the environment maintenance. Must be.
First of all, I deleted the Centos7 container and image, so I will build the CentOS container (virtual environment) on Docker for Windows again as a review.
Building a CentOS container (virtual environment) [Review]
Get CentOS Docker image
$ docker pull centos:centos7
centos7: Pulling from library/centos
2d473b07cdd5: Pull complete
Digest: sha256:0f4ec88e21daf75124b8a9e5ca03c37a5e937e0e108a255d890492430789b60e
Status: Downloaded newer image for centos:centos7
docker.io/library/centos:centos7
$ docker images
REPOSITORY   TAG       IMAGE ID       CREATED       SIZE
centos       centos7   8652b9f0cb4c   6 weeks ago   204MB
$
Create / start CentOS container
$ docker run -it --name="centos7" centos:centos7 /bin/bash
#
Command package installation
When I typed commands like sudo, java, git, ant, wget, unzip, I got the following "command not found" message:
# sudo
bash: sudo: command not found
#
First, keep the CentOS package up to date with the yum update command.
# yum update
Loaded plugins: fastestmirror, ovl
Determining fastest mirrors
 * base: ftp.iij.ad.jp
 * extras: ftp.iij.ad.jp
 * updates: ftp.iij.ad.jp
base                                                     | 3.6 kB     00:00
extras                                                   | 2.9 kB     00:00
updates                                                  | 2.9 kB     00:00
(1/4): base/7/x86_64/group_gz                              | 153 kB   00:00
(2/4): extras/7/x86_64/primary_db                          | 222 kB   00:00
(3/4): updates/7/x86_64/primary_db                         | 4.7 MB   00:00
(4/4): base/7/x86_64/primary_db                            | 6.1 MB   00:01
Resolving Dependencies
--> Running transaction check
---> Package bind-license.noarch 32:9.11.4-26.P2.el7 will be updated
---> Package bind-license.noarch 32:9.11.4-26.P2.el7_9.3 will be an update
---> Package centos-release.x86_64 0:7-9.2009.0.el7.centos will be updated
---> Package centos-release.x86_64 0:7-9.2009.1.el7.centos will be an update
---> Package coreutils.x86_64 0:8.22-24.el7 will be updated
---> Package coreutils.x86_64 0:8.22-24.el7_9.2 will be an update
---> Package curl.x86_64 0:7.29.0-59.el7 will be updated
---> Package curl.x86_64 0:7.29.0-59.el7_9.1 will be an update
---> Package device-mapper.x86_64 7:1.02.170-6.el7 will be updated
---> Package device-mapper.x86_64 7:1.02.170-6.el7_9.3 will be an update
---> Package device-mapper-libs.x86_64 7:1.02.170-6.el7 will be updated
---> Package device-mapper-libs.x86_64 7:1.02.170-6.el7_9.3 will be an update
---> Package glib2.x86_64 0:2.56.1-7.el7 will be updated
---> Package glib2.x86_64 0:2.56.1-8.el7 will be an update
---> Package kpartx.x86_64 0:0.4.9-133.el7 will be updated
---> Package kpartx.x86_64 0:0.4.9-134.el7_9 will be an update
---> Package libcurl.x86_64 0:7.29.0-59.el7 will be updated
---> Package libcurl.x86_64 0:7.29.0-59.el7_9.1 will be an update
---> Package openssl-libs.x86_64 1:1.0.2k-19.el7 will be updated
---> Package openssl-libs.x86_64 1:1.0.2k-21.el7_9 will be an update
---> Package python.x86_64 0:2.7.5-89.el7 will be updated
---> Package python.x86_64 0:2.7.5-90.el7 will be an update
---> Package python-libs.x86_64 0:2.7.5-89.el7 will be updated
---> Package python-libs.x86_64 0:2.7.5-90.el7 will be an update
---> Package systemd.x86_64 0:219-78.el7 will be updated
---> Package systemd.x86_64 0:219-78.el7_9.2 will be an update
---> Package systemd-libs.x86_64 0:219-78.el7 will be updated
---> Package systemd-libs.x86_64 0:219-78.el7_9.2 will be an update
---> Package vim-minimal.x86_64 2:7.4.629-7.el7 will be updated
---> Package vim-minimal.x86_64 2:7.4.629-8.el7_9 will be an update
--> Finished Dependency Resolution

Dependencies Resolved

================================================================================
 Package               Arch      Version                       Repository  Size
================================================================================
Updating:
 bind-license          noarch    32:9.11.4-26.P2.el7_9.3       updates     91 k
 centos-release        x86_64    7-9.2009.1.el7.centos         updates     27 k
 coreutils             x86_64    8.22-24.el7_9.2               updates    3.3 M
 curl                  x86_64    7.29.0-59.el7_9.1             updates    271 k
 device-mapper         x86_64    7:1.02.170-6.el7_9.3          updates    297 k
 device-mapper-libs    x86_64    7:1.02.170-6.el7_9.3          updates    325 k
 glib2                 x86_64    2.56.1-8.el7                  updates    2.5 M
 kpartx                x86_64    0.4.9-134.el7_9               updates     81 k
 libcurl               x86_64    7.29.0-59.el7_9.1             updates    223 k
 openssl-libs          x86_64    1:1.0.2k-21.el7_9             updates    1.2 M
 python                x86_64    2.7.5-90.el7                  updates     96 k
 python-libs           x86_64    2.7.5-90.el7                  updates    5.6 M
 systemd               x86_64    219-78.el7_9.2                updates    5.1 M
 systemd-libs          x86_64    219-78.el7_9.2                updates    418 k
 vim-minimal           x86_64    2:7.4.629-8.el7_9             updates    443 k

Transaction Summary
================================================================================
Upgrade  15 Packages

Total download size: 20 M
Is this ok [y/d/N]: y
Downloading packages:
Delta RPMs disabled because /usr/bin/applydeltarpm not installed.
warning: /var/cache/yum/x86_64/7/updates/packages/bind-license-9.11.4-26.P2.el7_9.3.noarch.rpm: Header V3 RSA/SHA256 Signature, key ID f4a80eb5: NOKEY
Public key for bind-license-9.11.4-26.P2.el7_9.3.noarch.rpm is not installed
(1/15): bind-license-9.11.4-26.P2.el7_9.3.noarch.rpm       |  91 kB   00:00
(2/15): centos-release-7-9.2009.1.el7.centos.x86_64.rpm    |  27 kB   00:00
(3/15): curl-7.29.0-59.el7_9.1.x86_64.rpm                  | 271 kB   00:00
(4/15): device-mapper-1.02.170-6.el7_9.3.x86_64.rpm        | 297 kB   00:00
(5/15): device-mapper-libs-1.02.170-6.el7_9.3.x86_64.rpm   | 325 kB   00:00
(6/15): kpartx-0.4.9-134.el7_9.x86_64.rpm                  |  81 kB   00:00
(7/15): libcurl-7.29.0-59.el7_9.1.x86_64.rpm               | 223 kB   00:00
(8/15): glib2-2.56.1-8.el7.x86_64.rpm                      | 2.5 MB   00:00
(9/15): openssl-libs-1.0.2k-21.el7_9.x86_64.rpm            | 1.2 MB   00:00
(10/15): python-2.7.5-90.el7.x86_64.rpm                    |  96 kB   00:00
(11/15): coreutils-8.22-24.el7_9.2.x86_64.rpm              | 3.3 MB   00:00
(12/15): systemd-219-78.el7_9.2.x86_64.rpm                 | 5.1 MB   00:00
(13/15): systemd-libs-219-78.el7_9.2.x86_64.rpm            | 418 kB   00:00
(14/15): vim-minimal-7.4.629-8.el7_9.x86_64.rpm            | 443 kB   00:00
(15/15): python-libs-2.7.5-90.el7.x86_64.rpm               | 5.6 MB   00:00
--------------------------------------------------------------------------------
Total                                               14 MB/s |  20 MB  00:01
Retrieving key from file:///etc/pki/rpm-gpg/RPM-GPG-KEY-CentOS-7
Importing GPG key 0xF4A80EB5:
 Userid     : "CentOS-7 Key (CentOS 7 Official Signing Key) <[email protected]>"
 Fingerprint: 6341 ab27 53d7 8a78 a7c2 7bb1 24c6 a8a7 f4a8 0eb5
 Package    : centos-release-7-9.2009.0.el7.centos.x86_64 (@CentOS)
 From       : /etc/pki/rpm-gpg/RPM-GPG-KEY-CentOS-7
Is this ok [y/N]: y
Running transaction check
Running transaction test
Transaction test succeeded
Running transaction
  Updating   : systemd-libs-219-78.el7_9.2.x86_64                          1/30
  Updating   : 1:openssl-libs-1.0.2k-21.el7_9.x86_64                       2/30
  Updating   : coreutils-8.22-24.el7_9.2.x86_64                            3/30
  Updating   : libcurl-7.29.0-59.el7_9.1.x86_64                            4/30
  Updating   : python-libs-2.7.5-90.el7.x86_64                             5/30
  Updating   : centos-release-7-9.2009.1.el7.centos.x86_64                 6/30
  Updating   : systemd-219-78.el7_9.2.x86_64                               7/30
Failed to get D-Bus connection: Operation not permitted
  Updating   : 7:device-mapper-libs-1.02.170-6.el7_9.3.x86_64              8/30
  Updating   : 7:device-mapper-1.02.170-6.el7_9.3.x86_64                   9/30
  Updating   : kpartx-0.4.9-134.el7_9.x86_64                              10/30
  Updating   : python-2.7.5-90.el7.x86_64                                 11/30
  Updating   : curl-7.29.0-59.el7_9.1.x86_64                              12/30
  Updating   : glib2-2.56.1-8.el7.x86_64                                  13/30
  Updating   : 2:vim-minimal-7.4.629-8.el7_9.x86_64                       14/30
  Updating   : 32:bind-license-9.11.4-26.P2.el7_9.3.noarch                15/30
  Cleanup    : curl-7.29.0-59.el7.x86_64                                  16/30
  Cleanup    : kpartx-0.4.9-133.el7.x86_64                                17/30
  Cleanup    : 7:device-mapper-1.02.170-6.el7.x86_64                      18/30
  Cleanup    : 7:device-mapper-libs-1.02.170-6.el7.x86_64                 19/30
  Cleanup    : systemd-219-78.el7.x86_64                                  20/30
  Cleanup    : python-2.7.5-89.el7.x86_64                                 21/30
  Cleanup    : centos-release-7-9.2009.0.el7.centos.x86_64                22/30
  Cleanup    : 32:bind-license-9.11.4-26.P2.el7.noarch                    23/30
  Cleanup    : python-libs-2.7.5-89.el7.x86_64                            24/30
  Cleanup    : coreutils-8.22-24.el7.x86_64                               25/30
  Cleanup    : 1:openssl-libs-1.0.2k-19.el7.x86_64                        26/30
  Cleanup    : libcurl-7.29.0-59.el7.x86_64                               27/30
  Cleanup    : systemd-libs-219-78.el7.x86_64                             28/30
  Cleanup    : glib2-2.56.1-7.el7.x86_64                                  29/30
  Cleanup    : 2:vim-minimal-7.4.629-7.el7.x86_64                         30/30
  Verifying  : python-2.7.5-90.el7.x86_64                                  1/30
  Verifying  : kpartx-0.4.9-134.el7_9.x86_64                               2/30
  Verifying  : centos-release-7-9.2009.1.el7.centos.x86_64                 3/30
  Verifying  : 7:device-mapper-1.02.170-6.el7_9.3.x86_64                   4/30
  Verifying  : 32:bind-license-9.11.4-26.P2.el7_9.3.noarch                 5/30
  Verifying  : coreutils-8.22-24.el7_9.2.x86_64                            6/30
  Verifying  : libcurl-7.29.0-59.el7_9.1.x86_64                            7/30
  Verifying  : 1:openssl-libs-1.0.2k-21.el7_9.x86_64                       8/30
  Verifying  : curl-7.29.0-59.el7_9.1.x86_64                               9/30
  Verifying  : python-libs-2.7.5-90.el7.x86_64                            10/30
  Verifying  : 2:vim-minimal-7.4.629-8.el7_9.x86_64                       11/30
  Verifying  : 7:device-mapper-libs-1.02.170-6.el7_9.3.x86_64             12/30
  Verifying  : systemd-libs-219-78.el7_9.2.x86_64                         13/30
  Verifying  : systemd-219-78.el7_9.2.x86_64                              14/30
  Verifying  : glib2-2.56.1-8.el7.x86_64                                  15/30
  Verifying  : 2:vim-minimal-7.4.629-7.el7.x86_64                         16/30
  Verifying  : systemd-libs-219-78.el7.x86_64                             17/30
  Verifying  : glib2-2.56.1-7.el7.x86_64                                  18/30
  Verifying  : python-2.7.5-89.el7.x86_64                                 19/30
  Verifying  : kpartx-0.4.9-133.el7.x86_64                                20/30
  Verifying  : 32:bind-license-9.11.4-26.P2.el7.noarch                    21/30
  Verifying  : centos-release-7-9.2009.0.el7.centos.x86_64                22/30
  Verifying  : python-libs-2.7.5-89.el7.x86_64                            23/30
  Verifying  : 7:device-mapper-1.02.170-6.el7.x86_64                      24/30
  Verifying  : 7:device-mapper-libs-1.02.170-6.el7.x86_64                 25/30
  Verifying  : systemd-219-78.el7.x86_64                                  26/30
  Verifying  : coreutils-8.22-24.el7.x86_64                               27/30
  Verifying  : 1:openssl-libs-1.0.2k-19.el7.x86_64                        28/30
  Verifying  : libcurl-7.29.0-59.el7.x86_64                               29/30
  Verifying  : curl-7.29.0-59.el7.x86_64                                  30/30

Updated:
  bind-license.noarch 32:9.11.4-26.P2.el7_9.3
  centos-release.x86_64 0:7-9.2009.1.el7.centos
  coreutils.x86_64 0:8.22-24.el7_9.2
  curl.x86_64 0:7.29.0-59.el7_9.1
  device-mapper.x86_64 7:1.02.170-6.el7_9.3
  device-mapper-libs.x86_64 7:1.02.170-6.el7_9.3
  glib2.x86_64 0:2.56.1-8.el7
  kpartx.x86_64 0:0.4.9-134.el7_9
  libcurl.x86_64 0:7.29.0-59.el7_9.1
  openssl-libs.x86_64 1:1.0.2k-21.el7_9
  python.x86_64 0:2.7.5-90.el7
  python-libs.x86_64 0:2.7.5-90.el7
  systemd.x86_64 0:219-78.el7_9.2
  systemd-libs.x86_64 0:219-78.el7_9.2
  vim-minimal.x86_64 2:7.4.629-8.el7_9

Complete!
#
If you get an error, please refer to here.
Install the sudo package with the yum install command.
# yum -y install sudo
Loaded plugins: fastestmirror, ovl
Loading mirror speeds from cached hostfile
 * base: ftp.iij.ad.jp
 * extras: ftp.iij.ad.jp
 * updates: ftp.iij.ad.jp
Resolving Dependencies
--> Running transaction check
---> Package sudo.x86_64 0:1.8.23-10.el7 will be installed
--> Finished Dependency Resolution

Dependencies Resolved

================================================================================
 Package        Arch             Version                   Repository      Size
================================================================================
Installing:
 sudo           x86_64           1.8.23-10.el7             base           842 k

Transaction Summary
================================================================================
Install  1 Package

Total download size: 842 k
Installed size: 3.0 M
Downloading packages:
sudo-1.8.23-10.el7.x86_64.rpm                              | 842 kB   00:00
Running transaction check
Running transaction test
Transaction test succeeded
Running transaction
  Installing : sudo-1.8.23-10.el7.x86_64                                    1/1
  Verifying  : sudo-1.8.23-10.el7.x86_64                                    1/1

Installed:
  sudo.x86_64 0:1.8.23-10.el7

Complete!
#
You have now installed the sudo command package.
# sudo
usage: sudo -h | -K | -k | -V
usage: sudo -v [-AknS] [-g group] [-h host] [-p prompt] [-u user]
usage: sudo -l [-AknS] [-g group] [-h host] [-p prompt] [-U user] [-u user]
            [command]
usage: sudo [-AbEHknPS] [-r role] [-t type] [-C num] [-g group] [-h host] [-p
            prompt] [-T timeout] [-u user] [VAR=value] [-i|-s] [<command>]
usage: sudo -e [-AknS] [-r role] [-t type] [-C num] [-g group] [-h host] [-p
            prompt] [-T timeout] [-u user] file ...
#
In addition to sudo, install command packages such as java, git, ant, wget, and unzip.
# yum -y install java-1.8.0-openjdk-devel
# yum -y install git
# yum -y install ant
# yum -y install wget
# yum -y install unzip
Stop and exit "centos7" on the CentOS container where you installed commands such as sudo.
# exit
exit
$
Saving a working CentOS container (virtual environment)
This time, I installed the sudo command on the CentOS container (virtual environment).
In this way, you can save the state of the container that has been customized such as settings and updates as an image. Now, let's create an image from the CentOS container that we customized this time and save it.
Stop the container to save
First, check the currently running container with no options.
$ docker ps
CONTAINER ID   IMAGE     COMMAND   CREATED   STATUS    PORTS     NAMES
$
This time, the CentOS container "centos7" with commands such as sudo installed should be stopped, so there is no container currently running.
If the container is running and not connected to it, you can stop it with the docker stop command.
Then add the -a option to show all containers, including dead containers.
$ docker ps -a
CONTAINER ID   IMAGE            COMMAND       CREATED          STATUS                            PORTS     NAMES
38cad34ec558   centos:centos7   "/bin/bash"   17 minutes ago   Exited (127) About a minute ago             centos7
$
Work such as installing commands such as sudo will be performed, and "centos7" of the CentOS container that is currently stopped will be displayed.
Save the stopped container to the image
Check the acquired images with the docker images command.
$ docker images
REPOSITORY   TAG       IMAGE ID       CREATED       SIZE
centos       centos7   8652b9f0cb4c   6 weeks ago   204MB
$
Save the customized CentOS container "centos" as a Docker image "centos: gahoh" with the docker commit command.
$ docker commit centos7 centos:gahoh
sha256:8beaf0d882f91e8d100b5b67696cc001ff57c743188024b6b2ead373aff28dee
$
If you want to create a Docker image with the container still running without pausing, use the "--pause = false" option.
Use the docker images command to check if a Docker image has been created.
$ docker images
REPOSITORY   TAG       IMAGE ID       CREATED          SIZE
centos       gahoh     8beaf0d882f9   46 minutes ago   663MB
centos       centos7   8652b9f0cb4c   6 weeks ago      204MB
$
You can see that a new Dokcer image "centos: gahoh" has been added.
Check the contents of the created image
Let's check if the image reflects what you worked on earlier.
Delete the container "centos7" with the docker rm command.
$ docker ps -a
CONTAINER ID   IMAGE          COMMAND       CREATED          STATUS                      PORTS     NAMES
cd115c8ce57b   centos:gahoh   "/bin/bash"   46 minutes ago   Exited (0) 21 minutes ago             centos
$
$ docker rm centos7
centos7
$ docker ps -a
CONTAINER ID   IMAGE     COMMAND   CREATED   STATUS    PORTS     NAMES
$
Now all the containers are gone.
Now, let's create and start the container "centos7" from the image "centos: gahoh" with the docker run command.
$ docker run -it --name="centos7" centos:gahoh /bin/bash
#
Try running the sudo command.
# sudo
usage: sudo -h | -K | -k | -V
usage: sudo -v [-AknS] [-g group] [-h host] [-p prompt] [-u user]
usage: sudo -l [-AknS] [-g group] [-h host] [-p prompt] [-U user] [-u user]
            [command]
usage: sudo [-AbEHknPS] [-r role] [-t type] [-C num] [-g group] [-h host] [-p
            prompt] [-T timeout] [-u user] [VAR=value] [-i|-s] [<command>]
usage: sudo -e [-AknS] [-r role] [-t type] [-C num] [-g group] [-h host] [-p
            prompt] [-T timeout] [-u user] file ...
#
at the end
This time, I intend to install Doker Desktop for Mac on a MacBook and describe in detail a series of steps such as building, setting, and saving a virtual environment of CentOS. If you find any mistakes or concerns about the description, we would appreciate it if you could give us feedback in the edit request or comment.
Recommended Posts