Create miscellaneous Photoshop videos with Python + OpenCV ② Create still image Photoshop
0. Introduction
This is a continuation from the previous time (Part 1 Face recognition). Overwrite the previously recognized face with another image. I referred to the following site. Image processing by python + Opencv 5 (resize) Overwrite Laughing Man on face with Python + OpenCV + pillow
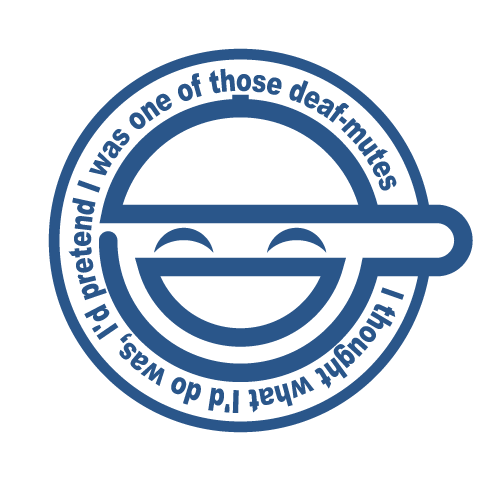
After all, the image to be overwritten will be this. Laughing Man Parts
1. Image resizing
Since the size of the recognized face and the size of the image to be overwritten are different, create a function to resize the image using the Resize () function of OpenCV. If you give the image and the changed size, it will expand and contract accordingly. I didn't want to change the aspect ratio of the original image, so it expands and contracts according to the smaller size difference (ratio). Below is the code.
resize_image
def resize_image(image, height, width):

    #Get the original size
    org_height, org_width = image.shape[:2]

    #Shrink to fit the larger size
    if float(height)/org_height > float(width)/org_width:
        ratio = float(height)/org_height
    else:
        ratio = float(width)/org_width

    #resize
    resized = cv2.resize(image,(int(org_height*ratio),int(org_width*ratio)))

    return resized
2. Resize result
Let's test the resizing function. I tried to make it 100 x 100 in size.
resizetest
    #Loading the image to overwrite
    ol_imgae_path = "target/warai_otoko.png "
    ol_image = cv2.imread(ol_imgae_path,cv2.IMREAD_UNCHANGED)   #Alpha channel(Transparent)IMREAD to read_Specify INCHANGED

    #resize
    resized_image = resize_image(ol_image, 100, 100)

    #Output of recognition result
    cv2.imwrite("result/warai_otoko_result.png ", resized_image)
Before

After

I was able to reduce it successfully.
3. Create a function to overwrite the image
Overwrite the image on the face part. A library called Pillow (PIL) is used to create a function that synthesizes an image at a specified position. The flow is -Convert images from OpenCV format to PIL format -Overwrite with overlay image -Return from PIL format to OpenCV format. It's like that.
overlayOnPart
import numpy as np
from PIL import Image

def overlayOnPart(src_image, overlay_image, posX, posY):

    #Get the size of the overlay image
    ol_height, ol_width = overlay_image.shape[:2]

    #Convert OpenCV image data to PIL
    #Convert from BGRA to RGBA
    src_image_RGBA = cv2.cvtColor(src_image, cv2.COLOR_BGR2RGB)
    overlay_image_RGBA = cv2.cvtColor(overlay_image, cv2.COLOR_BGRA2RGBA)

    #Convert to PIL
    src_image_PIL=Image.fromarray(src_image_RGBA)
    overlay_image_PIL=Image.fromarray(overlay_image_RGBA)

    #Change to RGBA mode for compositing
    src_image_PIL = src_image_PIL.convert('RGBA')
    overlay_image_PIL = overlay_image_PIL.convert('RGBA')

    #Prepare a transparent campus of the same size
    tmp = Image.new('RGBA', src_image_PIL.size, (255, 255,255, 0))
    #Overwrite the prepared campus
    tmp.paste(overlay_image_PIL, (posX, posY), overlay_image_PIL)
    #Combine and save the original and campus
    result = Image.alpha_composite(src_image_PIL, tmp)

    return  cv2.cvtColor(np.asarray(result), cv2.COLOR_RGBA2BGRA)
4. Built-in overwrite function
I will put a laughing man on the face of the Lenna image that I recognized last time. Added loading of images to overwrite the previous source, After reducing the size to fit the size of the face, overwrite it.
overlay_face
#coding=utf-8

import cv2
import numpy as np
from PIL import Image


def overlay_face():

    #Reading the file to be recognized
    image_path = "target/Lenna.png "
    image = cv2.imread(image_path)

    #Loading the image to overwrite
    ol_imgae_path = "target/warai_otoko.png "
    ol_image = cv2.imread(ol_imgae_path,cv2.IMREAD_UNCHANGED)   #Alpha channel(Transparent)IMREAD to read_Specify INCHANGED

    #Convert to grayscale
    image_gray = cv2.cvtColor(image, cv2.COLOR_BGR2GRAY)

    #File specification of feature amount for face recognition
    cascade_path = "haarcascades/haarcascade_frontalface_alt.xml"
    #Acquire the features of the cascade classifier
    cascade = cv2.CascadeClassifier(cascade_path)

    #Perform face recognition
    facerecog = cascade.detectMultiScale(image_gray, scaleFactor=1.1, minNeighbors=1, minSize=(1, 1))


    if len(facerecog) > 0:


        #Overwrite the image on all recognized faces
        for rect in facerecog:

            #Display recognition result
            print ("Recognition result")
            print ("(x,y)=(" + str(rect[0]) + "," + str(rect[1])+ ")" + \
                "height:"+str(rect[2]) + \
                "width:"+str(rect[3]))

            #Resize the image to fit the recognition range
            resized_ol_image = resize_image(ol_image, rect[2], rect[3])

            #Creating an overwritten image
            image = overlayOnPart(image, resized_ol_image, rect[0], rect[1])

    #Output of recognition result
    cv2.imwrite("result/Lenna_result.png ", image)


if __name__ == '__main__':
    overlay_face()
5. Overwrite result

It went well.
6. Finally
Now that you can create a still image Photoshop, From the next time, I will apply it to videos. Create miscellaneous Photoshop video with Python + OpenCV ③ Create miscellaneous Photoshop video
Recommended Posts