Until you install Arch Linux on VMware
Introduction!
When I actually installed Arch Linux on VMware, it was difficult to understand that it was an article on another site, so I summarized it. We have summarized it in an easy-to-understand manner, so we hope that not only those who are new to us but also those who have given up on the way will try again.
Since the method of building the VMware environment is posted, please proceed to the next if you understand. ** Make sure you have the latest version of VMware Workstation Player. ** ** If I didn't do this, the virtual environment couldn't be started.
People who are facing
- I want to configure Linux from the smallest package!
- Recently, the package has become complicated and I feel something heavy.
- Somehow it's more manual than auto!
- Tired of Ubuntu and CentOS ...
- I love customizing my own PC
- I'm a Vim sect. (I'm a nano sect. ~~ It's ridiculous !!! ~~ Please rest assured that people are in.)
What is Arch Linux in the first place?

As the name implies, it is one of the Linux distributions, and it has the appeal of being particularly customizable among Linux, but it is basically not for beginners but for commands and settings, such as increasing the choices and making the installation procedure difficult. A distribution for people who are used to touching files.
My environment
- OS: Windows10 Pro 64-bit (Version 2004)
- CPU: Intel Core i7-6700
- Memory: 16GB
Apps to install, etc.
- VMWare Workstation 15 Player
- TeraTerm
Prerequisites
There are various packages that I like. Please add or delete at any time.
- Use grub as the boot loader.
- The GUI installation method is not described. It is until the installation is completed.
Since we are using VMware this time, it may or may not be in the BIOS or UEFI section. Please enable the Intel Virtualization Technology (VT-x) settings If you do not understand, please refer to the following.
Also, it is assumed that WMware Workstation Player is already installed. If you do not have it, please refer to the following.
Install VMware (https://slacknotebook.com/vmware-player-15-on-windows/#toc1)
Image file download destination
Image file (mirror.archlinuxjp.org)
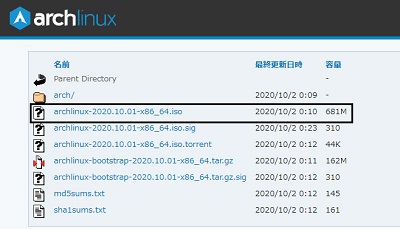
Select this iso and download!
1. Build a virtual environment with VMware
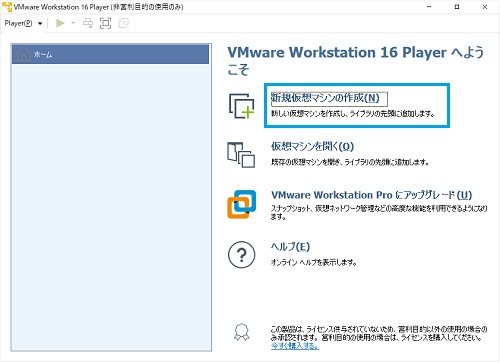
If you understand this part, please ignore it! After the VMware installation is complete, start it.
Click Create New Virtual Machine (N)
Specify the Arch Linux image you downloaded earlier in the installer disk image file

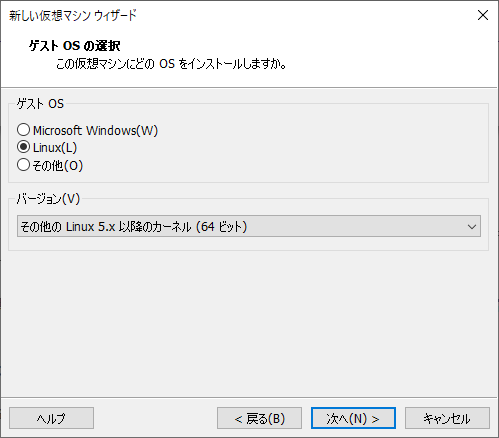
Set guest OS to "Linux" version to "Other Linux 5.x or later kernel (64-bit)"
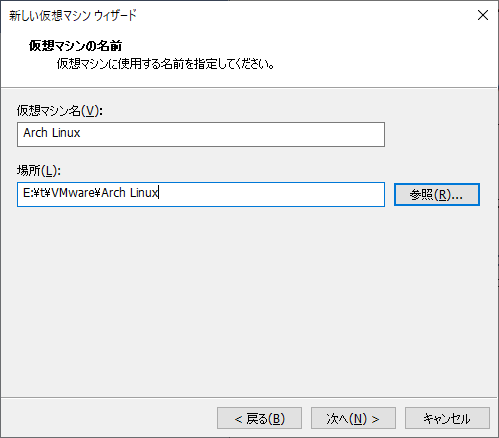
This time, I'll call it "Arch Linux". If you want to specify the location, change it.
This time, specify the disk capacity to 20G. If you want to touch it a lot, increase it.
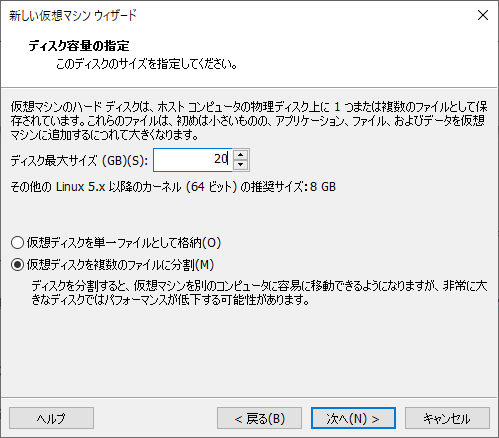
~~ Alright! Done! This is not the end of environment construction. Customize your hardware.
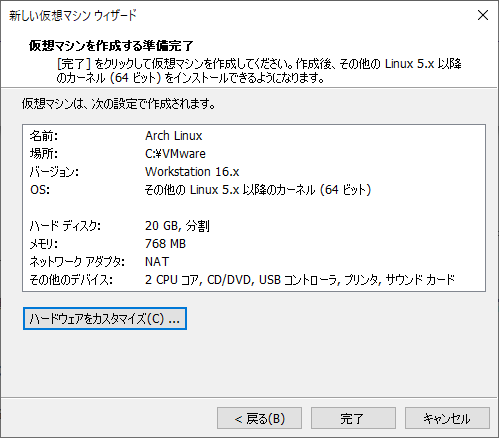
Increase the number of memory and processors. Set the network adapter to "bridge". Please proceed to the next if possible.

2. efi settings
** Don't start yet! !! !!
~~ Arch Linux is unfriendly ~~ There are still settings. ** **
Open the directory where the virtual environment is located.
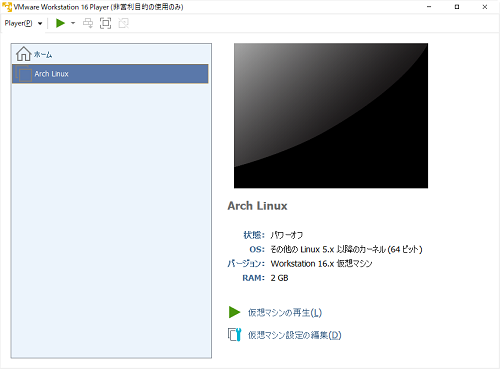
Start the file with the extension ".vmx" with Notepad. Add to the following, ** Please do not save yet **. It's a promise. Press Ctrl + Shift + S
firmware = "efi"
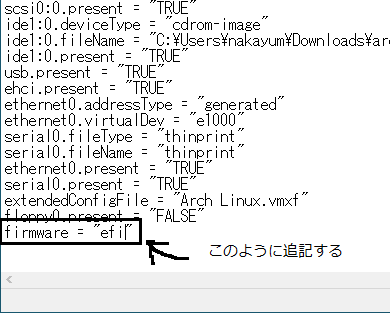
** Be sure to change the character code from "UTF-8" to "ANSI". ** **
The characters are garbled and cannot be opened.

This completes the settings.
3. Start and build a virtual environment
Now let's start the built virtual environment.
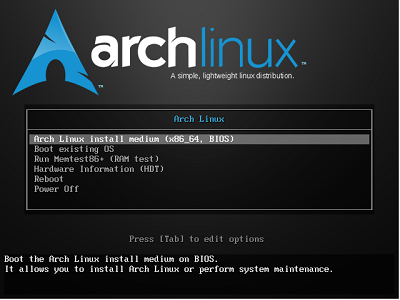
Here, if this screen is displayed, efi has not been set. Make the settings above.
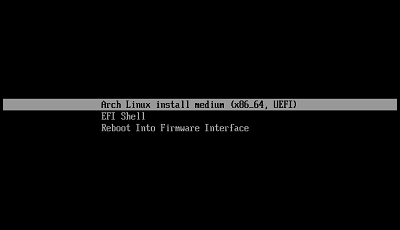
If this screen is displayed, efi has been set, so proceed as it is.
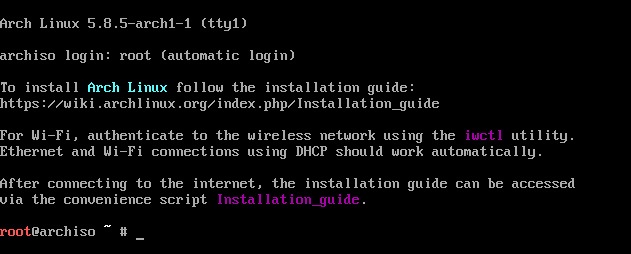
This screen will appear if you start up without any errors.
Then ~~ Arch Linux is unfriendly, so let's set it ~~.
Keymap settings
Probably most people use Japanese keyboards. (I'm sorry for the US array) Most Linux, including ArchLinux, uses a US keyboard layout, so first set the keyboard layout for the Japanese layout.
python
# loadkeys jp106
Confirm communication by ping
In most cases, the network connection should be established, but check it just in case.
python
# ping -c 4 archlinux.jp
Set root password
A simple password is recommended as this is only a temporary connection with SSH. I made it "a".
python
# passwd
Connect with SSH
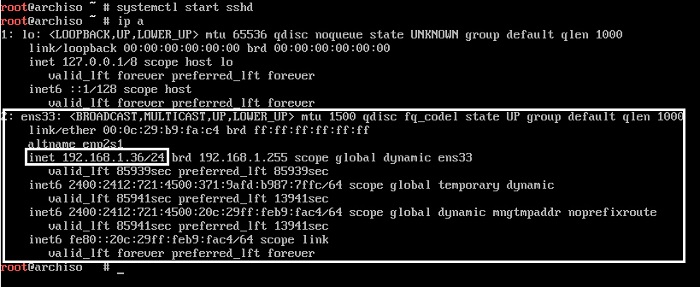
It is hard to type commands to the virtual machine, so operate it via SSH. Start sshd and check the IP address.
python
Start SSH daemon
# systemctl start sshd

Confirmation of IP address
# ip a
When I checked, it was "ens33" in my environment and the IP address was "192.168.1.36".
Time setting
The official manual recommends setting the time first, so set it.
python
# timedatectl set-ntp true
4. Create partition
Disks recognized by the live environment are assigned block devices such as / dev / sda and / dev / nvme0n1. To check the device, use the lsblk or fdisk command. Since efi is started, we will partition with GPT. This command will start gdisk.
python
# gdisk /dev/sda
First, create a GPT partition table with "o" ** This will delete all existing partitions **
python
Command (? for help):o
This option deletes all partitions and creates a new protective MBR.
Proceed? (Y/N): y
The partition is [Arch Linux Installation Guide](https://wiki.archlinux.jp/index.php/%E3%82%A4%E3%83%B3%E3%82%B9%E3%83%88% E3% 83% BC% E3% 83% AB% E3% 82% AC% E3% 82% A4% E3% 83% 89 # .E3.83.91.E3.83.BC.E3.83.86.E3.82.A3 It is based on .E3.82.B7.E3.83.A7.E3.83.B3). The partitioning this time is set as follows.
| partition | capacity |
|---|---|
| ESP (EFI Syeten Partition) | 512M |
| swap partition | 1GB |
| Data partition | All remaining capacity |
ESP is a FAT32 formatted partition recommended for UEFI boot. Swap is the capacity to use a part of the disk as a substitute for memory when multiple tasks are started and memory is insufficient when using a personal computer. All the remaining areas are created as data areas (root, home directory, etc.).
python
Command (? for help):n
Permission number: 1
First sector :Enter without pressing anything
Last sector : +512M
Hex code or GUID : EF00

Command (? for help):n
Permission number: 2
First sector :Enter without pressing anything
Last sector : +1G
Hex code or GUID : 8200

Command (? for help):n
Permission number: 3
First sector :Enter without pressing anything
Last sector :Enter without pressing anything
Hex code or GUID : 8300
Finally, specify W to partition. It cannot be used as it is, so format each partition next.
python
Command (? for help):W
Final checks complete. About to write GPT data. THIS WILL OVERWRITE EXISTING
PARTITIONS!!

Do you want to proceed? (Y/N): y
OK; writing new GUID partition table (GPT) to /dev/sda.
The operation has completed successfully.
Format each partition
Format ESP partition
Use the mkfs.vfat command because the UEFI boot partition must be formatted with FAT32.
python
# mkfs.vfat -F32 /dev/sda1
Linux file system (ext4) format
Use the mkfs.ext4 command as the command for formatting.
python
# mkfs.ext4 /dev/sda3
Create and load swap
To create swap space on Linux, use the mkswap command You can set it with the swapon command to actually use the swap space you created.
python
# mkswap /dev/sda2
# swapon /dev/sda2
Check if the format was successful
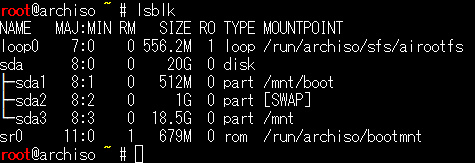
Use the lsblk command to see if it was formatted.
python
# lsblk
If it looks like this, it's OK.
Partition mount
Next, mount the formatted partition.
python
First mount the root directory
# mount /dev/sda3 /mnt
Create a directory and ESP/mnt/Mount on boot
# mkdir /mnt/boot
# mount /dev/sda1 /mnt/boot
Once the mount is complete, the system will be installed! Another breath!
5. System installation
Edit mirror list
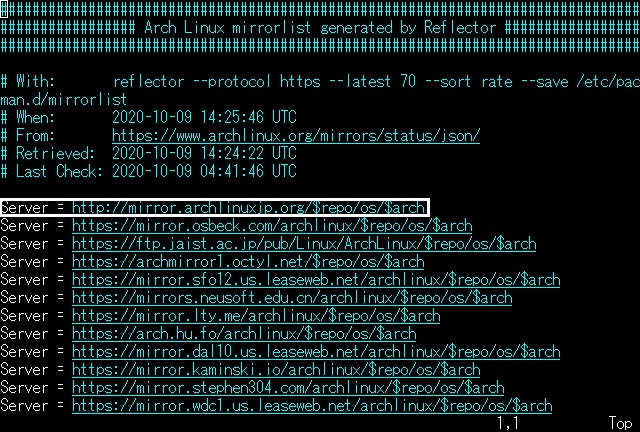
Install the base system from here, but connect to the server to download the package. There are several mirrors in each country, and the default settings can take a long time to download, so choose a Japanese server. The mirror list is stored in /etc/pacman.d/mirrorlist, and the server is used first from the beginning, so edit this file.
Edit using the editor you want to use.
python
# nano /etc/pacman.d/mirrorlist
Once open, add this text to this position.
/etc/pacman.d/mirrorlist
Server = http://mirror.archlinuxjp.org/$repo/os/$arch
For nano
Write with Ctrl + O Exit with Ctrl + X
for vim
Enter insert mode with i Exit insert mode with Esc End with: wq
Base system installation
After editing the mirror list, it's time to install the base system. Install Linux-based and: Please add or delete as needed.
- vi
- vim
- nano
- wget
- man-db
- man-pages
python
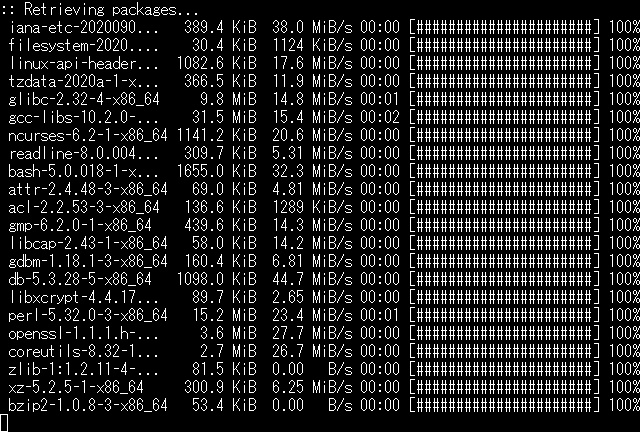
# pacstrap /mnt base base-devel linux linux-firmware btrfs-progs intel-ucode vi vim nano dosfstools efibootmgr openssh dhcpcd netctl ccache zsh zsh-completions zsh-syntax-highlighting wget man-db man-pages screenfetch
Downloading
Creating fstab
fstab is for storing partition and file system information and where it is mounted. You can use genfstab to find the currently mounted partition and write the appropriate value.
python
# genfstab -U -p /mnt >> /mnt/etc/fstab
6. Arch Linux system settings
From here, enter the installed Arch Linux system and make various settings.
The Arch Linux system you just installed is in / mnt, so set the root to / mnt. The chroot command treats mnt as the root directory.
python
# arch-chroot /mnt /bin/bash
Language and keymap settings
Set the language used on Linux. This time, ja_JP and en_US (English) are required as default, so specify them. To set the keymap, you can select the language to use by removing the # at the beginning of the language to use from the /etc/locale.gen file.
python
# nano /etc/locale.gen
- en_US.UTF-8 UTF-8
- ja_JP.UTF-8 UTF-8
Delete these two first #s and save.
Then run the following command to generate the locale.
python
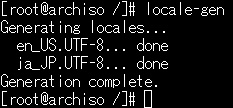
# locale-gen
If both 2 are displayed as done, the process is complete.
Create locale.conf file
If you set Japanese at this stage, the characters may be garbled, so leave it in English without setting Japanese here.
python
# echo LANG=en_US.UTF-8 > /etc/locale.conf
Keymap settings (ignored for US layout)
The keyboard layout of the console on the installed Arch Linux is English layout by default, so specify the keyboard layout in the following configuration file. If you are using a Japanese keyboard, write the contents of KEYMAP = jp106 in the /etc/vconsole.conf file. Ignore this command for US arrays.
python
# echo KEYMAP=jp106 > /etc/vconsole.conf
Area setting
If you live in Japan, please hit the following command.
python
# ln -s /usr/share/zoneinfo/Asia/Tokyo /etc/localtime
Time setting
Set the hardware clock to UTC.
python
# hwclock -u -w
Decide the Hostname
Hostname is the name of the Linux you want to install. Write any name you like in "/ etc / hostname". This time, set the Hostname to arch.
python
# echo arch > /etc/hostname
Edit / etc / hosts by deleting YOUR_HOSTNAME in the same way.
python
# nano /etc/hosts
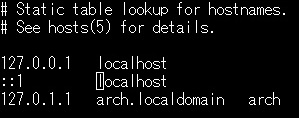
Then set the root password. ** If you do not do this, you will not be able to log in even if you can install **
python
# passwd
Activate the daemon automatically
Enter this command to enable the daemon at startup.
python
# systemctl enable sshd
# systemctl enable systemd-networkd
# systemctl enable systemd-resolved
# systemctl enable dhcpcd.service
7. Boot loader settings
In order to boot Arch Linux, you need to select and install a Linux-compatible bootloader. This time I will use GRUB.
python
# grub-install --target=x86_64-efi --efi-directory=/boot --bootloader-id=arch_grub --recheck --debug
# grub-mkconfig -o /boot/grub/grub.cfg
This completes the installation process! Thank you for your hard work.
8. Reboot the system
Let's reboot to see if it actually works.
python
# exit
# reboot
If you restart and this screen appears, it is proof that the installation is complete!
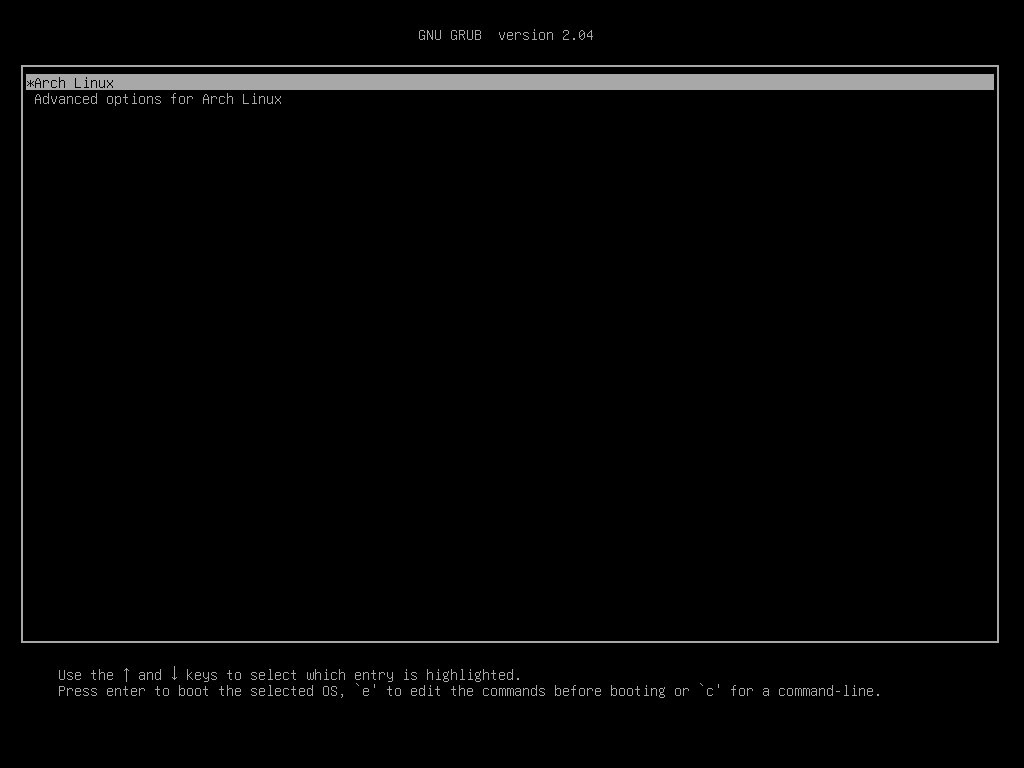
Once you're logged in, try typing the screenfetch command !!!
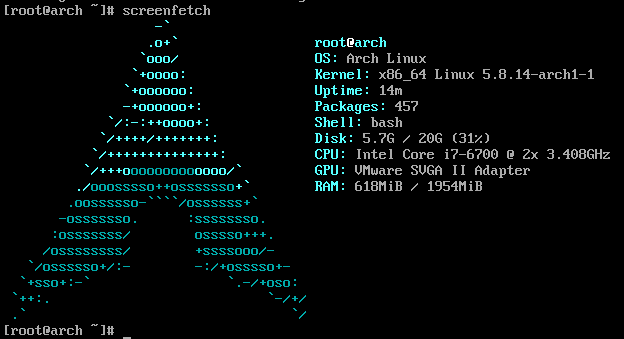
** Oh ... beautiful ... this is Arch Linux. Han romance **
References
Arch Linux Official Page [Arch Linux Installation Guide](https://wiki.archlinux.jp/index.php/%E3%82%A4%E3%83%B3%E3%82%B9%E3%83%88%E3%83%BC % E3% 83% AB% E3% 82% AC% E3% 82% A4% E3% 83% 89) How to install Arch Linux on VMware Fusion [Base system installation] Install Arch Linux on VMware [Arch Linux Installation Our Complete Edition](https://qiita.com/TsutomuNakamura/items/b60518f8788e5e998744#base-%E3%83%91%E3%83%83%E3%82%B1%E3%83% BC% E3% 82% B8% E3% 81% AE% E3% 82% A4% E3% 83% B3% E3% 82% B9% E3% 83% 88% E3% 83% BC% E3% 83% AB) Mako's Note-Initial Arch Linux Settings Sakura Knowledge-Easy installation of rch Linux- "Fun Sakura Cloud" (17) Kuro's Thought Note-I tried using Arch Linux Tech Memo --Arch Linux Initial Settings Login becomes fun! I tried playing with CentOS using screenfetch Windows: Use VMware Workstation 15 Player
Recommended Posts