[RUBY] Rails Tutorial 6th Edition Learning Summary Chapter 7
Overview
This article deepens my understanding by writing a Rails tutorial commentary article to further solidify my knowledge It is part of my study. In rare cases, ridiculous content or incorrect content may be written. Please note. I would appreciate it if you could tell me implicitly ...
Source Rails Tutorial 6th Edition
What to do in this chapter
Since the User model was created in the previous chapter, the user registration function is implemented. From here, we will implement RESTful pages.
Show users
Create and work with topic branches as usual.
git checkout -b sign-up
Debugging and Rails environment
Make debug information displayed in the layout file.
erb:application.html.erb
<!DOCTYPE html>
<html>
  <%= render 'layouts/head' %>
  <body>
    <%= render 'layouts/header' %>
    <div class="container">
      <%= yield %>
      <%= render 'layouts/footer' %>
      <%= debug(params) if Rails.env.development? %>
    </div>
  </body>
</html>
Rails has three environments, each test: test environment development: development environment production: production environment In this case, debugging is not required in the production environment or test environment. It is set to display debug information only in the development environment.
Since I put debug information in the layout, I also add CSS.
.debug_dump{
  clear: both;
  float: left;
  width: 100%;
  margin-top: 45px;
  @include box_sizing;
}
Here, we are loading CSS rules packaged using Saas's mixin feature.
Take a look at the debug information.

You can see that the controller and actions are written. These are included in params and are written in YAML format. YAML consists of hashes. We will confirm what format it is written in the exercise immediately after.
Exercise
-
It turns out to be the about action of static_pages.

-
`` `to_yaml``` and y method have the same effect It converts the attributes of the user object to YAML.
>> y user.attributes
---
id: 1
name: taketake
email: [email protected]
created_at: !ruby/object:ActiveSupport::TimeWithZone
  utc: &1 2020-06-10 12:51:23.959140000 Z
  zone: &2 !ruby/object:ActiveSupport::TimeZone
    name: Etc/UTC
  time: *1
updated_at: !ruby/object:ActiveSupport::TimeWithZone
  utc: &3 2020-06-10 13:09:09.579353000 Z
  zone: *2
  time: *3
password_digest: "$2a$12$xkZDNGfs2Dnjzbm5XxfCfu.sB3I4ug4PFtTHukKdp0EF9YLLsE5Sm"
=> nil
Users resource
Data creation, display, update, deletion when implemented according to REST principles Assign to each action as a basic HTTP operation (GET, POST, PATCH, DELETE). The User information display page refers to resources with attributes that uniquely identify each user. Basic resource name / ID The display page of the user with ID 1 is / users / 1. (Error because routing is undefined at this stage)
Add the following line to routes.rb to enable routing.
users
 This one line gives you access to the basic actions you need for RESTful Users resources.

 |HTTP request|URL|action|Named route|Use|
 |:--|:--|:--|:--|:----------------|
 |GET|/users|index|users_path|List page of all users|
 |GET|/users/1|show|user_path(user)|Page displaying a specific user|
 |GET|/usres/new|new|new_user_path|New user page|
 |POST|/users|create|users_path|Action to create a user|
 |GET|/users/1/edit|edit|edit_users_path|id=Page to edit 1 user|
 |PATCH|/users/1|update|user_path(user)|Action to update user|
 |DELETE|/users/1|destroy|user_path|Action to delete user|

 From Rails Tutorial 6th Edition
https://railstutorial.jp/chapters/sign_up?version=6.0#table-RESTful_users

 Since we have implemented routing, it will work if you create a page and action to display.

 Immediately create a template for the user display page (show page).
 Since we are not using a generator, manually create show.html.erb in app / views / users.


#### **`erb:show.html.erb`**
<%= @user.name %>,<%= @user.email %>
 The @user variable is used here, but it cannot be used because it is not defined.
 Therefore, it can be used by defining the @user variable in the show action of the Users controller.

```rb
  def show
    @user = User.find(params[:id])
  end
The character type "1" is stored in params [: id], but it is automatically converted to an integer type when specified in the argument of the find method. The 1 part of / users / 1 of the URL is stored in params [: id].
Exercise
erb:show.html.erb
<%= @user.name %>,<%= @user.email %><br>
<%= @user.created_at %><br>
<%= @user.updated_at %>

erb:show.html.erb
<%= @user.name %>,<%= @user.email %><br>
<%= Time.now %>

debugger method
I was able to check the status of the application by using the debug method. Try debugging using the debugger method as well.
If you plug in the debugger, you can check the status of variables etc. when the debugger is read. Very useful for debugging. If you get an unidentified error in future application development, insert a debugger and take a closer look. You may know the cause of the error.
Exercise
- Attach to_yaml to params.
(byebug) puts params.to_yaml
--- !ruby/object:ActionController::Parameters
parameters: !ruby/hash:ActiveSupport::HashWithIndifferentAccess
  controller: users
  action: show
  id: '1'
permitted: false
nil
- nil because nothing is defined in the controller
(byebug) @user
nil
- If you leave the debugger on, it will always stop at that line, so delete it when you are not using it.
Gravatar image and sidebar
If you use a service called Gravatar to associate images with email addresses, you can simply configure Gravatar's image path. An excellent one that automatically registers images registered in Gravatar.
Define the gravatar_for method. gravatar_for is a helper method that returns an image file when you pass a user object
  def gravatar_for(user)
    gravatar_id = Digest::MD5::hexdigest(user.email.downcase)
    gravatar_url = "https://secure.gravatar.com/avatar/#{gravatar_id}"
    image_tag(gravatar_url, alt: user.name, class:"gravatar")
  end
Note that the last image_tag is an implicit return value, as in the example.
Change the user's email address to the email address associated with the image with Gravatar.
>> User.first.update_attribute(:email,"[email protected]")
   (0.4ms)  SELECT sqlite_version(*)
  User Load (0.1ms)  SELECT "users".* FROM "users" ORDER BY "users"."id" ASC LIMIT ?  [["LIMIT", 1]]
   (0.1ms)  begin transaction
  User Update (9.9ms)  UPDATE "users" SET "email" = ?, "updated_at" = ? WHERE "users"."id" = ?  [["email", "[email protected]"], ["updated_at", "2020-06-11 12:21:07.548685"], ["id", 1]]
   (3.1ms)  commit transaction
=> true
Edit show.html.erb and custom.scss to get closer to the mockup.

It will be a little stylish.
Exercise
-
I'm doing it, so I'll omit it.
-
Assign to the option hash size (default value is 80)
  def gravatar_for(user,options={ size: 80})
    size = options[:size]
    gravatar_id = Digest::MD5::hexdigest(user.email.downcase)
    gravatar_url = "https://secure.gravatar.com/avatar/#{gravatar_id}?s=#{size}"
    image_tag(gravatar_url, alt: user.name, class:"gravatar")
  end
- Assign to the keyword argument size (default value is 80)
```rb
  def gravatar_for(user,size: 80)
    gravatar_id = Digest::MD5::hexdigest(user.email.downcase)
    gravatar_url = "https://secure.gravatar.com/avatar/#{gravatar_id}?s=#{size}"
    image_tag(gravatar_url, alt: user.name, class:"gravatar")
  end
Option hash Option name={hash}の形式で指定する。ただし入れ子になったhashなので size = options[:size]Otherwise, it cannot be used as size. If you specify it as a keyword variable, you can specify the default value, and when the default value is specified, Convenient thing that you can omit the argument It feels like an easy-to-use version of the option hash.
###User registration form Since the user profile page has been completed for the time being, create a user registration form.
####form_Use with form_with takes in ActiveRecord objects and builds a form with those attributes. User-created page/sign up is users#Because it is tied to new form to new action_Define the User object required by with.
@user = User.new
Also create form erb and scss.

#####Exercise
1.

```erb
<div class="row">
  <div class="col-md-6 col-md-offset-3">
     <%= form_with(model: @user, local: true) do |foobar| %>
      <%= foobar.label :name %>
      <%= foobar.text_field :name %>

      <%= foobar.label :email %>
      <%= foobar.email_field :email %>

      <%= foobar.label :password %>
      <%= foobar.password_field :password %>

      <%= foobar.label :password_confirmation, "Confirmation" %>
      <%= foobar.password_field :password_confirmation %>

      <%= foobar.submit "Create my account", class: "btn btn-primary" %>
    <% end %>
  </div>
</div>
It still works, but Since f is used as the abbreviation for form, it is not good to use meaningless and irrelevant strings such as foobar.
####Form HTML Summarize the points briefly.
・ Local:If true is the default, send using Ajax. Option to cancel Ajax transmission.
-The f object is for the method corresponding to the HTML form element.@Returns HTML for setting user attributes.
・ Form_If you want to check the HTML generated by with, check the source with a browser. Windows people can browse with F12 key.
-If you specify type for each of the text, email address, and password, the characters will be hidden if it is a password, or if it is an email address. There are differences such as the keyboard for entering an email address is displayed on a smartphone or the like.
-Hash initialized using the value of the name attribute of the input tag(params)To configure.
・ Form_to with@When user is specified, the process is divided depending on whether it is a new User or an existing User. This time@Since user is a new User object that we just created, to create a new object Since the POST request is sent, the method attribute of the form tag is also POST.
・ Form_When a form is generated with with, HTML called CSRF is automatically generated to prevent attacks.
#####Exercise
-
- You can't send data using form with HTML alone.
###User registration failure Create a form that returns an error and prompts you to re-enter when you submit invalid data.
####Correct form The content entered on the new action form page is sent to the create action. The processing flow is The signup page fills in the form. ↓ Data is sent to the create action. ↓ User in the create action.Create a user object using new ↓ Save the created user object → Set to display the signup page again if it fails.
There is such a description in the create action.
user])
In this line, the data entered on the form page is in the params hash:By passing the user symbol
Can be substituted.

#### **`user])`**
```@user = user.new(params[

This code works on older Rails, but the new Rails has a mass assignment vulnerability, so
An error will occur.

As a countermeasure, we use something called Strong Parameters.

####Strong Parameters
In the code I wrote earlier

#### **`user])`**
```@user = user.new(params[

There was a line.
This line is a very dangerous implementation for security and has been error-prone since Rails 4
What is dangerous
admin=Included attributes in post requests that users shouldn't be able to edit, such as 1
Just because the contents of the database will be overwritten.
By using StrongParameter, you can specify the required parameters and the allowed parameters.
This allows you to safely update the contents of the database.

To make this StrongParameter easier to use, user in an external method_It is common to define params.
Furthermore, this method does not need to be used by external users, so write it in private. Doing so will prevent this method from being used externally.

```rb
private
    def user_params
      params.require(:user).permit(:name,:email,:password,:password_confirmation)
    end
By defining this method and passing it as StrongParameter, the error will not occur for the time being. There is no feedback because we have not yet implemented the processing when data saving succeeds or fails. We will implement these from now on.
#####Exercise 1.
--- !ruby/object:ActionController::Parameters
parameters: !ruby/hash:ActiveSupport::HashWithIndifferentAccess
  admin: '1'
  controller: users
  action: new
permitted: false
####Error message Implement the error message when user registration fails.
The object that got stuck in the verificationerrors.full_messagesThe error message is stored as an array in.
>> user.save
   (0.1ms)  begin transaction
  User Exists? (0.7ms)  SELECT 1 AS one FROM "users" WHERE "users"."email" IS NULL LIMIT ?  [["LIMIT", 1]]
   (0.1ms)  rollback transaction
=> false
>> user.errors.full_messages
=> ["Password can't be blank", "Password can't be blank", "Password is too short (minimum is 6 characters)", "Name can't be blank", "Email can't be blank", "Email is invalid"]
New page with this error message(sign up page)Output all at once with Bootstrap form-By adding the control class An error display like that is completed
erb:_error.messages.erb.html
<% if @user.errors.any? %>
  <div id="error_explanation" >
    <div class="alert alert-danger">
      The form contains <%= pluralize(@user.errors.count, "error") %>.
    </div>
    <ul>
       <% @user.errors.full_messages.each do |msg| %>
        <li><%= msg %></li>
      <% end %>
    </ul>
  </div>
<% end %>
↑ Newly created error_messages partial
pluralize(@user.errors.count,"error")
[email protected] count(2 or more)In the case of, a convenient method that automatically corrects errors and plurals.

#### **`if @user.errors.any?`**
this [email protected] if there is at least one error in errors. empty?Has the opposite effect of.
#####Exercise
1.You can see that if you rewrite the validation, the error statement will change accordingly ↓

2.New page(new page)Submit the form with to jump to create. Because create specifies to render a new action with render when data saving fails. The URL will be that of the create page.
#####Test on failure
Write an integration test for a series of new user registration operations.
rails g integration_test users_signup
users_signup_test.rb
require 'test_helper'

class UsersSignupTest < ActionDispatch::IntegrationTest
  test "invalid signup information" do
    get signup_path
    assert_no_difference 'User.count' do
      post users_path, params:{user:{name:"",
                                     email:"user@invalid",
                                     password:"foo",
                                     password_confirmation:"bar"}}
    end
    assert_template 'users/new'
  end
end
assert_no_difference 'User.count' do
Arguments before and after processing in the block with(User.count)Check that the value of is unchanged.

#### **`{~`**
```post users_path,params {user

In the create action params[:user]The value of the(Form input value)Is being sent.

#####Exercise
1.If you fill the template, it looks like this

```rb
  test "invalid signup information" do
    get signup_path
    assert_no_difference 'User.count' do
      post users_path, params:{user:{name:"",
                                     email:"user@invalid",
                                     password:"foo",
                                     password_confirmation:"bar"}}
    end
    assert_template 'users/new'
    assert_select 'div#error_explanation'
    assert_select 'div.field_with_errors'
  end
CSS alert if you want to add more details-You can test danger and so on.
assert_select 'div.alert-danger'
####Completion of registration form

At this stage, invalid data can be processed, but valid data cannot be processed.
When I enter valid data and submit it, it freezes.
No template found for UsersController#create, rendering head :no_content Completed 204 No Content in 348ms (ActiveRecord: 8.5ms | Allocations: 6337)
This is because the create action does not have a valid view.
Because the action loads the corresponding view when the process is finished
If the data is valid```if @user.save```Because it becomes true and the processing of the action ends as it is
Go read the create view. An error occurs because the create view has not been created.
But this time the create action creates a new user(Save to database)I hope I can do it, so I don't make a view
After saving the user, jump to the profile page of the created user.

```rb
  def create
    @user = User.new(user_params)
    if @User
 redirect_to @user ## redirect_to is a method that redirects to the specified page
    else
      render 'new'
    end
  end
hereredirect_to @userThere is a line
this,Meaningless point!!
If you don't understand it here, it will continue????Because of the condition
Points I want you to do your best to understand...
redirect_to @userTo be exactredirect_to user_path(@user)Will be.
Passing an object for the User resource will profile that user(Individual page)Want to see
Because Rails will guess for youredirect_to @userBut it works.
It's a function for efficiency, but we, the beginners, may get stuck, so please forgive me.
It's convenient to remember, so let's understand it well.
#####Exercise 1.
>> User.create(name:"Anpanman",email:"[email protected]",password:"foobar",password_confirmation:"foobar")
   (1.4ms)  SELECT sqlite_version(*)
   (0.1ms)  begin transaction
  User Exists? (0.7ms)  SELECT 1 AS one FROM "users" WHERE "users"."email" = ? LIMIT ?  [["email", "[email protected]"], ["LIMIT", 1]]
  User Create (3.9ms)  INSERT INTO "users" ("name", "email", "created_at", "updated_at", "password_digest") VALUES (?, ?, ?, ?, ?)  [["name", "Anpanman"], ["email", "[email protected]"], ["created_at", "2020-06-13 14:33:31.718157"], ["updated_at", "2020-06-13 14:33:31.718157"], ["password_digest", "$2a$12$WJ1/TrXoJLq.c3Q9KetVq.h4VmV6cTkrGf92wzQcpigckRj1ZCKPm"]]
   (18.0ms)  commit transaction
=> #<User id: 4, name: "Anpanman", email: "[email protected]", created_at: "2020-06-13 14:33:31", updated_at: "2020-06-13 14:33:31", password_digest: [FILTERED]>
  def create
    @user = User.new(user_params)
    if @user.save
      redirect_to user_url(@user)
    else
      render 'new'
    end
  end
This still works the same.
####flash If you created a user, "The user was created."!"And When deleted, it will be displayed for a short time until you move from within the page, such as "Deleted". Display a status message. This is also the message that the post was successful.
If you want to create a temporary message that only appears on the same page like this, Rails Use a special variable called flash.
def create
@user = User.new(user_params)
if @user.save
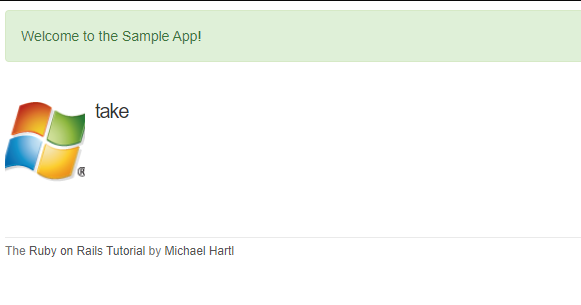
flash[:success] = "Welcome to the Sample App!"
redirect_to user_url(@user)
else
render 'new'
end
end
flash[:success]Store the message when the user creation is successful in. By doing this, the message can be displayed only once at the redirect destination.
After that, only when the message assigned to flash is incorporated in the layout and flash exists Specifies to display flash.
   <% flash.each do |message_type,message| %>
    <div class="alert alert-<%=message_type %>"><%= message %></div>
  <% end %>
#####Exercise 1.If you put a symbol in the expression expansion of the character string:Will be returned
>> "#{:success}"
=> "success"
2.I feel that the answer has come out even if I was asked to think about it, but it is explained. :with success key:The danger key is a symbol When a symbol is assigned to the expression expansion of a character string, the output without: is output.
>> flash = { success: "It worked!", danger: "It failed." }
=> {:success=>"It worked!", :danger=>"It failed."}
 >> flash.each do |key, value|
?>  puts "#{key}"
>>  puts "#{value}"
>> end
success
It worked!
danger
It failed.
=> {:success=>"It worked!", :danger=>"It failed."}
####Actual user registration The contents of the database may be messed up, so try resetting it for now.
rails db:migrate:reset
When you create a new user on the form after resetting
Flash welcome message is green(alert-success class)Is displayed and the user is created.
This welcome message disappears when the page is reloaded.
#####Exercise
1.
```irb
>> User.find_by(email:"[email protected]")
(0.4ms) SELECT sqlite_version(*)
User Load (1.2ms) SELECT "users".* FROM "users" WHERE "users"."email" = ? LIMIT ? [["email", "[email protected]"], ["LIMIT", 1]]
=> #<User id: 1, name: "take", email: "[email protected]", created_at: "2020-06-14 02:57:10", updated_at: "2020-06-14 02:57:10", password_digest: [FILTERED]>
>>
####Test on success I wrote the test when it failed, so next I will write the test when it succeeds.
  test "valid signup information" do
    get signup_path
    assert_difference 'User.count', 1 do
      post users_path, params:{user:{name:"sample",
                                     email:"[email protected]",
                                     password:"foobar",
                                     password_confirmation:"foobar"}}
      end
      follow_redirect!
      assert_template 'users/show'
  end
assert_In difference, it is tested that the first argument changes by the second argument before and after processing in the block.
That is, send valid user-created information to the create page to test that the user is actually created.
follow_redirect!Is a method to move to the redirect destination.
This method will take you to the show page of the user you created at this stage
assert_templateso'users/show'Check if the template is displayed.
Also in the last line thisassert_templateI'm testing the show page overall by running.
In other words, even if an error occurs on the show page or it is not displayed properly, it will be displayed as an error.
This one line confirms the important functions.
#####Exercise 1.Text tests can easily break if the text is wrong or if you change the text itself This time I will test that there is some sentence in flash.
assert_not flash.empty?
2.```<%= content_tag(:div,message,class:"alert alert-#{message_type}") %>```
In this line, the element is the first argument(div element)Specify, the contents of the element with the second argument(Text content)Specify,
Specify class in the 3rd argument. By doing this, it is easy to understand and concise because it can be written only with erb.

3.There is no redirect destination(not specified)Get angry.
RuntimeError: RuntimeError: not a redirect! 204 No Content test/integration/users_signup_test.rb:26:in `block in class:UsersSignupTest'
4.For the test that one more user is sent when valid user information is sent
Since the create action was rewritten to false, the line that creates the user is not executed, so even in the test

#### **`"User.count" didn't change by 1.→User.I get angry that the count hasn't changed.`**
 FAIL["test_valid_signup_information", #<Minitest::Reporters::Suite:0x0000559122566bd0 @name="UsersSignupTest">, 1.1665384099906078]
 test_valid_signup_information#UsersSignupTest (1.17s)
        "User.count" didn't change by 1.
        Expected: 1
          Actual: 0
        test/integration/users_signup_test.rb:20:in `block in <class:UsersSignupTest>'
###Professional deployment With the implementation of this chapter, you can actually create a user and save it in the database. Add settings to secure user registration. First, commit and push Git as usual.
####SSL in production environment When you actually create a user in the production environment, the data entered in the network will flow, but if it is not encrypted Information that should not be leaked, such as passwords and email addresses, is easily captured. To prevent this, in the production environment, by encrypting using SSL Strengthen the security of subsequent websites.
You can securely communicate with https by forcing the browser to use SSL.
config.force_ssl = true
production.Just enable this commented out line in rb and you're done.

All you have to do is set up SSL on your server
If you have your own domain, you need to purchase and set up an SSL certificate
Take advantage of Heroku's SSL(herokuapp.com)You can easily use SSL

####Web server for production environment
The web server for the production environment is WEBrick by default, but it is vulnerable to traffic increase.
Change to a Puma server that is strong against a lot of traffic.

Since Rails 5 and later, Puma can be used by default.
All you have to do is create a config file to run Puma.


#### **`database.yml`**
```yml

 SQLite. Versions 3.8.0 and up are supported.
   gem install sqlite3

   Ensure the SQLite 3 gem is defined in your Gemfile
   gem 'sqlite3'

default: &default
  adapter: sqlite3
  pool: <%= ENV.fetch("RAILS_MAX_THREADS") { 5 } %>
  timeout: 5000

development:
  <<: *default
  database: db/development.sqlite3

 Warning: The database defined as "test" will be erased and
 re-generated from your development database when you run "rake".
 Do not set this db to the same as development or production.
test:
  <<: *default
  database: db/test.sqlite3

production:
  adapter: postgresql
  encoding: unicode
  # For details on connection pooling, see Rails configuration guide
 # https://railsguides.jp/configuring.html #Pool database connections
  pool: <%= ENV.fetch("RAILS_MAX_THREADS") { 5 } %>
  database: sample_app_production
  username: sample_app
  password: <%= ENV['SAMPLE_APP_DATABASE_PASSWORD'] %>
There are various information about this time in the official Heroku document, so I will put a link for reference. Heroku official documentation(Rails)
#####Exercise
1.
 It has a key(https)→ Communicating with SSL.
2.Is displayed.(Same as development environment)
Recommended Posts