YOLO v4 environment construction ①
next time YOLO v4 environment construction ②
reference https://youtu.be/5pYh1rFnNZs
system
Windows10 GeForce GTX 960
python installation
Install python 3.7.7
** Check Add Python 3.7 to PATH **
numpy installation
From the command prompt
$ pip install numpy
Incidentally update pip
$ python -m pip install --upgrade pip
Install Visual Studio Code
I want to make Visual Studio Code the default editor for Git, so install it first. The version is 1.45.1 No need for someone else with an editor
Install Git
Install Git 2.26.2 There is a screen to select the default editor, so select VS Code (default is Vim) Then proceed as it is OK
Install CMake
Install CMake 3.17.2
Visual Studio installation
Install Visual Studio 16.5 Community
Check ** python ** and ** Desktop Development ** to install

You will be asked to restart ** Restart your PC **
GPU driver update
Download and install the driver in your environment from NVIDIA Official
- Graphic boards of other brands are not supported Updated to GTX960 445.87 When finished ** Restart your PC **
CUDA installation
Search and download nvidia cuda toolkit
Version 10.2

Change the installation destination to directly under the C drive

Then proceed as it is
Download NVIDIA cuDNN
https://developer.nvidia.com/cudnn

Create a new account and download ** cuDNN v7.6.5 **

Move the downloaded ** zip file directly under the C drive and unzip it ** to create the `` `cuda``` folder.
Put the unzipped cuDNN related files under CUDA
\cuda\In bin**cudnn64_7.dll**Copy
#### **`\Program Files\NVIDIA GPU Computing Toolkit\CUDA\v10.2\Paste to bin`**
```c


 Similarly

#### **`\cuda\In include**cudnn.h**Copy`**
```c


#### **`\Program Files\NVIDIA GPU Computing Toolkit\CUDA\v10.2\Paste to include`**
```c


#### **`\cuda\lib\on x64**cudnn.lib**Copy`**
```c


#### **`\Program Files\NVIDIA GPU Computing Toolkit\CUDA\v10.2\lib\Paste to x64`**
```c


# OpenCV installation
## Clone opencv and opencv_contrib from GitHub
 Create and move the ```opencv``` directory directly under the C drive
git clone https://github.com/opencv/opencv git clone https://github.com/opencv/opencv_contrib
Create a ``` build``` directory in the same directory
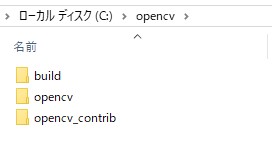
# CMake settings and build
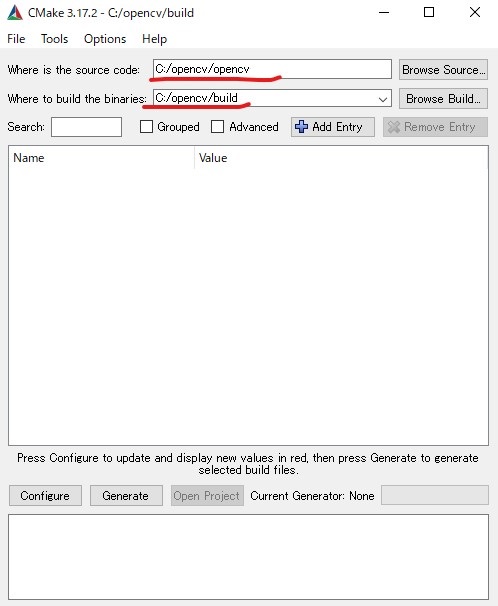
Start CMake and set the source code and build destination to `` `C: / opencv / opencv``` and `` `C: / opencv / build``` respectively
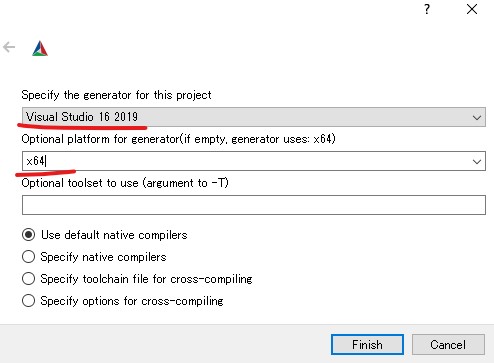
Press ** Configure ** button to set generator and platform to `` `Visual Studio 16 2019` `` and `` `x64```
Check `` `BUILD_opencv_world` `` in the list
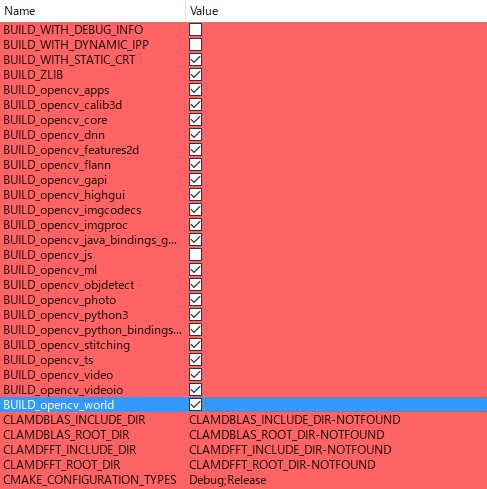
Make sure there are no errors and press ** Generate **
# Build OpenCV in Visual Studio
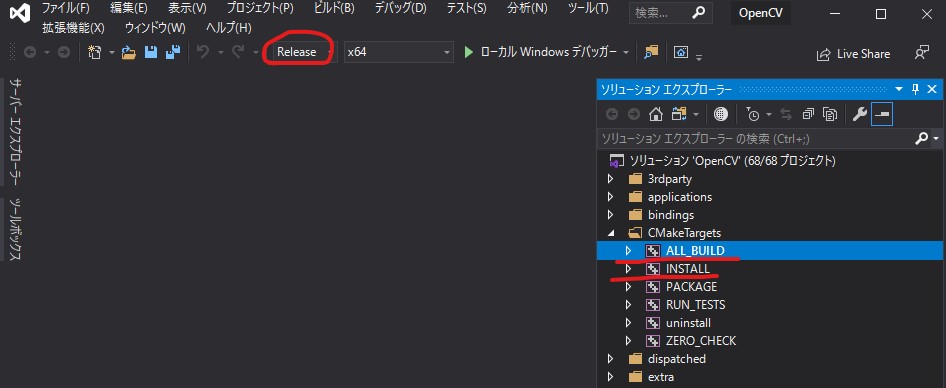
Open ** ALL_BUILD.vcxproj ** in the build folder ``` C: \ opencv \ build``` and start Visual Studio
Change to Release mode and build ```ALL_BUILD``` and ```INSTALL``` from the right-click menu respectively
## Check the operation at the command prompt
Start the python interpreter at the command prompt and check that openCV works
$ python
import cv2 cv2.version '4.3.0-dev'
# Continue to next time

 [YOLO v4 environment construction ②](https://qiita.com/kzsDev/items/85d117195f44a86dd8fe)
Recommended Posts