[Rails AWS Docker] Build an existing Ruby on Rails + MySQL application with Docker and deploy it on AWS (4)
This is the way to build a production environment on AWS by turning a Ruby on Rails application created as a portfolio into a Docker container. The portfolio itself is here. [[Portfolio] Overview of the portfolio created during job change activities (Tec camp)] (https://qiita.com/sho_U/items/058e590325ee6833abb0)
I was suffering a lot, so I hope it helps someone.
| title | |
|---|---|
| 1 | Docker containerization of Rails application in local environment |
| 2 | Create a VPC on AWS. Create a public subnet |
| 3 | Create a private subnet |
| 4 | Create an EC2 instance |
| 5 | Create an RDS |
| 6 | Upload Docker container to AWS |
Create an EC2 instance
What is EC2
It's called Elastic Compute Cloud, and it's roughly a virtual computer. By placing it on AWS, we will build a system on the cloud.

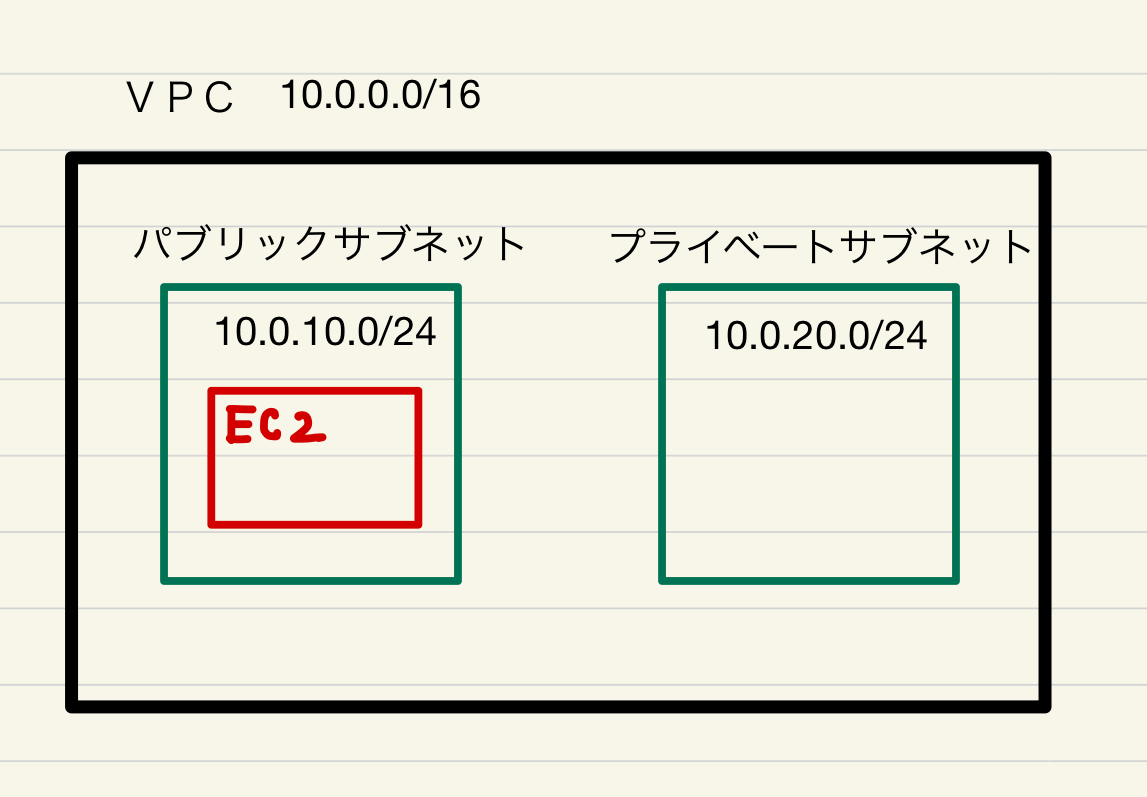
Place the created EC2 instance on the public subnet and place the app itself.
Creating an EC2 instance
Search for EC2 from the search window and enter the console.

Click Launch Instance.

This time, we will use the quick start "AMAZON Linux 2" as the instance type. (Roughly) What type of computer to use. This time, select the one whose OS is linux.

For the type, select t2.micro, which is a free usage tier. (Roughly) It's about how much specs to make.

→ Click "Next Step: Advanced Instance Settings".
| item | Contents | Explanation (roughly) |
|---|---|---|
| Number of instances | 1 | Number of instances to launch |
| Purchase options | no check | If you select Spot Instance, you can use it cheaply (when it does not start all the time) |
| network | fitO2_vpc | Place it in the VPC created earlier. |
| Subnet | fitO2_public_subnet_1a | Place it in the public subnet created earlier. |
| Auto-assigned public IP | Use subnet settings (disabled) | To allocate a fixed IP later |
| Placement group | no check | Settings to speed up communication between multiple instances |
| Capacity booking | None | Avoid being unable to start an instance when the resource limit is exceeded (charged) |
| IAM roll | None | A service that sets permissions that can be linked to AWS resources |
| CPU options | None | Options for CPU performance |
| Shutdown operation | Stop | Operation at shutdown |
| Stop-Hibernate operation | None | Add pause operation to stop operation |
| Enable termination protection | None | Prevents accidental termination |
| monitoring | None | Make monitoring every 5 minutes feel like 1 minute. |
| Tenancy | share | Whether to occupy the hard disk |
| Elastic Inference | None | Streamline machine learning |
| Credit specifications | None | There is no limit when the specified amount of communication arrives |
Network interface
| Primary IP | 10.0.10.10 | Set a private IP address for the subnet. |
Click "Next Step: Add Storage"
| item | Contents | Explanation (roughly) |
|---|---|---|
| size | 8 | |
| Volume type | General purpose SSD | |
| Delete together | check | |
| encryption | No encryption |
Click "Add Tag"
| item | Contents | Explanation (roughly) |
|---|---|---|
| name | fitO2_web | |
| Volume type | General purpose SSD | |
| instance | check | |
| volume | check |
Click "Security Group Settings"
Select an existing security group. Apply the (fitO2_SG) created earlier.
Click "Confirm and Create"
Click "Launch"
Creating a key pair
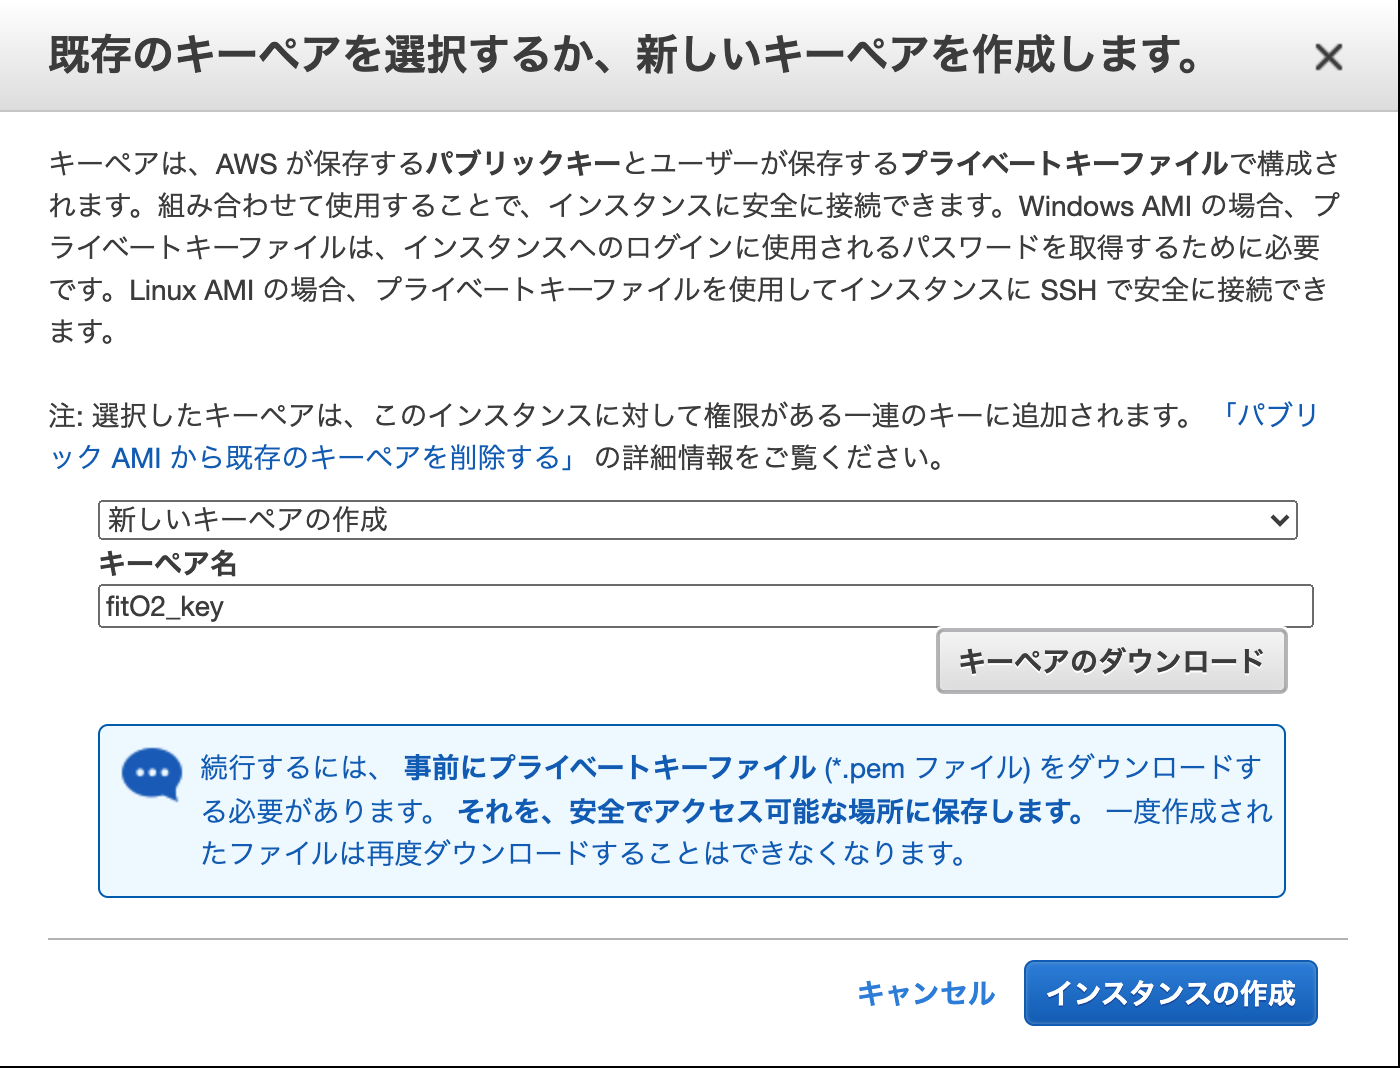
Create a new key pair (if you have already created a key pair, you can create an existing one)
Set the key pair name and download.
A (roughly) key pair is a key used when connecting to ssh. Connect using the key pair downloaded when connecting with ssh, and if it matches the key generated on the AWS side, the connection is permitted.
"Create Instance"

Once created, name the instance for clarity. You can edit the name by clicking on the name.

Move the downloaded key pair to a suitable position. (This time ~/.ssh)
Create an Elastic IP (fixed) address.
If you stop the current instance, the IP address will change, so allocate a fixed IP.
From the EC2 dashboard, select Elastic IP.
Click Assign New Address.
Network border group: ap-northease-1 Public IPv4 Address Pool: Amazon's IPv4 Address Pool
Click "Assign".
Give the created Elastic IP address a name so that it is easy to understand.
Associate an Elastic IP (fixed) address with an instance.
Check the created IP address and select "Address Association" from the action.
Resource: Instance Instance: Select the created instance Private IP address: 10.0.10.10
Click "Associate"
Try and confirm the ssh connection.
After confirming that the instance status is running
sudo ssh -i ~/.ssh/fitO2_key.pem ec2-user@Fixed IP address
~/.ssh/fitO2_key.pem is the location where the private key is stored/the name of the private key The static IP is the one that is displayed as Elastic IP by selecting it from the instance list and clicking the description tag.
Are you sure you want to continue connecting (yes/no/[fingerprint])?

Type yes to enter
       __|  __|_  )
       _|  (     /   Amazon Linux 2 AMI
      ___|\___|___|

https://aws.amazon.com/amazon-linux-2/
If it is displayed as above, the connection is successful.
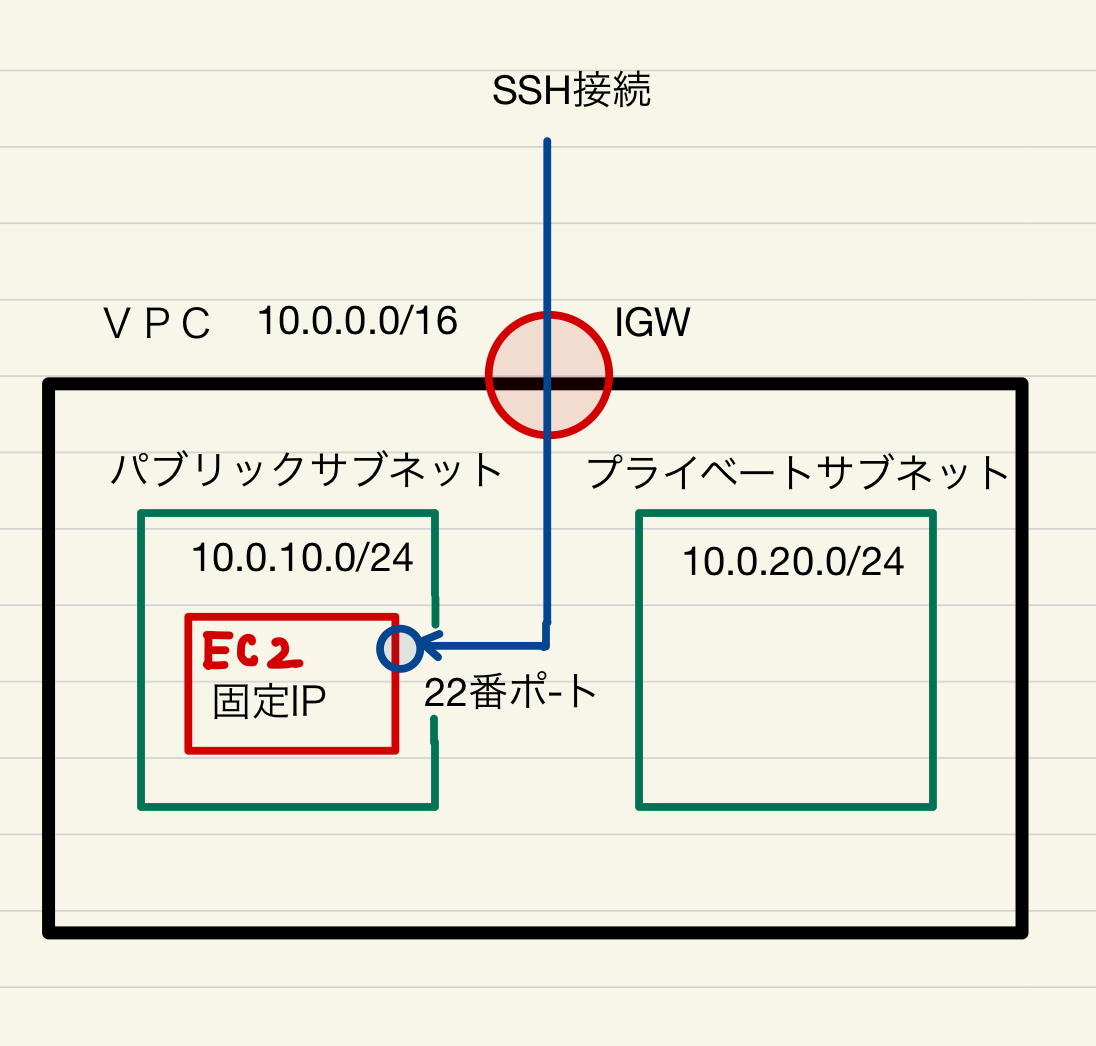
In the figure, the connection is made with the image below.

The security group (fitO2_SG) created earlier is applied to EC2.

For inbound (incoming communication), in the case of ssh connection, port 22 is used and all access sources (0.0.0.0/0) are allowed, so it was possible to connect with ssh. is.
I created an EC2 instance and was able to make an ssh connection.
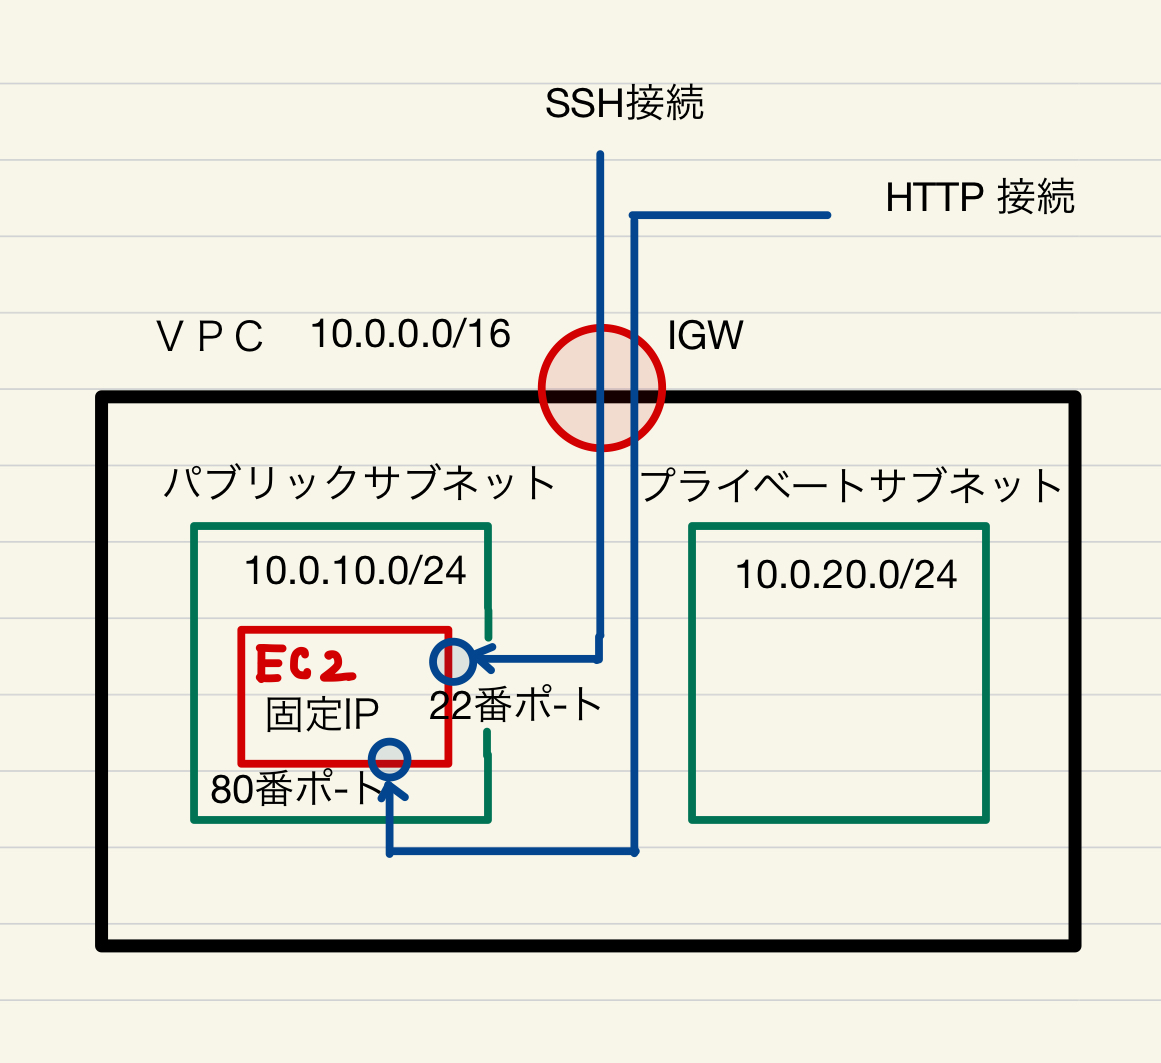
Since port 80 is also open for http communication, the instance you just created is in a state that allows the following communication.

You have now set up a security group like the one above for your public subnet EC2 instance.
Continue to next time (5) Create RDS
Recommended Posts