Make people smile with Deep Learning
Deep Feature Interpolation for Image Content Changes
Deep Feature Interpolation (DFI) is a technique for giving an image a specific attribute (for example, "smile", "elderly", "beard"). As a method of giving a specific attribute, a method using a Generative Adversarial Network (GAN) such as "Autoencoding beyond pixels using a learned similarity metric" is known. However, DFI takes a different approach than GAN. The paper can be found at https://arxiv.org//abs/1611.05507.
Overview
As known from "A Neural Algorithm of Artistic Style" etc., from the Feature Map (intermediate layer output) obtained by inputting the image to CNN. , You can restore the image. There is an explanation in Algorithm for converting style, so I think you will deepen your understanding by reading this blog. In DFI, "Feature Map of an image with a specific attribute" is obtained by adding an attribute vector to "Feature Map obtained from an image". Then, the "image with specific attributes" is restored from the obtained Feature Map.
Image conversion procedure
Follow the procedure below to convert the image.
- Prepare a CNN to be used for image recognition, such as VGG 19-layer model.
- Prepare the conversion source image (called the original image).
- Decide the attributes you want to give to the original image (called the desired attributes).
- Collect each of the following sets of images.
- An image that is close to the original image and has the desired attributes (called a target set)
- An image that is close to the original image and does not have the desired attributes (called a source set)
- Enter the images contained in the target set into the CNN to get the Feature Map. Calculate its average $ \ bar {\ phi} ^ {t} $.
- Similarly, for the images included in the source set, calculate the average $ \ bar {\ phi} ^ {s} $ of the CNN Feature Map.
- Calculate the attribute vector $ w = \ bar {\ phi} ^ {t}-\ bar {\ phi} ^ {s} $.
- Enter the original image $ x $ into the CNN to get the Feature Map $ \ phi (x) $.
- Calculate the weighted sum $ \ phi (x) + \ alpha w $ of the Feature Map and the attribute vector obtained from the original image.
- Optimize the converted image $ z $. Optimize the Feature Map $ \ phi (z) $ obtained when you enter $ z $ into the CNN so that it approaches $ \ phi (x) + \ alpha w $.
Here is a diagram of the algorithm used in the paper. The Step number is in the paper and is different from this article.

Implementation
I implemented it with Chainer. https://github.com/dsanno/chainer-dfi
Make people smile with DFI
Let's use DFI to give the face image a smile attribute.
Use Labeled Faces in the Wild dataset
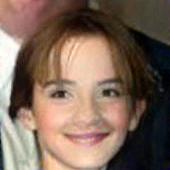
In the paper, the Feature Map was calculated using images from the Labeled Faces in the Wild (LFW) dataset. The LFW contains more than 13,000 face images and vectors that quantify the attributes of the face images such as "Male" and "Smiling". In the paper, as a similar image to be used as a source / target set, an image with many common attributes with the original image was selected. Try to make the image included in LFW smile in the same way. The result is as follows.
| The original image | Smile | Smile+Open your mouth |
|---|---|---|
 |
 |
 |
 |
 |
 |
 |
 |
 |
The parameters etc. are as follows.
- Attribute vector weight $ \ alpha $ is 0.4
- The original image is clipped so that the face part is cut out.
- Select an image with the attribute value of the original image and the attribute value with a small Euclidean distance as the image of the target source set.
- For "Smile", select a target set with a Smile attribute of 0.5 or more and a source image with a Smile attribute of less than -0.5.
- For "Smile + Open Mouth", select a target set with a Smile attribute of 0.5 or more and a Mouth_closed attribute of less than -0.5, and a source image with a Smile attribute of less than -0.5 and a Mouth_Closed attribute of 0.5 or more.
- Up to 100 images of target set and source set
Use your own image
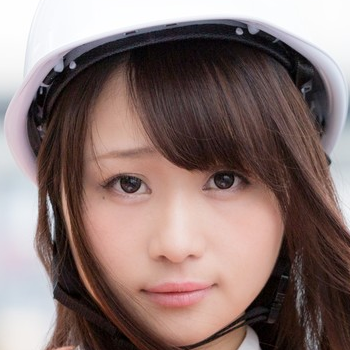
I tried to convert the image distributed in Pakutaso.

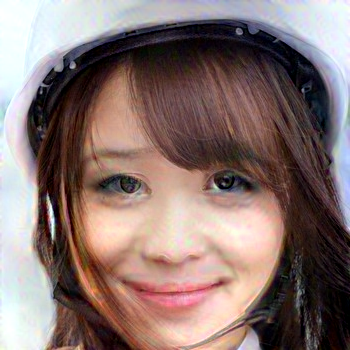
I will make a smile on my face that makes me feel a little nervous. The weight parameter $ \ alpha $ has been changed in the range 0.1-0.5. If the weight is too large, the image will be distorted too much.
| Weight 0.1 | Weight 0.2 | Weight 0.3 |
|---|---|---|
 |
 |
 |
| Weight 0.4 | Weight 0.5 | |
 |
 |
- Use CelebA dataset for face image dataset
- Since the attribute vector of the original image is unknown, I selected the source / target set as follows.
- Manually determine the attributes of the original image, such as "Young" attribute being positive and "Male" attribute being negative.
- Select an image with the same attributes as the original image based on the attribute information of the dataset
- Target images with positive attributes and include negative images in the source
Do you really have attributes?
I've shown above that you can make a face image smile, but does this technique really add attributes to the image? I think no. The CNN used is for image recognition purposes, and its Feature Map is not learning about any particular attribute. Therefore, what can be generated using the Feature Map difference between the source and the target set is the "average image difference between the source and target". If the attribute is a smile, it means that a smile image is generated by adding "image difference between a non-smiling face and a smile" to the original image.
Since only the image difference is added, it is necessary to align the facial parts arrangement between the original image and the source / target image. In fact, if the original image and the source / target image do not have the same face position, the lips may appear in strange positions. The face image dataset used does not include parts placement information or face orientation attributes, but the position and size of the face in the image are aligned, so I think it's generally working. In order to perform more natural image conversion, I think it is necessary to select the source / target image in consideration of the facial parts arrangement.
Comparison with GAN-based method
The paper also compares the generated images with GAN-based methods. Please see the paper for the images actually generated. Here, we will compare the characteristics of the methods.
| DFI | GAN base | |
|---|---|---|
| Do you need a trained model? | necessary | Unnecessary |
| Pre-learning | Unnecessary | Need to learn generative model |
| One image generation time(When using GPU) | Dozens of seconds | It takes less than a second |
| Image required for image generation | Dozens to hundreds of similar images are required when generating images | None |
About implementation
I will write about the difference between the description of the paper and the implementation used this time. If you're not interested in the details of the implementation, you can skip it.
Whether to normalize the Feature map
The paper says "We use the convolutional layers of the normalized VGG-19 network pre-trained on ILSVRC2012," and you can see that the Feature Map is normalized. Feature Map normalization is described in "Understanding Deep Image Representations by Inverting Them", but it means dividing Feature Map by L2 norm. Normalization was not performed for the following reasons.
- Works without normalization
- When normalizing, it is necessary to multiply the loss (square error) related to the Feature Map by $ 10 ^ 6 $ to $ 10 ^ 8 $, and I felt that the adjustment was troublesome.
Whether to combine feature maps
In the paper, conv3_1, conv4_1, and conv5_1 among the intermediate layers of VGG-19 layers are used as Feature Maps. This point is the same for this implementation. In addition, the paper states "The vector $ \ phi (x) $ consists of concatenated activations of the It says convnet when applied to image x ", and you can see that multiple Feature Maps are combined. However, it worked without combining Feature Maps, so it was not combined in this implementation.
Attribute vector normalization
Attribute vector in the dissertation
References
- Paul Upchurch et al. "Deep Feature Interpolation for Image Content Changes", 2016
- A. B. L. Larsen et al. "Autoencoding beyond pixels using a learned similarity metric", 2015
- Leon A. Gatys et al. "A Neural Algorithm of Artistic Style"
- A. Mahendran and A. Vedaldi. "Understanding deep image representations by inverting them", 2015
- Algorithm to convert style
Recommended Posts