Let's measure the test coverage of pushed python code on GitHub.
This is a sequel to Article on CI of Python driver for DIY PV system monitoring, this time python code coverage (test cover) Rate) is measured.
Measure coverage on the command line
Run the test first
It's tedious to write the following test runner code every time, so pip install the nose package and use the nosetests command.
import unittest

if __name__ == "__main__":
    all_tests = unittest.TestLoader().discover("./", "test_*.py")
    unittest.TextTestRunner(verbosity=1).run(all_tests)
nosetests is a command that can be used by pip installing the nose package.
As you can see from How to find test cases for nosetests, it seems that it will collect and execute subclasses of unittest.TestCase for the time being. ..
tsmppt60_driver $ nosetests -v
test_init (test_base_controller.TestChargeControllerStatus) ... ok
test_compute_scaler_current (test_base_management.TestMb) ... ok
test_compute_scaler_voltage (test_base_management.TestMb) ... ok

----------------------------------------------------------------------
Ran 3 tests in 0.230s

OK
Write the following in test_suite of setup.py, have nose collect the test suite and test via setup.py It is also possible to do it.
setup (
    # ...
    test_suite='nose.collector'
)
$ python setup.py test
Test coverage measurement
To measure coverage, add the following --with-coverage option.
tsmppt60_driver $ nosetests -h | grep coverage
  --with-coverage       Enable plugin Coverage:  Activate a coverage report

tsmppt60_driver $ nosetests -v --with-coverage
test_init (test_base_controller.TestChargeControllerStatus) ... ok
test_compute_scaler_current (test_base_management.TestMb) ... ok
test_compute_scaler_voltage (test_base_management.TestMb) ... ok

Name                                                       Stmts   Miss  Cover   Missing
----------------------------------------------------------------------------------------
minimock.py                                                  197     79    60%   51-57, 63-66, 108-109, 113, 229, 231-232, 237-238, 241-242, 258, 264-265, 290, 294, 297, 300, 325, 335-341, 364, 388-393, 408, 417-418, 455-465, 479-487, 493, 506, 517, 526, 528, 530-533, 537, 540-548, 551-565, 643-644
...
The coverage measurement results are recorded in the .coverage file under the same directory.
tsmppt60_driver $ cat .coverage | head
!coverage.py: This is a private format, don't read it directly!{"lines": {"/Users/
Test coverage reporting
Generate a coverage report using the coverage package and commands. If you pip install and get help, you'll see that the following subcommands are available:
$ pip install coverage
$ coverage --help
Coverage.py, version 4.0.3
Measure, collect, and report on code coverage in Python programs.

usage: coverage <command> [options] [args]

Commands:
    annotate    Annotate source files with execution information.
    combine     Combine a number of data files.
    erase       Erase previously collected coverage data.
    help        Get help on using coverage.py.
    html        Create an HTML report.
    report      Report coverage stats on modules.
    run         Run a Python program and measure code execution.
    xml         Create an XML report of coverage results.
You can read the .coverage file in which the measurement result is recorded and display the report.
Please note that if you do not narrow down the target modules with the --include option, dependent modules other than the test target will also be reported together, which will be complicated.
tsmppt60_driver $ coverage report --include=tsmppt60_driver/*
Name                          Stmts   Miss  Cover
-------------------------------------------------
tsmppt60_driver/__init__.py      28     16    43%
tsmppt60_driver/base.py         117     51    56%
tsmppt60_driver/status.py        60     37    38%
-------------------------------------------------
TOTAL                           205    104    49%
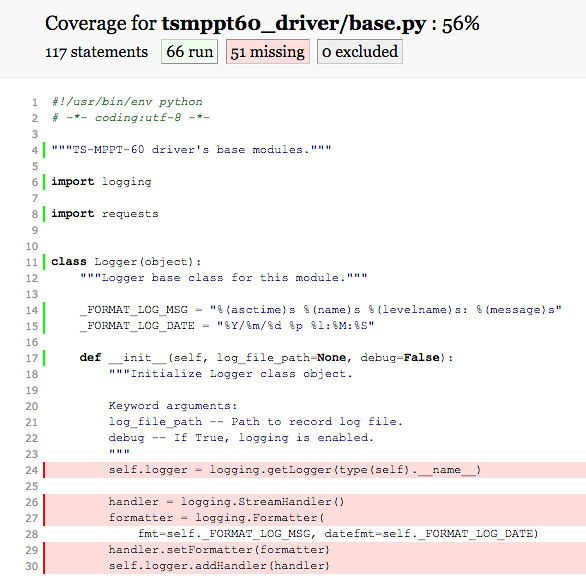
You can also generate a report in HTML format that allows you to visually see which paths in your code are covered and which are not.
tsmppt60_driver $ coverage html --include=tsmppt60_driver/*
tsmppt60_driver $ open htmlcov/index.html
It is like this.

Automatically measure coverage using web services
The introduction has become long, but the main subject is from here.
Use Coveralls, which is easy to work with Travis CI introduced last time.
If .travis.yml has already been set, it would have been as follows,
language: python
python:
  - "2.7"
# - "3.2"
# TODO:
# dest.write(u'  ')
# ^
# SyntaxError: invalid syntax
  - "3.3"
  - "3.4"
  - "3.5"
  # does not have headers provided, please ask https://launchpad.net/~pypy/+archive/ppa
  # maintainers to fix their pypy-dev package.
  - "pypy"
# command to install dependencies
install:
  - pip install .
  - pip install -r requirements.txt -r test-requirements.txt
Add the following to this,
script:
  - coverage run --source=tsmppt60_driver setup.py test
after_success:
  - coveralls
Add the following to test-requirements.txt.
nose
coverage
coveralls
Mostly I just follow the README of coveralls-python.
With this, every time you push to the github repository, Travis CI will automatically run the test and Coveralls will automatically measure the coverage.

Badge display
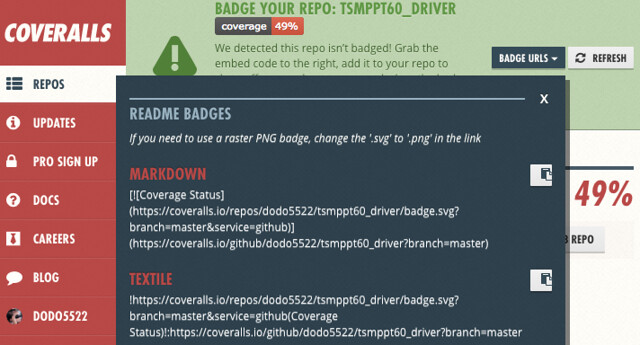
Coveralls coverage measurement result badge
In coveralls REPOS, after measuring coverage, jump to the link of the target repository, and there is a link "BADGE YOUR REPO: TSMPPT60_DRIVER" on the screen, so you can get the URL of the badge there.
There is a complete lineup of MARKDOWN format and others, so please copy and paste according to your environment.

You can also put the following badges on the README on GitHub.
Various badges
If you put a badge like Travis CI or Coveralls on the README, you'll want to see some other information in the same badge. right?
Therefore, there is a service called shields.io.
As you can see from the link above, you can make your own badges in the following formats.
https://img.shields.io/badge/<SUBJECT>-<STATUS>-<COLOR>.svg
For example, if you do the following
https://img.shields.io/badge/python-3.3,3.4,3.5-blue.svg
It will be displayed as follows.
It doesn't make much sense, but you can make a badge like this.
Recommended Posts


