How to get started with Gatsby (TypeScript) x Netlify x Docker
Good news for me, who pays for the blog server again this month, even though I'm not making any money. There is a way to get your blog to the world ** for free ** using ** Gatsby x Netlify **! !! ** **
This time, I will introduce how to distribute a blog while using Docker: muscle:
First of all, check the overall flow smoothly
- Build a Docker environment to start Gatsby
- Build a site with Gatsby (TypeScript)
- Automatically deploy articles by linking Netlify with GitHub
I will introduce it in this article according to the above flow (・ ∀ ・) Click here for the sample repository after completion
Development environment
- Docker: 20.10.1
- docker-compose: 1.27.4
- Node: 12.17.0
- Gatsby: 2.10.0
Checking the file structure
I usually read Qiita's articles and always think "I want to know the file structure" (laughs). I will post the file structure after completion.
gatsby-ts-netlify-docker
    |- gatsby
        |- ...
    |- docker-compose.yml
    |- Dockerfile
    |- README.md
Environment construction with Docker
Docker will be used as a local node execution environment!
Dockerfile
Place the Dockerfile in the location I introduced earlier and write the following!
Dockerfile
FROM node:12.17.0

RUN mkdir gatsby-ts-netlify-docker
WORKDIR /gatsby-ts-netlify-docker

RUN yarn global add gatsby-cli
FROM gets the image, RUN creates the gatsby-ts-netlify-docker folder, and WORKDIR sets the working directory.
Finally, we have added gatsby-cli, which is the heart of this time, to global.
docker-compose.yml
If you can write it, create it in the place where you introduced docker-compose.yml and write the following!
docker-compose.yml
version: '3.8'
services:
  gatsby:
    build: ./
    tty: true
    stdin_open: true
    volumes:
      - ./:/gatsby-ts-netlify-docker
    environment:
      - NODE_ENV=development
    ports:
      - 8000:8000
Tell the location of the Dockerfile with build. Use tty and stdin_open to set the connection between the container and the host, use volumes to match the host and the container directory, and use ports to set the port for setting up the server locally. ..
Build & launch
If you can place the Dockerfile and docker-compose.yml files, let's start the container after building!
$ docker-compose build
$ docker-compose up -d
The container is now built and launched!
Build your site with Gatsby
This time, we will build a site using the Starter Library that supports TypeScript.
Go inside a Docker container
First let's go inside the container to execute the command: open_hands:
$ docker-compose exec gatsby bash
I think you've put it in the container now!
Introduction of Starter Library
The Library that I decided to introduce this time has the following features.
--Written in TypeScript --Minimal configuration
Therefore, the one chosen was ...
It was ** gatsby-starter-typescript-plus **! Link from here
We will introduce this.
gatsby new gatsby https://github.com/resir014/gatsby-starter-typescript-plus
If you think "It will take time", please be assured that it is a normal specification ~ (* ´∀ ` *)
If you see the following display, you are successful! !!

I will finally display it!
As you can see in the image, start the server with gats by develop. ** But there is a caveat here ...! ** **
If you start it as above, it will not be displayed even if you access it with localhost.
So, start it with the following command.
gatsby develop -H 0.0.0.0
After building, when I try to access localhost: 8000 ...?

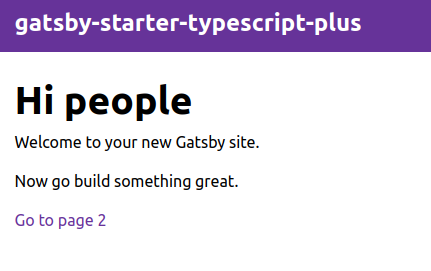
If you see a screen like this, you're successful! !! !! : laughing:
Distribute to the world using Netlify
If you do not have a Netlify account, you can easily register if you have a GitHub account, so please register.
When you register an account, you will be taken to a place like My Page, so please look for the button below.
 If you press here, you can link with the GitHub repository.

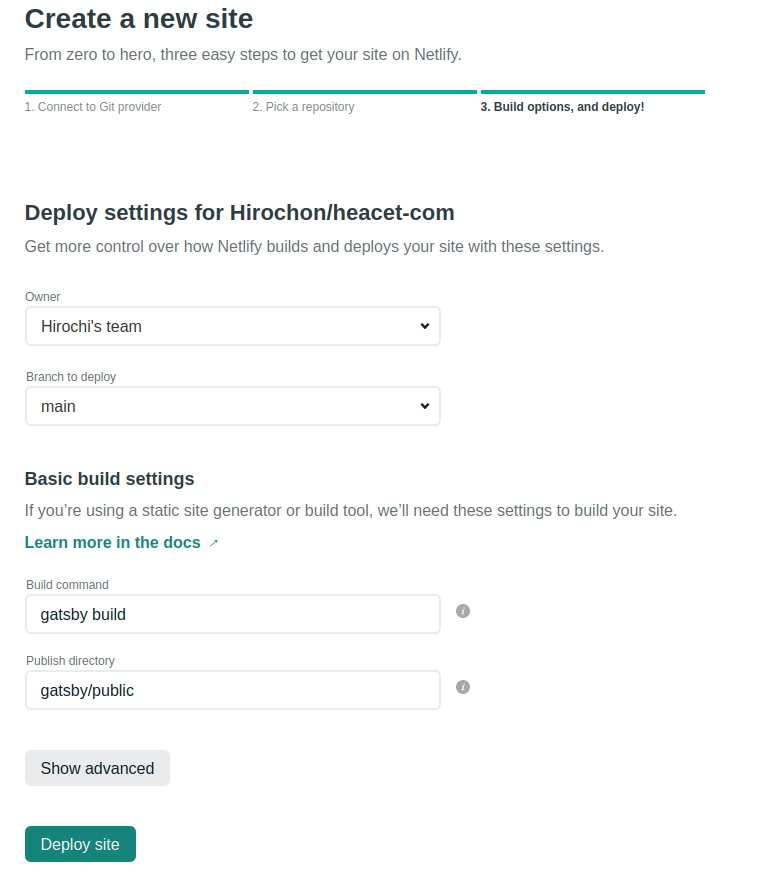
Please enter like this at the end.
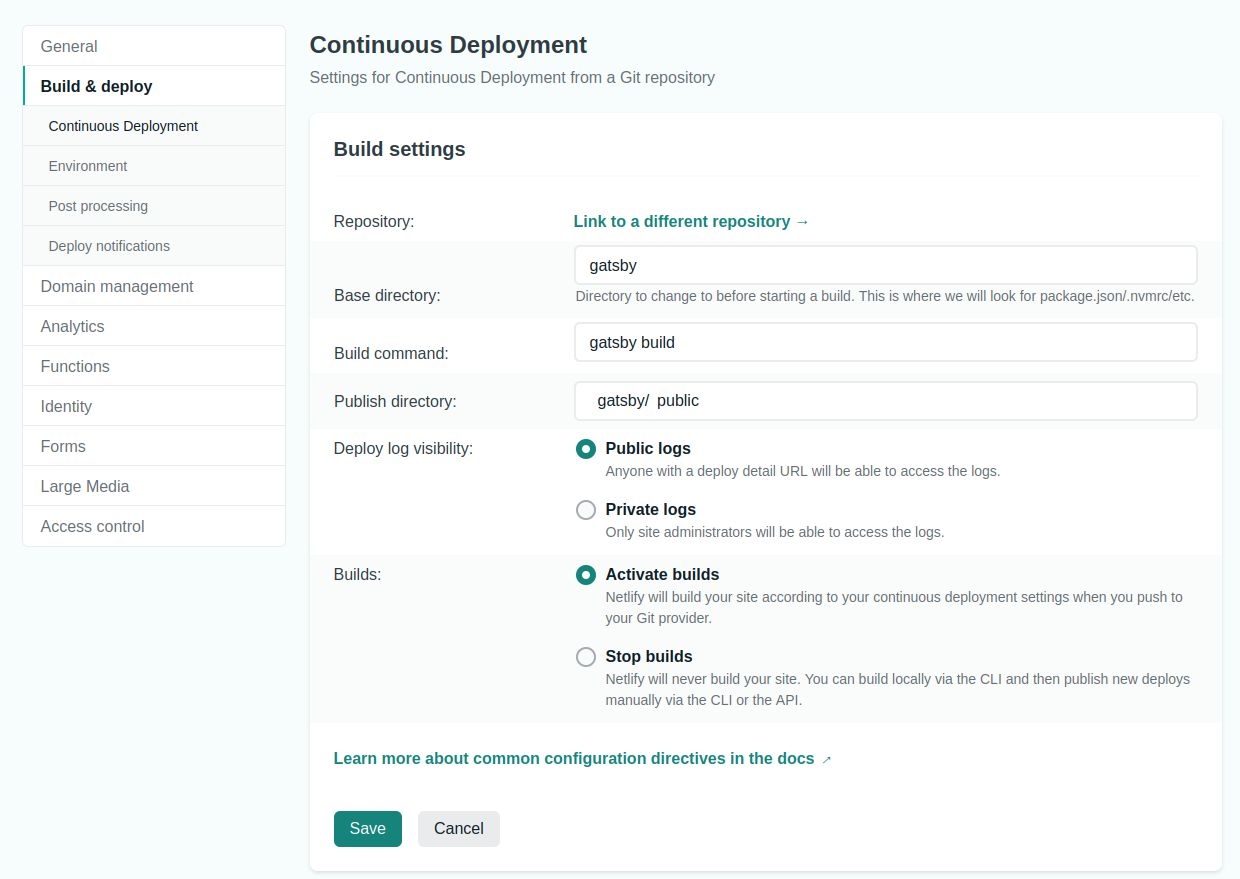
If deploy fails
Press Site settings in the upper right corner, select Build & Deploy, press Edit settings, and write as follows.

Subdomain change
You can still access it from Netlify, but outsiders can't access it yet. By setting a subdomain there, you can access it from the outside.
As before, go to Site settings, then to Domain management, and select Edit site name from Options to change the subdomain.
For example, if you set the subdomain to sample, then https://sample.netlify.app will be the domain.
You should now be able to access it from anywhere! !!
Automatic deployment of changes using GitHub
Actually, you don't need to set anything. Lol
Just push to the default remote branch on GitHub. This will ignite the Netlify side and deploy it automatically! (Dedicated: cry :)
at the end
Thank you for watching until the end.
I'm wondering what to use for the starter library Since the file is generated under Gatsby in the root directory, I was a little stumbled on Netlify's Build when I was doing it while looking at other people's articles, but it is relatively easy to introduce. Why don't you try it!
If you have any mistakes, simple impressions, or good points, please feel free to comment (´ 艸 ` *)
Recommended Posts